Installing an optional tape drive
Use this information to install an optional tape drive.I
The System x3650 M4 RDX-DDS internal enablement kit is used to install a tape drive in a System x3650 M4 server. The System x3650 M4 RDX-DDS internal enablement kit is compatible only with the following tape drives:
- DDS Generation 5 (DDS/5) SATA tape drive
- DDS Generation 6 (DDS/6) USB tape drive
- RDX USB Removable Hard Disk Drive
The RDX-DDS internal enablement kit contains the following components:
- One tape enablement tray
- One SAS signal cable (for USB tape drive only)
- One tape drive power cable
- Four M3 x 6 screws
The following illustration shows how to install an optional tape drive.
Figure 1. Tape drive installation
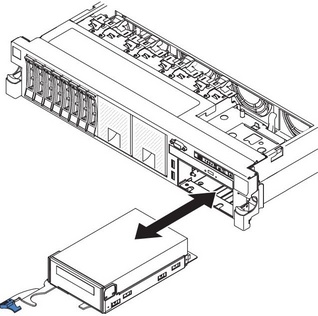
To install a SATA or USB tape drive, complete the following steps:
- Install the tape drive on the tray as shown in the following illustration. If the tape drive comes with a metal spacer attached, remove the spacer before you install the tape drive on the tray.Figure 2. Installing the tape drive on the tray

- Connect the following tape enablement kit cables to the connectors on the system board:
- SAS signal cables into the SAS connectors on the system board
- Tape drive power cable to the system board
Figure 3. Cable connections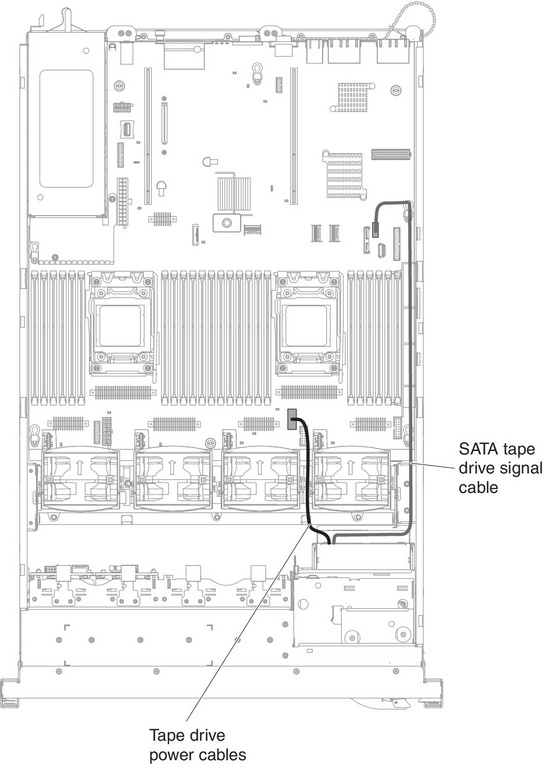
If you have other devices to install or remove, do so now. Otherwise, go to Completing the installation.
Give documentation feedback