Install the bus bar cover
(Trained service technician only) Use this information to install the bus bar cover.
About this task
Read Installation Guidelines and Safety inspection checklist to ensure that you work safely.
Go to Drivers and Software download website to see the latest firmware and driver updates for your server.
Go to Update the firmware for more information on firmware updating tools.
- A video of this procedure is available at YouTube.
Procedure
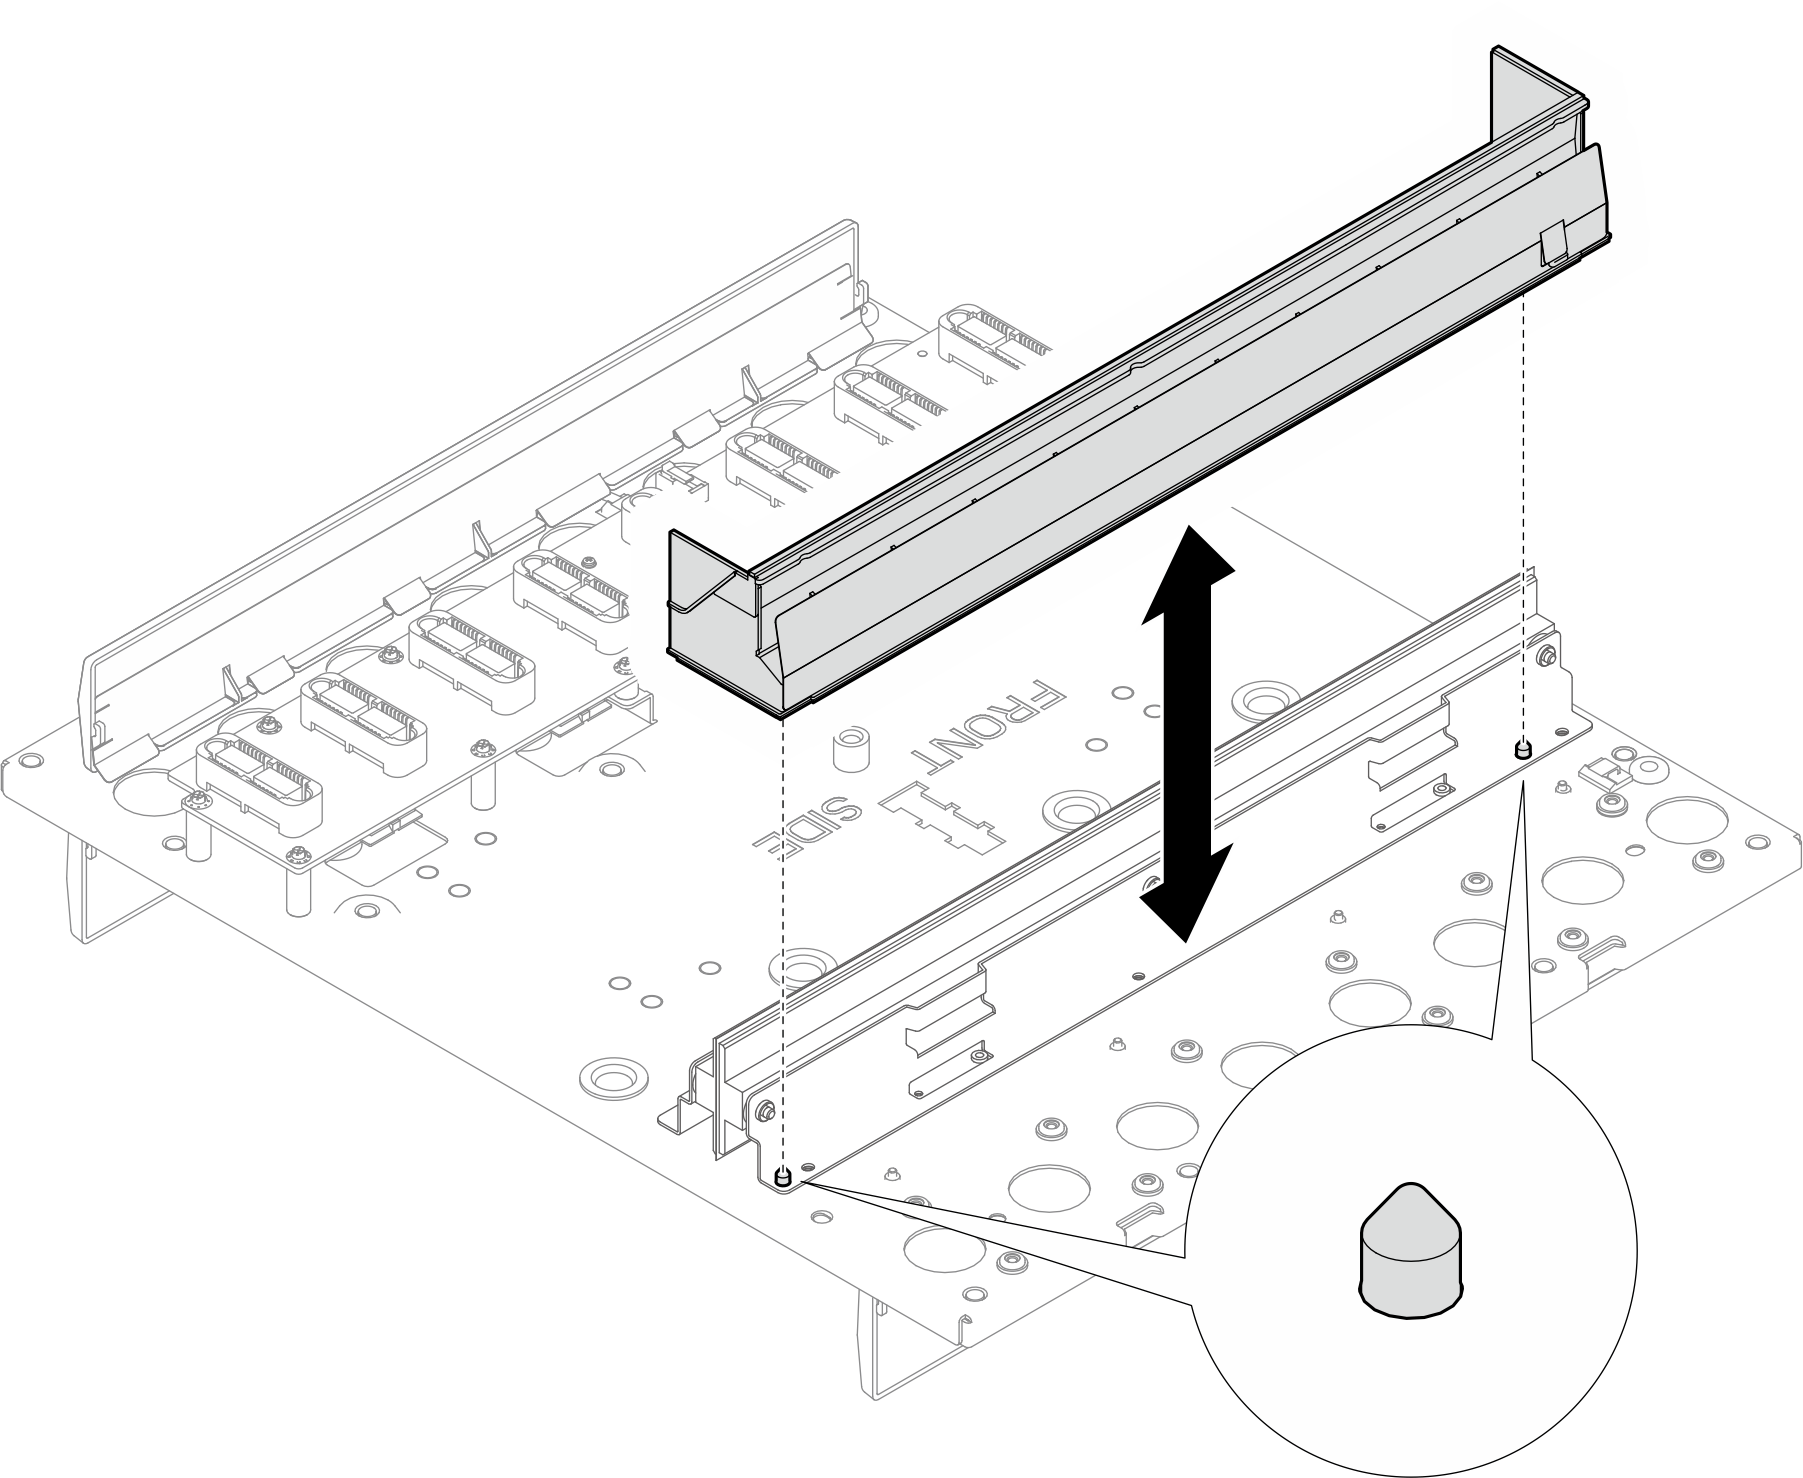
- Align the bus bar cover with the two guide pins on the bus bar. Then, install the bus bar cover to the mid-plate assembly.Figure 1. Installing the bus bar cover
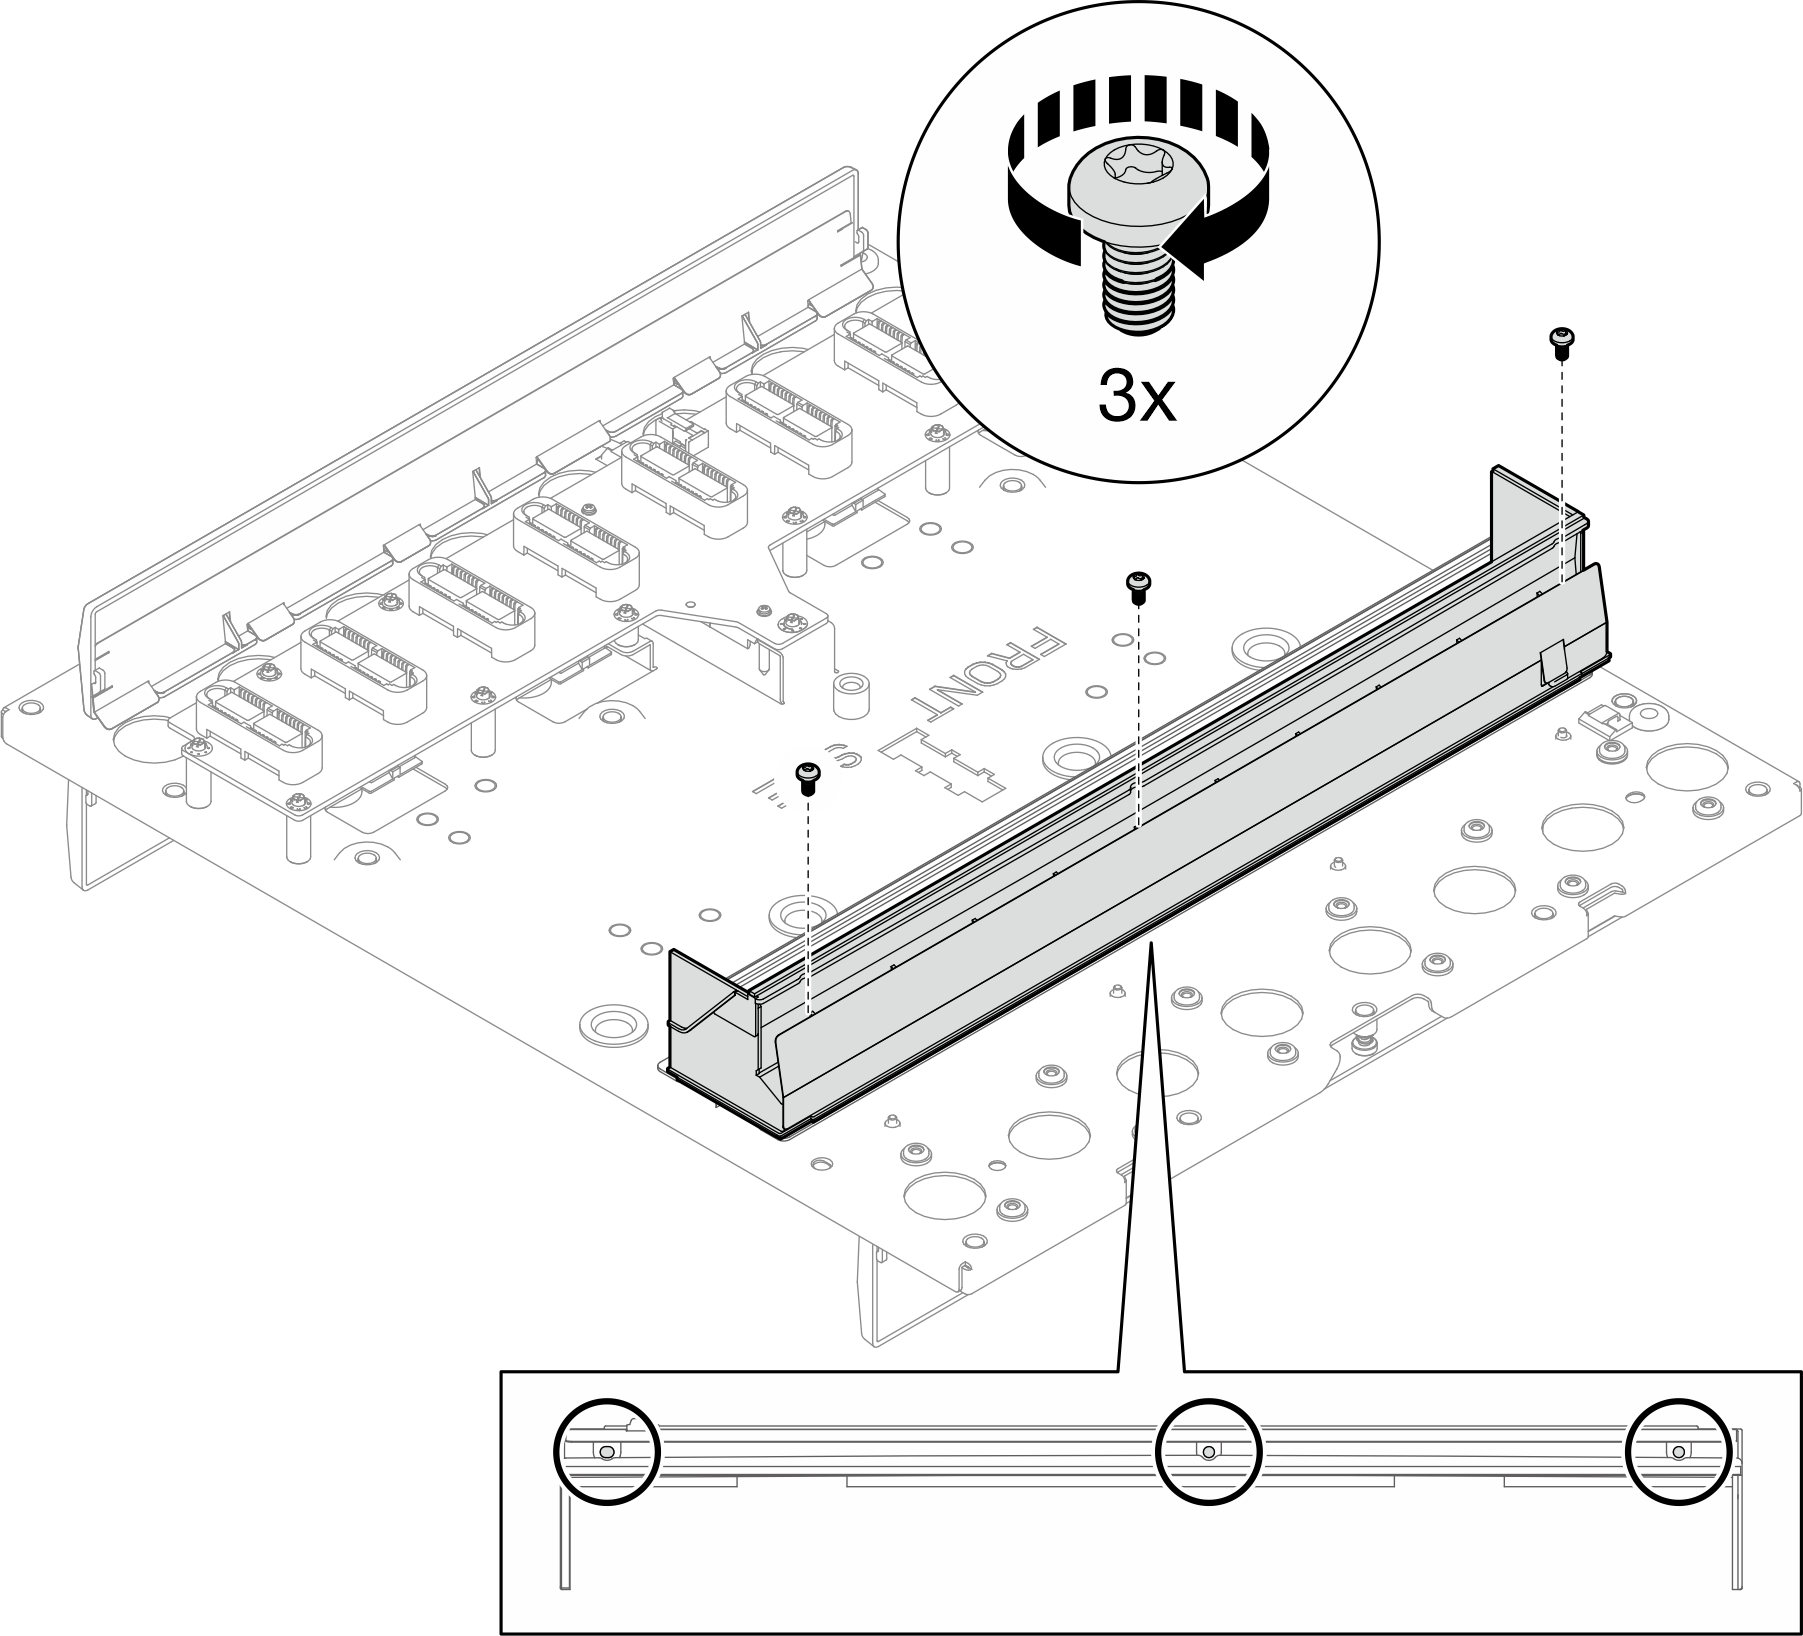
- Install three M4 T20 screws to secure the bus bar cover to the bus bar.Figure 2. Installing screws to the bus bar cover
After you finish
Install the leakage sensor. See Install the leakage sensor.
Install the enclosure mid-plate assembly. See Install the mid-plate assembly.
Install upper and lower manifold. See Install the manifold.
Install all Power Conversion Station (PCS) cage. See Install a Power Conversion Station (PCS) cage.
Install all Power Conversion Stations (PCS). See Install a Power Conversion Station (PCS).
Install the SMM3. See Install the SMM3.
Install the blank filler. See Install the blank filler.
Install all trays into the front of the enclosure. See Install a tray in the enclosure.
- Install any other required components.
- Connect all required cables.
- Connect the enclosure to power.
- Restart any nodes that you shut down. See Power on the solution.
- The SMM3 is powered-on automatically.