Remove a PCIe adapter from a riser cage
Use this information to remove a PCIe adapter from a riser cage.
About this task
Attention
Read Installation Guidelines and Safety inspection checklist to ensure that you work safely.
Turn off the corresponding DWC tray that you are going to perform the task on.
Disconnect all external cables from the enclosure.
Use extra force to disconnect QSFP cables if they are connected to the solution.
The following illustration might differ slightly from your hardware, but the removal method is the same.
Watch the procedure
- A video of this procedure is available at YouTube.
Procedure
- Remove the PCIe adapter from the riser cage.
 Remove the PH1 screw the secures the PCIe adapter to the riser cage.
 Remove the PCIe adapter from the riser cage.Figure 1. PCIe adapter removal
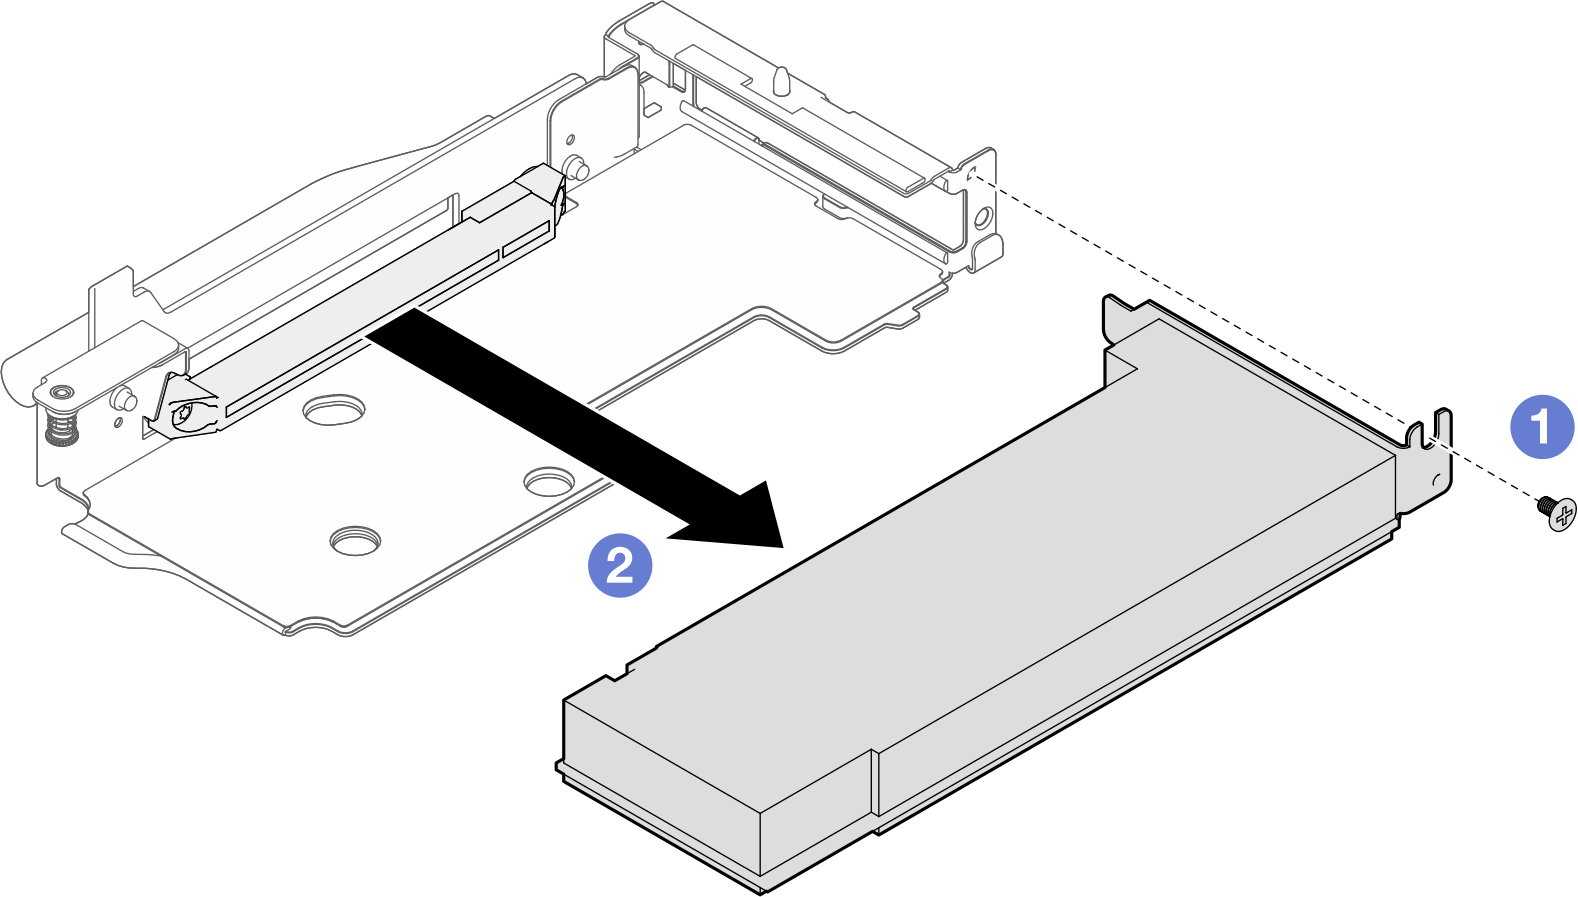
- For shared I/O or socket direct configurations, disconnect the cable.
- Carefully pull the two latches outward.
- Open the bottom cable clip cover.
 Remove the cable clip away from the connectors.
 Gently grasp and pull the black plastic sheets outward.
 Pull the cable connectors out of the adapter.Figure 2. PCIe adapter cable removal
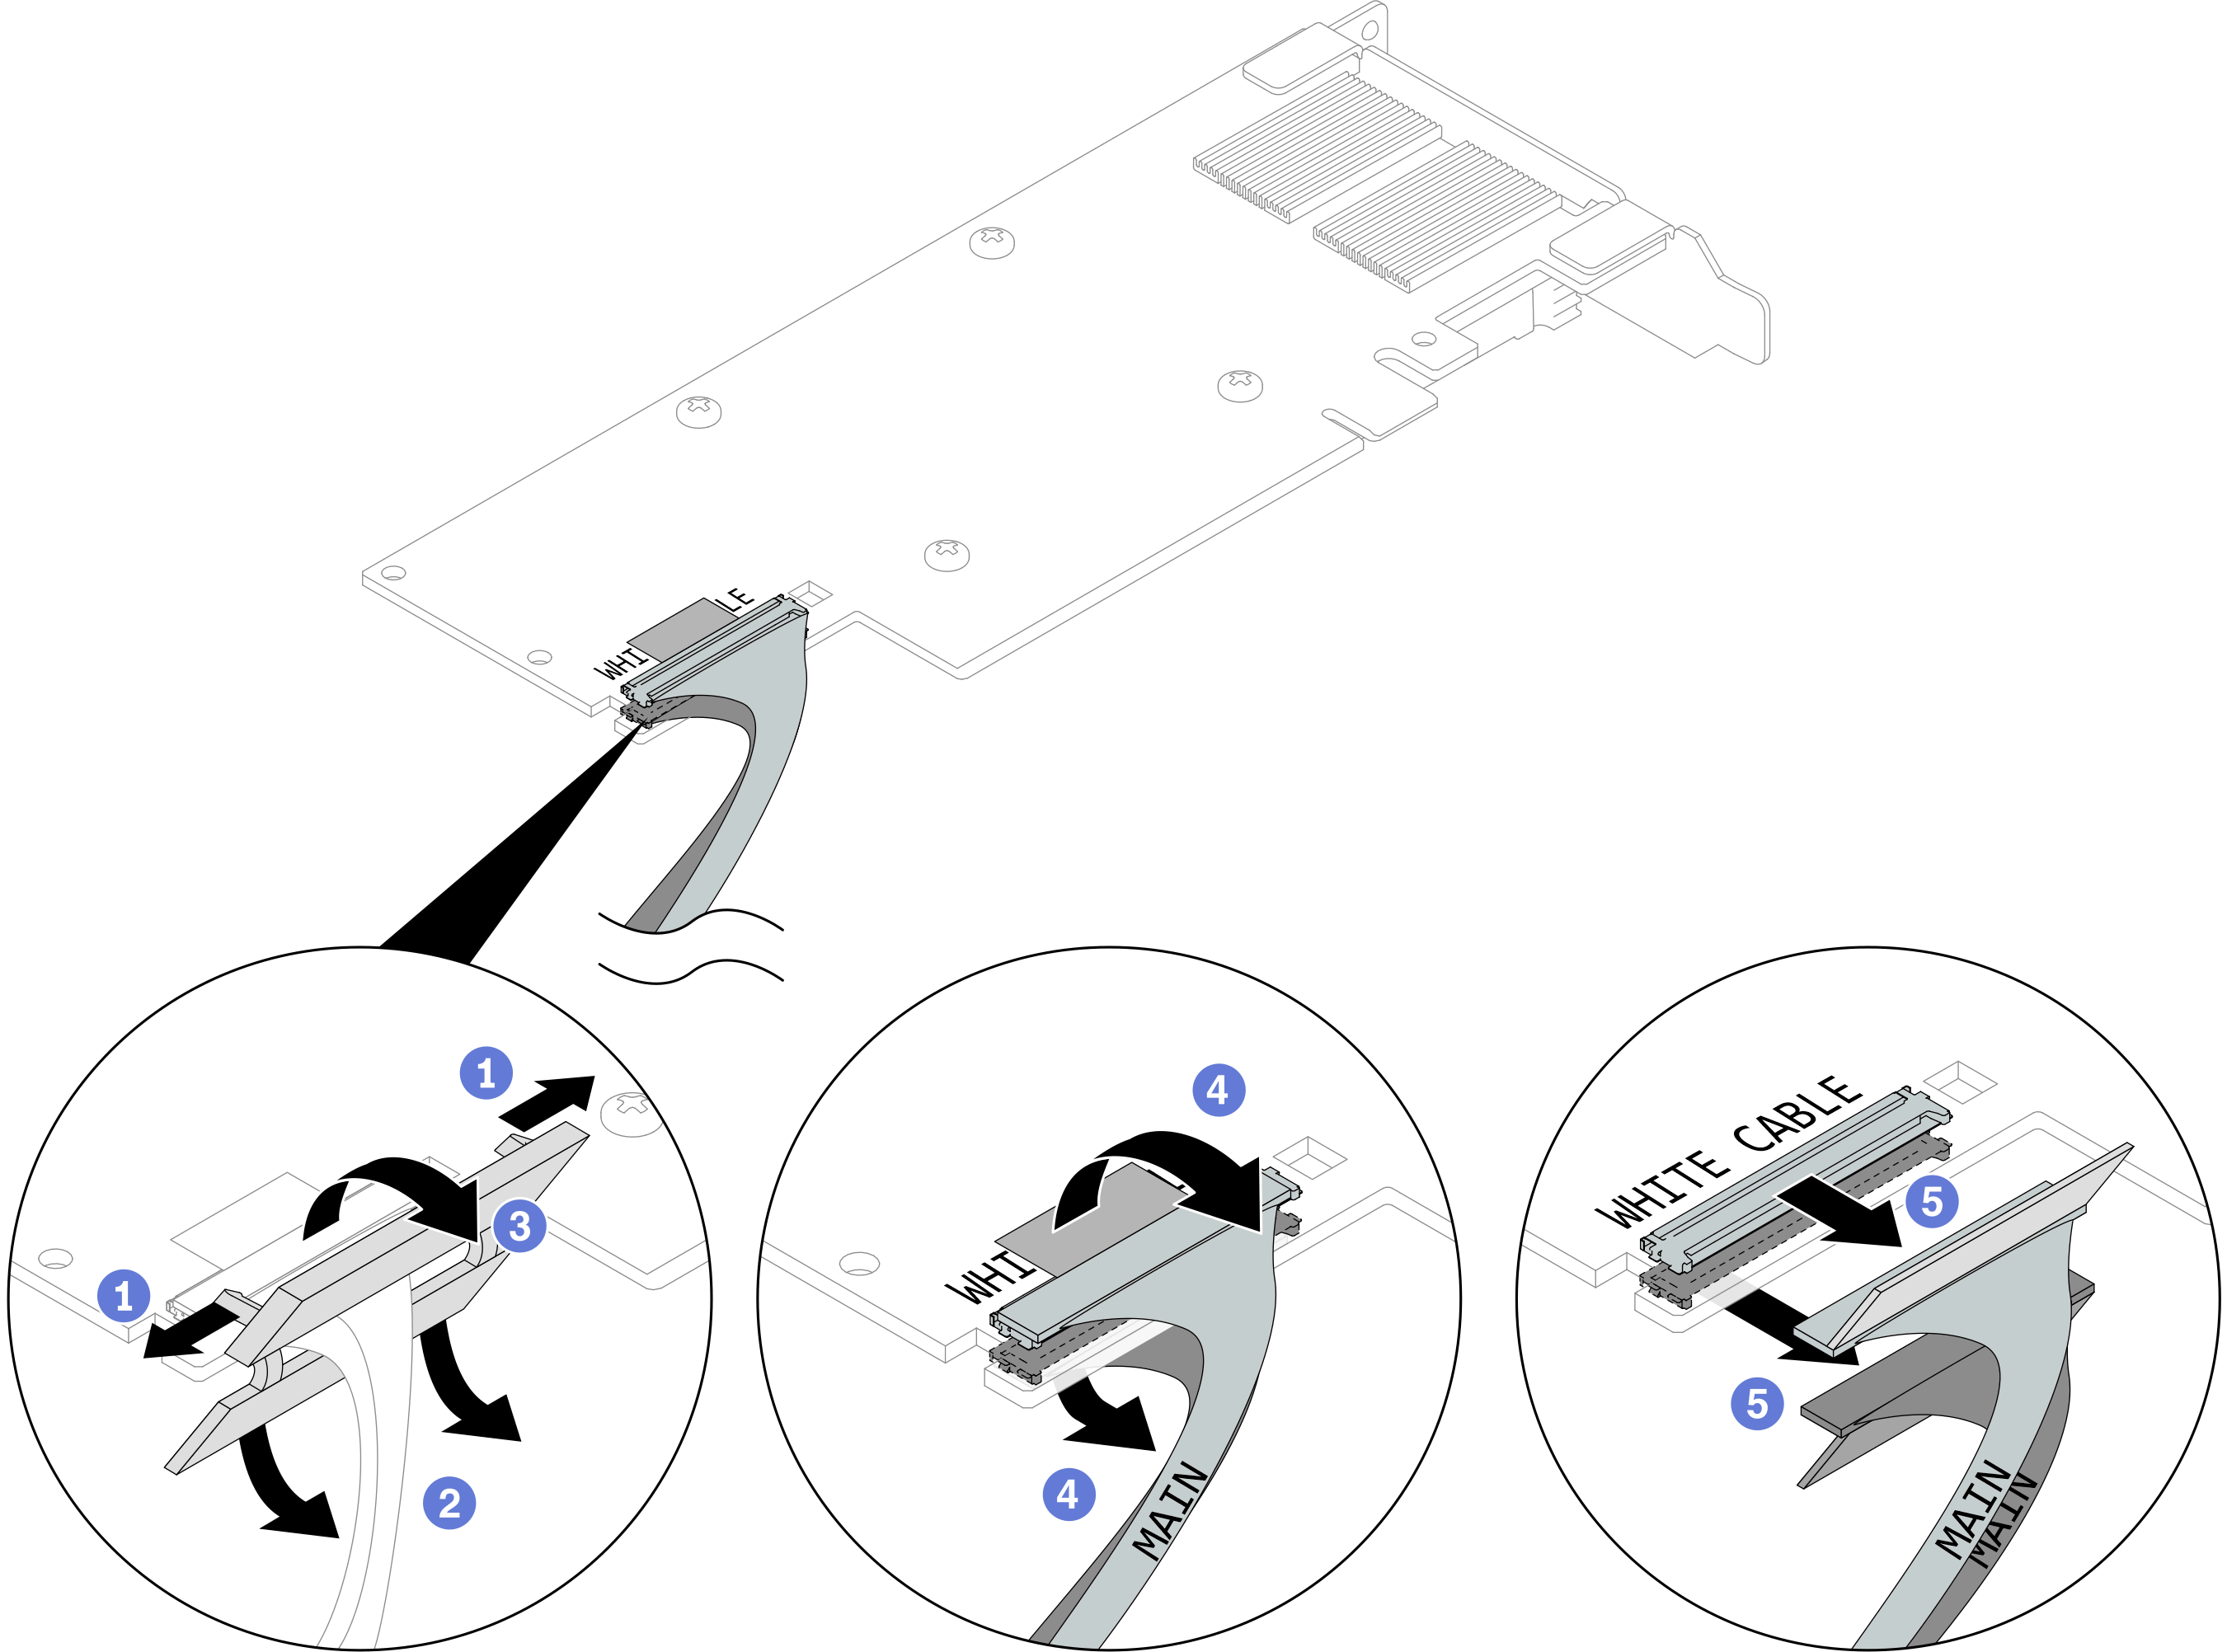
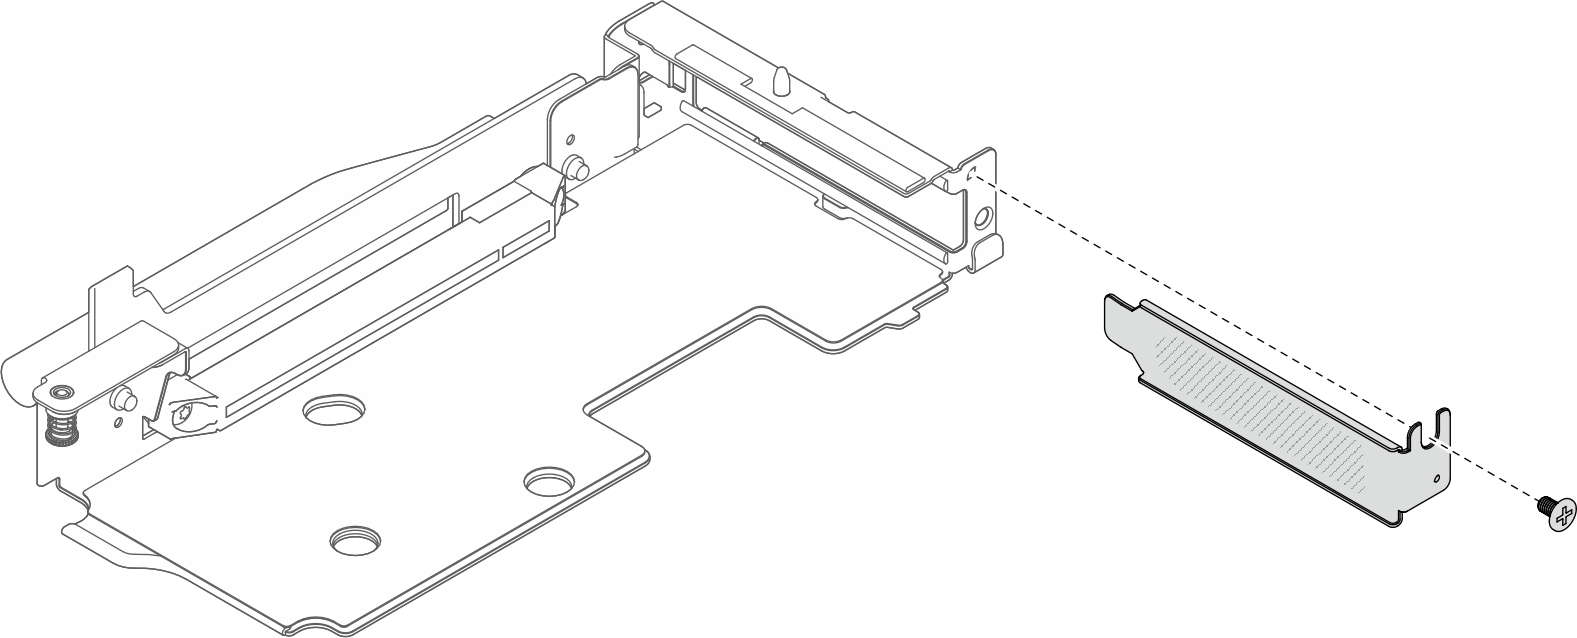
- If necessary, install a filler into the PCIe riser-cage and secure it with a PH1 screw.Figure 3. Filler installation
After you finish
If you are instructed to return the component or optional device, follow all packaging instructions, and use any packaging materials for shipping that are supplied to you.
Give documentation feedback