Remove a node from the rack
Follow instructions in this section to remove a node from the rack.
About this task
R006
CAUTION
Do not place any object on top of a rack-mounted device unless that rack-mounted device is intended for use as a shelf.
Attention
Read Installation Guidelines and Safety inspection checklist to ensure that you work safely.
Power off the server and peripheral devices and disconnect the power cords and all external cables. See Power off the server.
Note
Depending on the model, your server might look slightly different from the illustration.
Remove the shipping bracket
Procedure
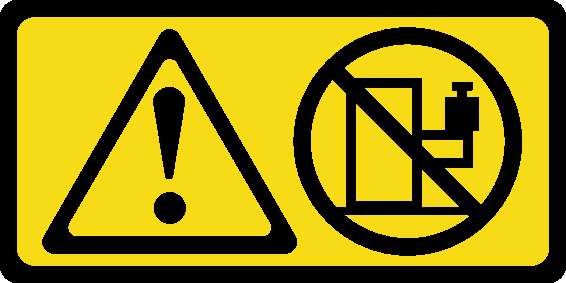
- Fully loosen the four captive screws on both sides of the shipping bracket as shown in the illustration.NoteAfter loosening the captive screws with a screwdriver, you can pull the captive screws by hand to make sure they are fully loosened to the maximum extension.Figure 1. Loosening the screws
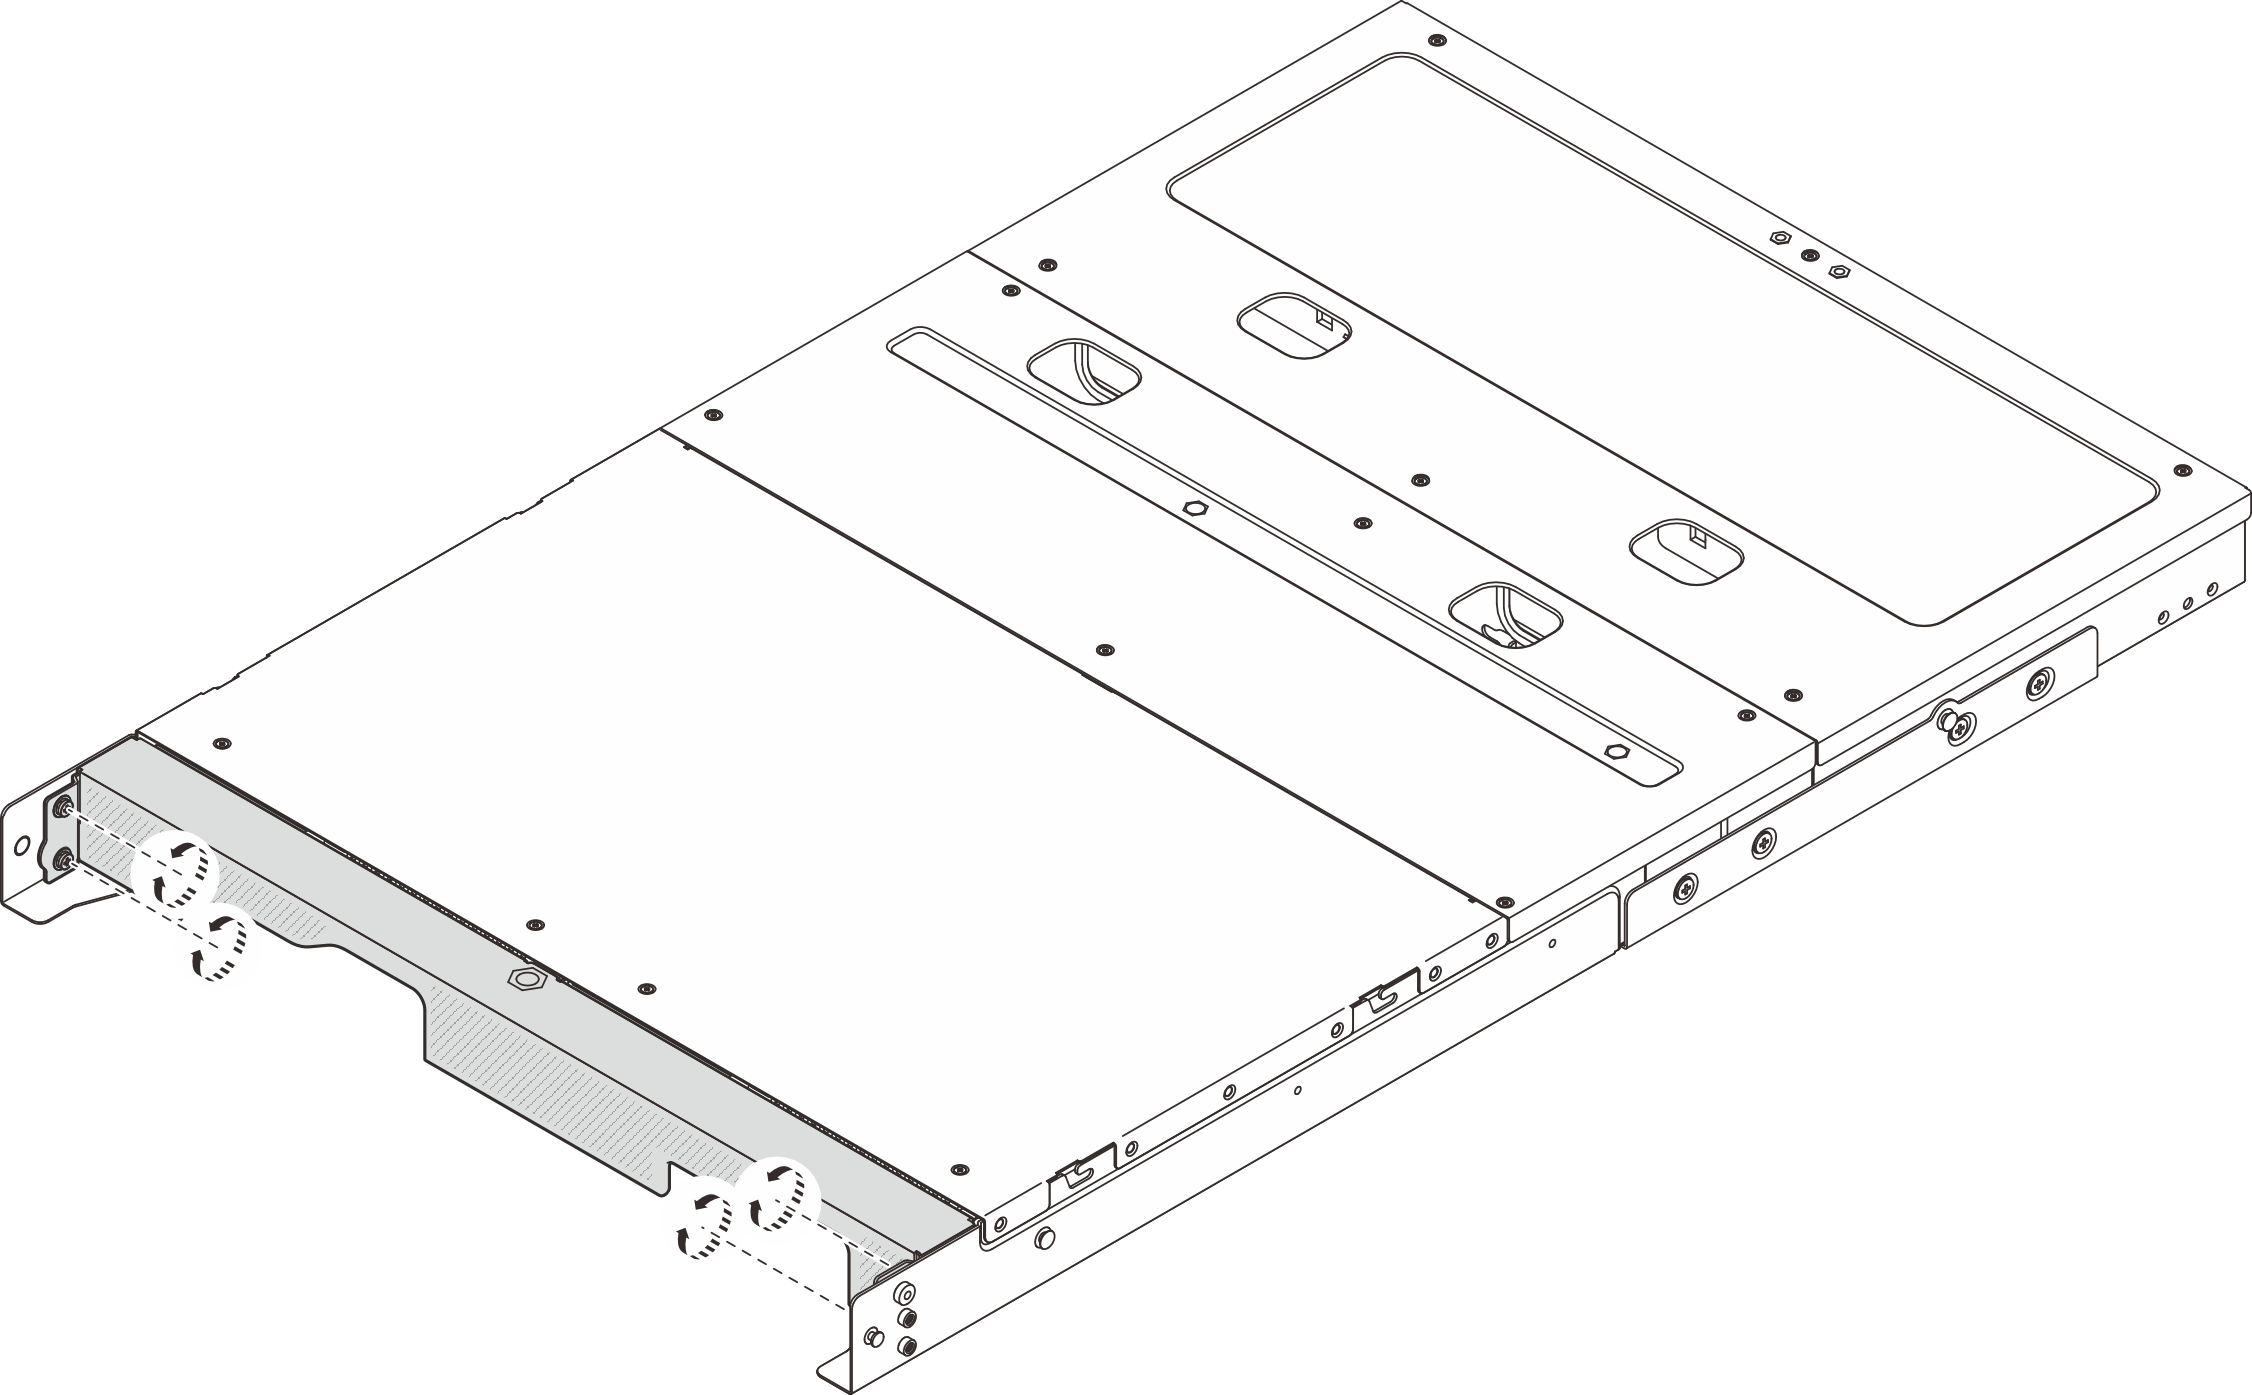
- Hold the shipping bracket by both hands, and then pull the shipping bracket horizontally without tilting to remove it from the enclosure.Figure 2. Removing the shipping bracket
Remove the node from the enclosure
Procedure
- Make preparation for this task.
- Disconnect all the cables from the node. To remove the power adapter cable, do the following:
 Use a flat-blade screwdriver to loosen the screw that lock the power cable.
 Disengage the power cable from the node.
Figure 3. Removing the power cable
- Disconnect all the cables from the node. To remove the power adapter cable, do the following:
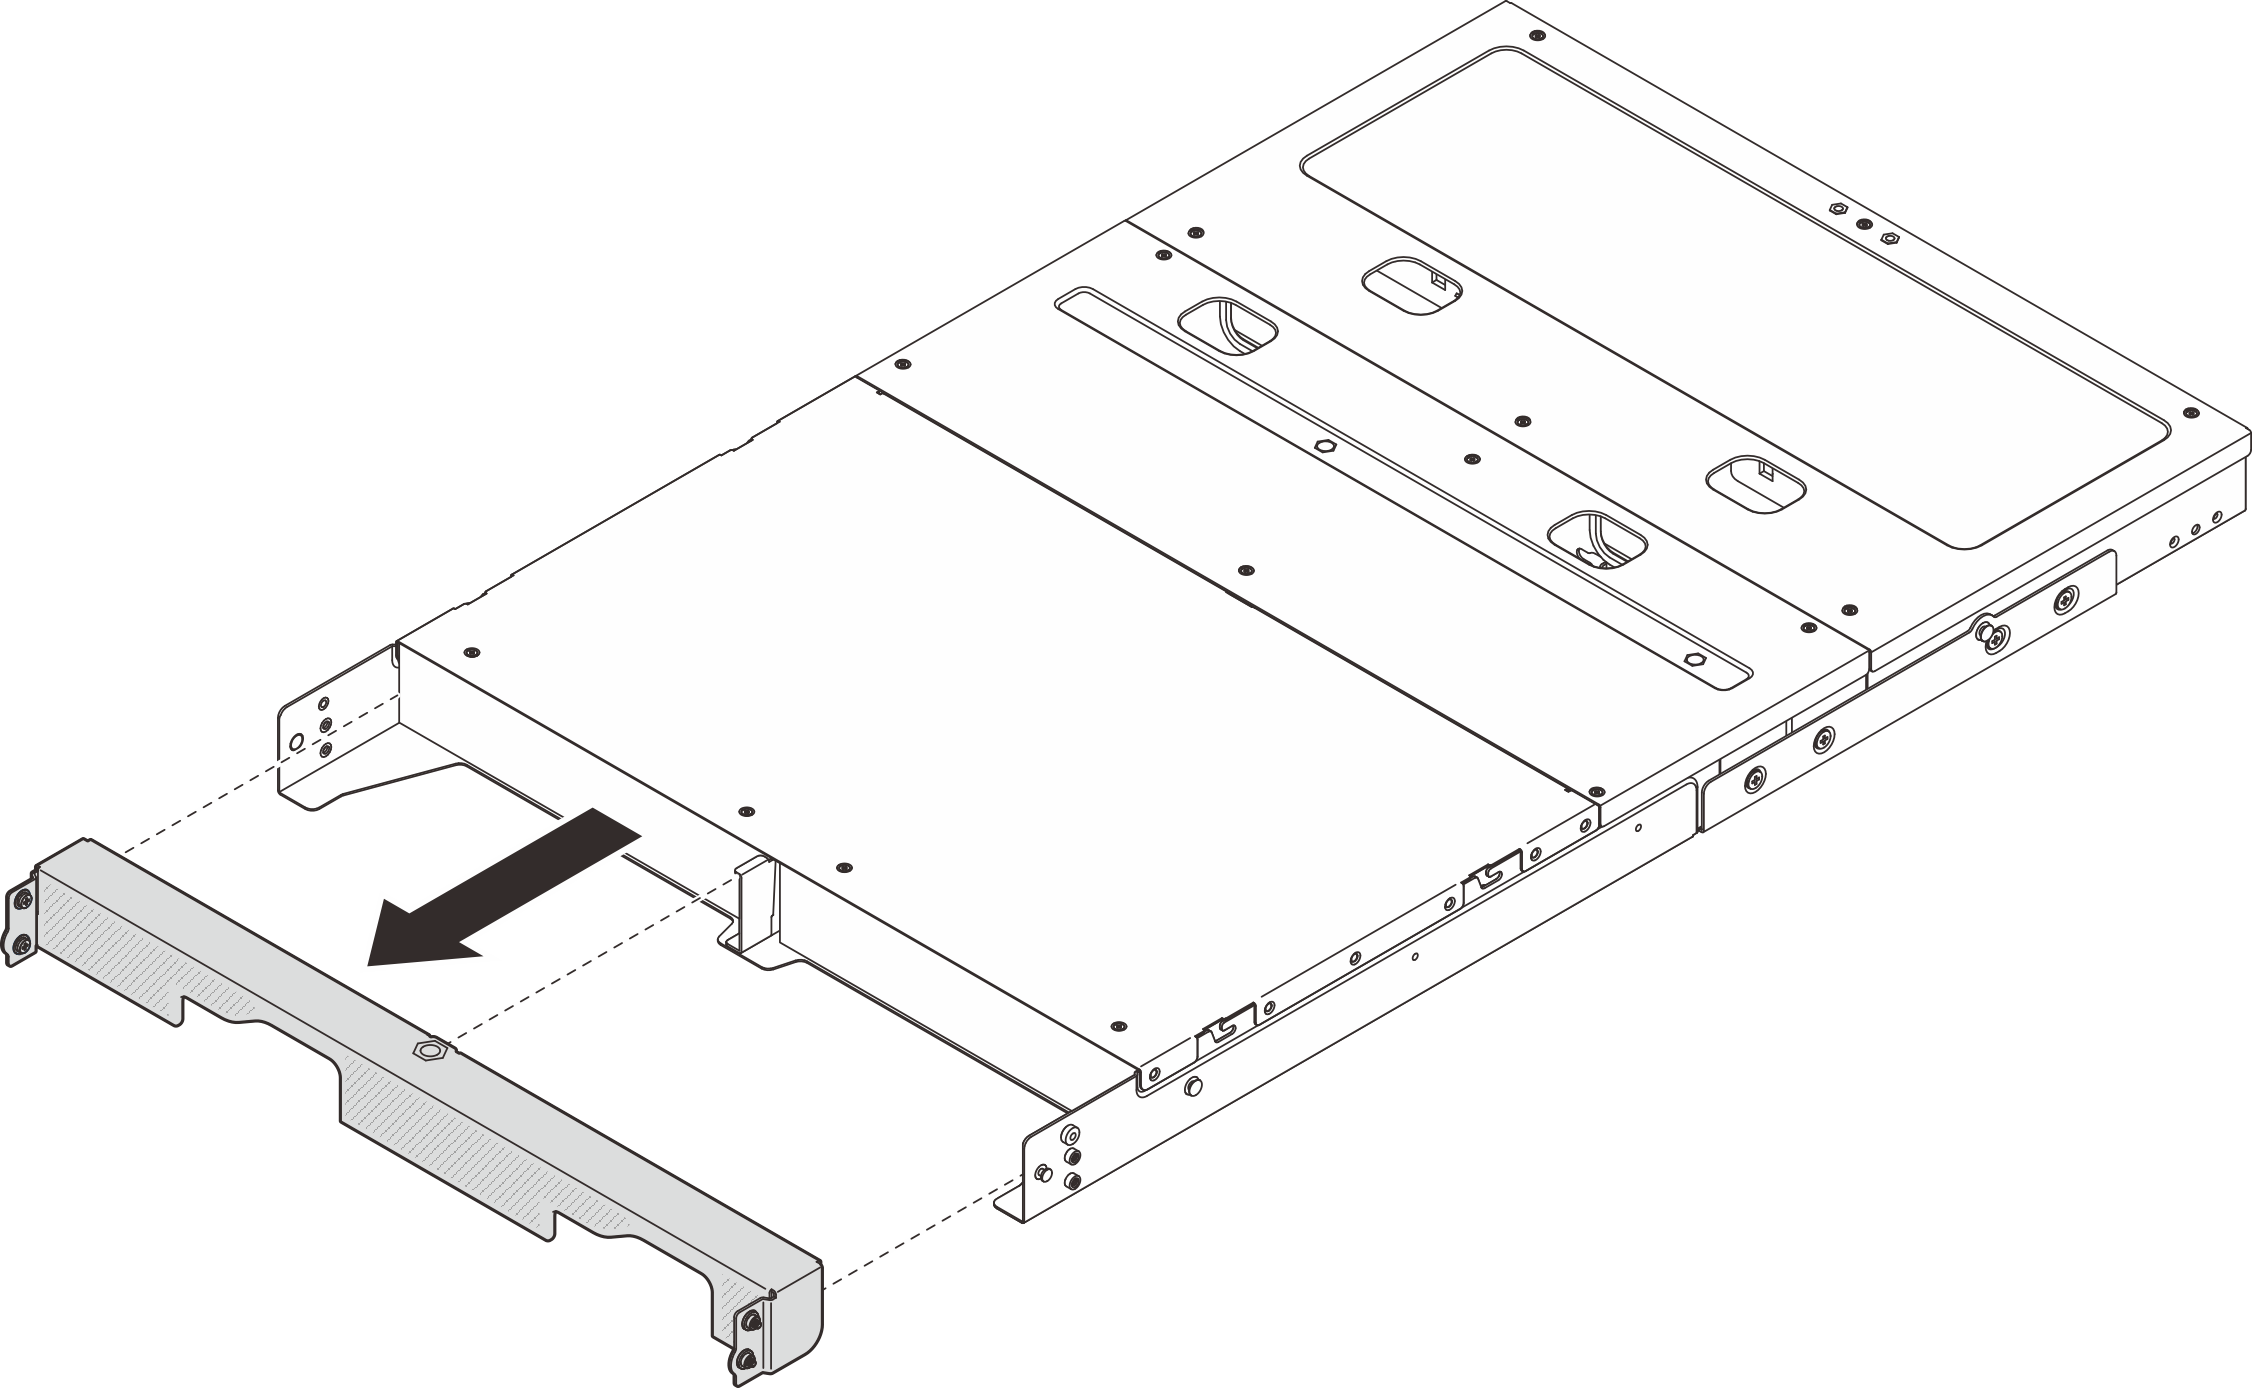
- Press and hold the release tab behind the node, and pull the node out of the enclosure.Figure 4. Removing the node
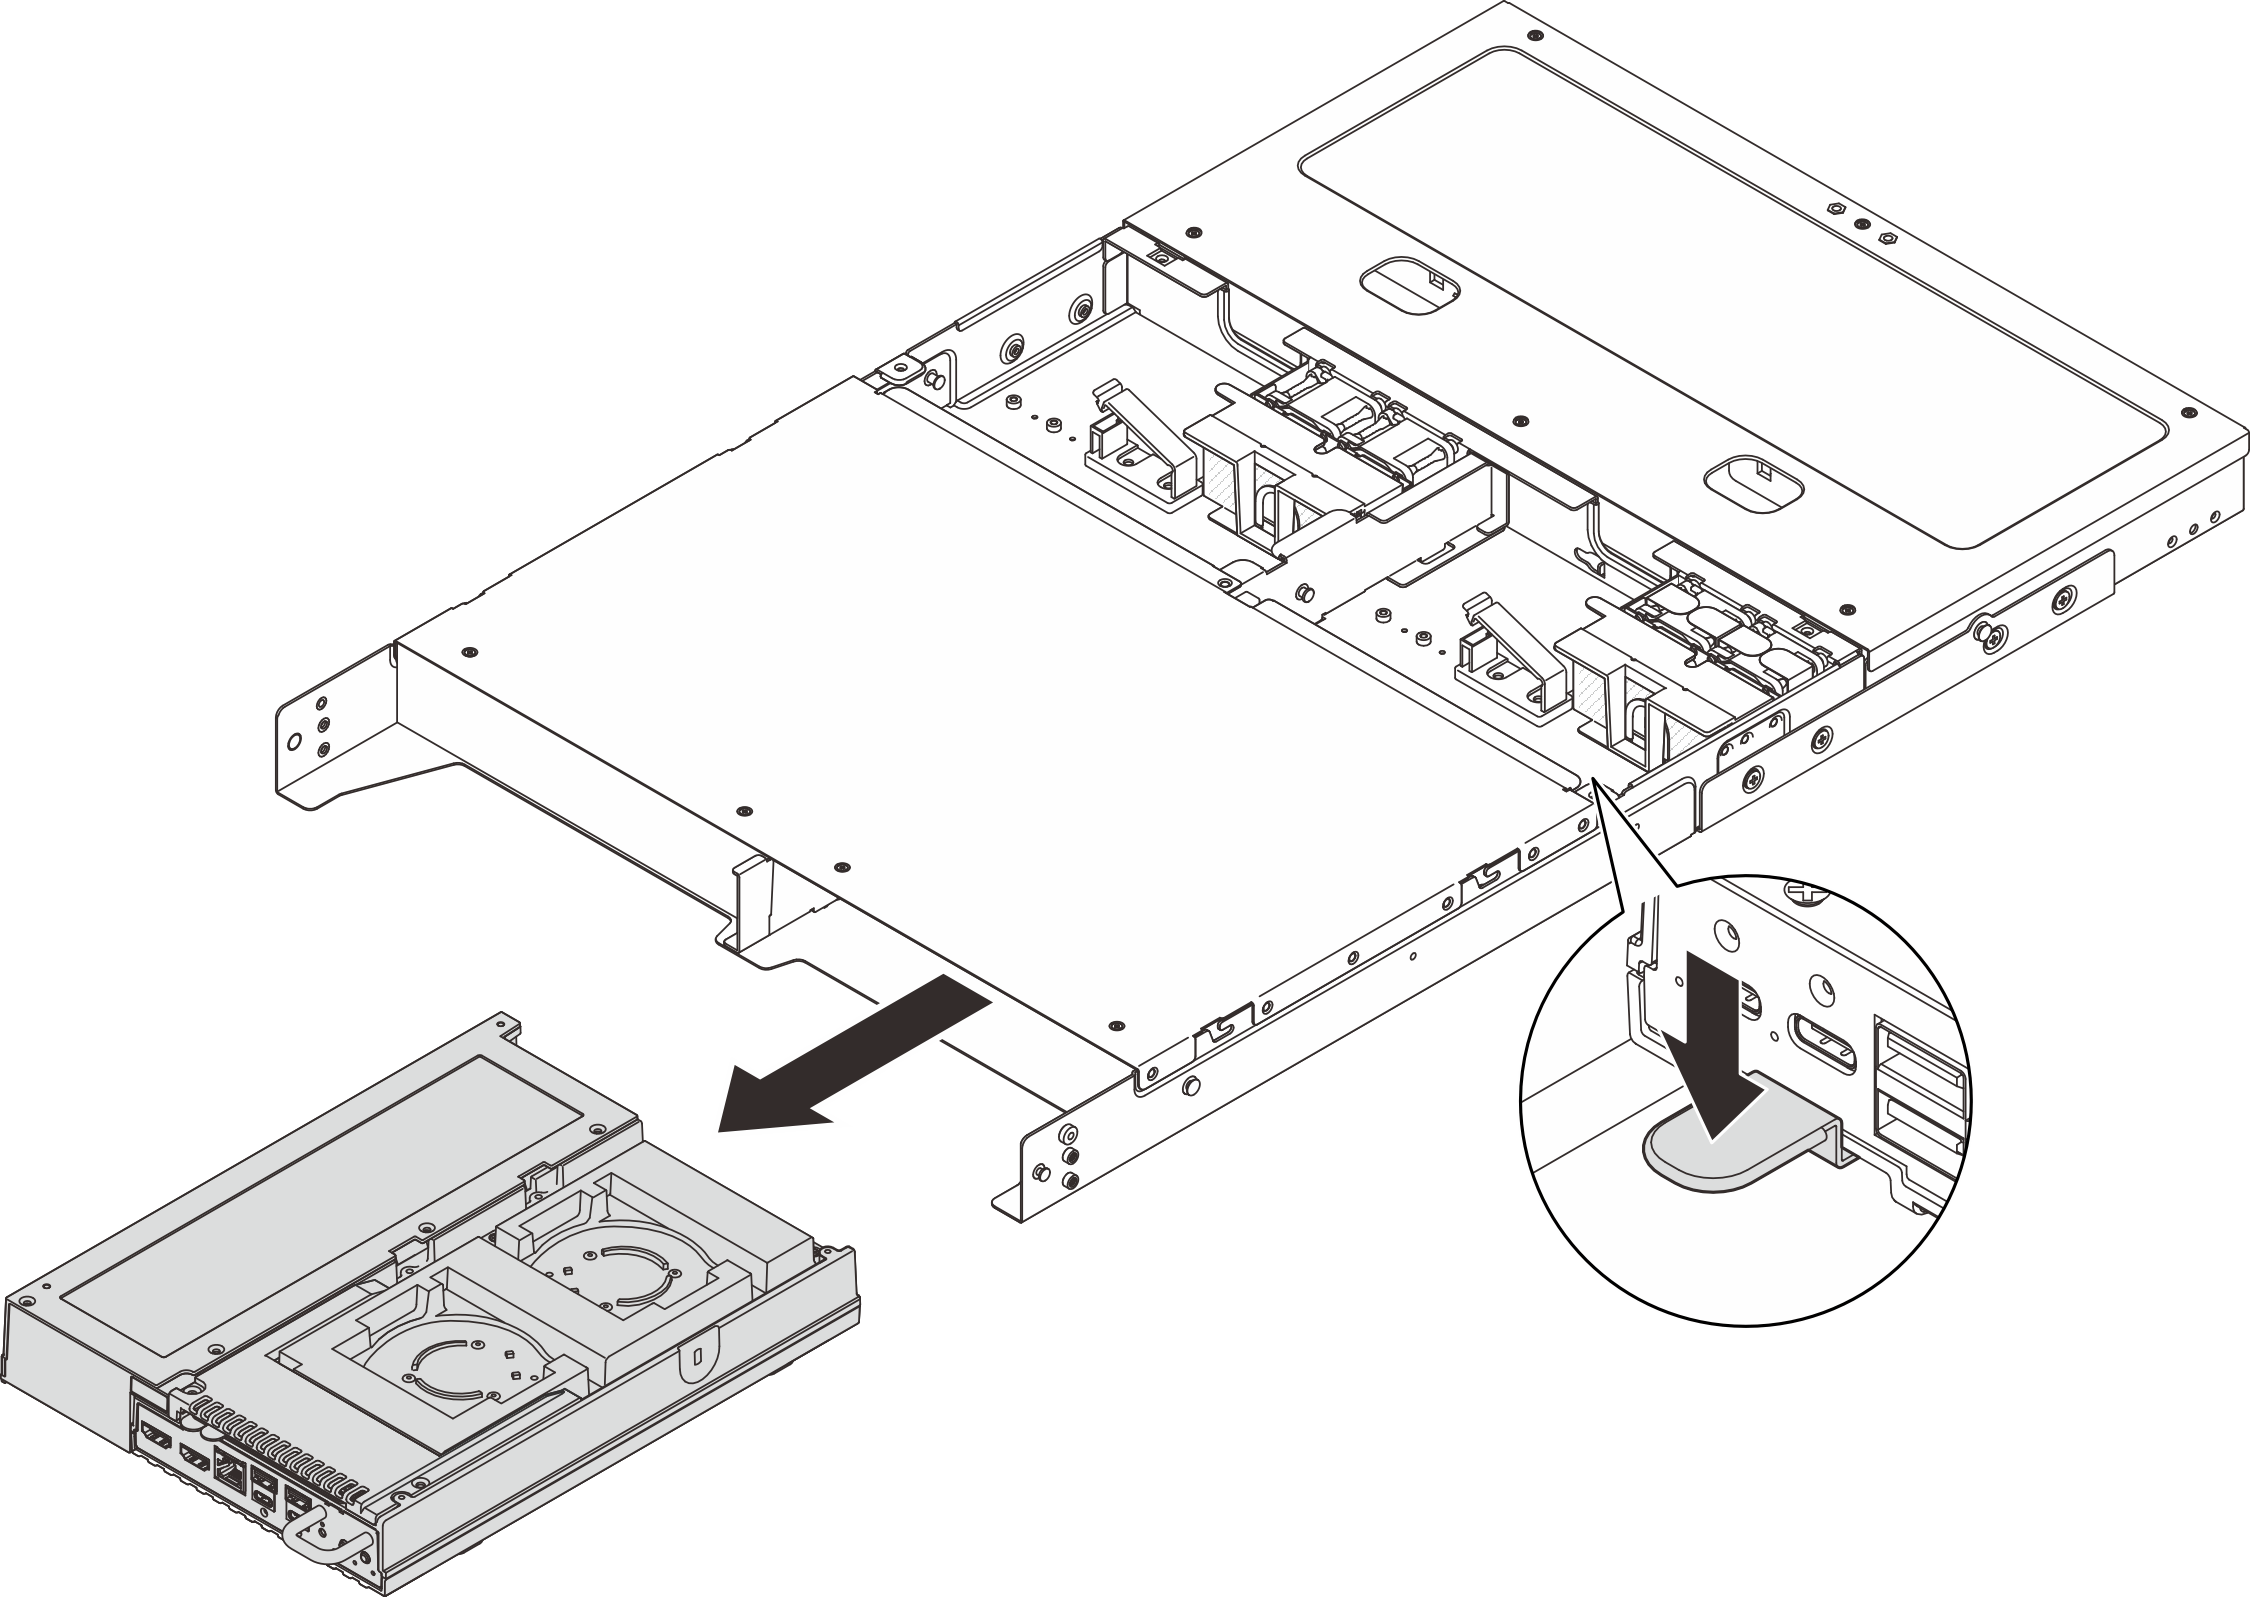 NoteA node bay should be installed with a node or a node filler. To install a node filler, insert the filler into the node bay; then, secure the filler with two screws.Figure 5. Installing the node filler
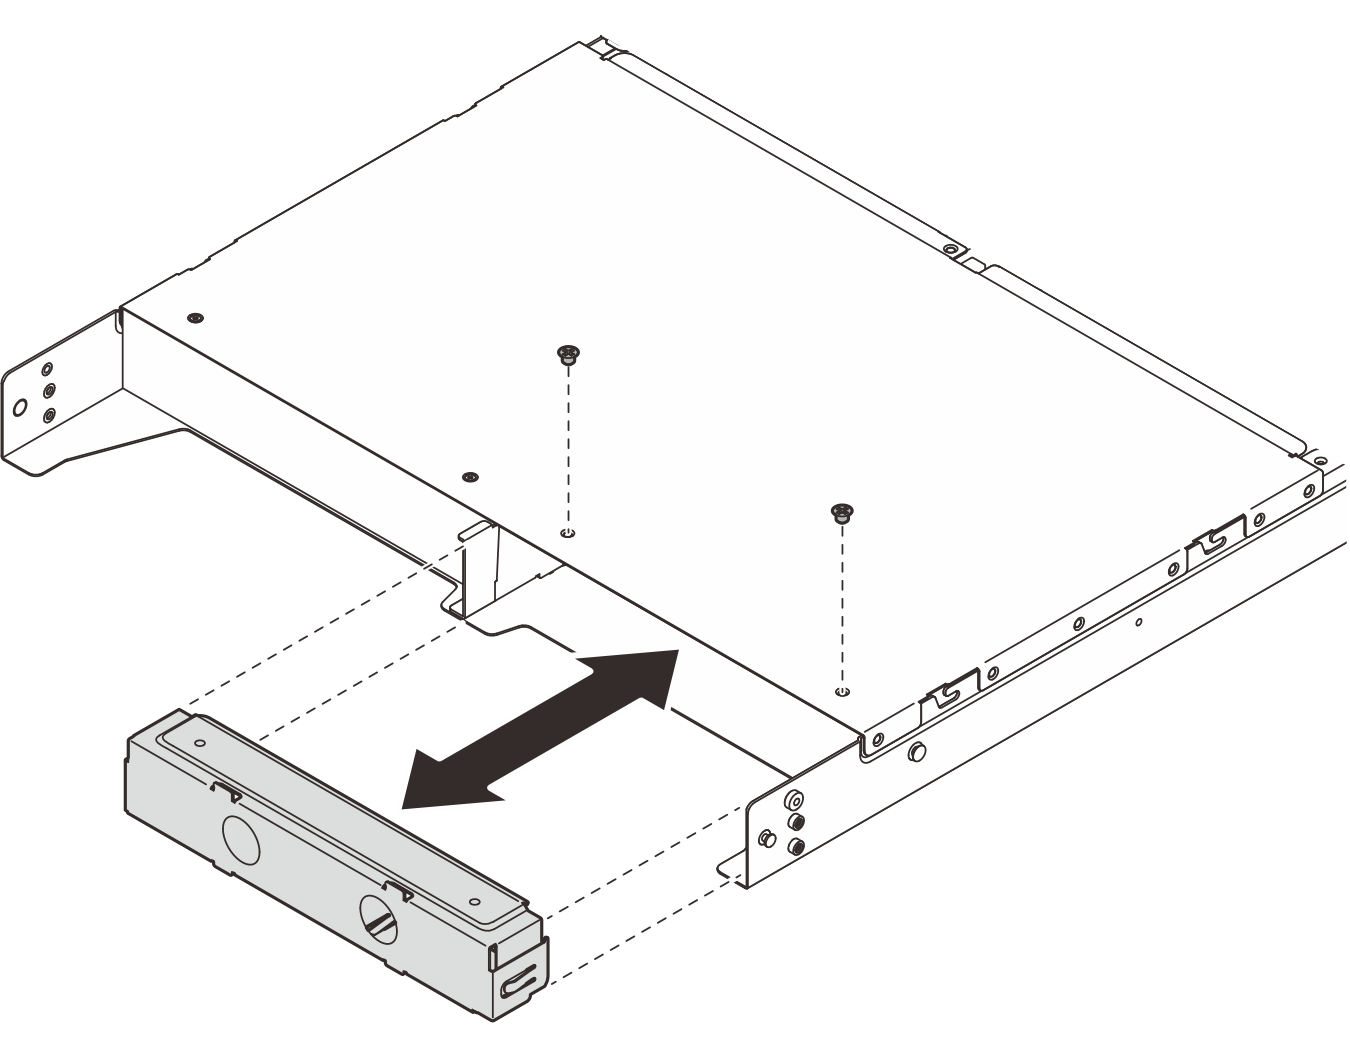
Remove the enclosure from the rack
Procedure
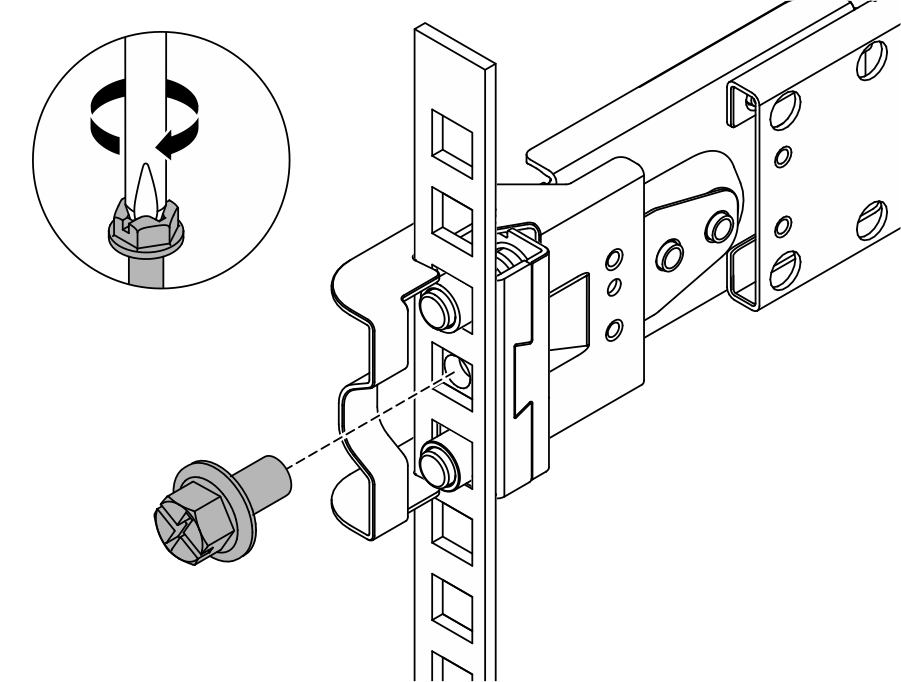
- If applicable, remove the M6 screws installed on the rear of the rails.Figure 6. Removing the screw
- Disengage the enclosure from the rack on the front.Figure 7. Disengaging enclosure from the rack
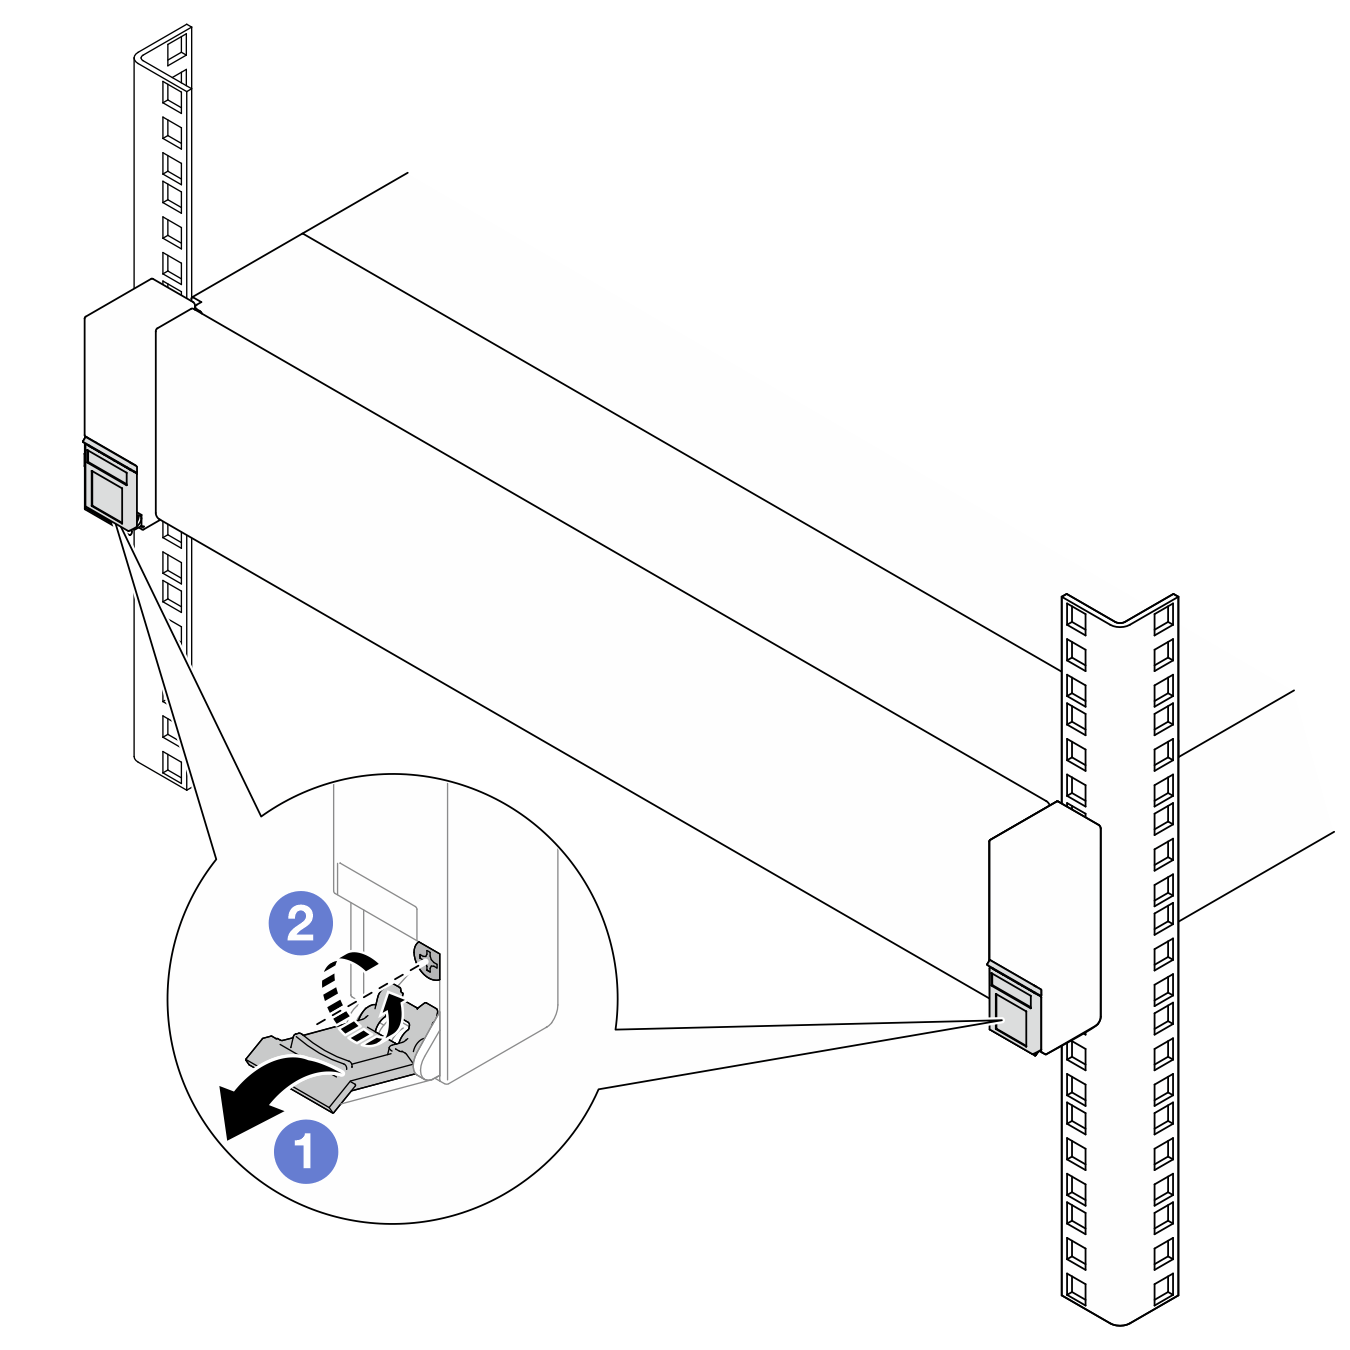
- Flip down the covers on the rack latches.
- Loosen the screws that secure the enclosure.
- Remove the enclosure from the rack.Figure 8. Pulling out the enclosure
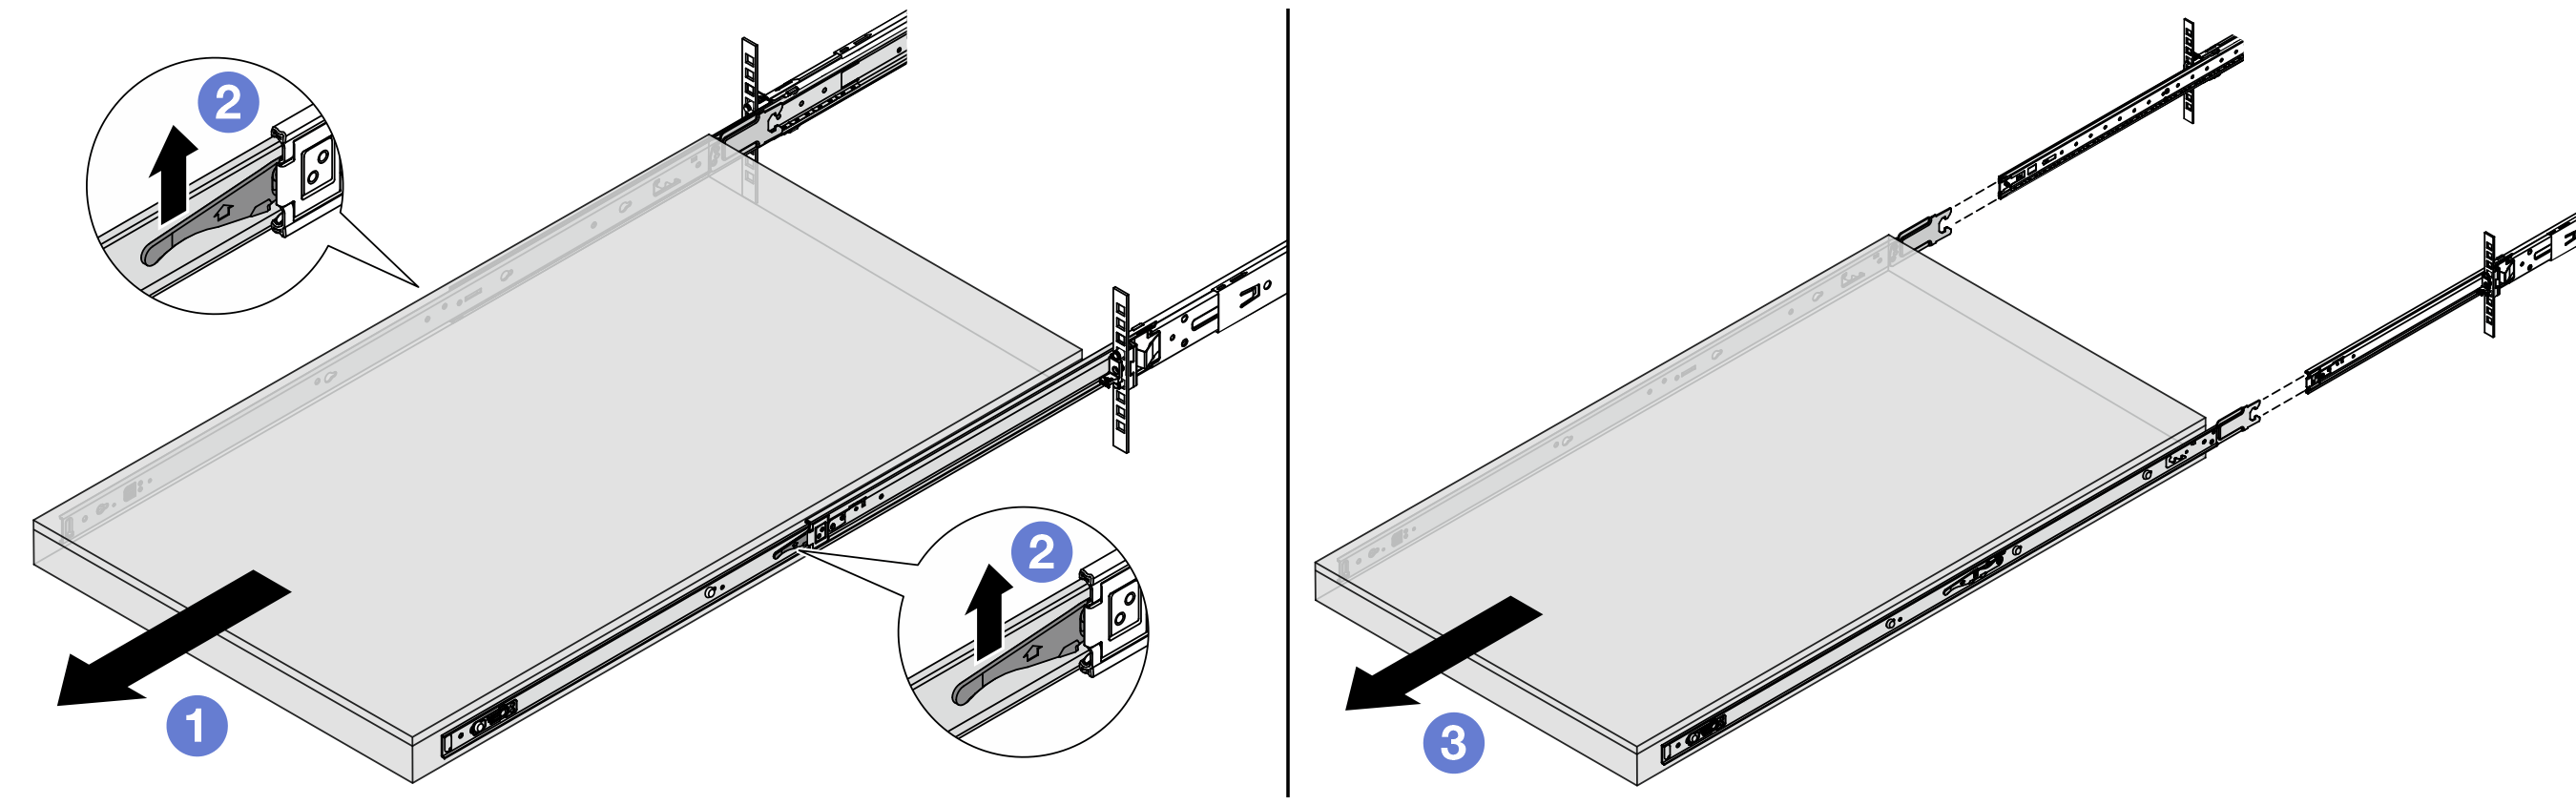
- Slide the enclosure all the way out until it stops.
- Push up the latches on the rails.
 Lift up the enclosure to remove it from the rails completely. Place the enclosure on a flat and sturdy surface.
- If necessary, remove the inner rails from the enclosure.Figure 9. Removing the inner rails
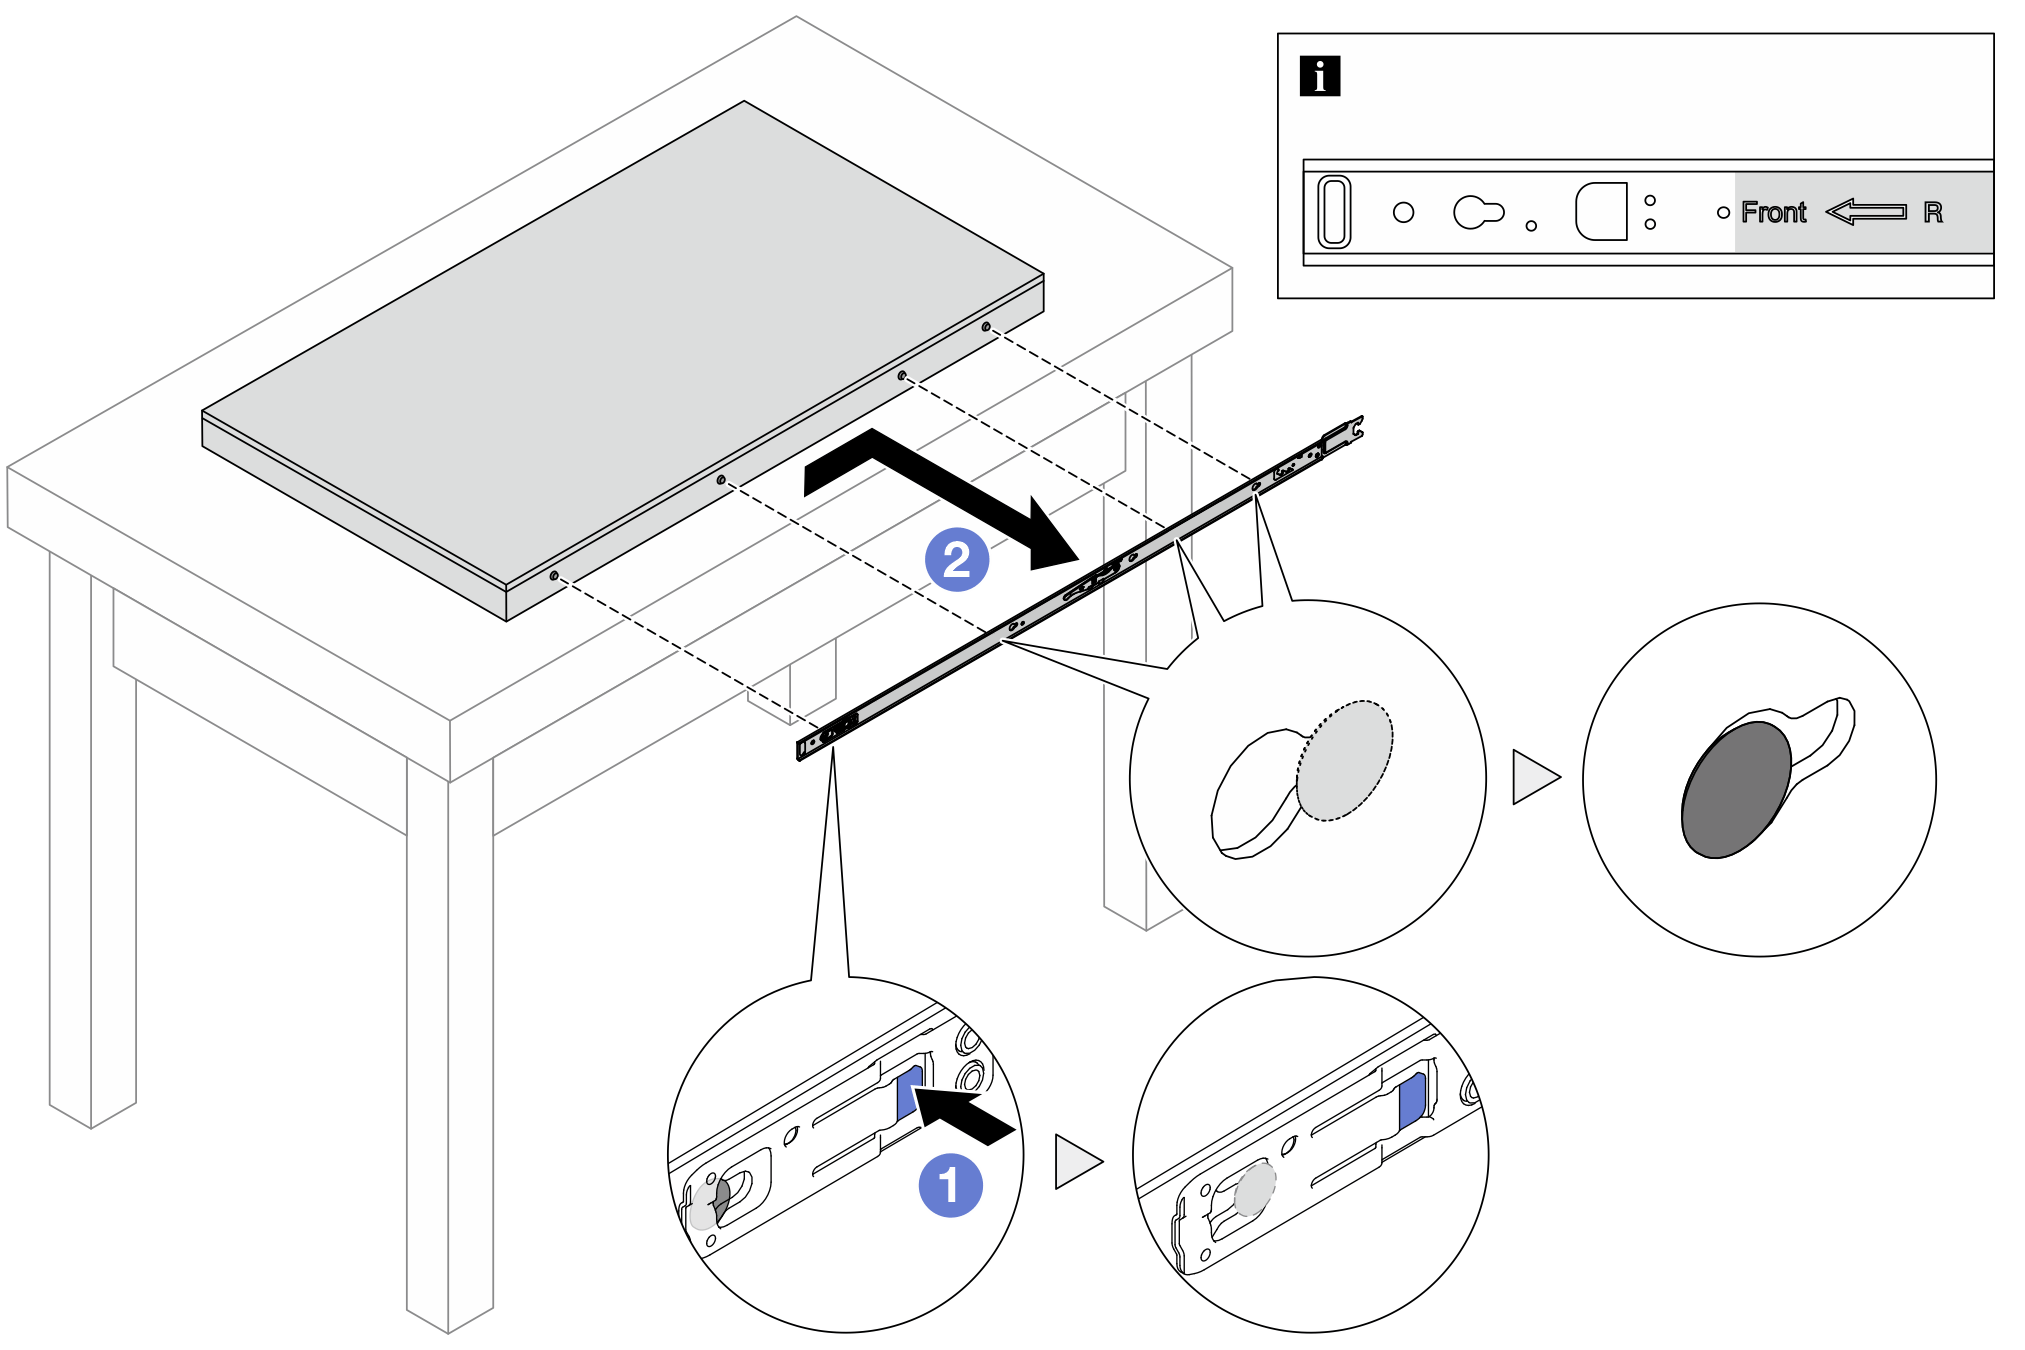
- Push the blue tab to release the latch.
- Push the inner rail backwards until the T-pins on the enclosure disengaged from the inner rail.
Give documentation feedback