Install a hot-swap drive
Follow instructions in this section to install a hot-swap drive into a drive bay.
About this task
Read Installation Guidelines and Safety inspection checklist to make sure that you work safely.
Touch the static-protective package that contains the component to any unpainted metal surface on the node; then, remove it from the package and place it on a static-protective surface.
- To make sure that there is adequate system cooling, do not operate the server for more than two minutes without either a drive or a drive bay filler installed in each bay.
- Locate the documentation that comes with the drive and follow those instructions in addition to the instructions in this chapter.
- For a complete list of supported optional devices for the server, see Lenovo ServerProven website.
- The drive bays are numbered to indicate the installation order (starting from number “0”). Follow the installation order.
Go to Drivers and Software download website for ThinkEdge SE350 V2 to see the latest firmware and driver updates for your server.
Go to Update the firmware for more information on firmware updating tools.
Depending on the specific configuration, the drives, drive bay fillers, or drive cage might look different from the illustrations in this section.
- the node is securely placed within an enclosure; or that
- the top cover is in place and fully closed, when the node is not installed in an enclosure.
Procedure
- Make preparations for this task.
- Locate the drive bay to install a drive.
- If a drive bay filler is installed in this drive bay, remove it first. Keep the drive bay filler in a safe place for future use.
- Make sure that the tray handle is in the open (unlocked) position.
- Install a drive into a drive bay.
 Align the drive with the guide rails in the bay; then, gently push the drive into the bay until the drive stops.
 Pivot the tray handle to the closed (lock) position with a click.Figure 1. Installation of a hot-swap drive
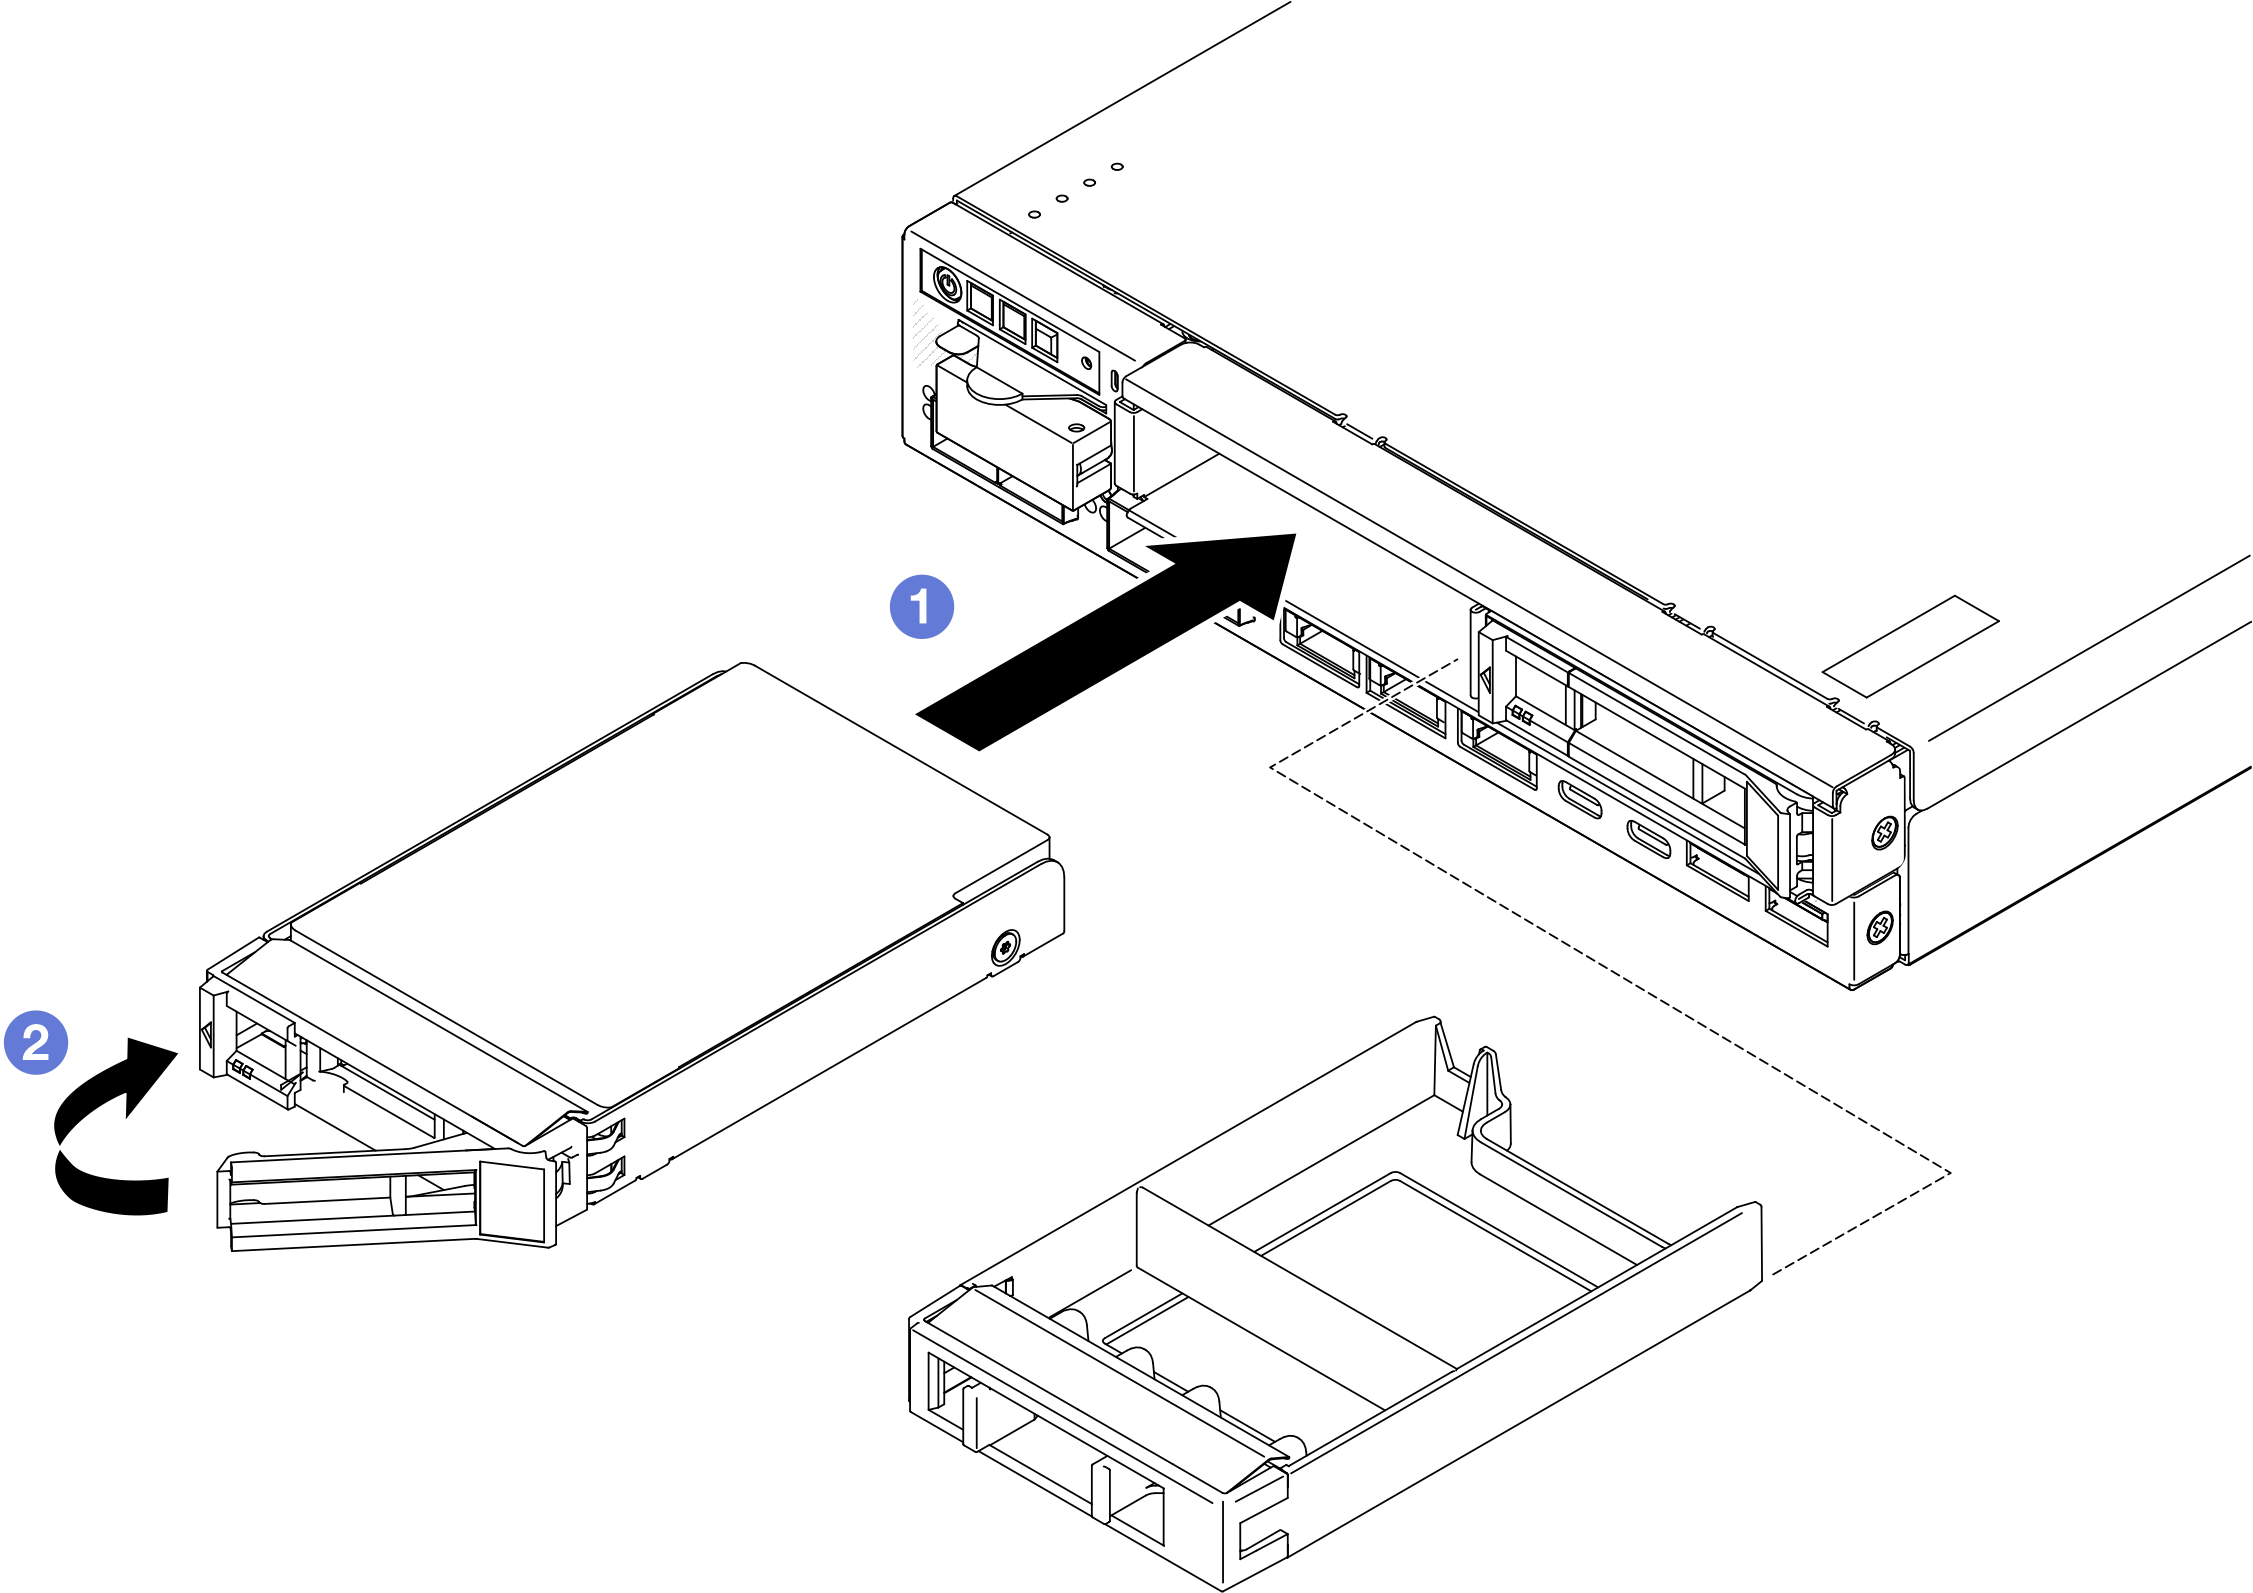
- If there are plans of installing additional drives, proceed to install all of them.
After this task is completed
After installing a SATA drive, if SED encryption is enabled on the system, reboot the system.
NoteWhen SED encryption is enabled, rebooting the system is required after installing a SATA drive; without rebooting, the SATA drive will not be recognized by the host OS.- Check the drive status LED to verify that the drive is operating correctly.
- If the yellow drive status LED of a drive is lit continuously, that drive is faulty and must be replaced.
- If the green drive activity LED is flashing, the drive is being accessed.
NoteFor more details about the drive LEDs, see Drive LEDs.
- If necessary, install the enclosure bracket to the enclosure or the security bezel to the node sleeve (see Configuration guide).