Install a processor heat sink (trained technician only)
Follow instructions in this section to install a heat sink. This procedure must be executed by a trained technician.
About this task
Removing and installing this component requires trained technicians. Do not attempt to remove or install the part without proper training.
To avoid potential danger, make sure to read and follow the safety information.
- S002
 CAUTIONThe power-control button on the device and the power switch on the power supply do not turn off the electrical current supplied to the device. The device also might have more than one power cord. To remove all electrical current from the device, ensure that all power cords are disconnected from the power source.
 - S012
 CAUTIONHot surface nearby.
Read Installation Guidelines and Safety inspection checklist to make sure that you work safely.
Touch the static-protective package that contains the component to any unpainted metal surface on the node; then, remove it from the package and place it on a static-protective surface.
Avoid touching the processor socket or processor contacts. Processor-socket contacts are very fragile and easily damaged. Contaminants on the processor contacts, such as oil from your skin, can cause connection failures.
Prevent the thermal grease on the processor or heat sink from coming in contact with anything. Contact with any surface can compromise the thermal grease, rendering it ineffective. Thermal grease can damage components, such as the electrical connectors in the processor socket.
Procedure
- Make preparations for this task.Figure 1. Application of the thermal grease
- Install the processor heat sink.
 Align the heat sink with the guide pins on the processor socket; then, insert the heat sink into the processor socket.


 Use a Phillips screwdriver to fully tighten the captive screws in the installation sequence shown on the heat-sink label. Tighten the screws until they stop; then, visually inspect to make sure that there is no gap between the screw shoulder beneath the heat sink and the processor socket. (For reference, the torque required for the nuts to fully tighten is 1.4-1.6 newton-meters, 12-14 inch-pounds.)Important
To prevent damage to the processor, make sure to follow the tightening sequence indicated in the illustration.
Figure 2. Installation of a processor heat sink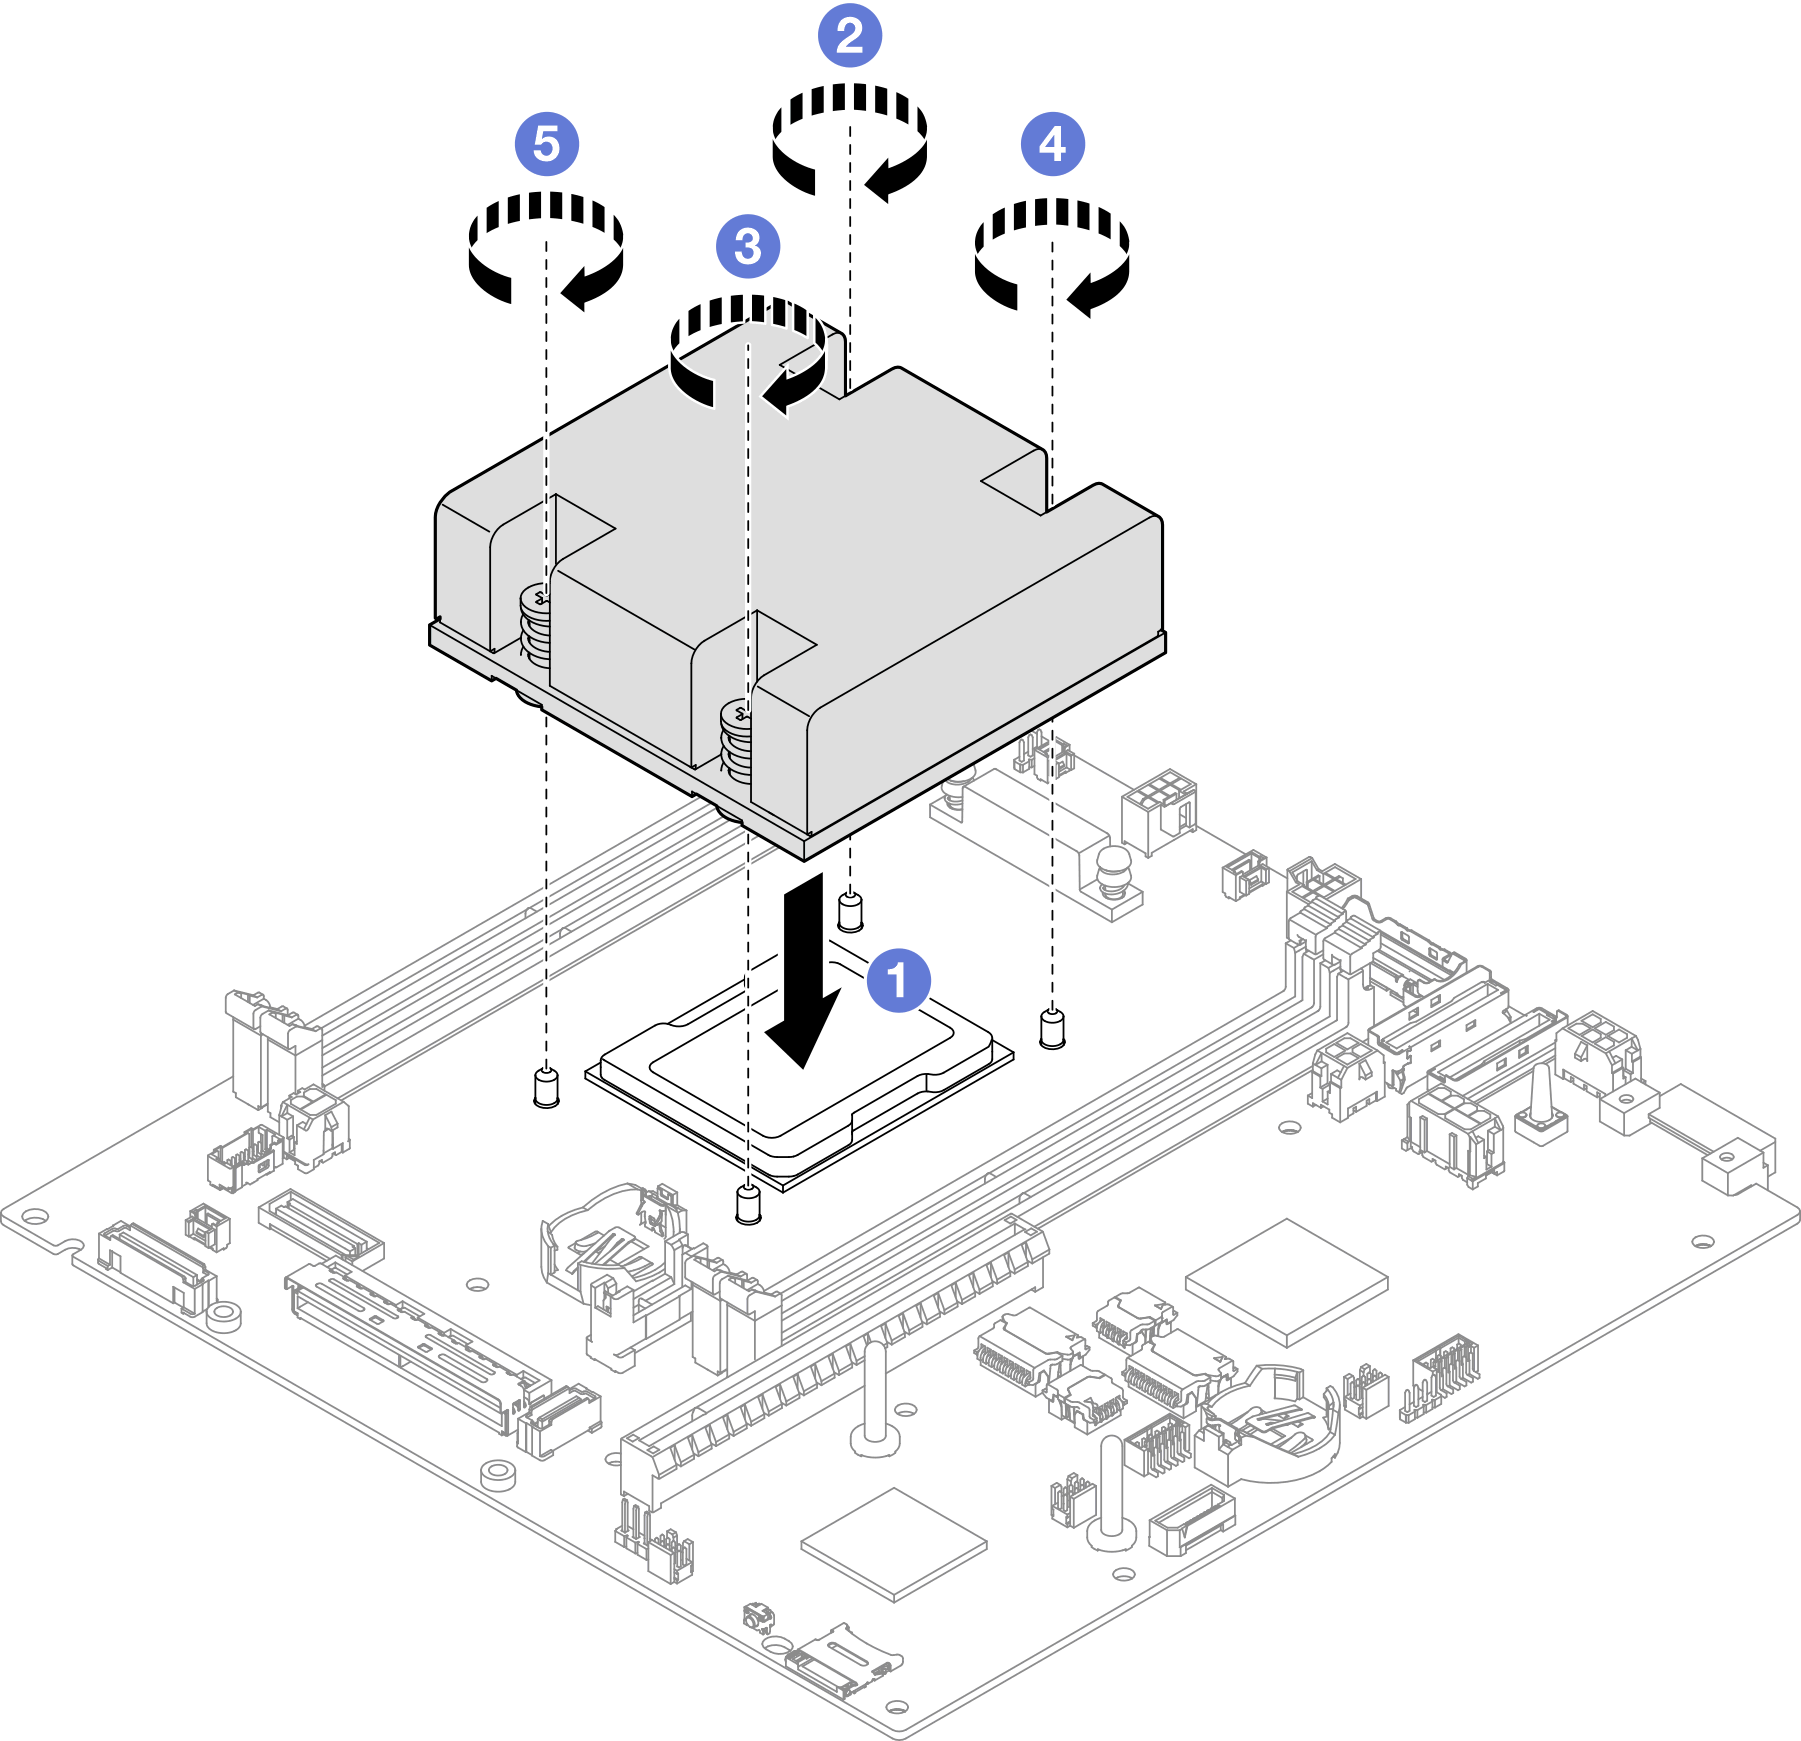
After this task is completed
- Proceed to complete the parts replacement (see Complete the parts replacement).