Remove the system board assembly
See this topic to learn how to remove the system board assembly. This procedure must be executed by a trained technician.
About this task
Attention
- Removing and installing this component requires trained technicians that are certified by Lenovo Service. Do no attempt to remove or install it without proper training and qualification.
Go over Installation Guidelines to ensure that you work with safety.
Turn off the server and peripheral devices and disconnect the power cords and all external cables (see Power off the server).
If the server is installed in a rack, slide the server out on its rack slide rails to gain access to the top cover, or remove the server from the rack.
Procedure
- Pull the plunger up; then, hold the plunger and the handle, and slide the system board slightly forward to disengage it from the chassis.Figure 1. Disengaging the system board
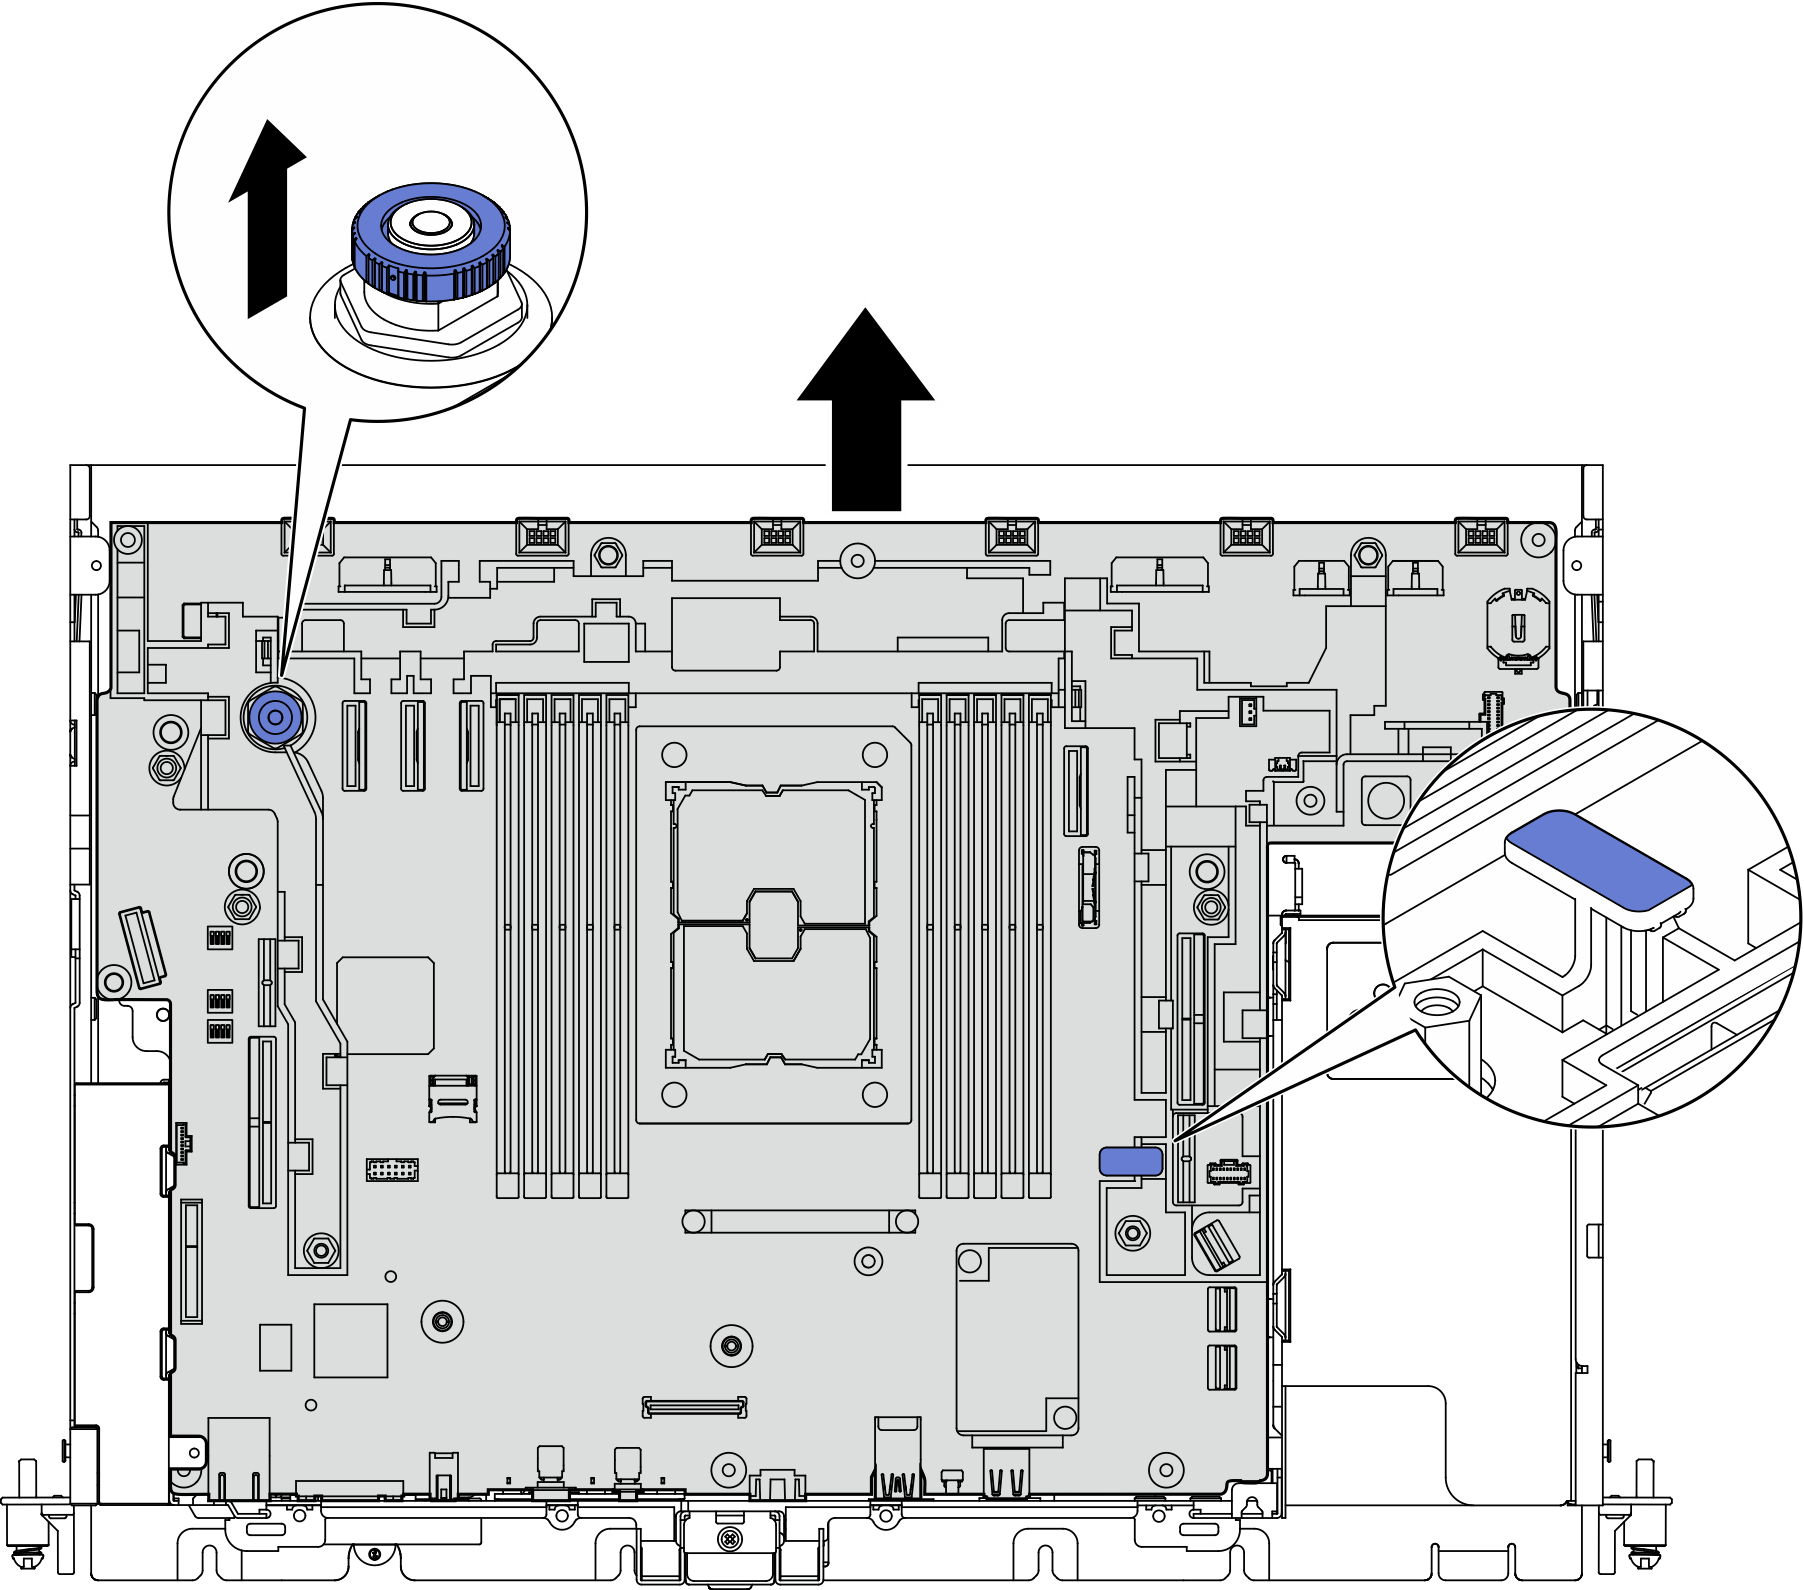
- Rotate the right end of the system board up to remove the system board from the chassis.Figure 2. Removing the system board

After this task is completed
- Install a replacement unit (see Install the system board assembly).
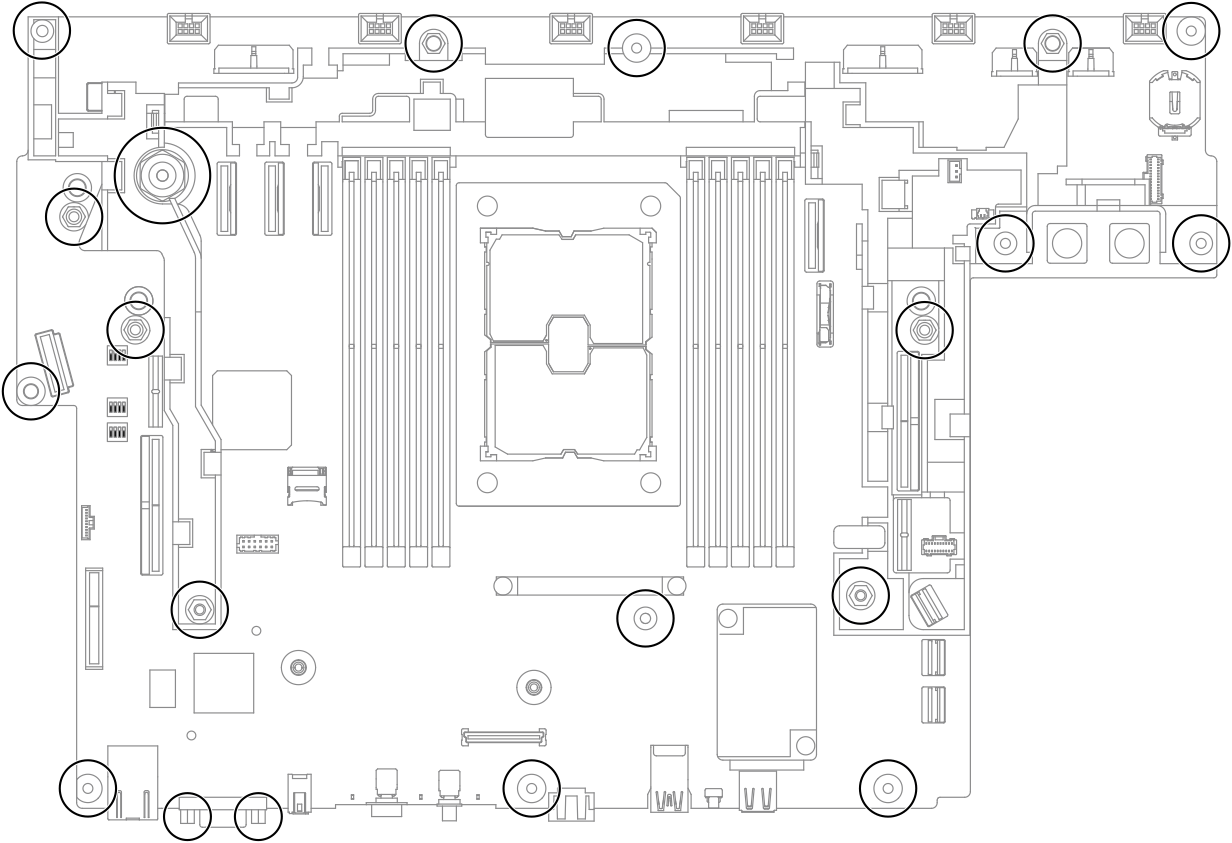
- If there is a plan of recycle, remove the screws as marked in the following illustration, and separate the supporting sheet from the system board.Figure 3. Recycling the system board
Give documentation feedback