Install the dust filter
Follow instructions in this section to install the dust filter.
About this task
Attention
Read Installation Guidelines and Safety inspection checklist to ensure that you work safely.
Depends on the operating environment, check the status of the dust filter at least every 3 months to make sure it is functional.
Important
With air flow sensor board installed, SE455 V3 BMC supports dust filter measurement to check the status of the dust filter. Log in to Lenovo XClarity Controller web interface, and go to to take the measurement by selecting Run immediately (once), or by setting a regular schedule.See Set dust filter measurement for more information.
- When taking the measurement, the fans will operate at full fan speed for about 30 seconds.
- After taking the measurement, see Lenovo XClarity Controller Event Log for the status of dust filter. For proper operation, replace the dust filter according to the action suggestions in the generated event.
Procedure
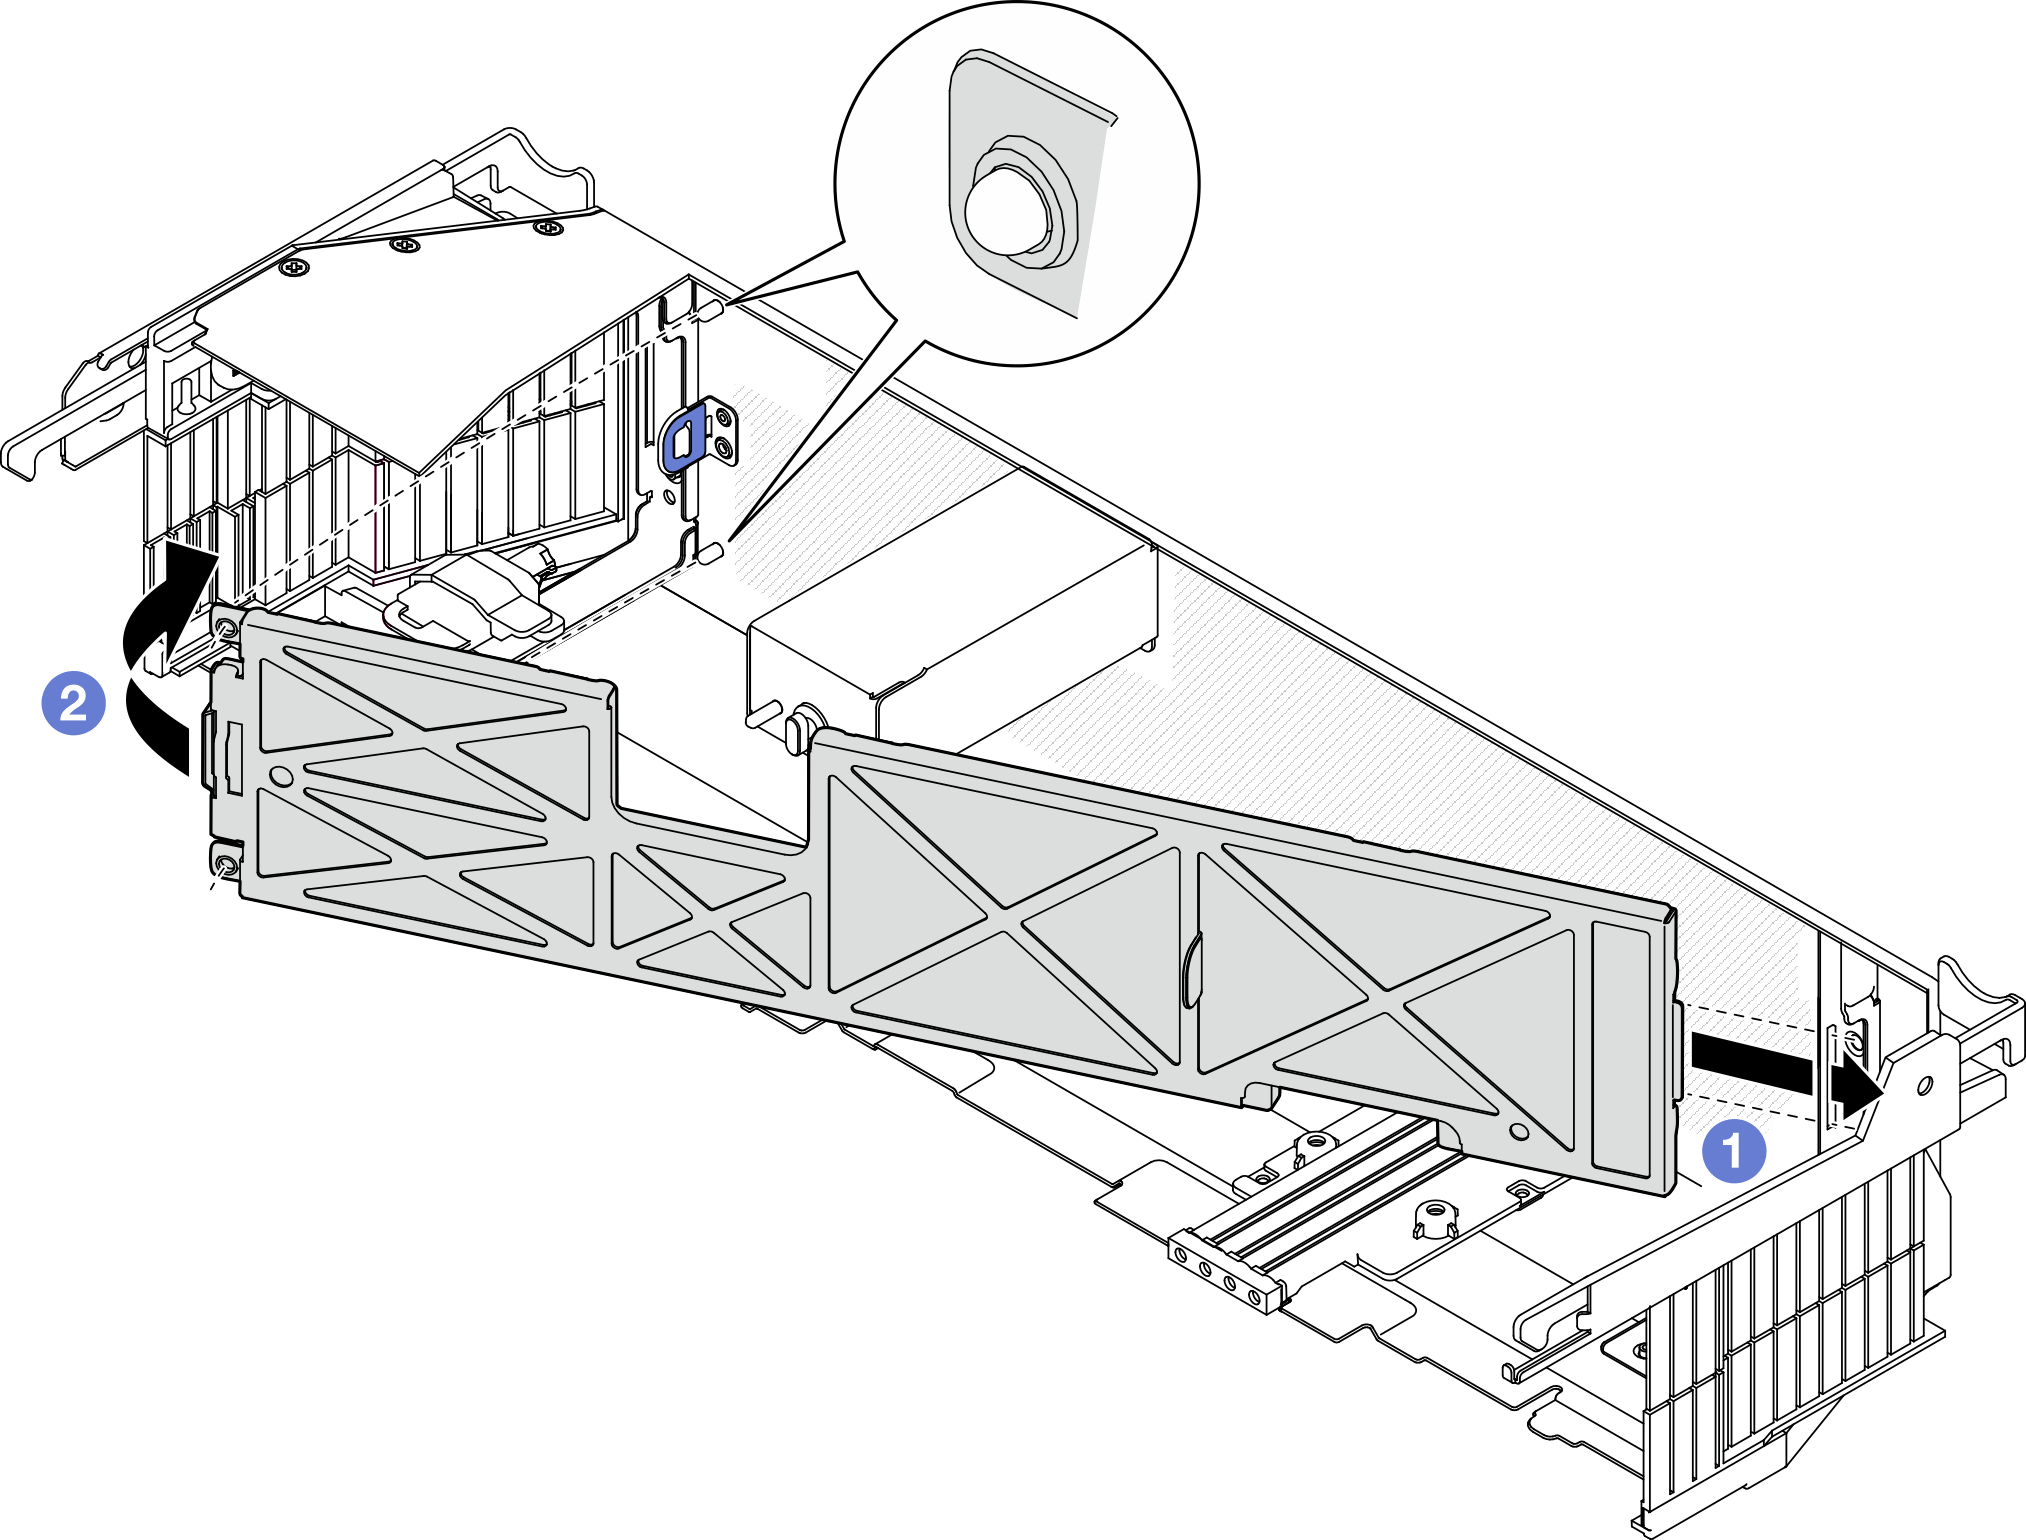
Install the dust filter.
 Insert the right side of the dust filter into the slot in the security bezel.
 Pivot the dust filter towards the security bezel until it is seated in place. Make sure the guide pins on the security bezel is seated in the holes on the dust filter.
Figure 1. Installing the dust filter
After this task is completed
Proceed to install the security bezel. See Install the security bezel.
Demo Video
Give documentation feedback