Install a front hot-swap drive
Follow instructions in this section to install a front hot-swap drive.
About this task
Read Installation Guidelines and Safety inspection checklist to ensure that you work safely.
Touch the static-protective package that contains the drive to any unpainted metal surface on the solution; then, remove the drive from the package and place it on a static-protective surface.
Make sure you save the data on your drive, especially if it is part of a RAID array, before you remove it from the server.
To avoid damage to the drive connectors, make sure that the server top cover is in place and fully closed whenever you install or remove a drive.
To make sure that there is adequate system cooling, do not operate the server for more than two minutes without either a drive or a drive bay filler installed in each bay.
Before you make changes to drives, drive controllers (including controllers that are integrated on the system board), drive backplanes, or drive cables, back up all important data that is stored on drives.
Before you remove any component of a RAID array (drive, RAID card, etc.), back up all RAID configuration information.
The following notes describe the type of drives that the server supports and other information that you must consider when you install a drive. For a list of supported drives, see Lenovo ServerProven website.
- Locate the documentation that comes with the drive and follow those instructions in addition to the instructions in this chapter.
- The drive bays are numbered to indicate the installation order (starting from number “0”). Follow the installation order when you install a drive.
Table 1. Front drive bay numbering (viewed from the front) Bay 0 Bay 2 Bay 1 Bay 3
Go to Drivers and Software download website for ThinkEdge SE455 V3 to see the latest firmware and driver updates for your server.
Go to Update the firmware for more information on firmware updating tools.
Procedure
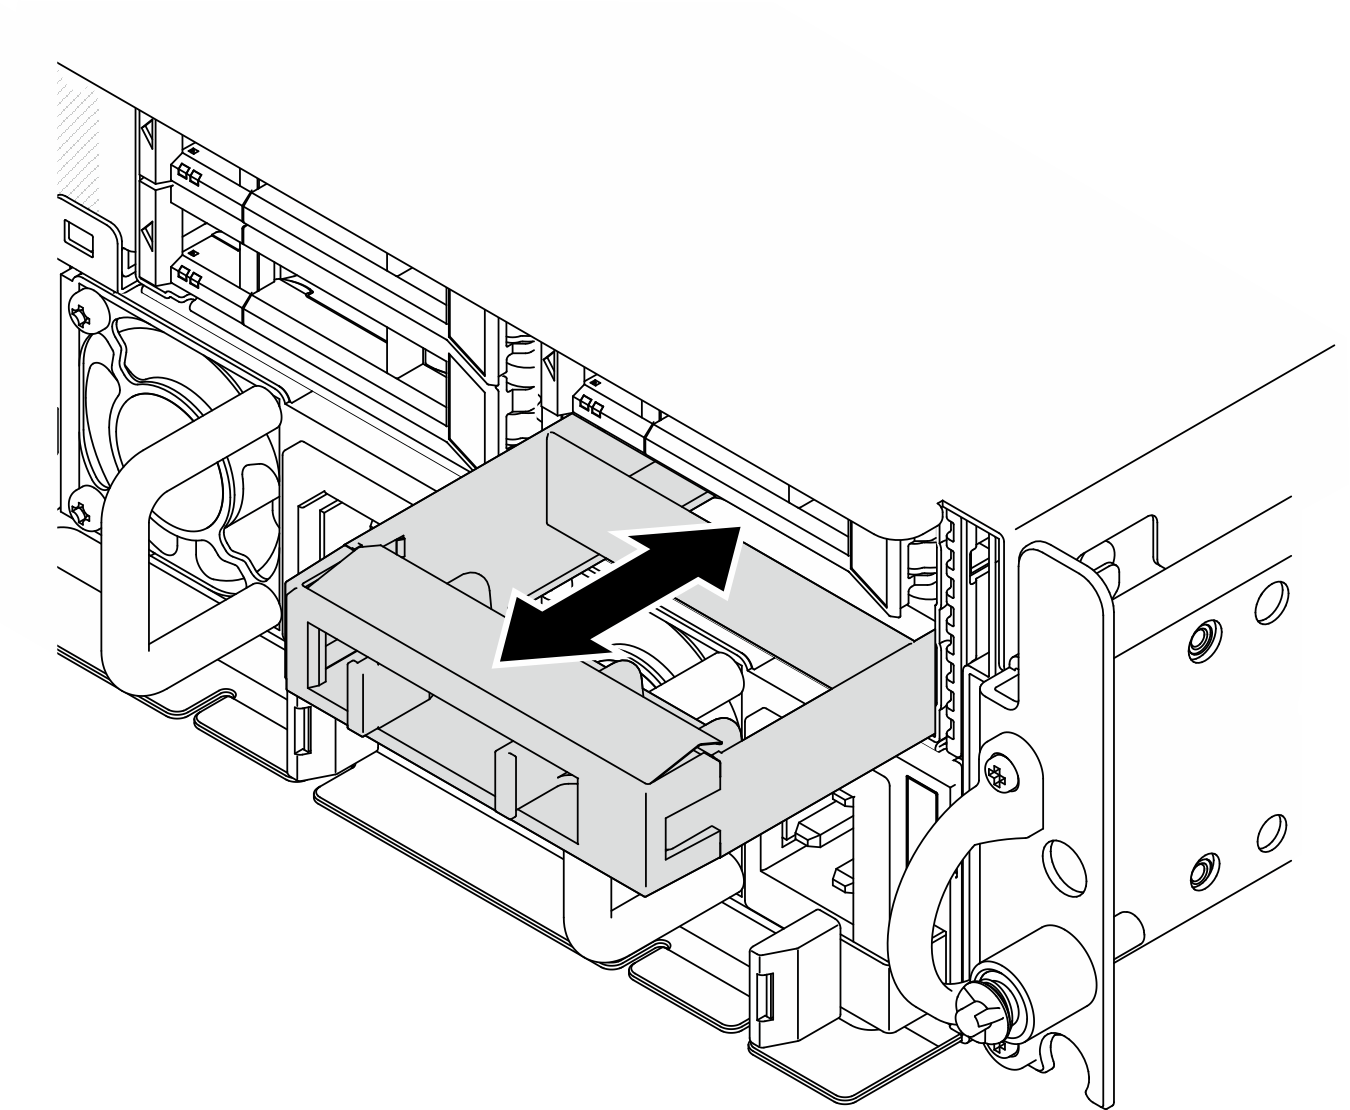
- If a drive filler is installed in the drive bay, remove it first. Keep the drive filler in a safe place for future use.Figure 1. Removing a drive filler
- Install the drive.
 Slide the drive into the drive bay, and push it until it stops.
 Rotate the handle back to the locked position.
Figure 2. Installing a front hot-swap drive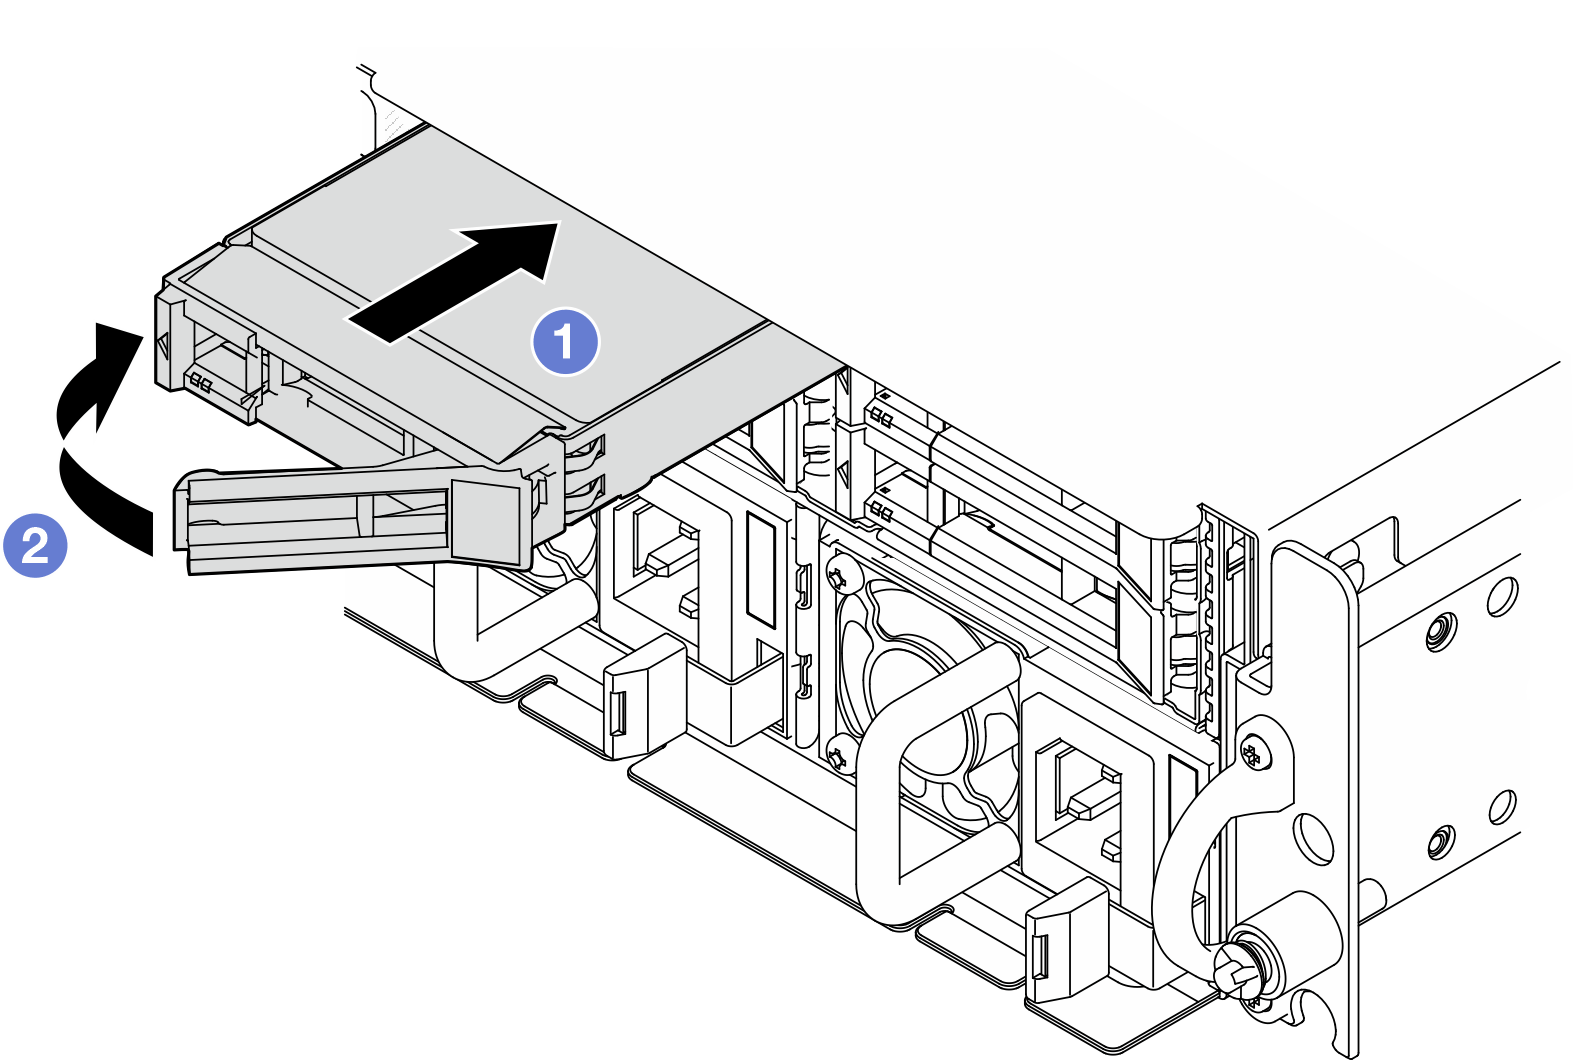
After this task is completed
After an SED is installed, if SED encryption is enabled on the system, reboot the system.
NoteWhen SED encryption is enabled, it is necessary to power cycle the system after installing an SED; without power cycling, the SED will not be recognized by the host OS. See Manage the Self Encryption Drive Authentication Key (SED AK) for more information.- Check the drive status LED to verify that the drive is operating correctly.
If the yellow drive status LED of a drive is lit continuously, that drive is faulty and must be replaced.
If the green drive activity LED is flashing, the drive is being accessed.
If the server is configured for RAID operation through a RAID adapter, you might have to reconfigure your disk arrays after you install drives. See RAID configuration for more information.
Demo Video