Install the interposer card
Use this information to install a interposer card option.
Before you install a interposer card, complete the following steps:
Read Installation Guidelines to ensure that you work safely.
- Carefully lay the compute node on a flat, static-protective surface, orienting the compute node with the bezel pointing toward you.
Remove the compute node cover (see Remove the compute node cover for instructions).
To install the interposer card, complete the following steps:
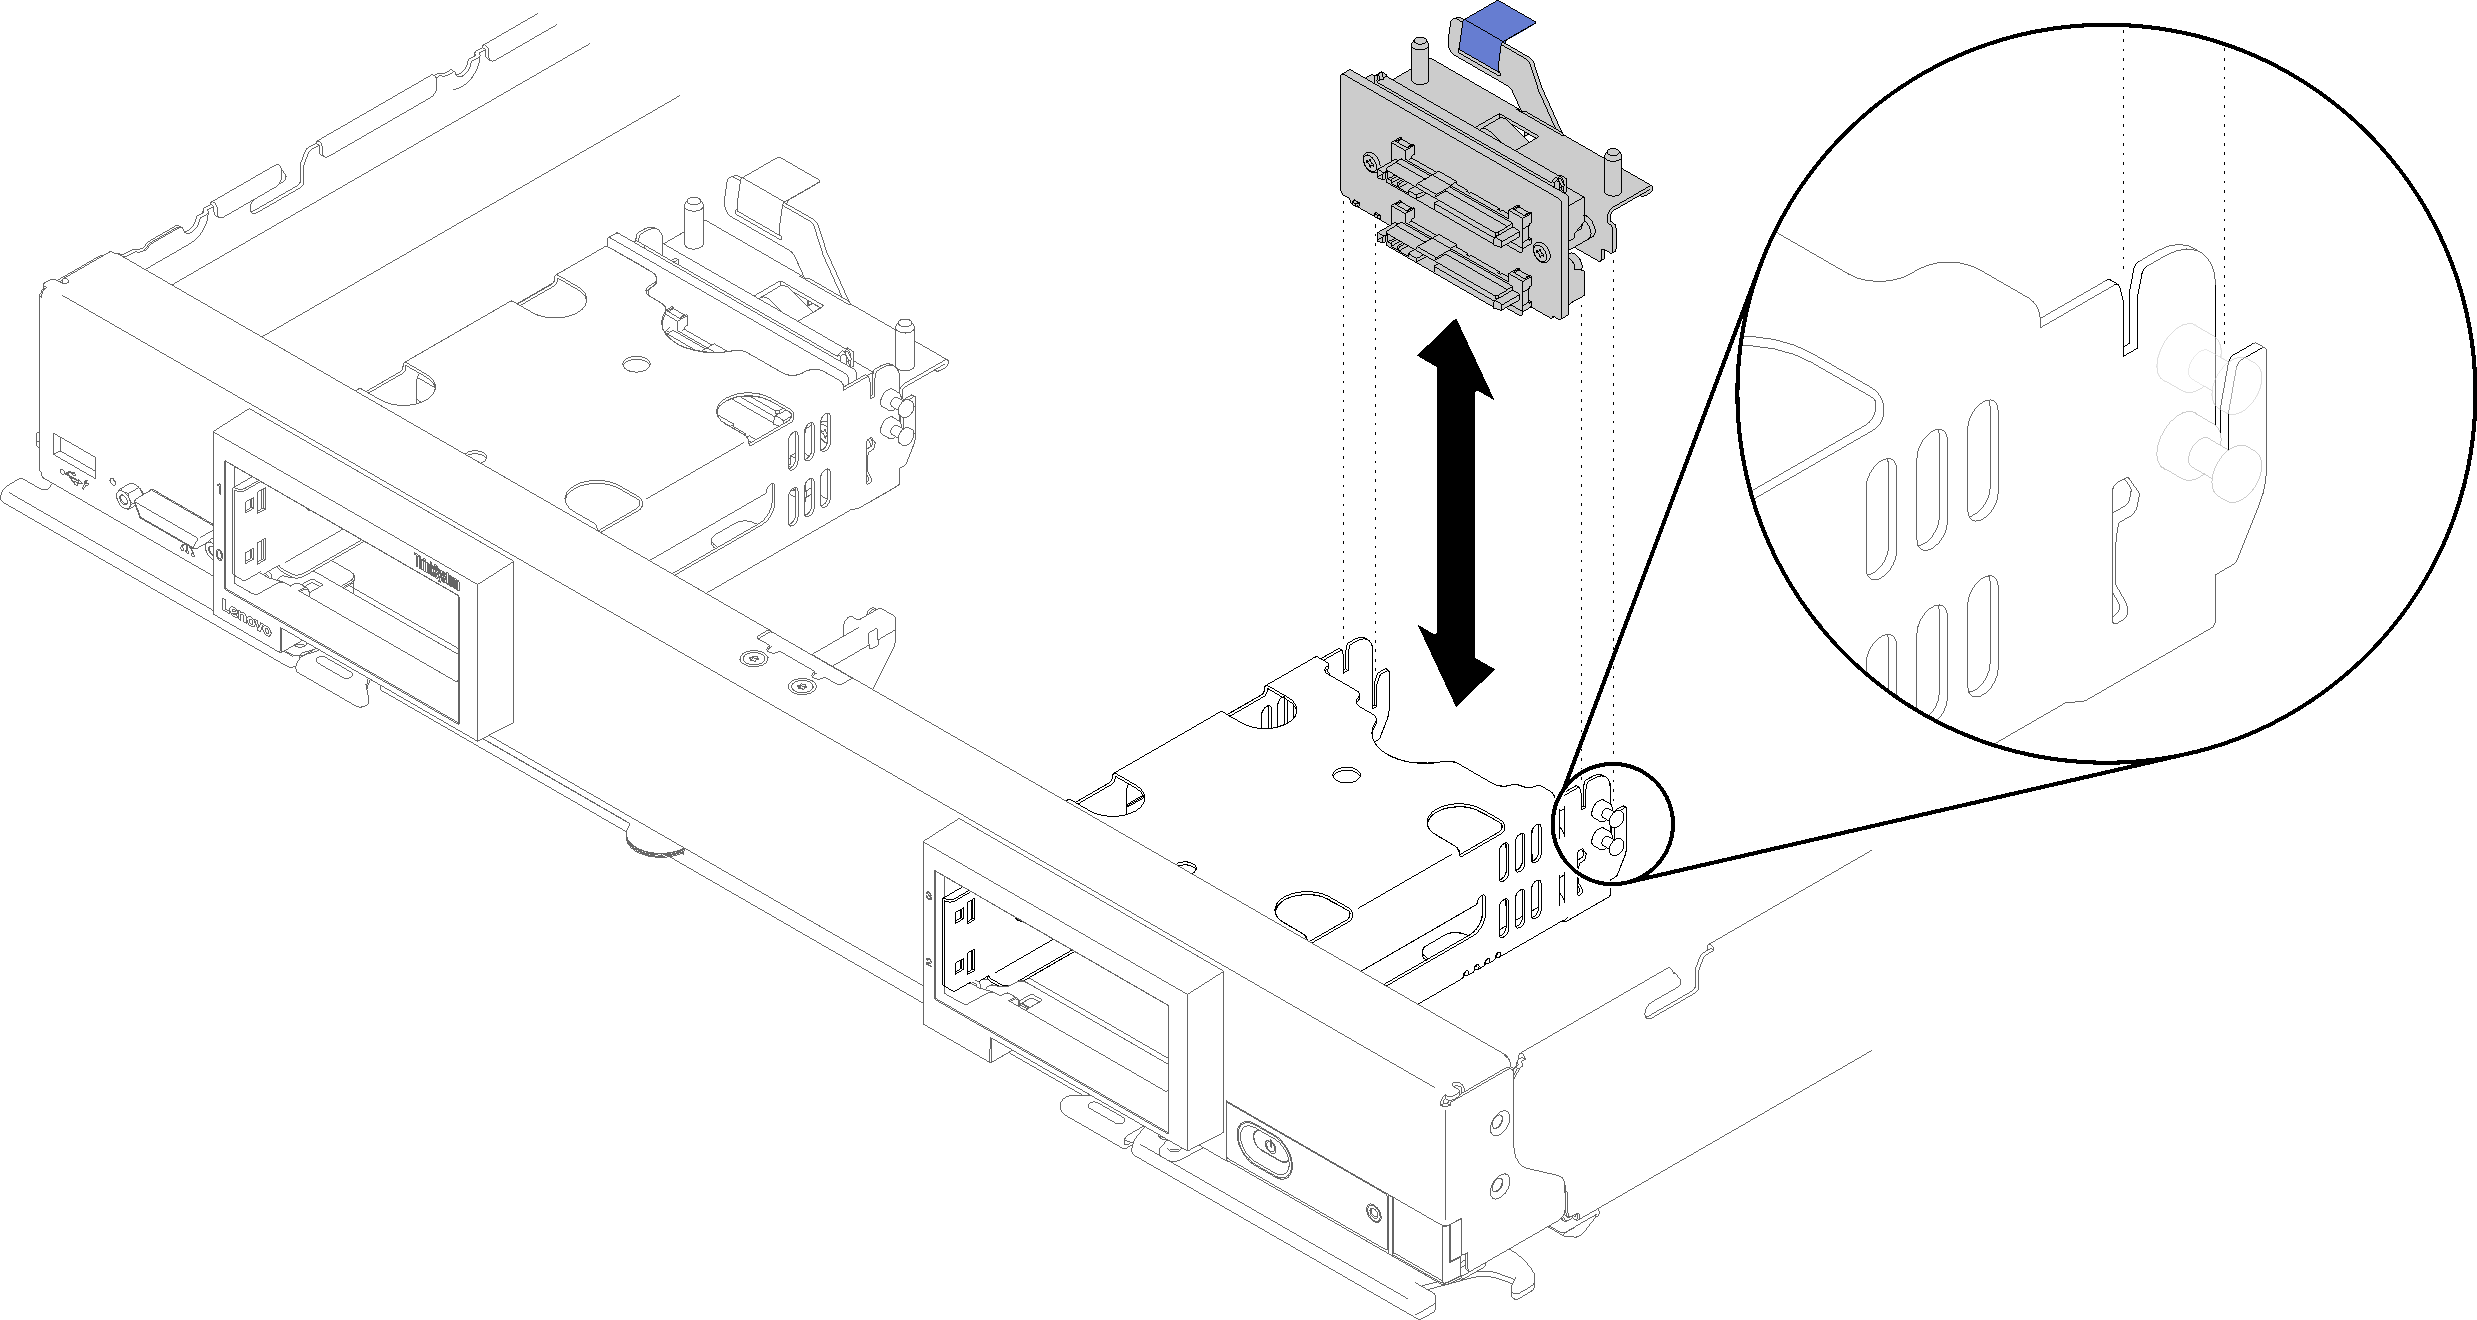
- If you are installing both the interposer card and drive backplane, first install the drive backplane in the compute node (see Install a 2.5-inch drive backplane for instructions). The drive backplane goes in the rear alignment slots on the drive cage.Figure 1. Drive backplane installation with backplane alignment slots
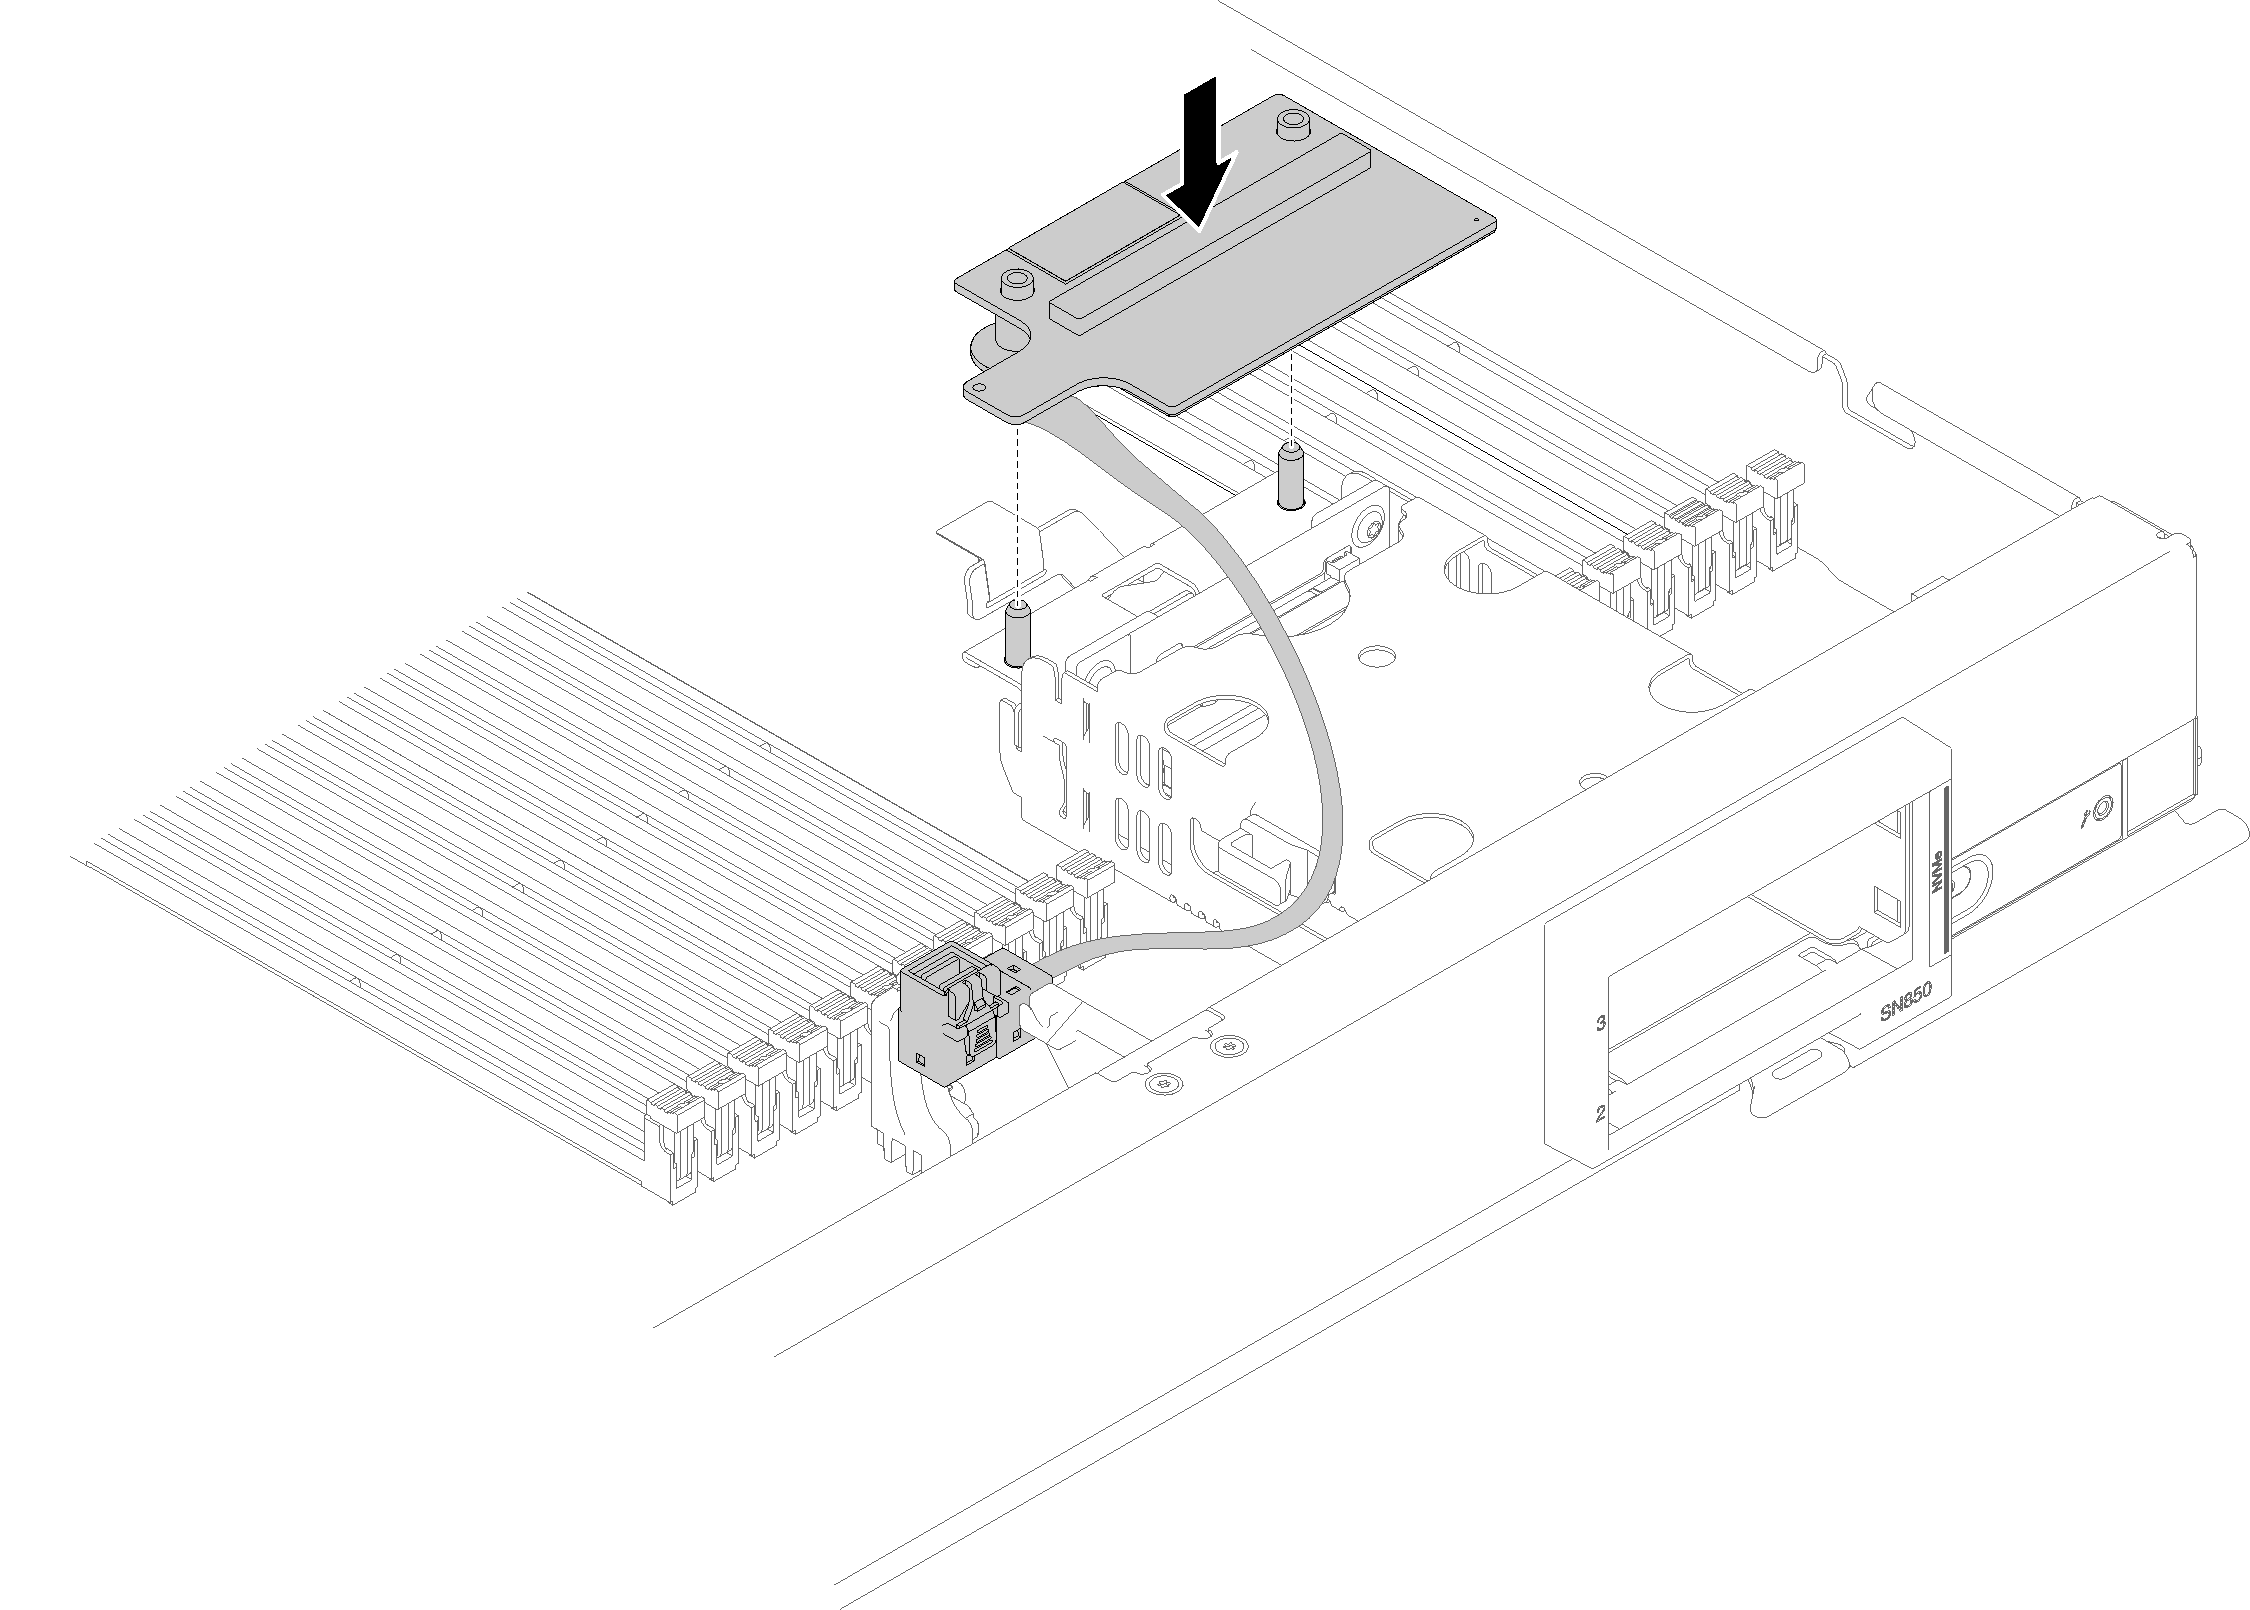
- Orient the connector on the interposer card with the connector on drive backplane.Figure 2. Interposer card installation
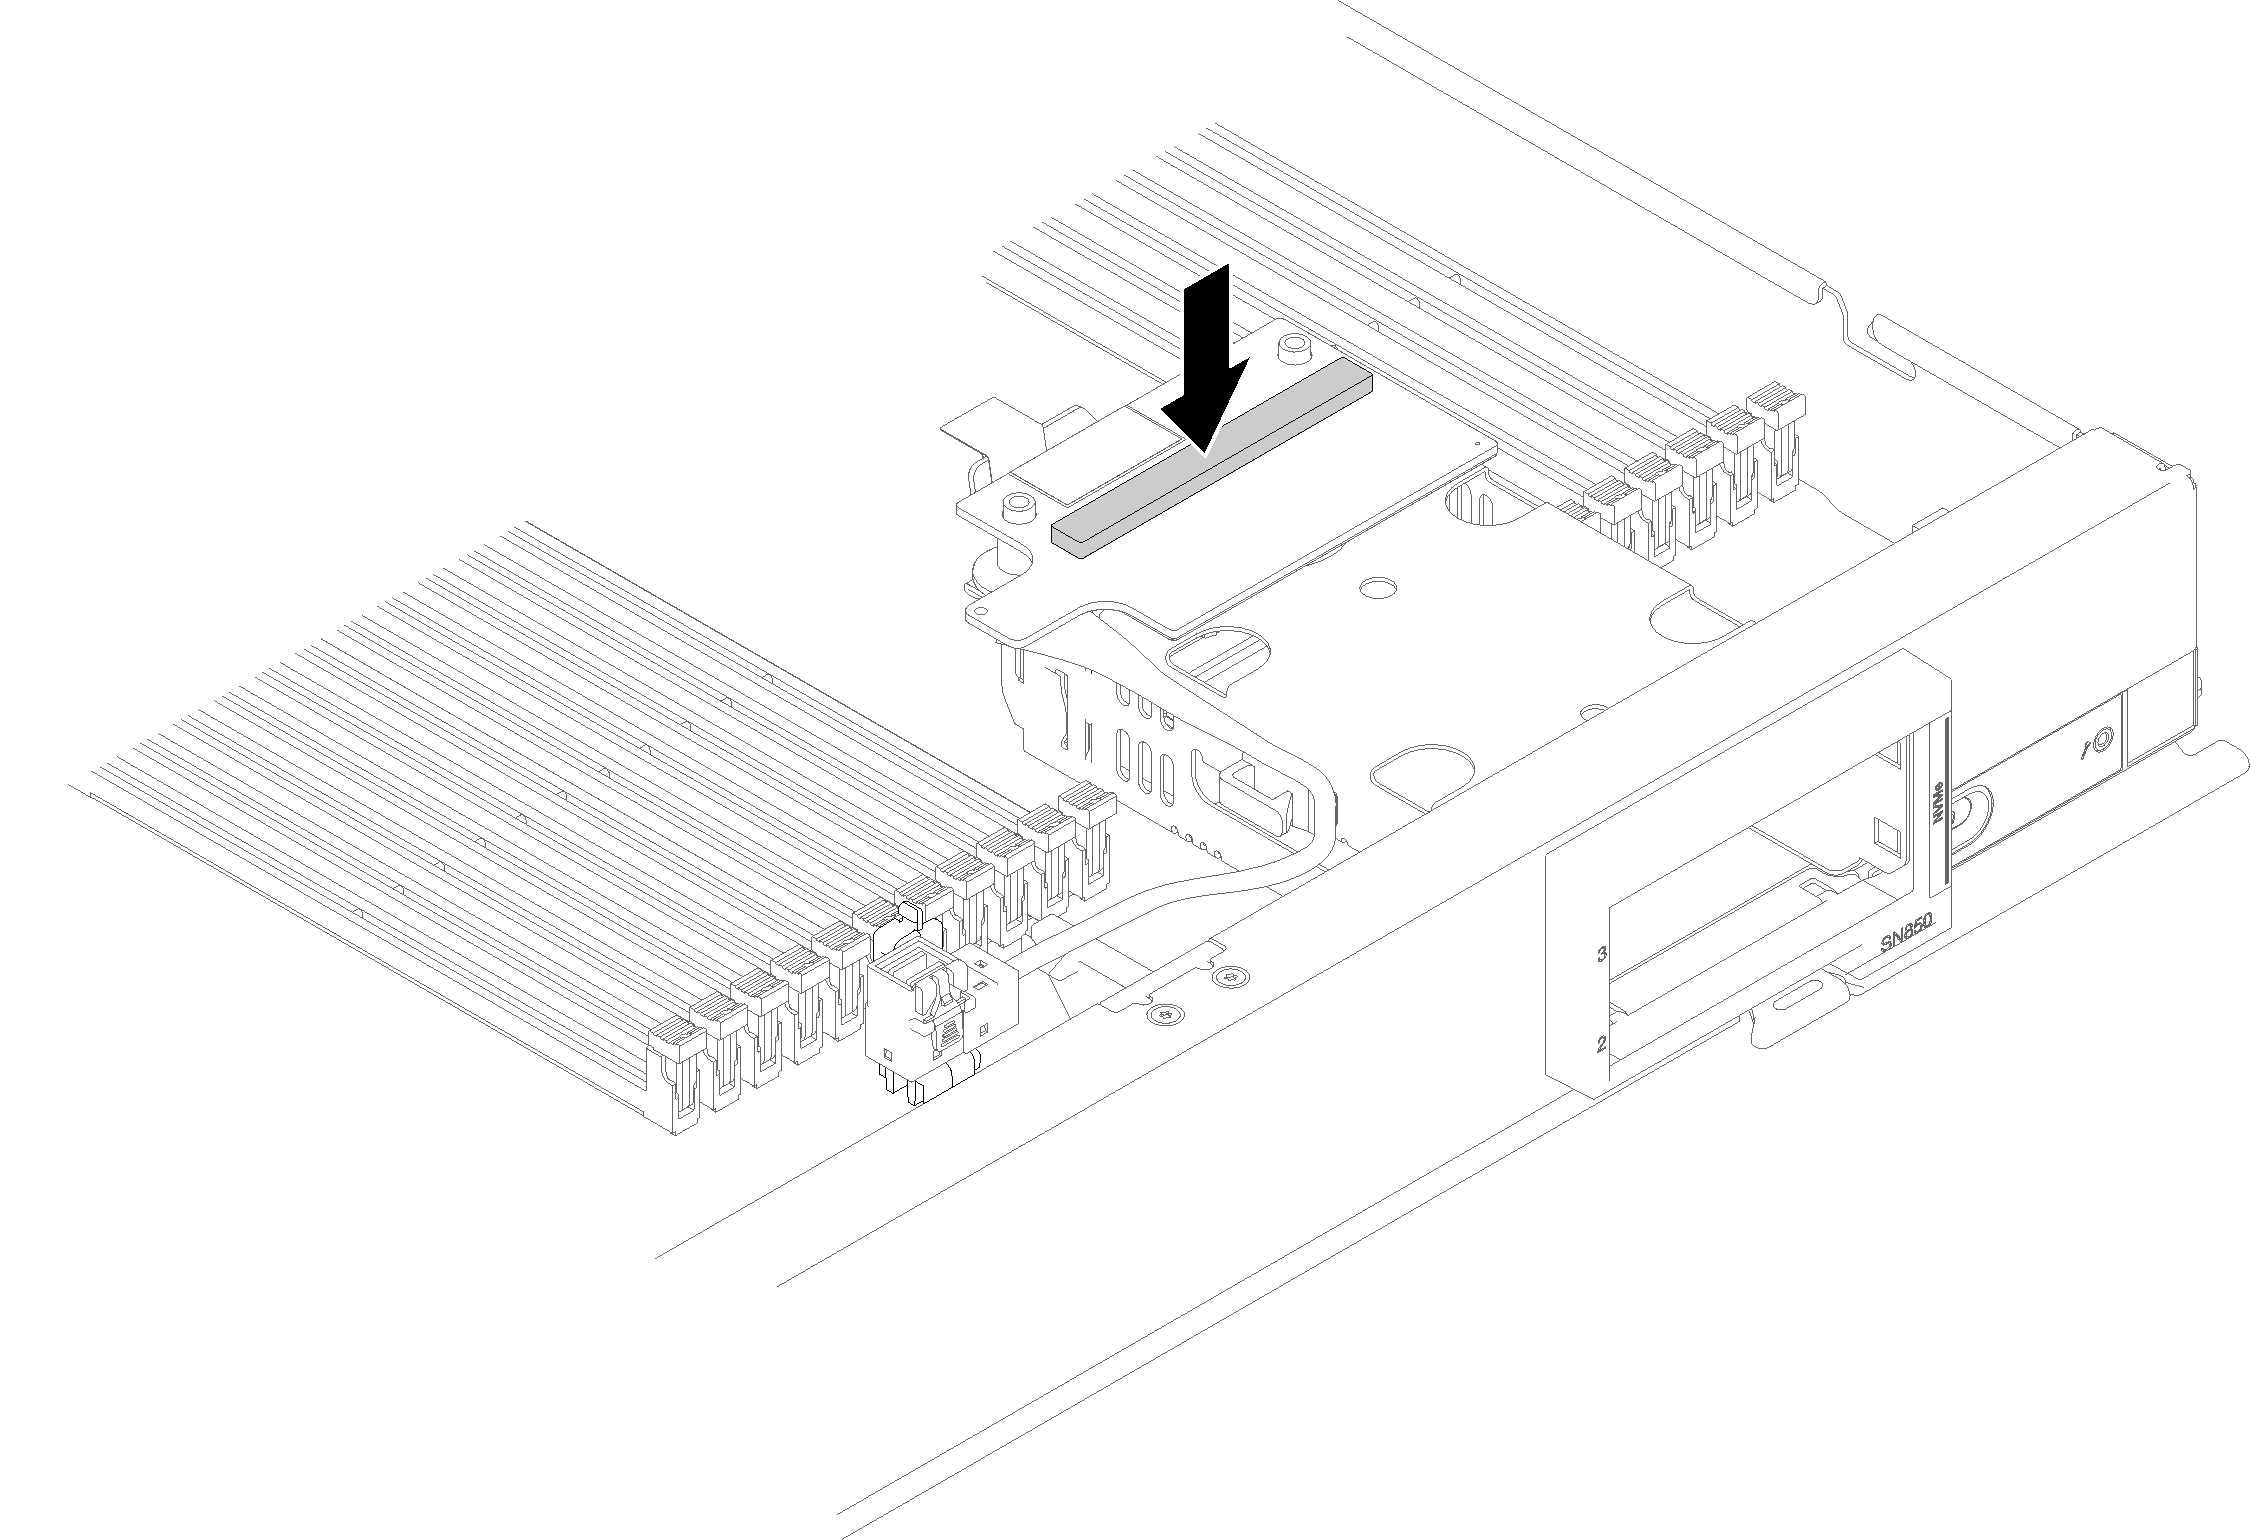
- Firmly press on the foam to seat the interposer card into the connector.Figure 3. Pressing the foam
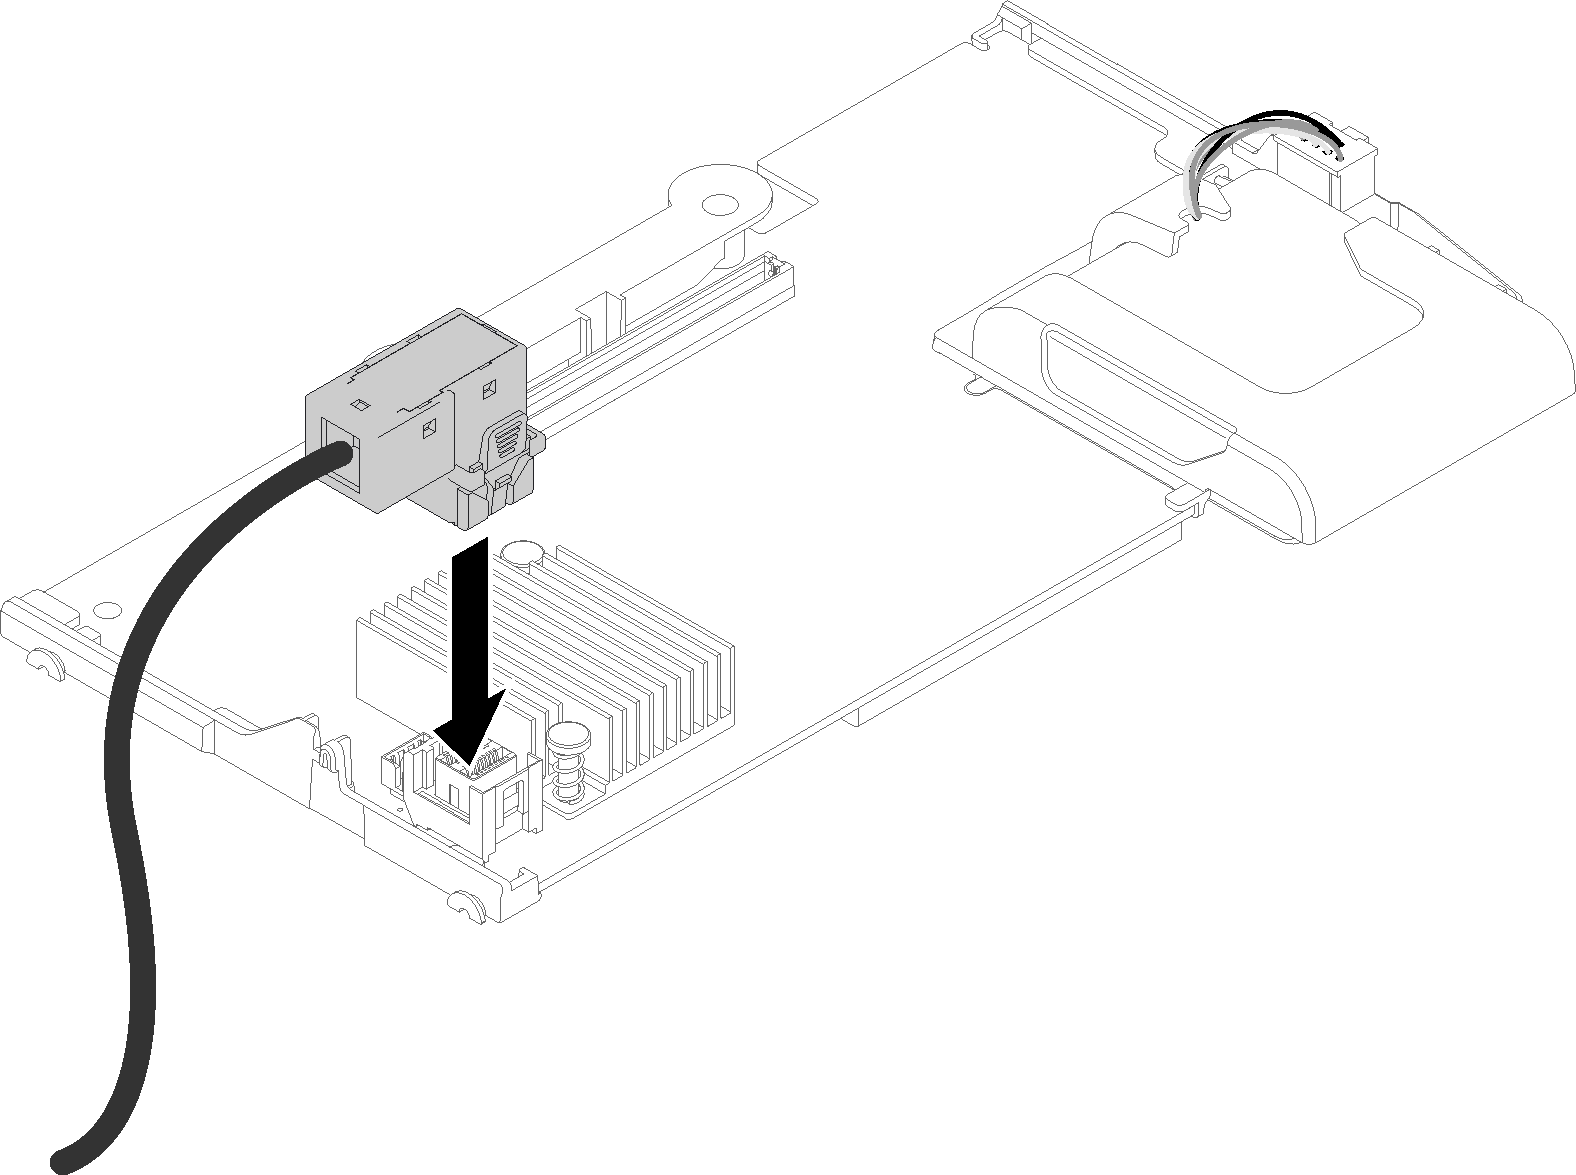
- Remove the RAID adapter (see Remove the RAID adapter for instructions). Connect the cable to the connector on the underside of the RAID adapter.Figure 4. Connecting the cable to RAID adapter
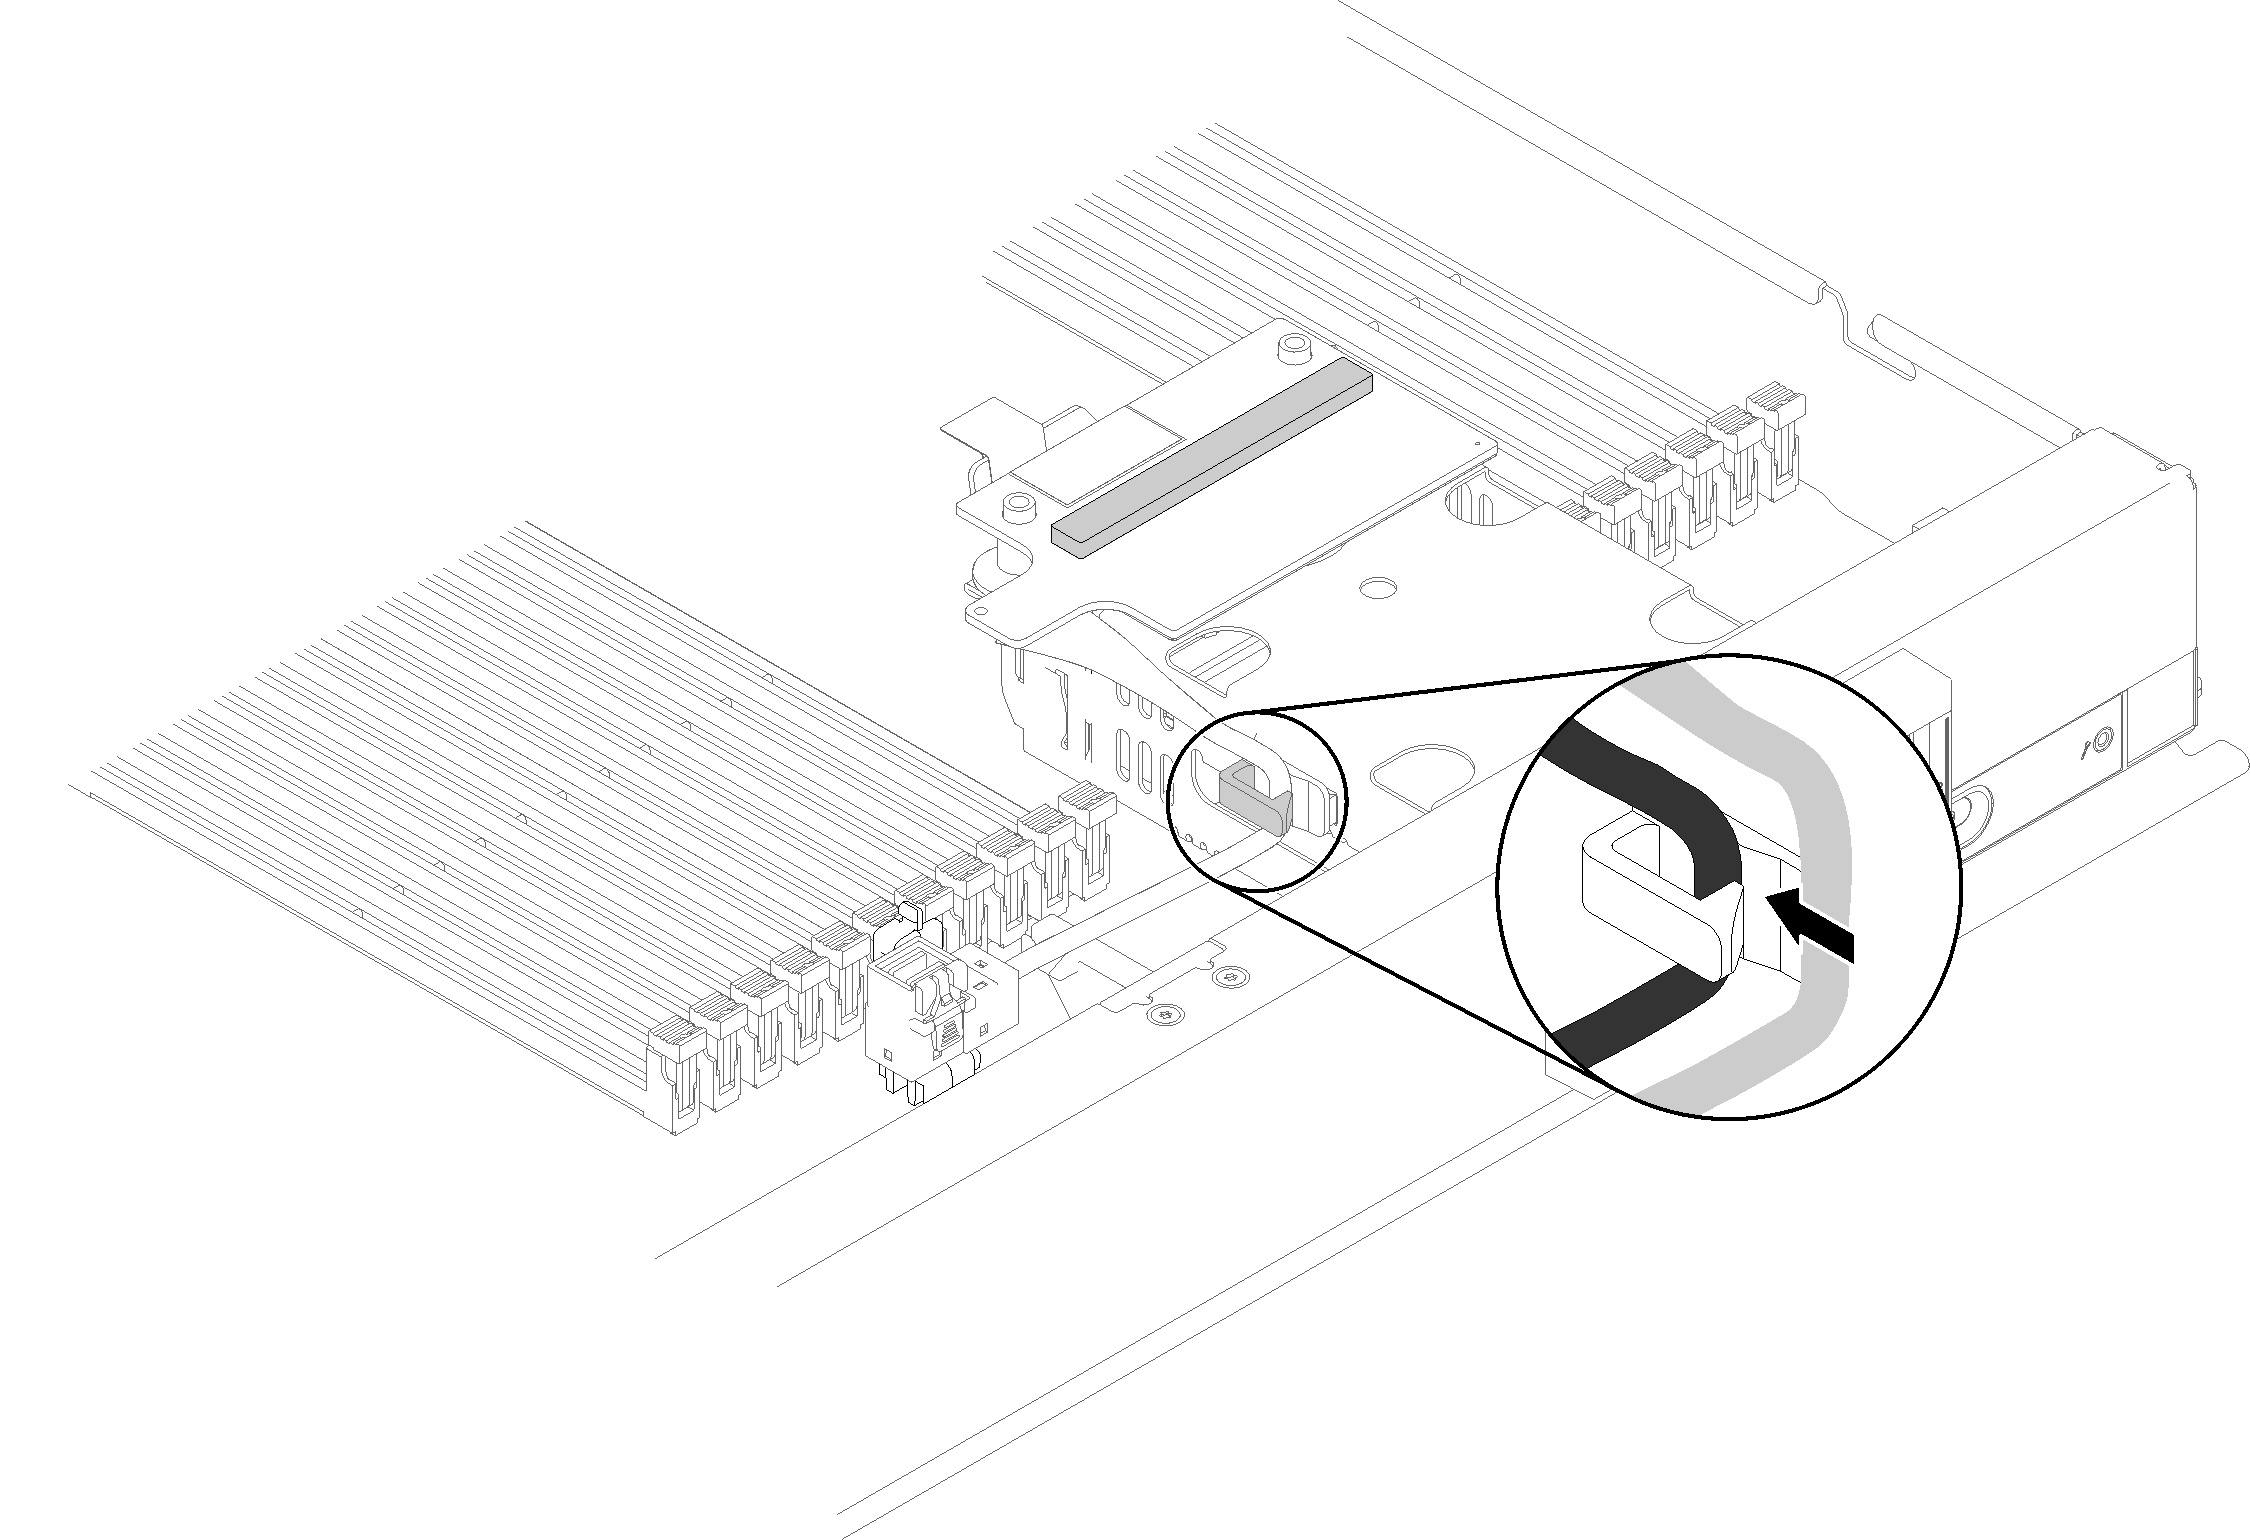
- Route the cable in front of DIMM slots by inserting into clip mounted on side of storage cage.Figure 5. Routing the cable
After you install the interposer card, complete the following steps:
- For configure the RAID array, see RAID configuration for instructions.
Demo video
Give documentation feedback