Remove the RAID adapter
If needed, use this information to remove the RAID adapter.
Before you remove the RAID adapter, complete the following steps:
Read Installation Guidelines to ensure that you work safely.
- Carefully lay the compute node on a flat, static-protective surface, orienting the compute node with the bezel pointing toward you.
Remove the compute node cover (see Remove the compute node cover for instructions).
The RAID adapter uses a specific drive backplane.
- If you need to remove the RAID adapter to access components on the system board (for example DIMM sockets 13-24), there is no need to remove the backplane.
- If you are removing only the RAID adapter to replace it, there is no need to remove the backplane.
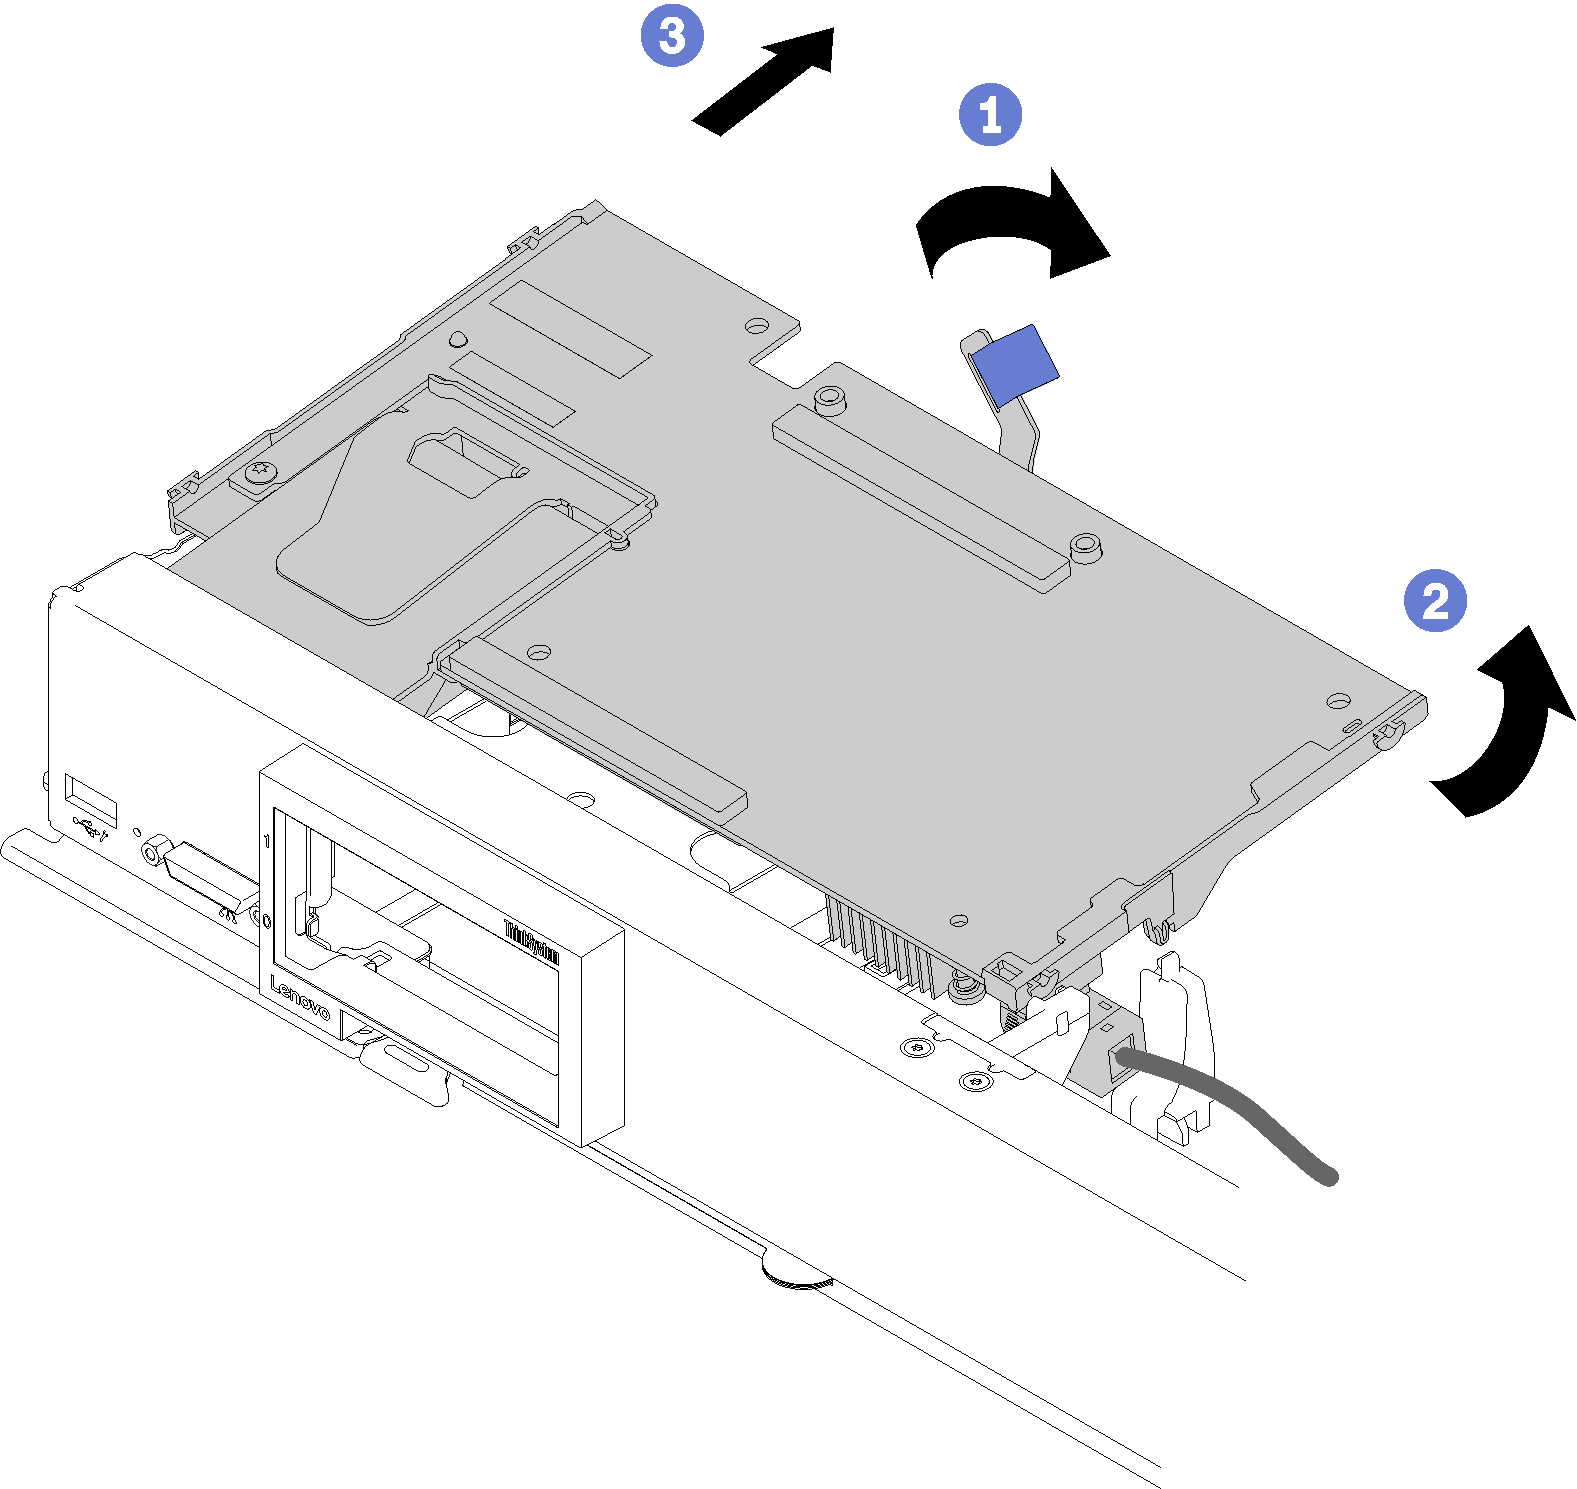
To remove a RAID adapter, complete the following steps:
- Slightly rotate the rear edge of the RAID adapter upward; then, remove it at angle as shown. Be cautious of the flash power module as it sits under the overhang of the compute node front panel.Figure 1. RAID adapter removal
- Disconnect the cable by pressing the latch and pull the cable out of the RAID adapter.Figure 2. Disconnecting cable from RAID adapter

If you are instructed to return the component or optional device, follow all packaging instructions, and use any packaging materials for shipping that are supplied to you.
Demo video
Give documentation feedback