Install the rear backplane

Use this information to install the rear backplane.

Before installing the rear backplane, touch the static-protective package that contains the new rear backplane to any unpainted surface on the outside of the server. Then, take the new rear backplane out of the package and place it on a static-protective surface.

To install the rear backplane, complete the following steps:

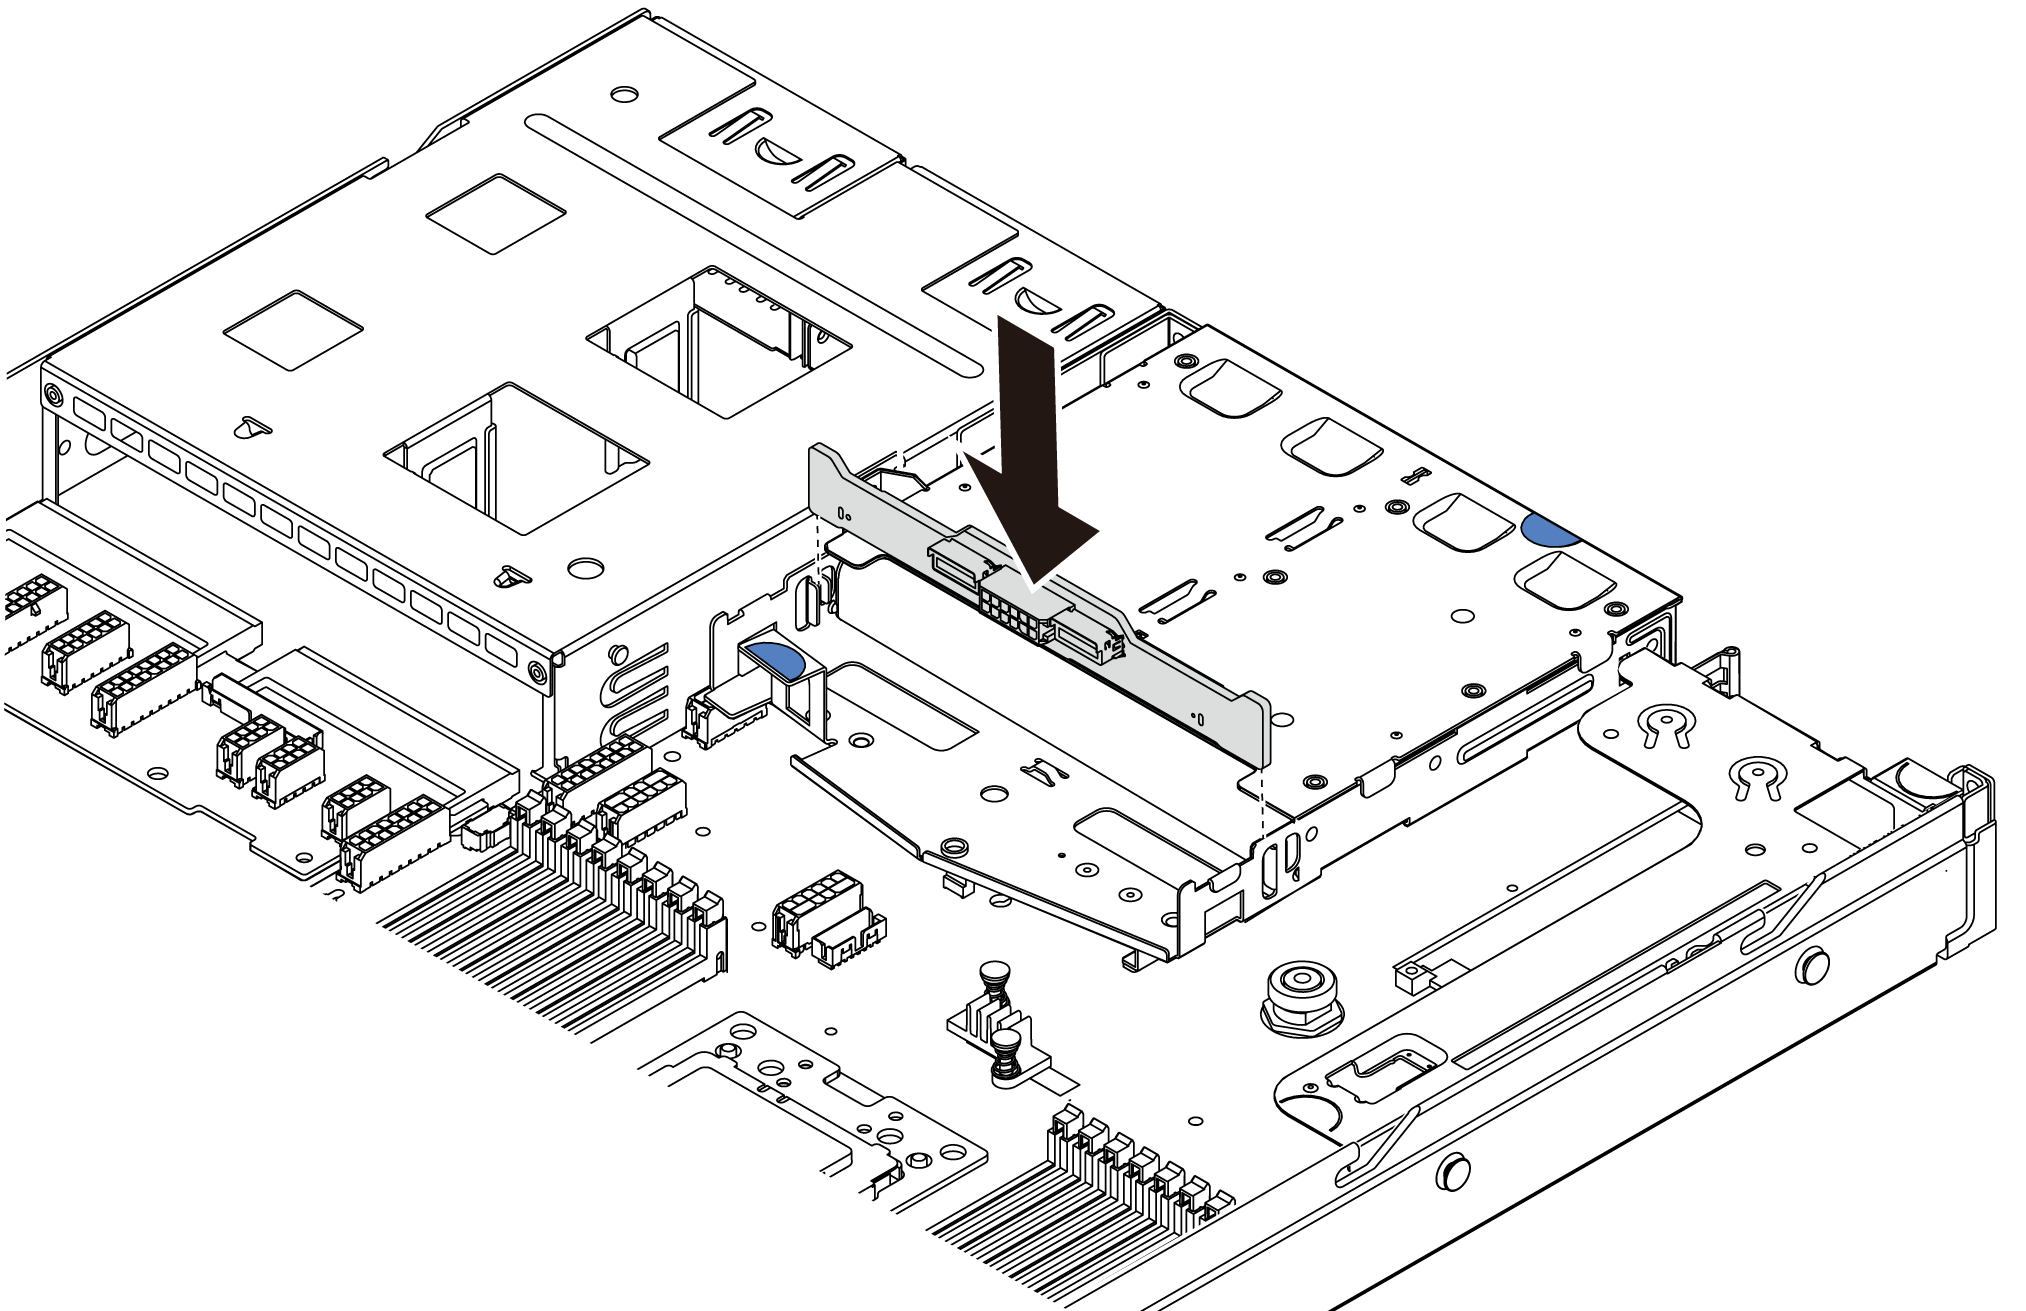
  1. Align the rear backplane with the rear hot-swap drive cage and lower it into the rear hot-swap drive cage.
    Figure 1. Rear backplane installation
    Rear backplane installation

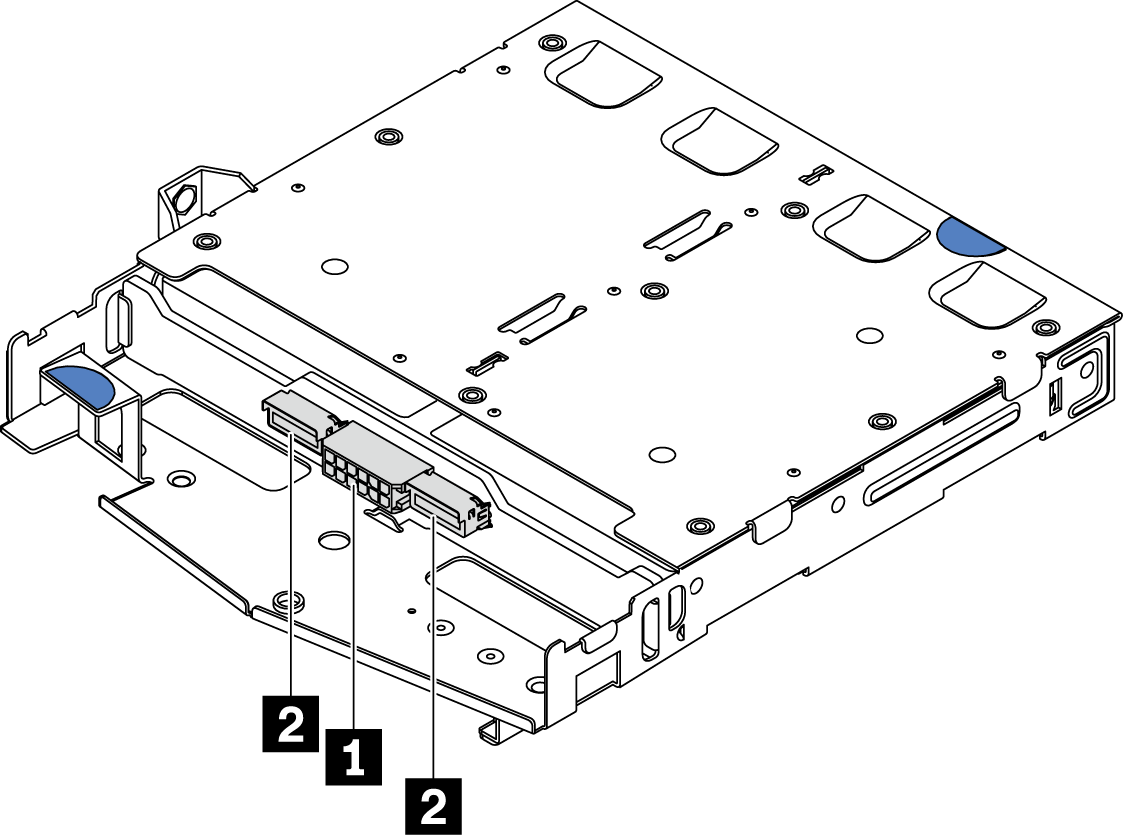
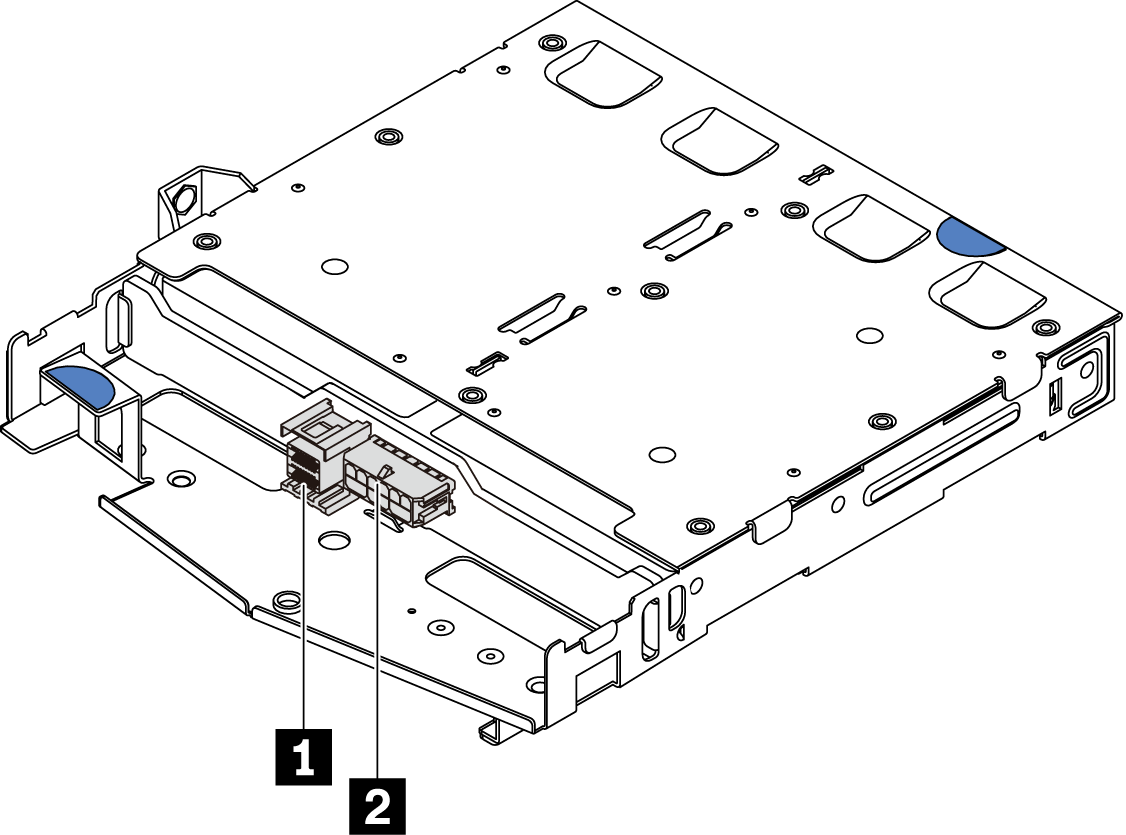
  2. Connect the signal cable and the power cable on the rear backplane. Refer to Internal cable routing.
    Figure 2. NVMe rear backplane connectors
    NVMe rear backplane connectors

    1Power connector
    2NVMe signal connector
    Figure 3. SAS/SATA rear backplane connectors
    SAS/SATA rear backplane connectors

    1SAS/SATA signal connector
    2Power connector
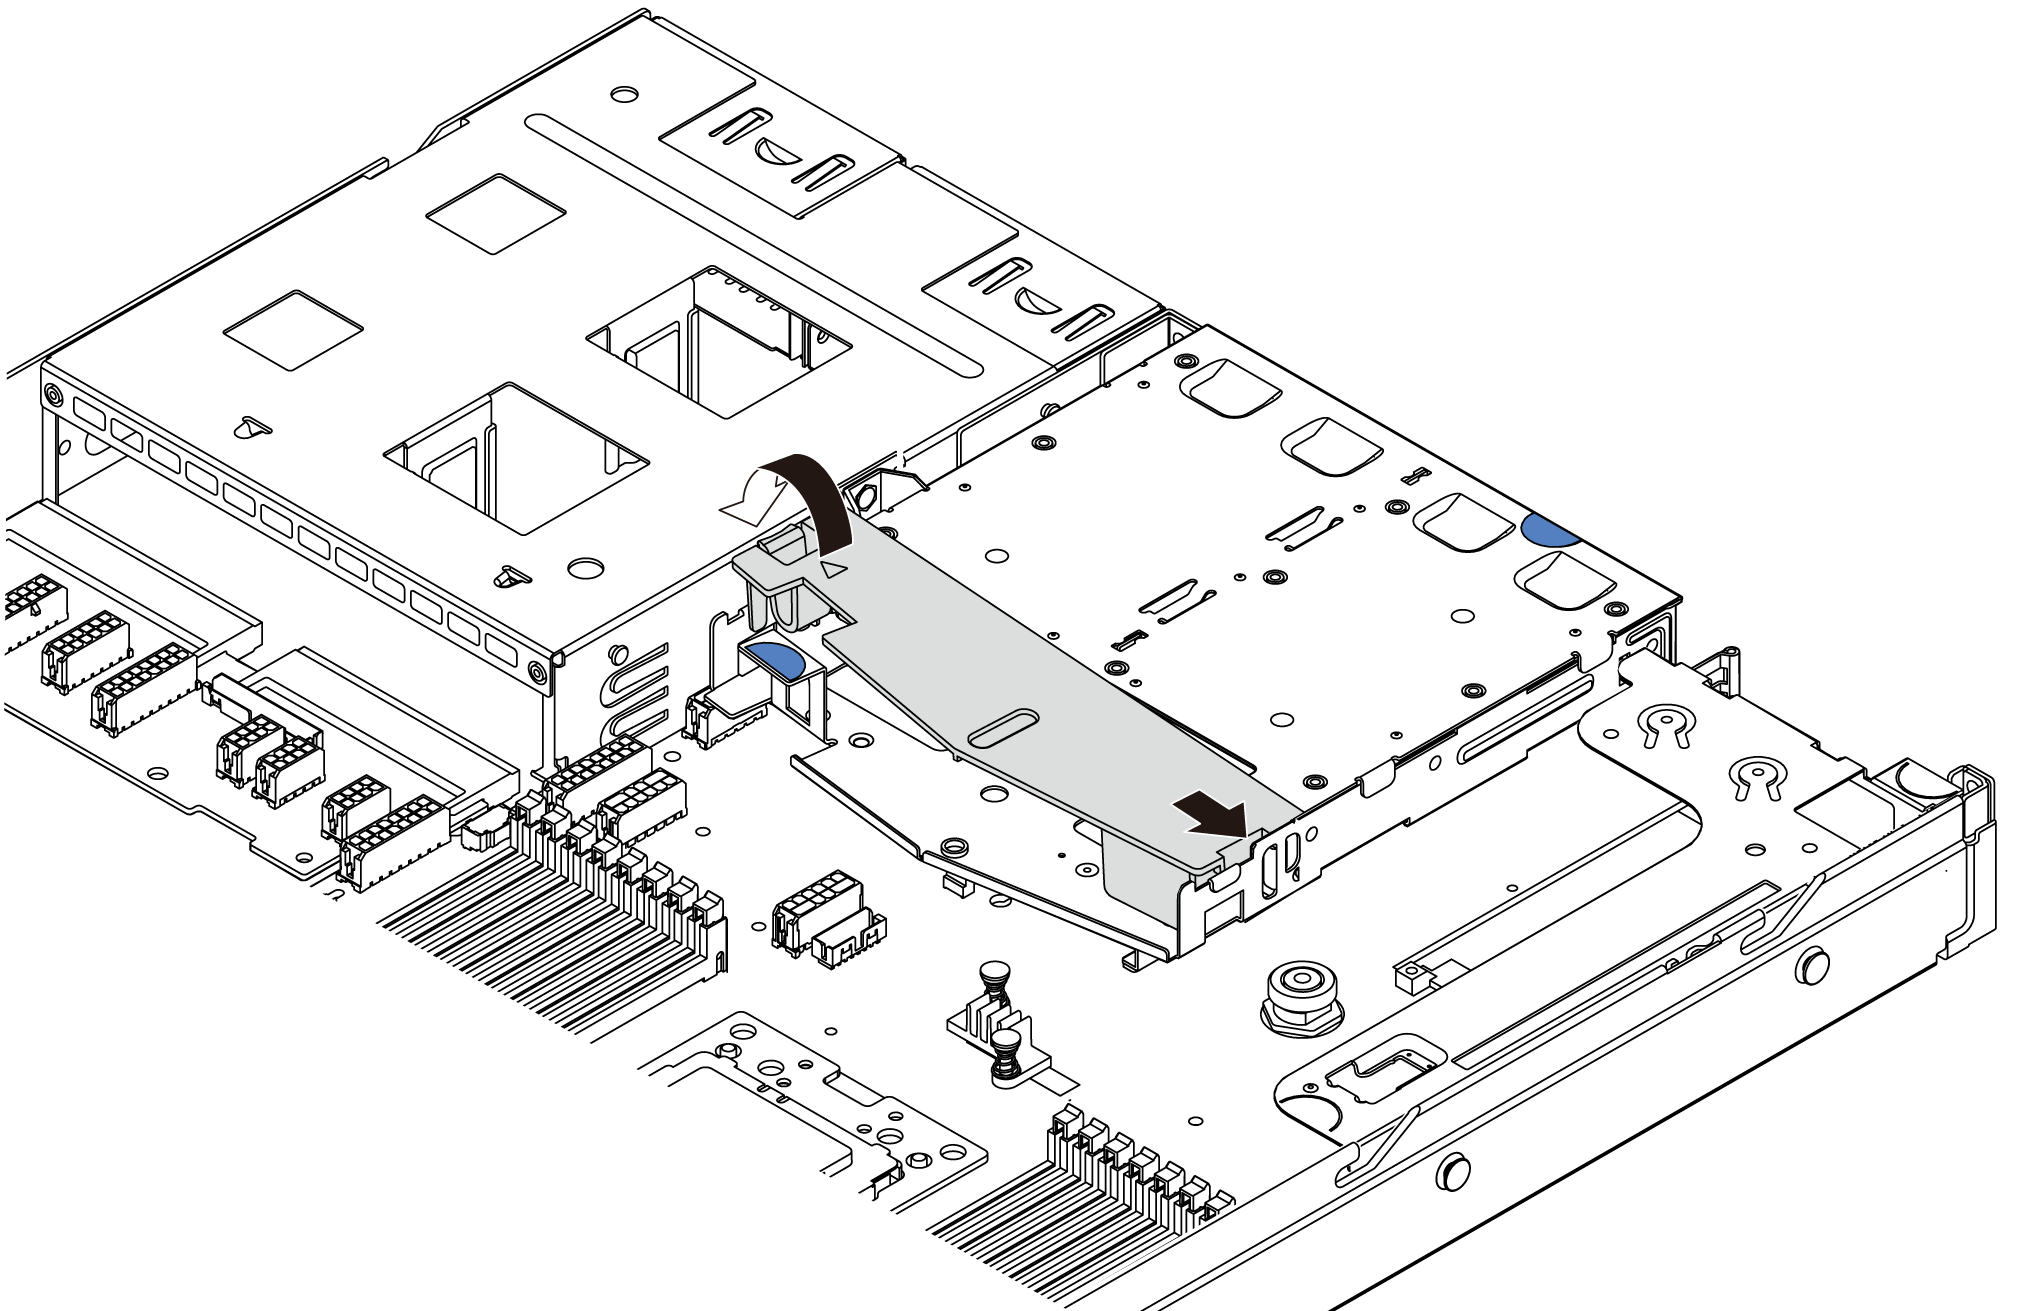
  3. Install the air baffle into the rear hot-swap drive cage as shown.
    Figure 4. Air baffle installation
    Air baffle installation

After installing the rear backplane:
  1. Reinstall the drives or drive fillers into the rear hot-swap drive cage. See Install a hot-swap drive.

  2. Complete the parts replacement. See Complete the parts replacement.

Demo video

Watch the procedure on YouTube