Install the backplane for ten 2.5-inch hot-swap drives
Use this information to install the backplane for ten 2.5-inch hot-swap drives.


Before installing the backplane:
Touch the static-protective package that contains the new backplane to any unpainted surface on the outside of the server. Then, take the new backplane out of the package and place it on a static-protective surface.
Connect the cables to the backplane. See Server model with six 2.5-inch SAS/SATA drives and four 2.5-inch NVMe drives or Server model with ten 2.5-inch SAS/SATA/NVMe drives.
To install the backplane, complete the following steps:
Note
There are two types of backplane for ten 2.5-inch hot-swap drives. The backplane you want to install might be different from the following illustration, but the installation method is the same.
Figure 1. Installation of backplane for ten 2.5-inch hot-swap drives
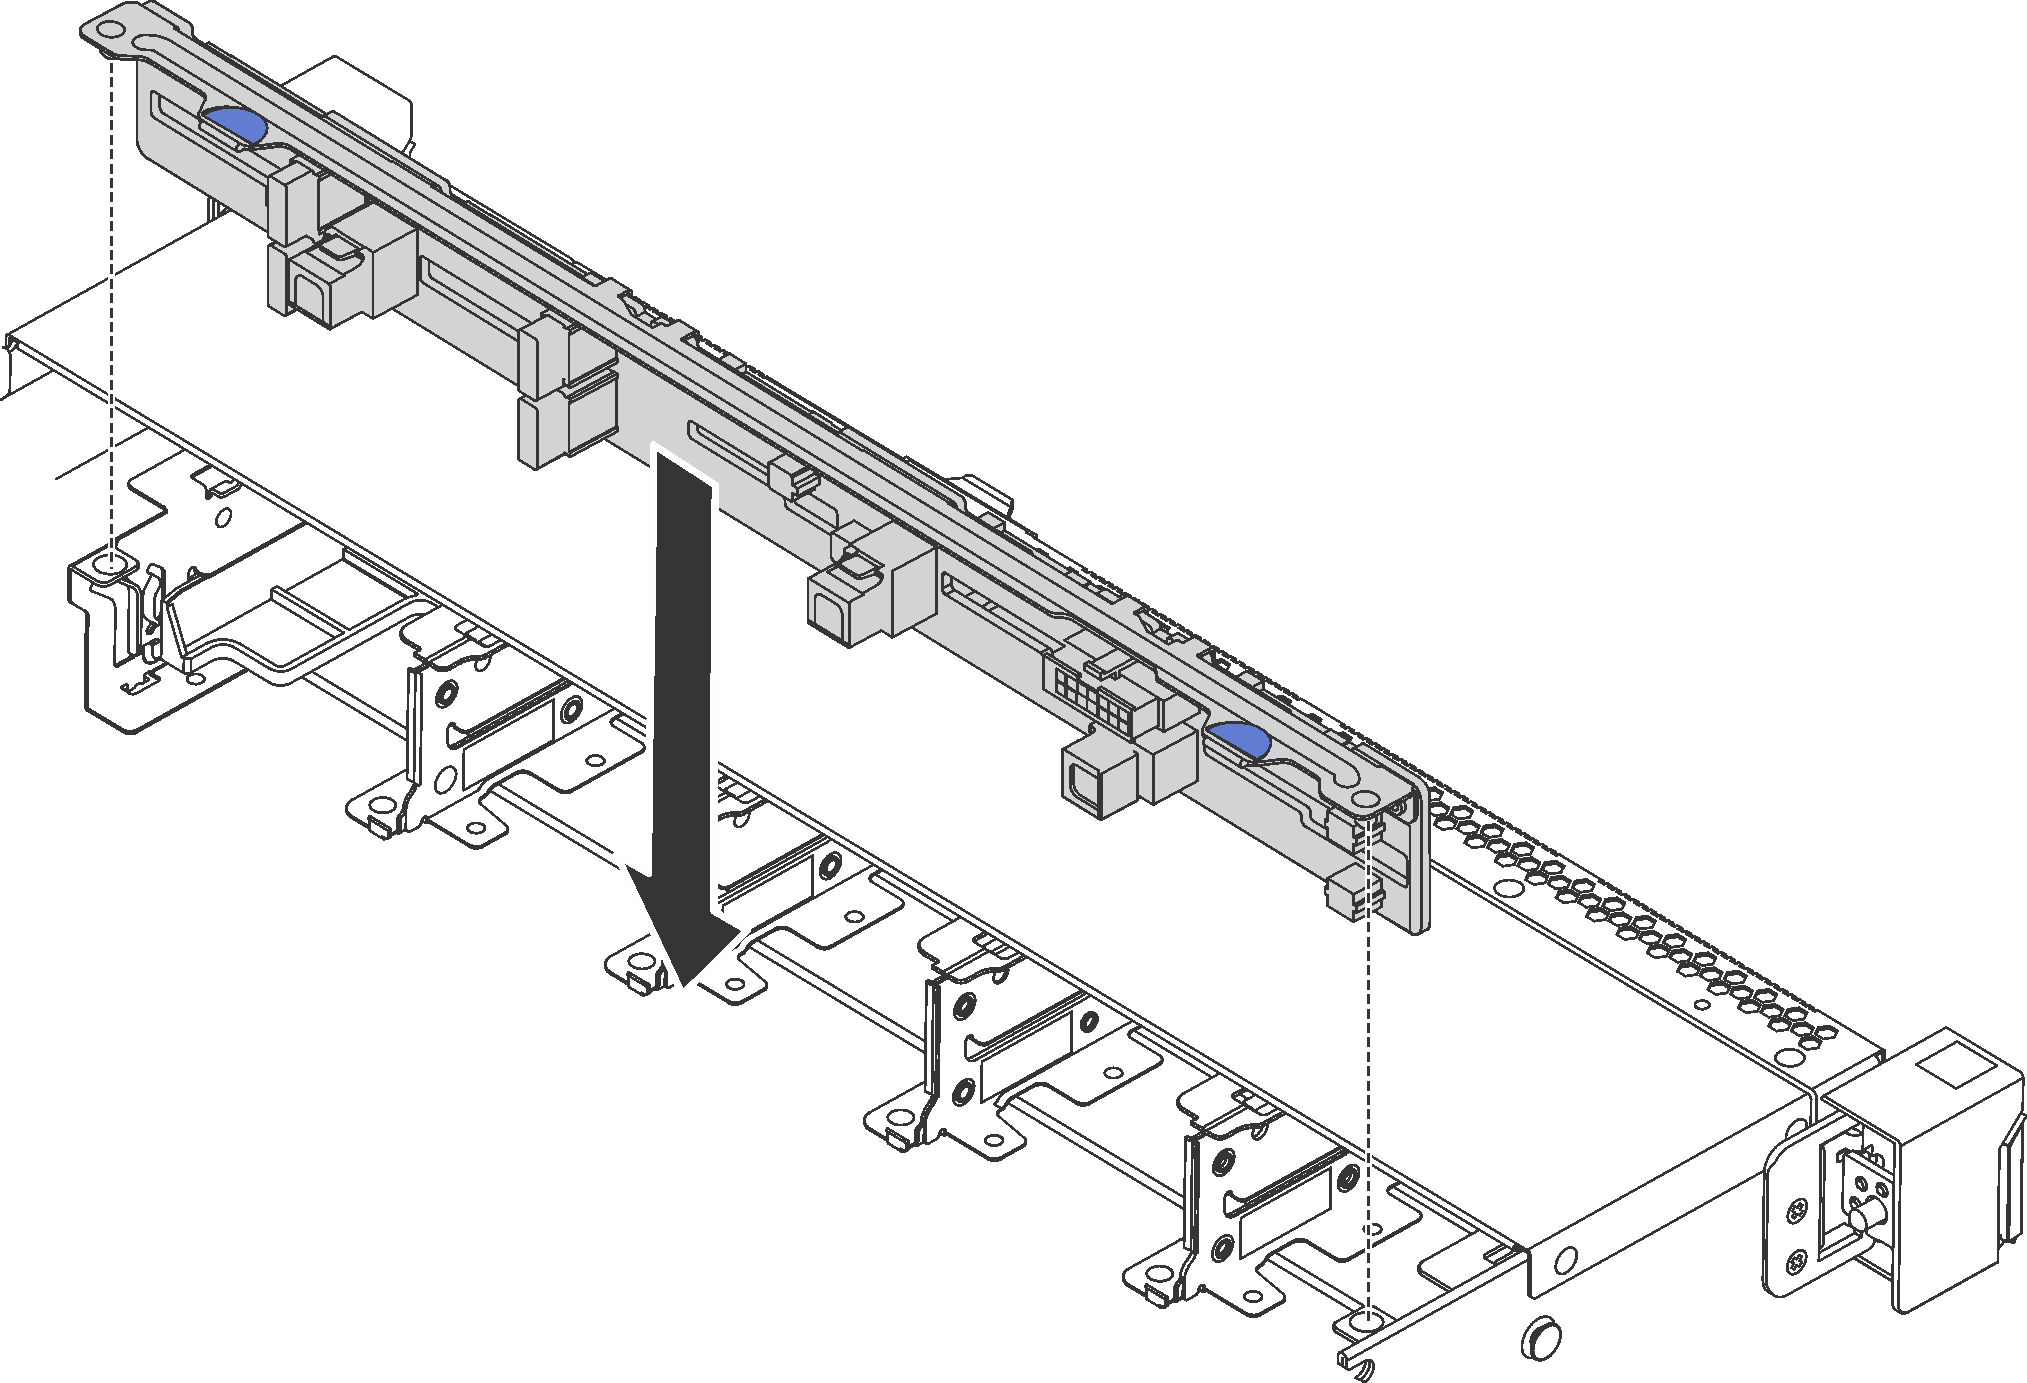
- Align the two pins on the backplane with the corresponding holes in the chassis as shown.
- Lower the backplane into the chassis. Ensure that the pins pass through the holes and the backplane is fully seated in place.
After you finish
Reinstall all the drives and drive fillers into the drive bays. See Install a hot-swap drive.
Complete the parts replacement. See Complete the parts replacement.
Demo video
Give documentation feedback