Remove the internal riser card
Use this information to remove the internal riser card.


Before removing the internal riser assembly:
Remove the top cover. See Remove the top cover.
Remove the air baffle. See Remove the air baffle.
If there is an M.2 module installed, remove it first. See Remove the M.2 adapter and M.2 drive.
If there is a PCIe adapter installed on the internal riser card, disconnect the cables from the PCIe adapter first.
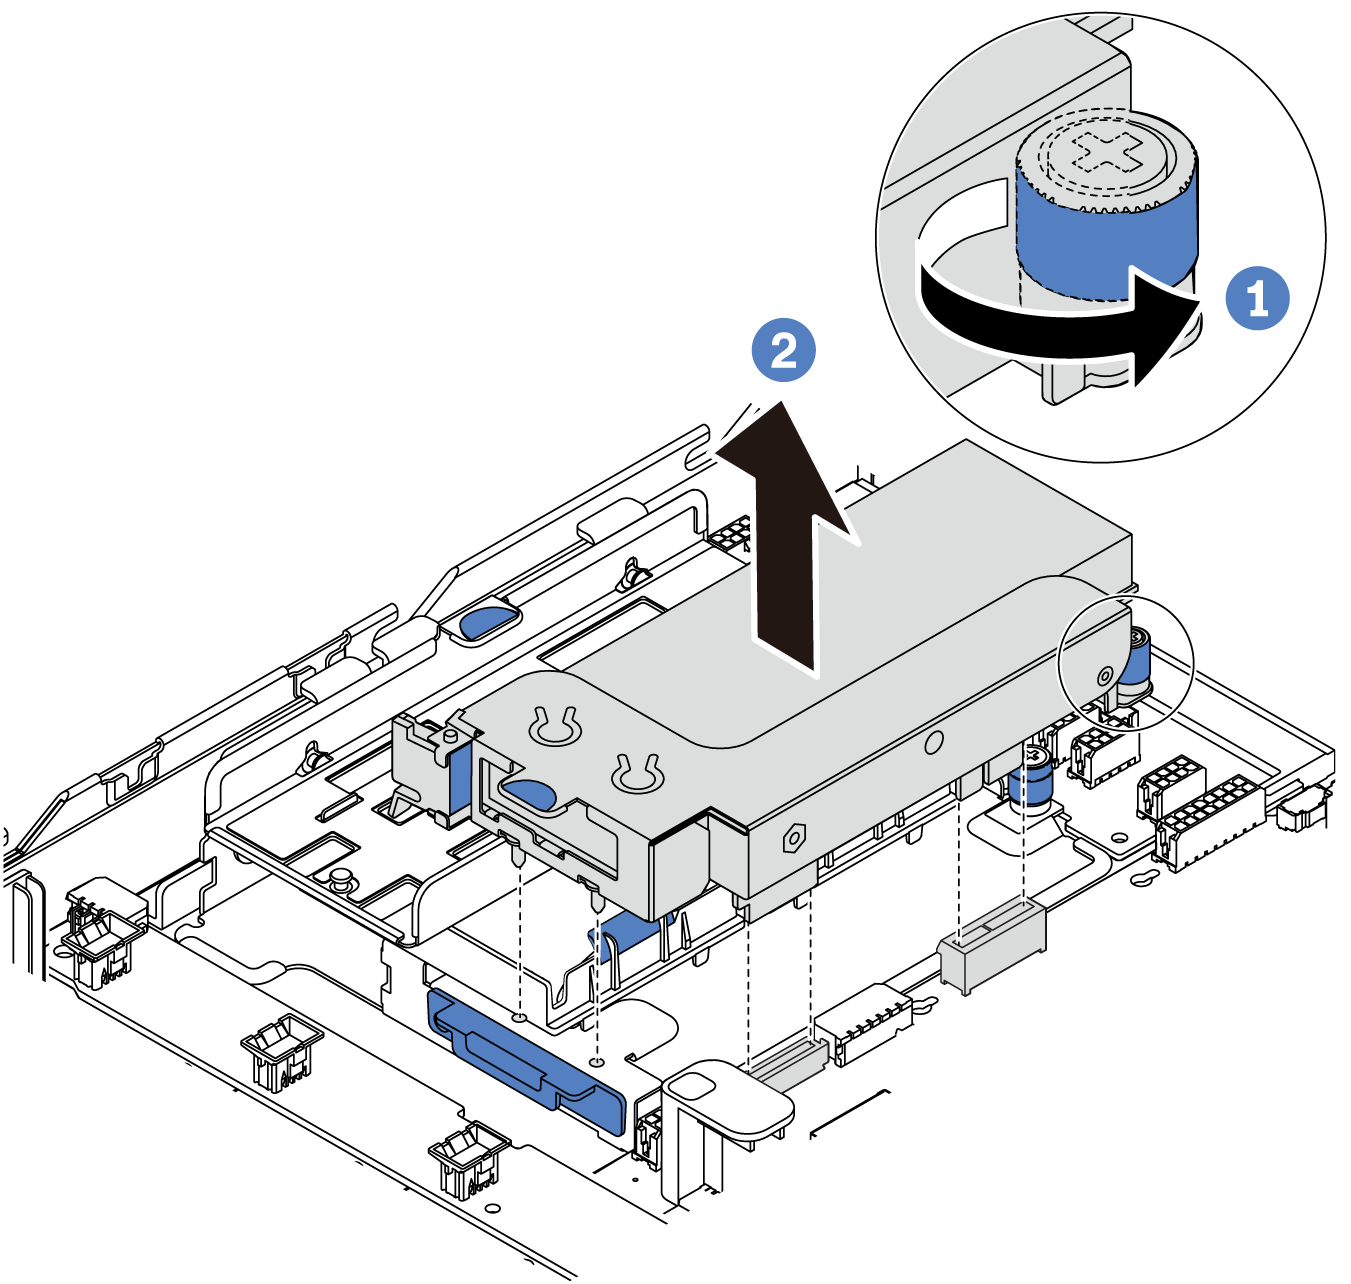
To remove the internal riser card, complete the following steps:
- Grasp the internal riser assembly by its edges and carefully lift it straight up and off the chassis.Figure 1. Internal riser assembly removal
- Remove the PCIe adapter from the riser assembly.
- Pivot the blue latch to the open position.
- Grasp the PCIe adapter by its edges and carefully pull it out of the PCIe slot.
NoteThe PCIe adapter might fit tightly into the PCIe slot. If necessary, alternatively move each side of the PCIe adapter a small and equal amount until it is removed from the slot.Figure 2. PCIe adapter removal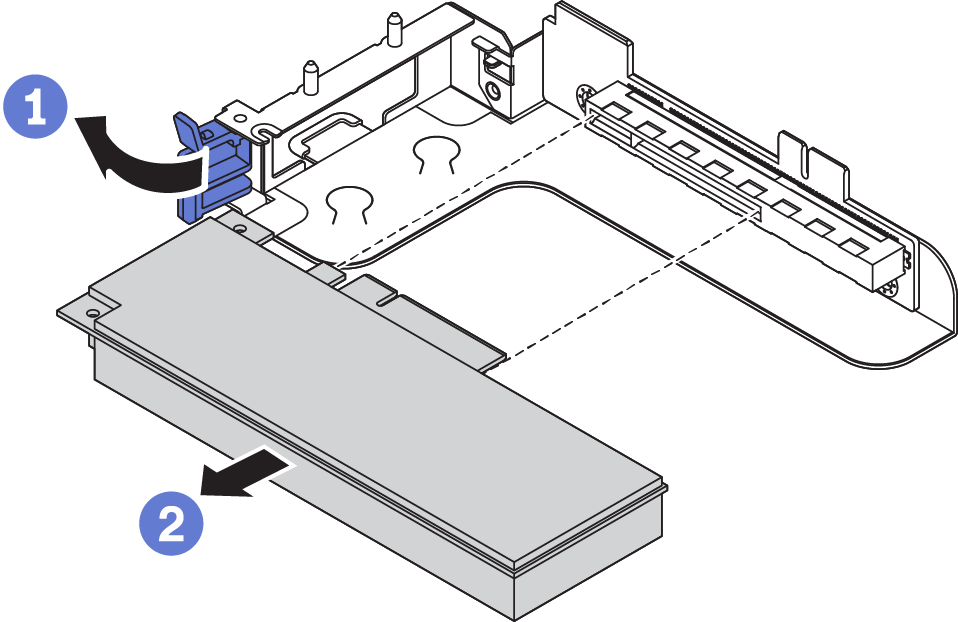
- Remove the internal riser card.
- Remove the two screws that secure the failing riser card.
- Remove the failing riser card from the bracket.
Figure 3. Internal riser card removal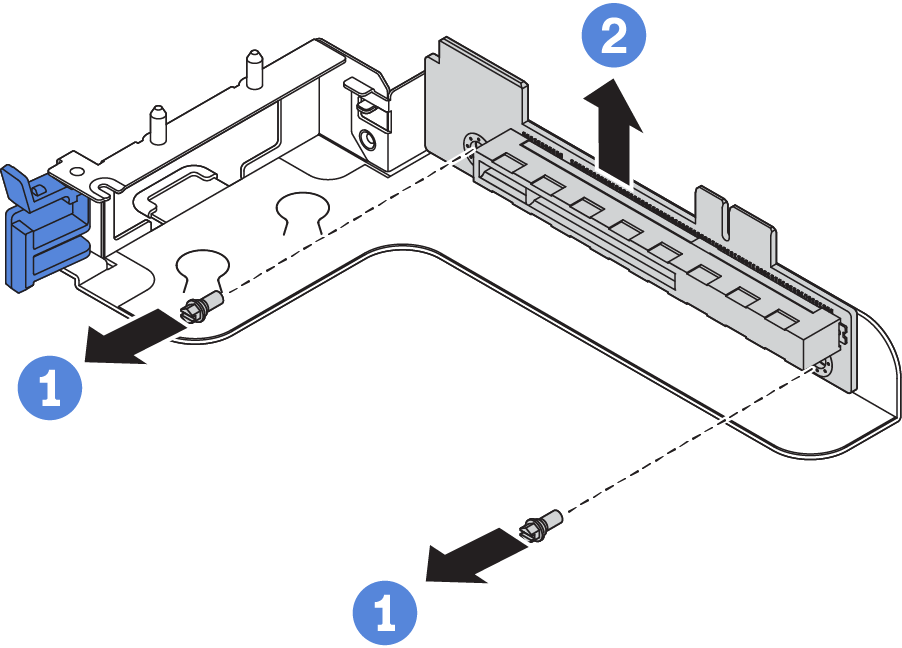
After you finish
If you are instructed to return the component or optional device, follow all packaging instructions, and use any packaging materials for shipping that are supplied to you.
Demo video
Give documentation feedback