Remove a PCIe riser
Follow instructions in this section to remove a PCIe riser.
About this task
Attention
- Read Installation Guidelines and Safety inspection checklist to ensure that you work safely.
- Power off the server and peripheral devices and disconnect the power cords and all external cables. See Power off the server.
- If the server is installed in a rack, slide the server out on its rack slide rails to gain access to the top cover, or remove the server from the rack. See Remove the server from rails.
Note
- Depending on the configuration, follow the corresponding procedures below for proper removal procedure:
- The PCIe riser location might look different from the illustrations in this topic.
Remove a PCIe LP riser
Procedure
- Grasp and lift the PCIe riser out of the chassis.Figure 1. PCIe LP riser removal (without power connector)
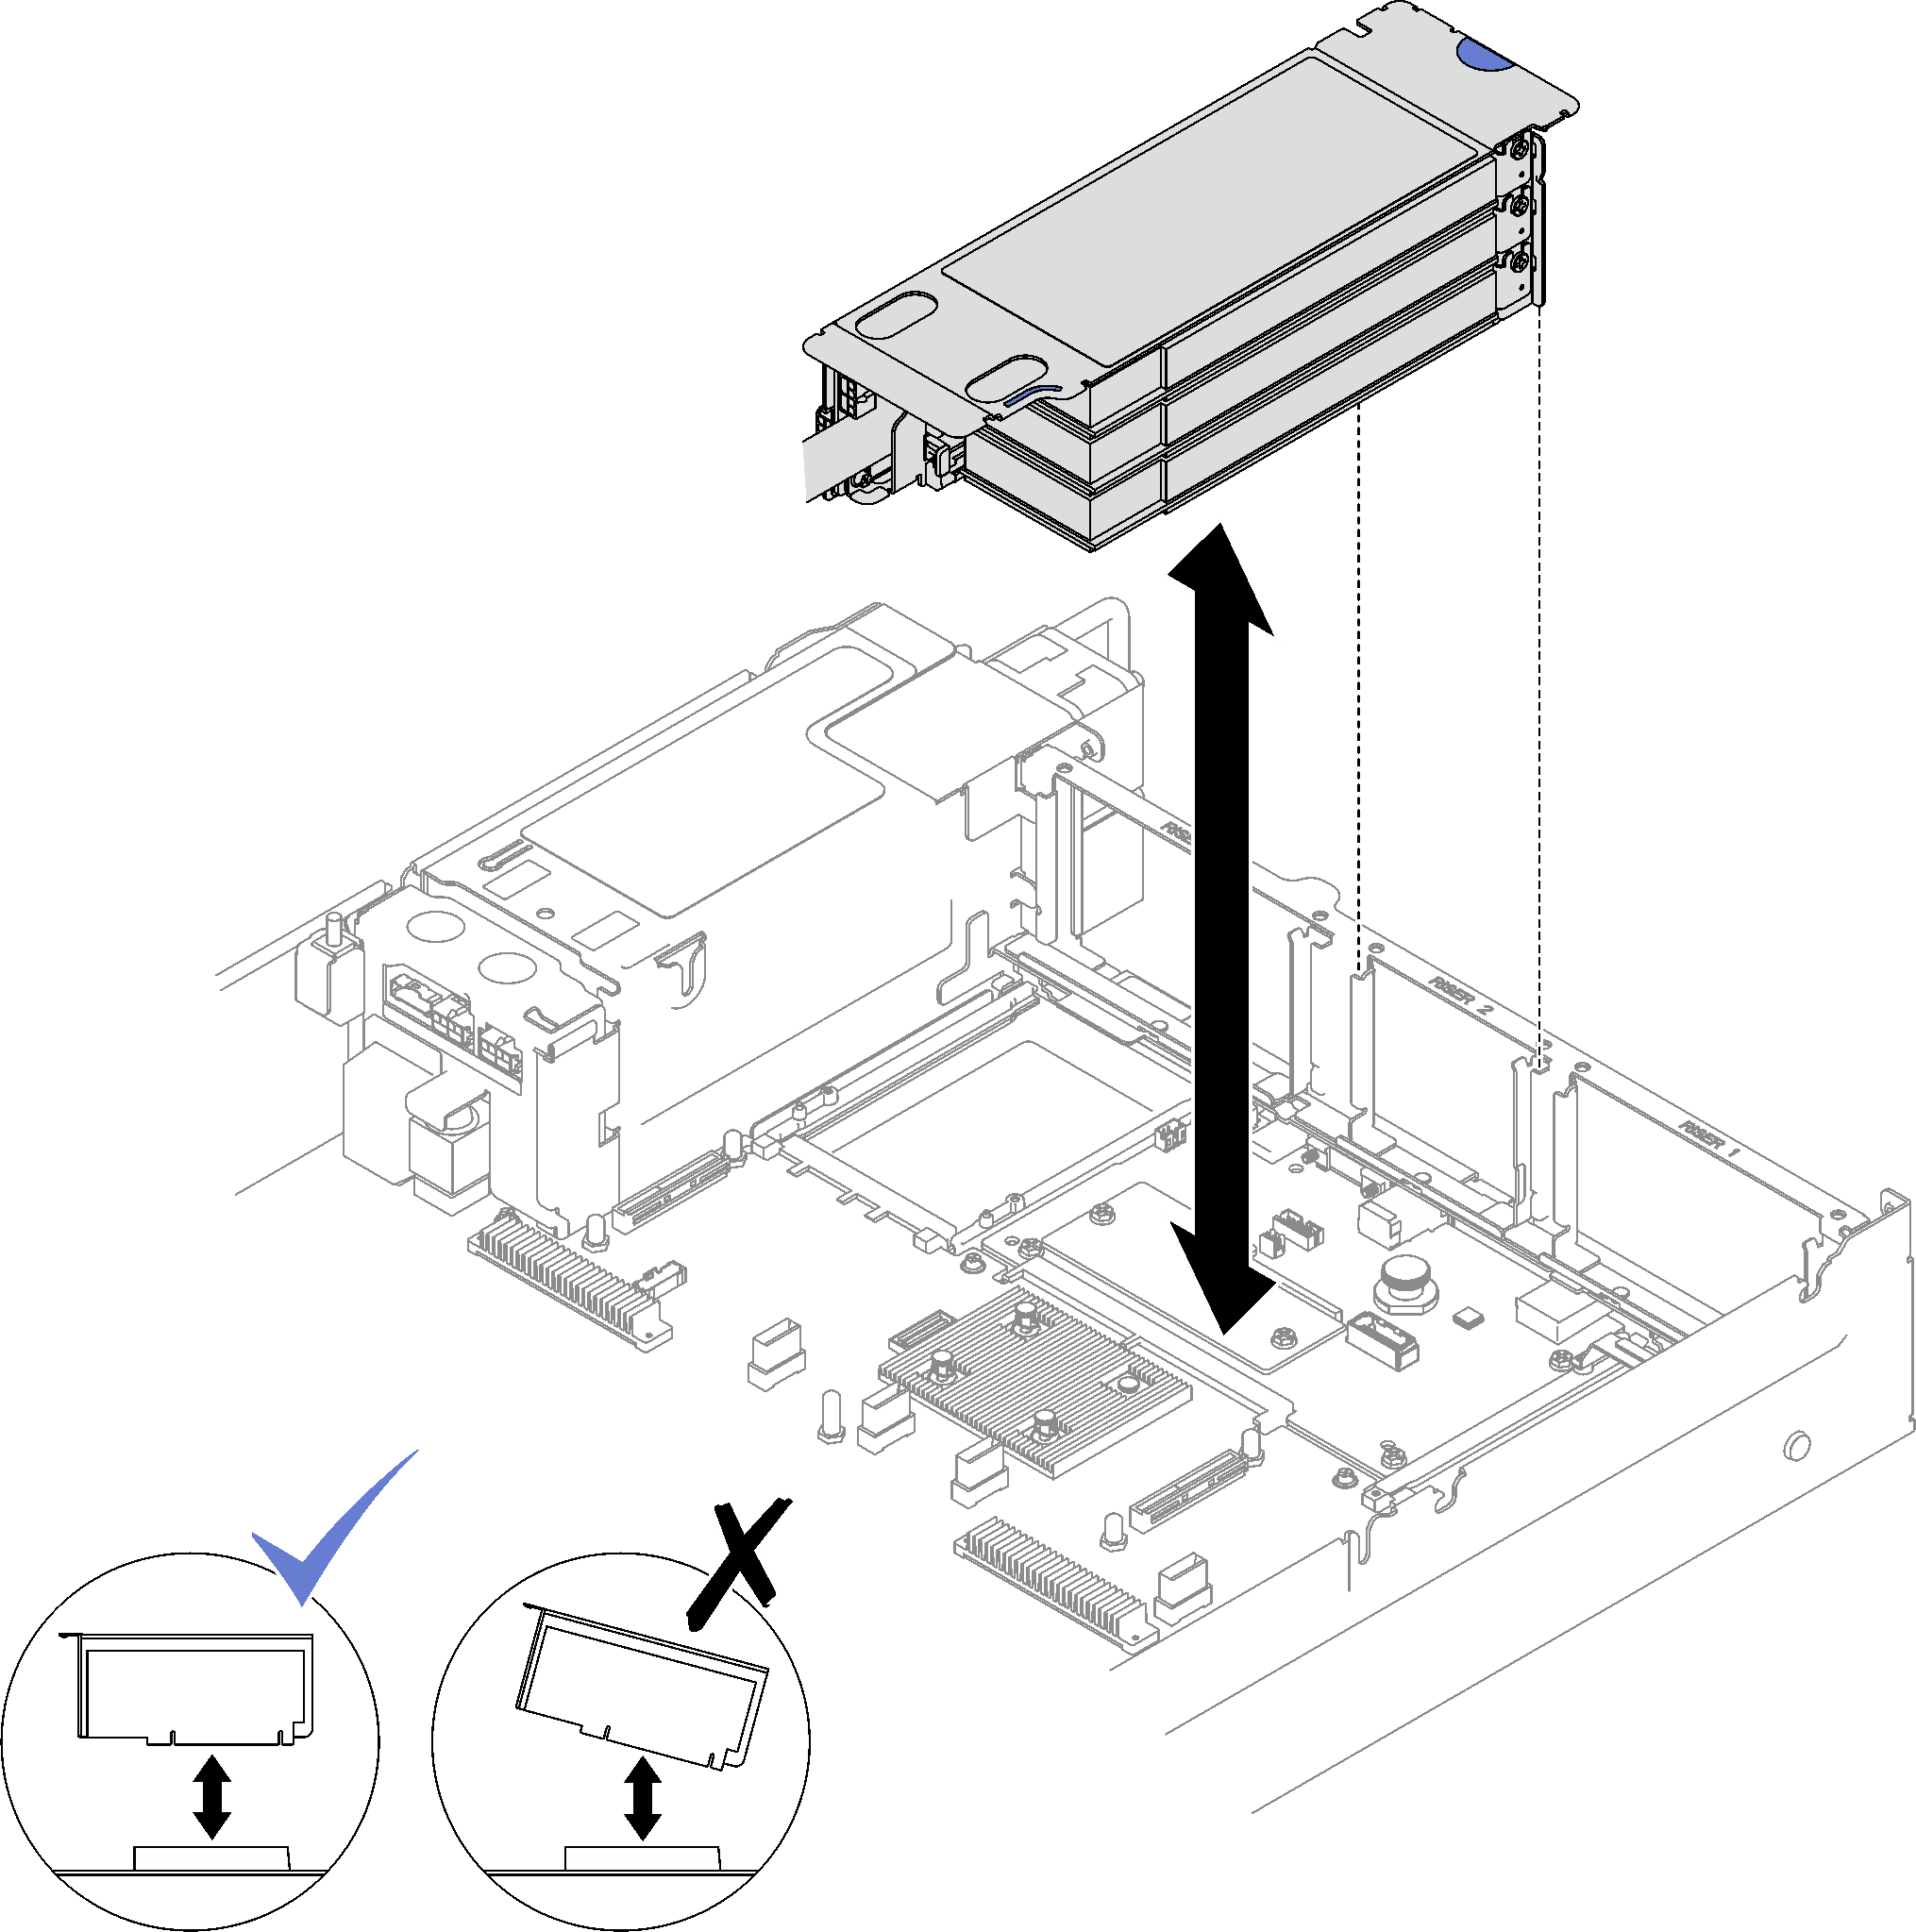 Figure 2. PCIe LP riser removal (with power connector)
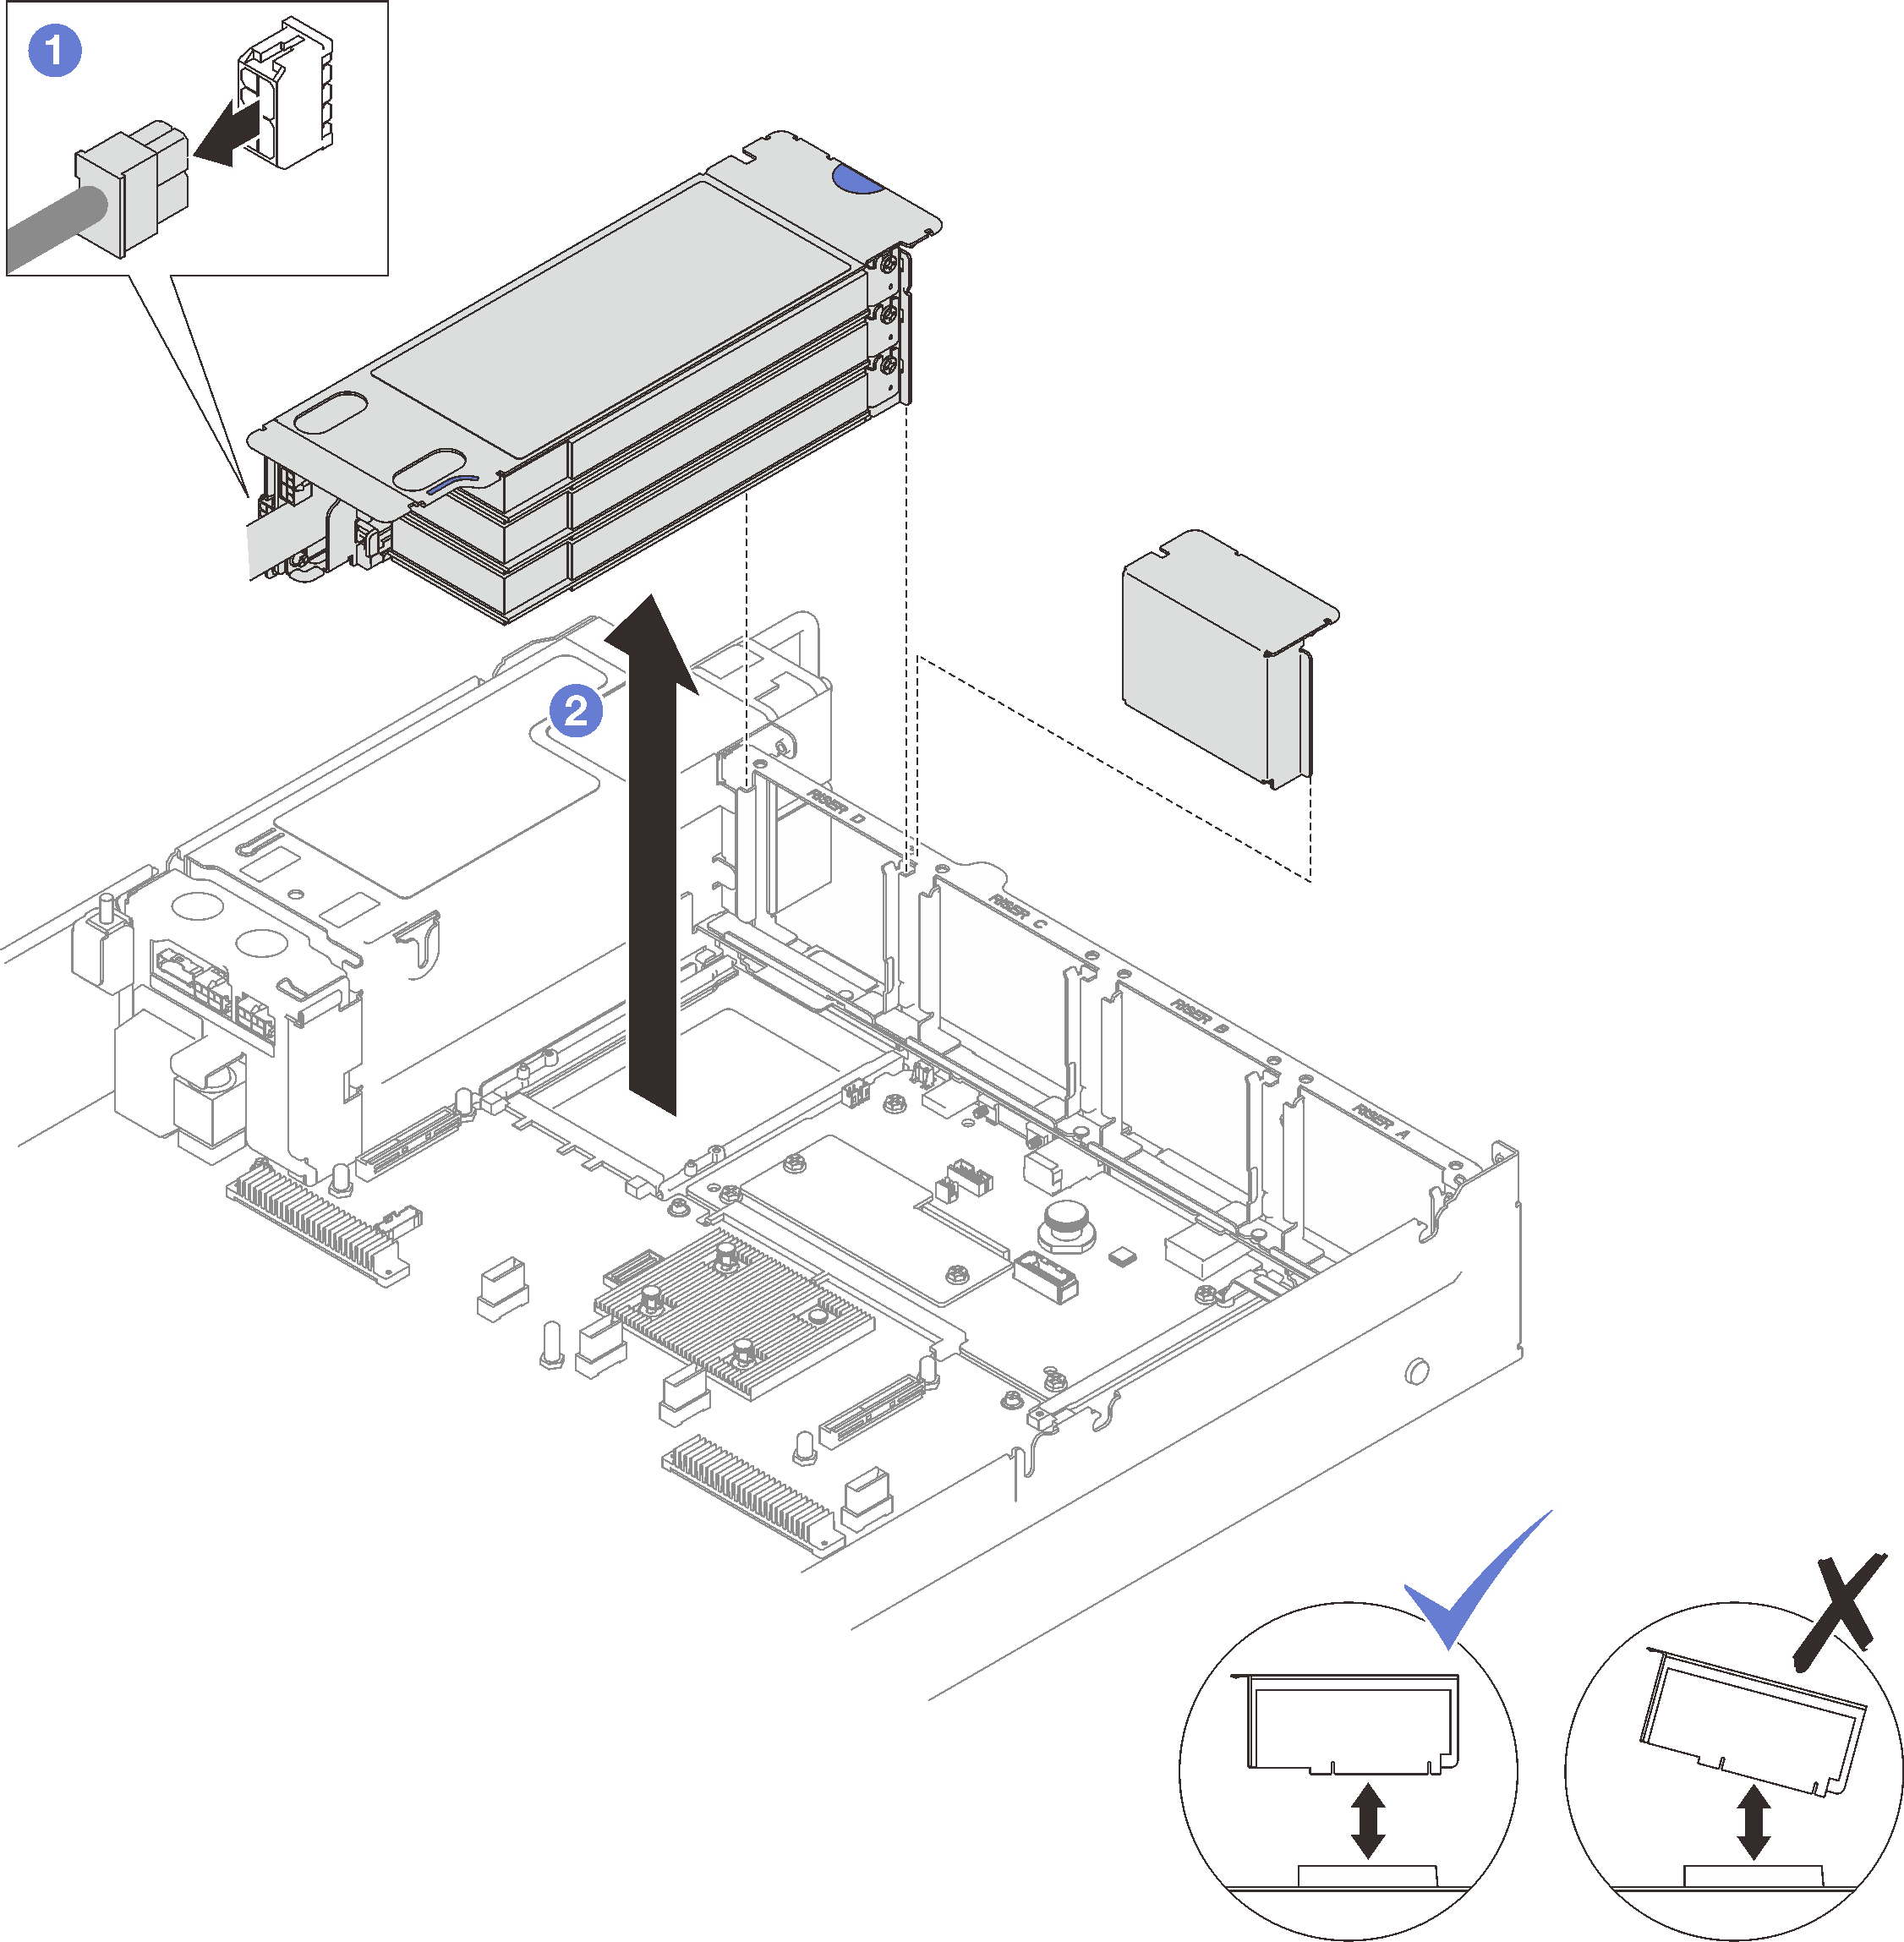
After you finish
- If no PCIe riser is going to be installed to the chassis, install a riser filler into the chassis.
- If you plan to replace a PCIe adapter, see Remove a PCIe adapter.
- If you are instructed to return the component or optional device, follow all packaging instructions, and use any packaging materials for shipping that are supplied to you.
Demo video
Remove a PCIe FHHL riser
Procedure
- Remove the PCIe riser.
 Disconnect the power cable from the PCIe riser.
 Grasp and lift the PCIe riser out of the chassis.Figure 3. PCIe FHHL riser removal
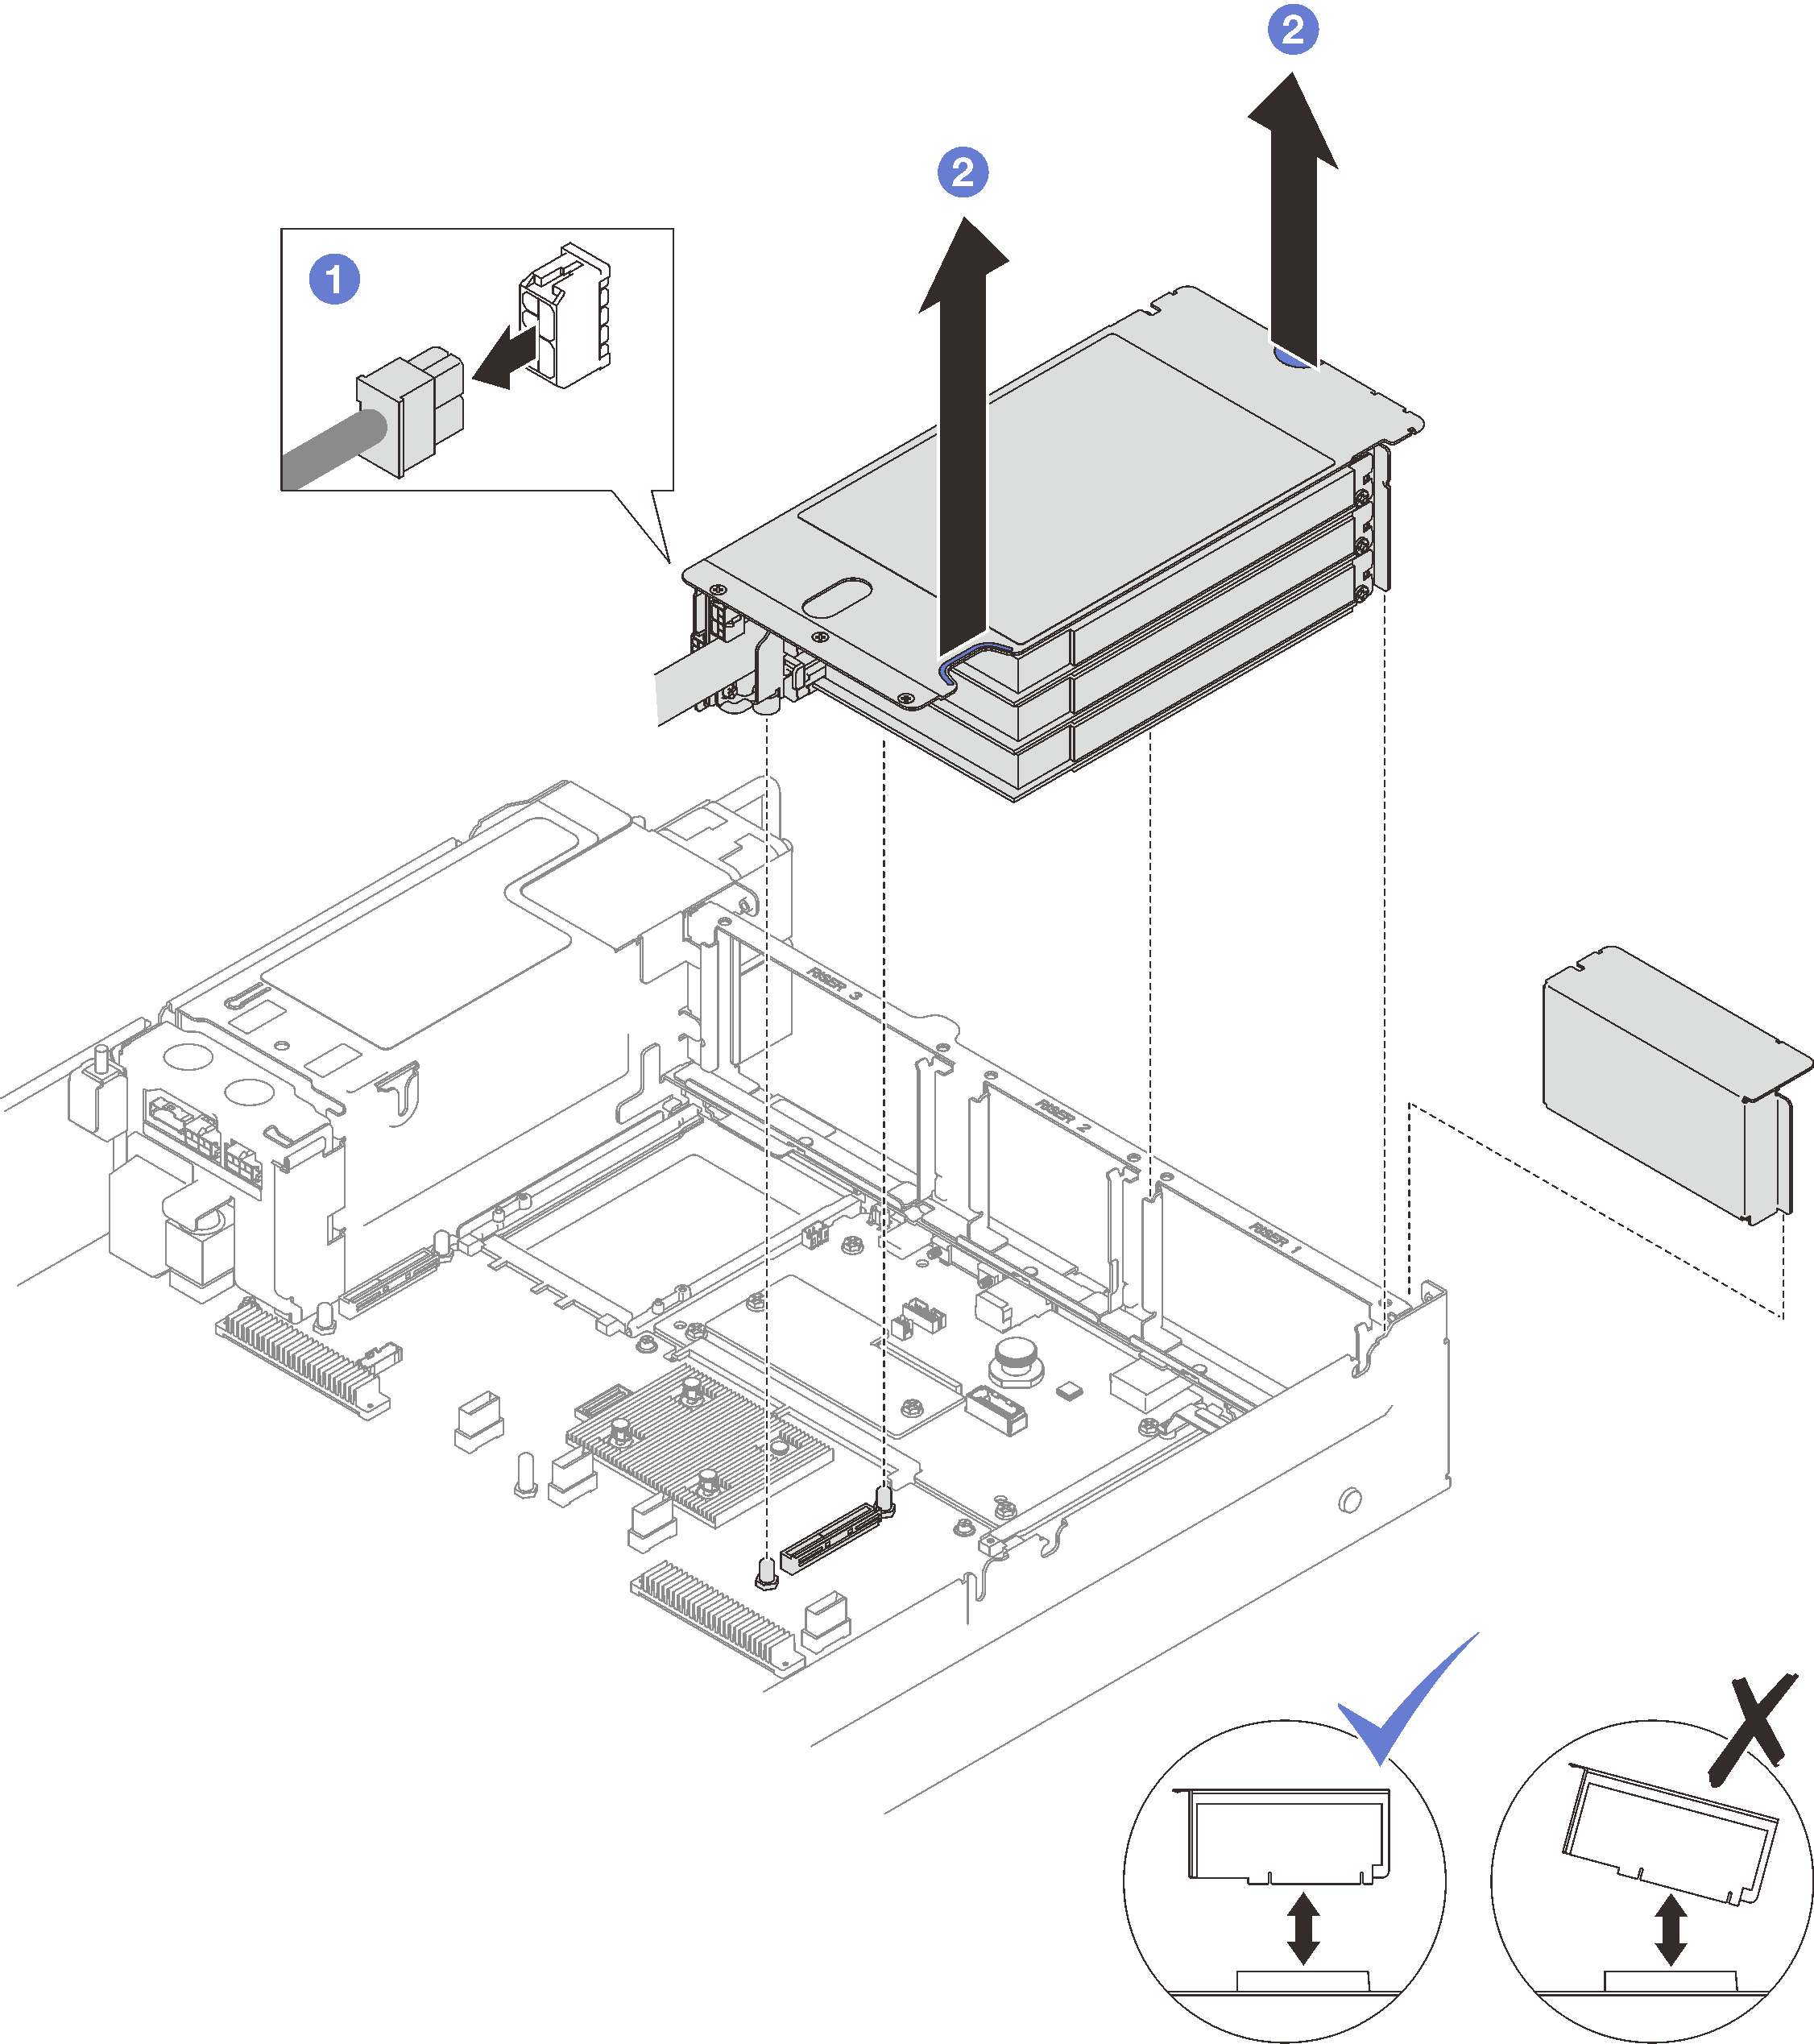
After you finish
- If no PCIe riser is going to be installed to the chassis, install a riser filler into the chassis.
- If you plan to replace a PCIe adapter, see Remove a PCIe adapter.
- If you are instructed to return the component or optional device, follow all packaging instructions, and use any packaging materials for shipping that are supplied to you.
Demo video
Remove a PCIe FHFL riser
Procedure
- Remove the PCIe riser.
- Disconnect the power cable from the PCIe riser.
- Gently pivot the tab on the rear air baffle outward toward the front of the server.
 Grasp and lift the PCIe riser out of the chassis.Figure 4. PCIe FHFL riser removal
After you finish
- If no PCIe riser is going to be installed to the chassis, install a riser filler into the chassis.
- If you plan to replace a PCIe adapter, see Remove a PCIe adapter.
- If you are instructed to return the component or optional device, follow all packaging instructions, and use any packaging materials for shipping that are supplied to you.
Demo video
Give documentation feedback