Rear view
The rear of the server provides access to several components, including the power supplies, PCIe adapters, serial port, and Ethernet port.
Note
Depending on the configuration, your server might be slightly different from the image.
Figure 1. Rear view
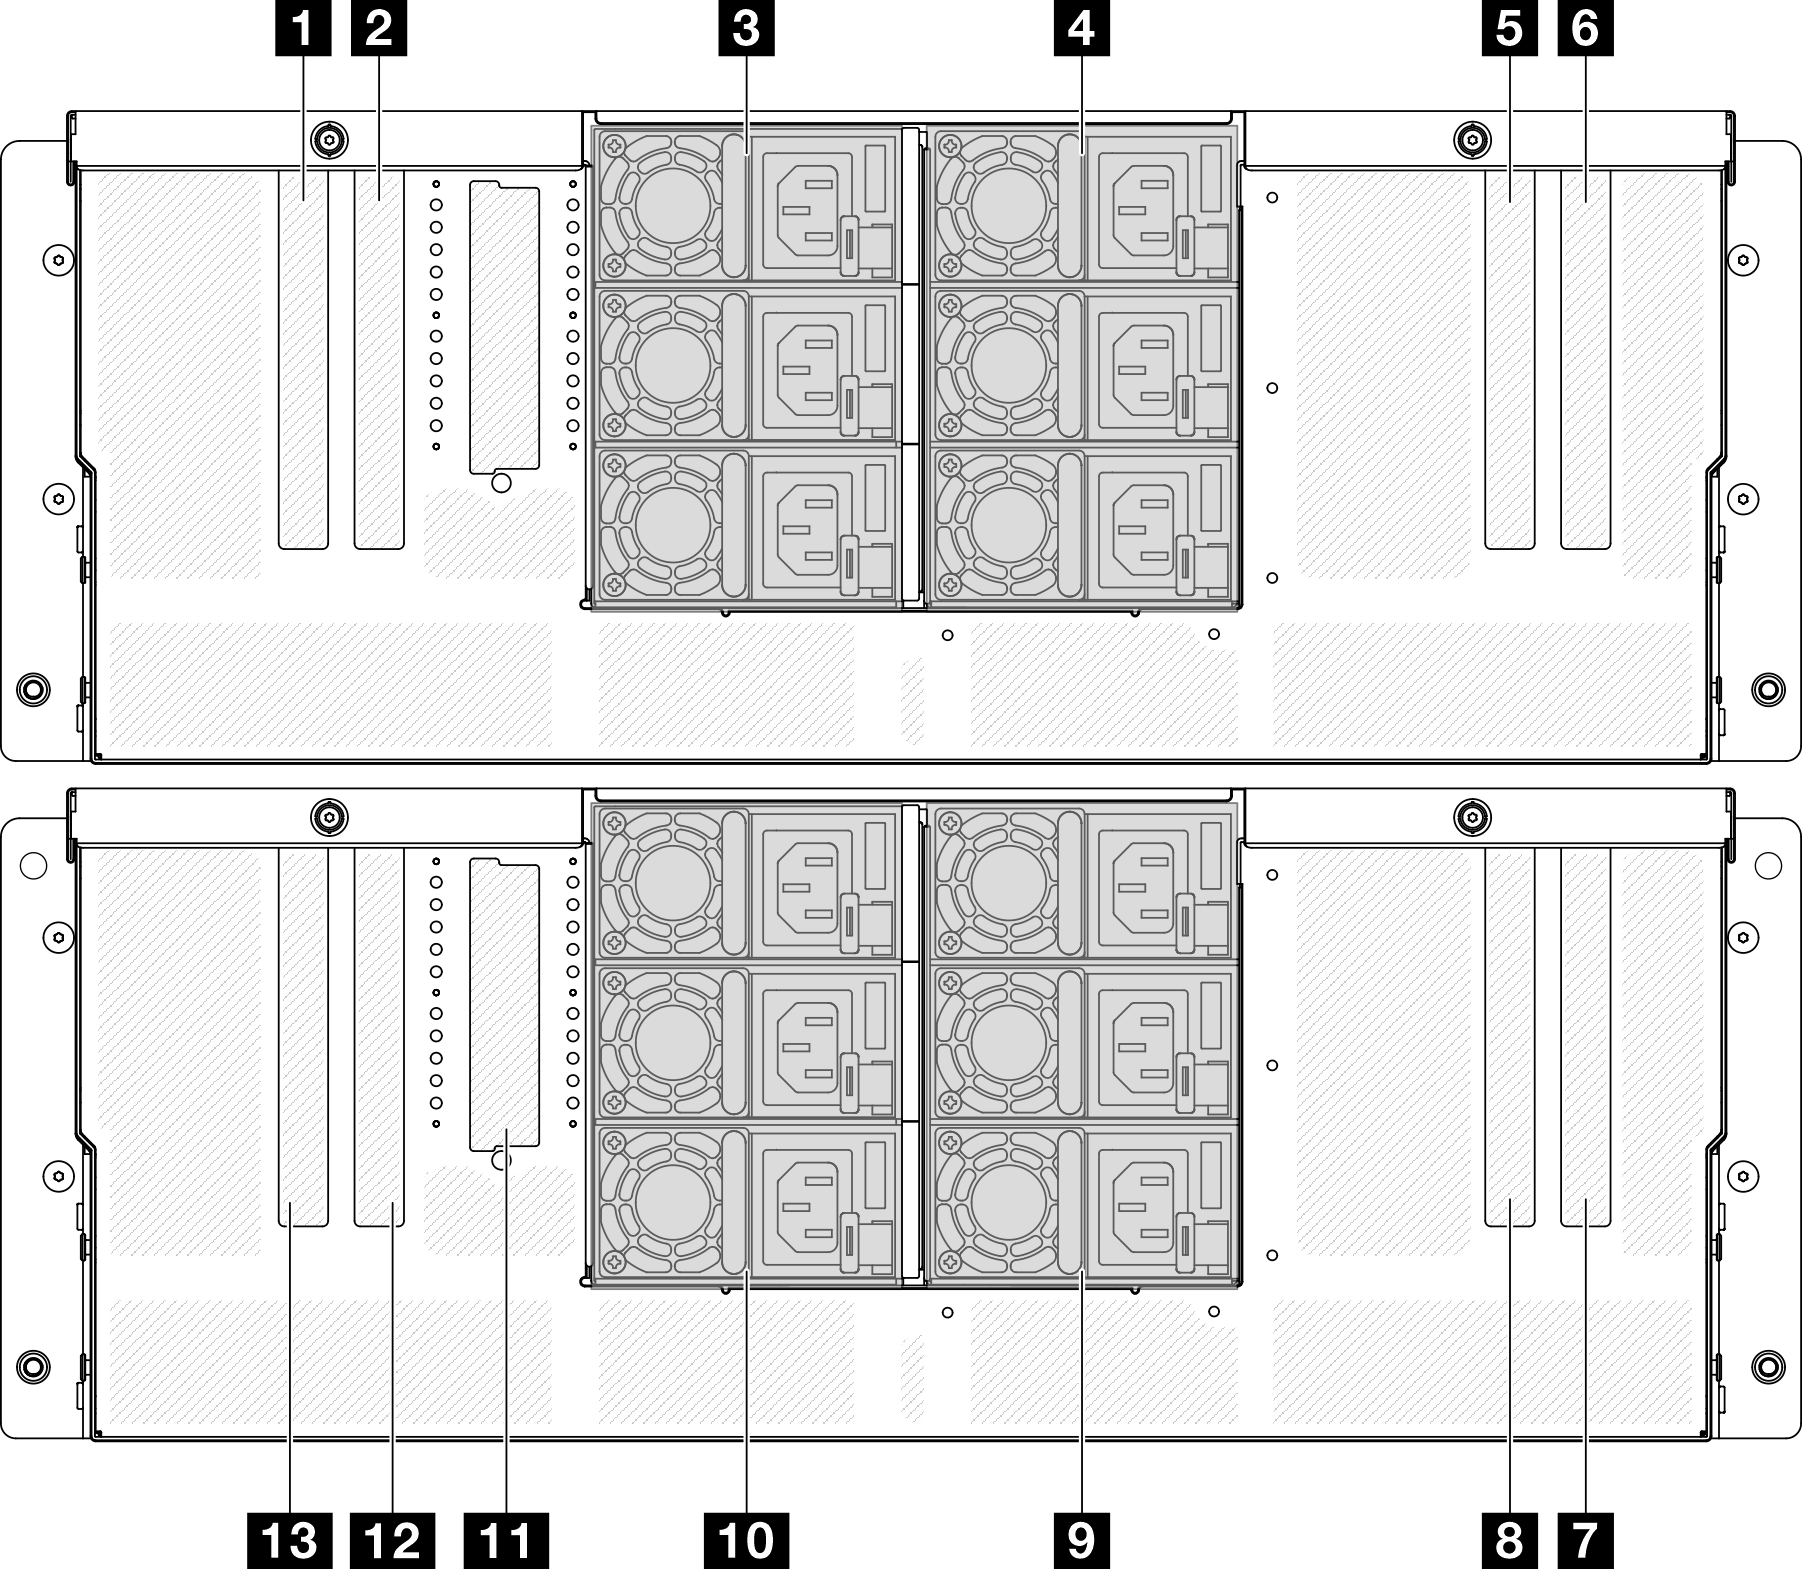
1 PCIe slot S5 | 8 PCIe slot P7 |
2 PCIe slot S6 | 9 PSU P4-P6 (top to bottom) |
3 PSU S1-S3 (top to bottom) | 10 PSU P1-P3 (top to bottom) |
4 PSU S4-S6 (top to bottom) | 11 OCP slot |
5 PCIe slot S7 | 12 PCIe slot P6 |
6 PCIe slot S8 | 13 PCIe slot P5/XCC system management port |
7 PCIe slot P8 |
1 / 2 / 5 / 6 PCIe slot S5-S8
Install PCIe adapters into these PCIe slots. See Install a PCIe adapter.
7 / 8 / 12 / 13 PCIe slot P5-P8
Install PCIe adapters into these PCIe slots. See Install a PCIe adapter.
Note
An Ethernet port assembly can also be installed into PCIe slot P5 to function as a redundant XCC system management port (10/100/1000 Mbps RJ-45).
3 / 4 / 9 / 10 Power supply bays
Install power supply units to these bays, connect them to power cords. See Install a hot-swap power supply unit.
Note
Make sure the power cords are connected properly. See Technical specifications for the power supplies supported by this system.
For information about the LEDs, see Power supply LEDs.
11 OCP slot
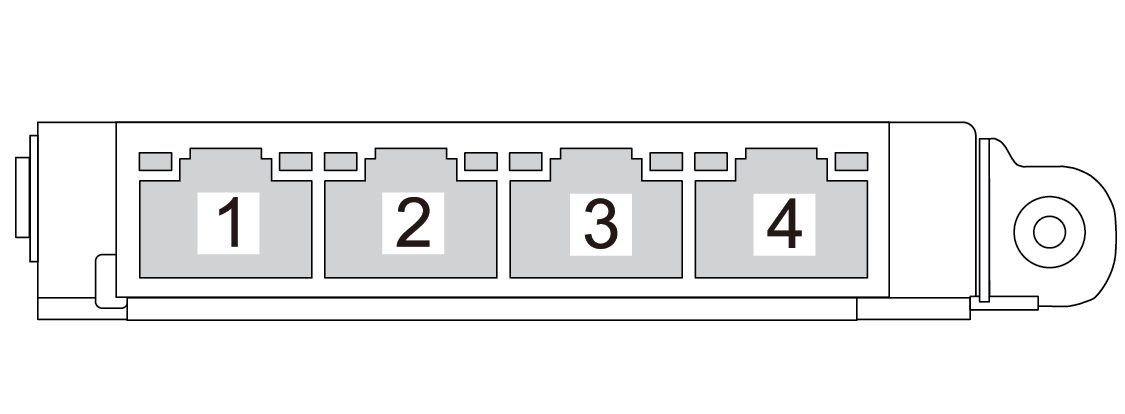
The system may support a 2-port or a 4-port OCP module for network connections. Port numbering are shown in the illustrations below.
Figure 2. Port numbering — 2-port OCP module

Figure 3. Port numbering — 4-port OCP 3.0 module
Give documentation feedback