Install a RAID card (lower tray)
The lower RAID card is in the lower compute tray that is accessed from the front of the server. Connect the three cables to the RAID card; then, connect the RAID card to the storage interposer in the lower compute tray.
S002

CAUTION
The power-control button on the device and the power switch on the power supply do not turn off the electrical current supplied to the device. The device also might have more than one power cord. To remove all electrical current from the device, ensure that all power cords are disconnected from the power source.


Complete the following steps to install a lower RAID card:
Figure 1. Lower RAID card installation
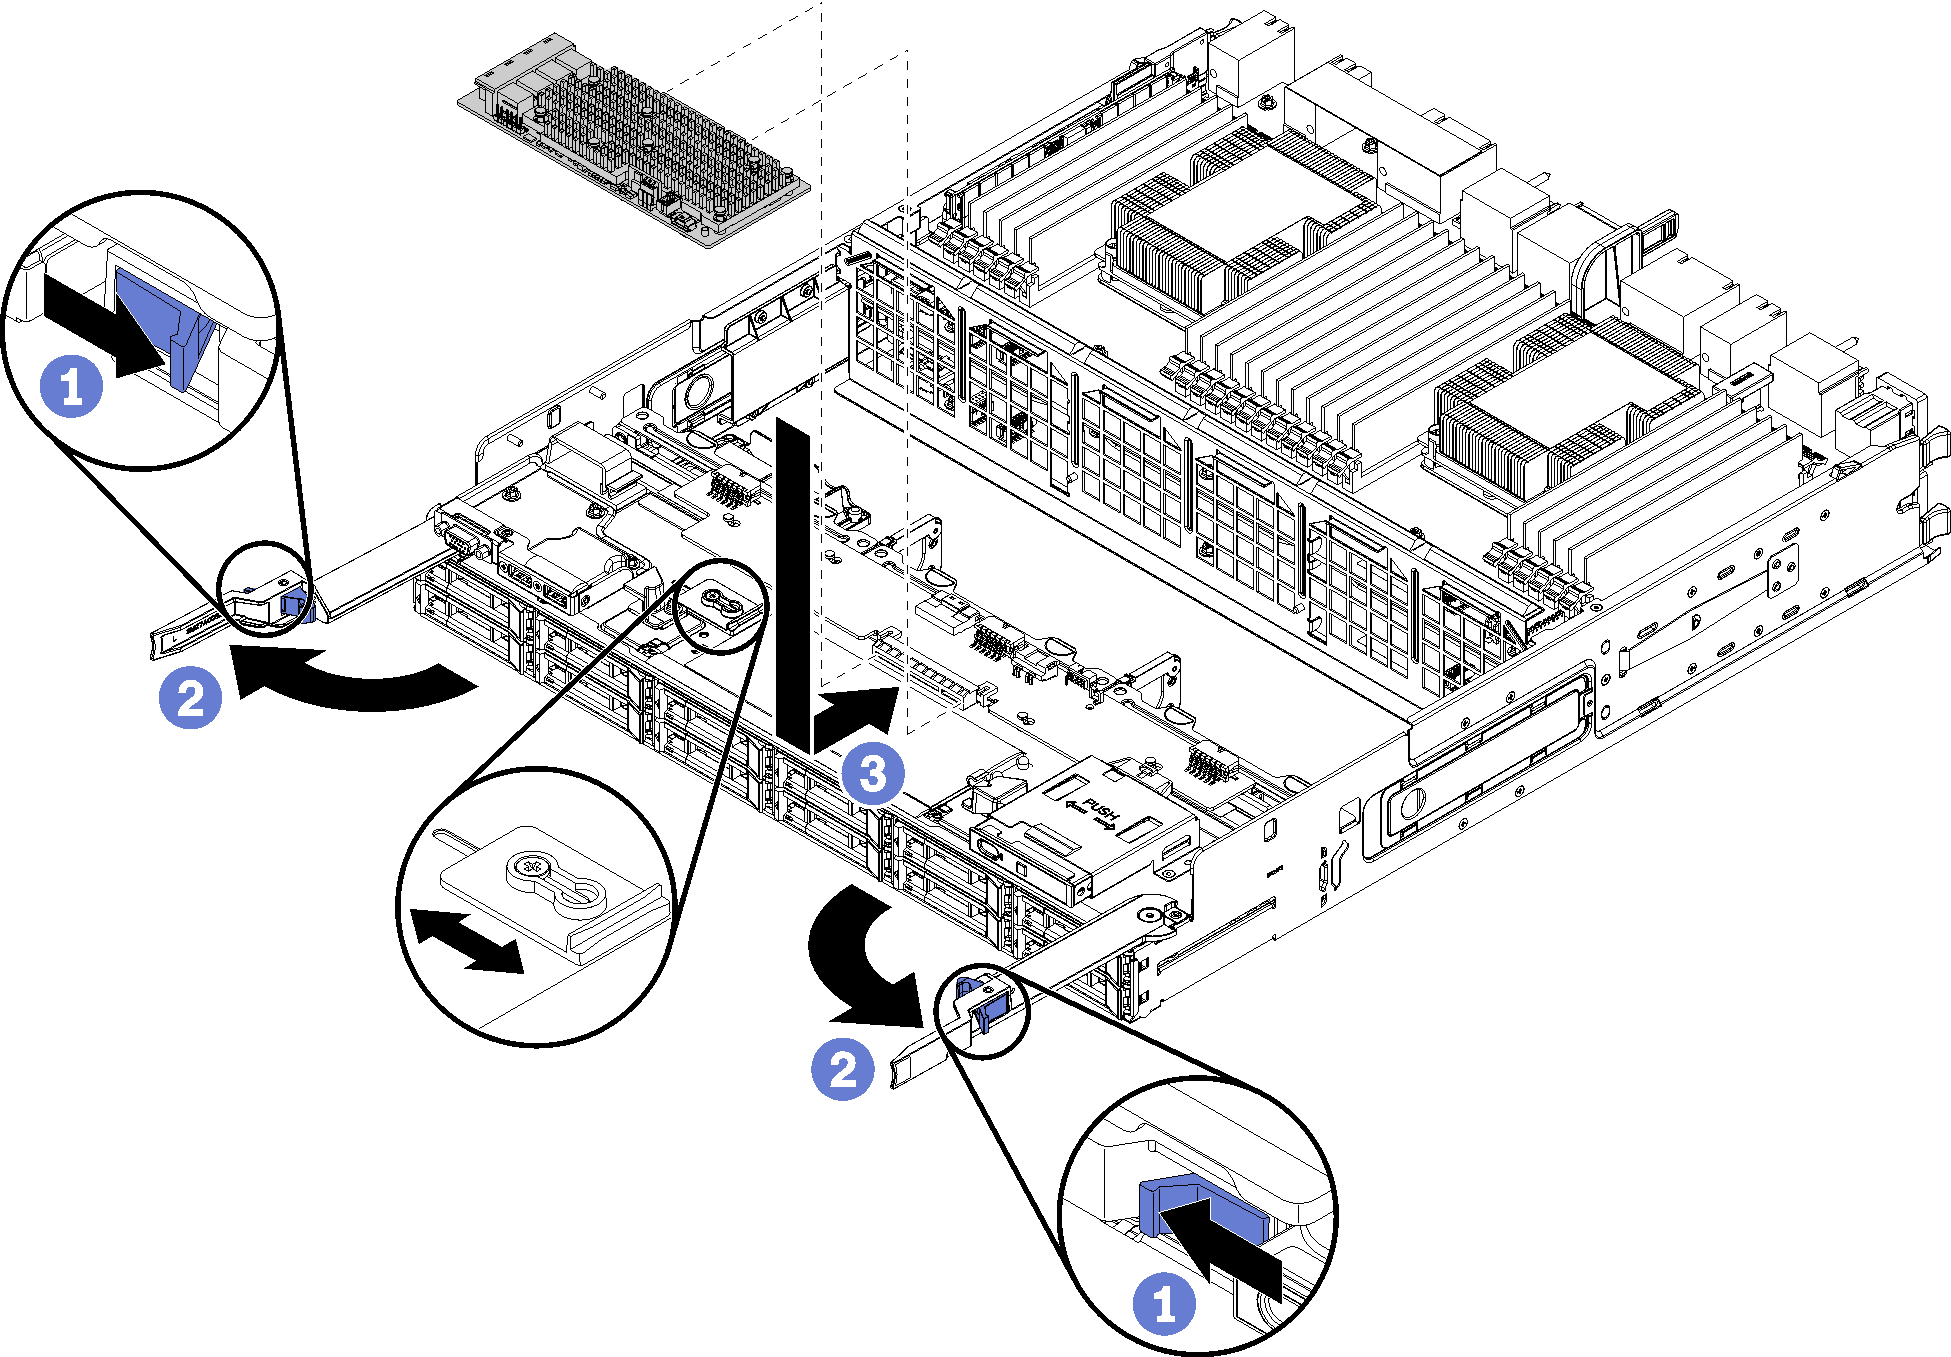
Note
RAID cards are available in two widths. If the RAID card that you are installing does not match the positioning of the left RAID card bracket, loosen the bracket screw, move the bracket to its other position, and tighten the bracket screw.
- Connect the three cables to the RAID card.
- Rotate the RAID card down and align it with the connector on the storage interposer card; then, insert the RAID card in the storage interposer card connector.
After you have installed the lower RAID card:
Install the lower fan cage. See Install a fan cage (lower tray).
Install the lower compute tray or place it in the normal operating position; then, install the front cover. See Install a compute tray and Install the front cover.
Demo video
Give documentation feedback