Install a RAID card (upper tray)
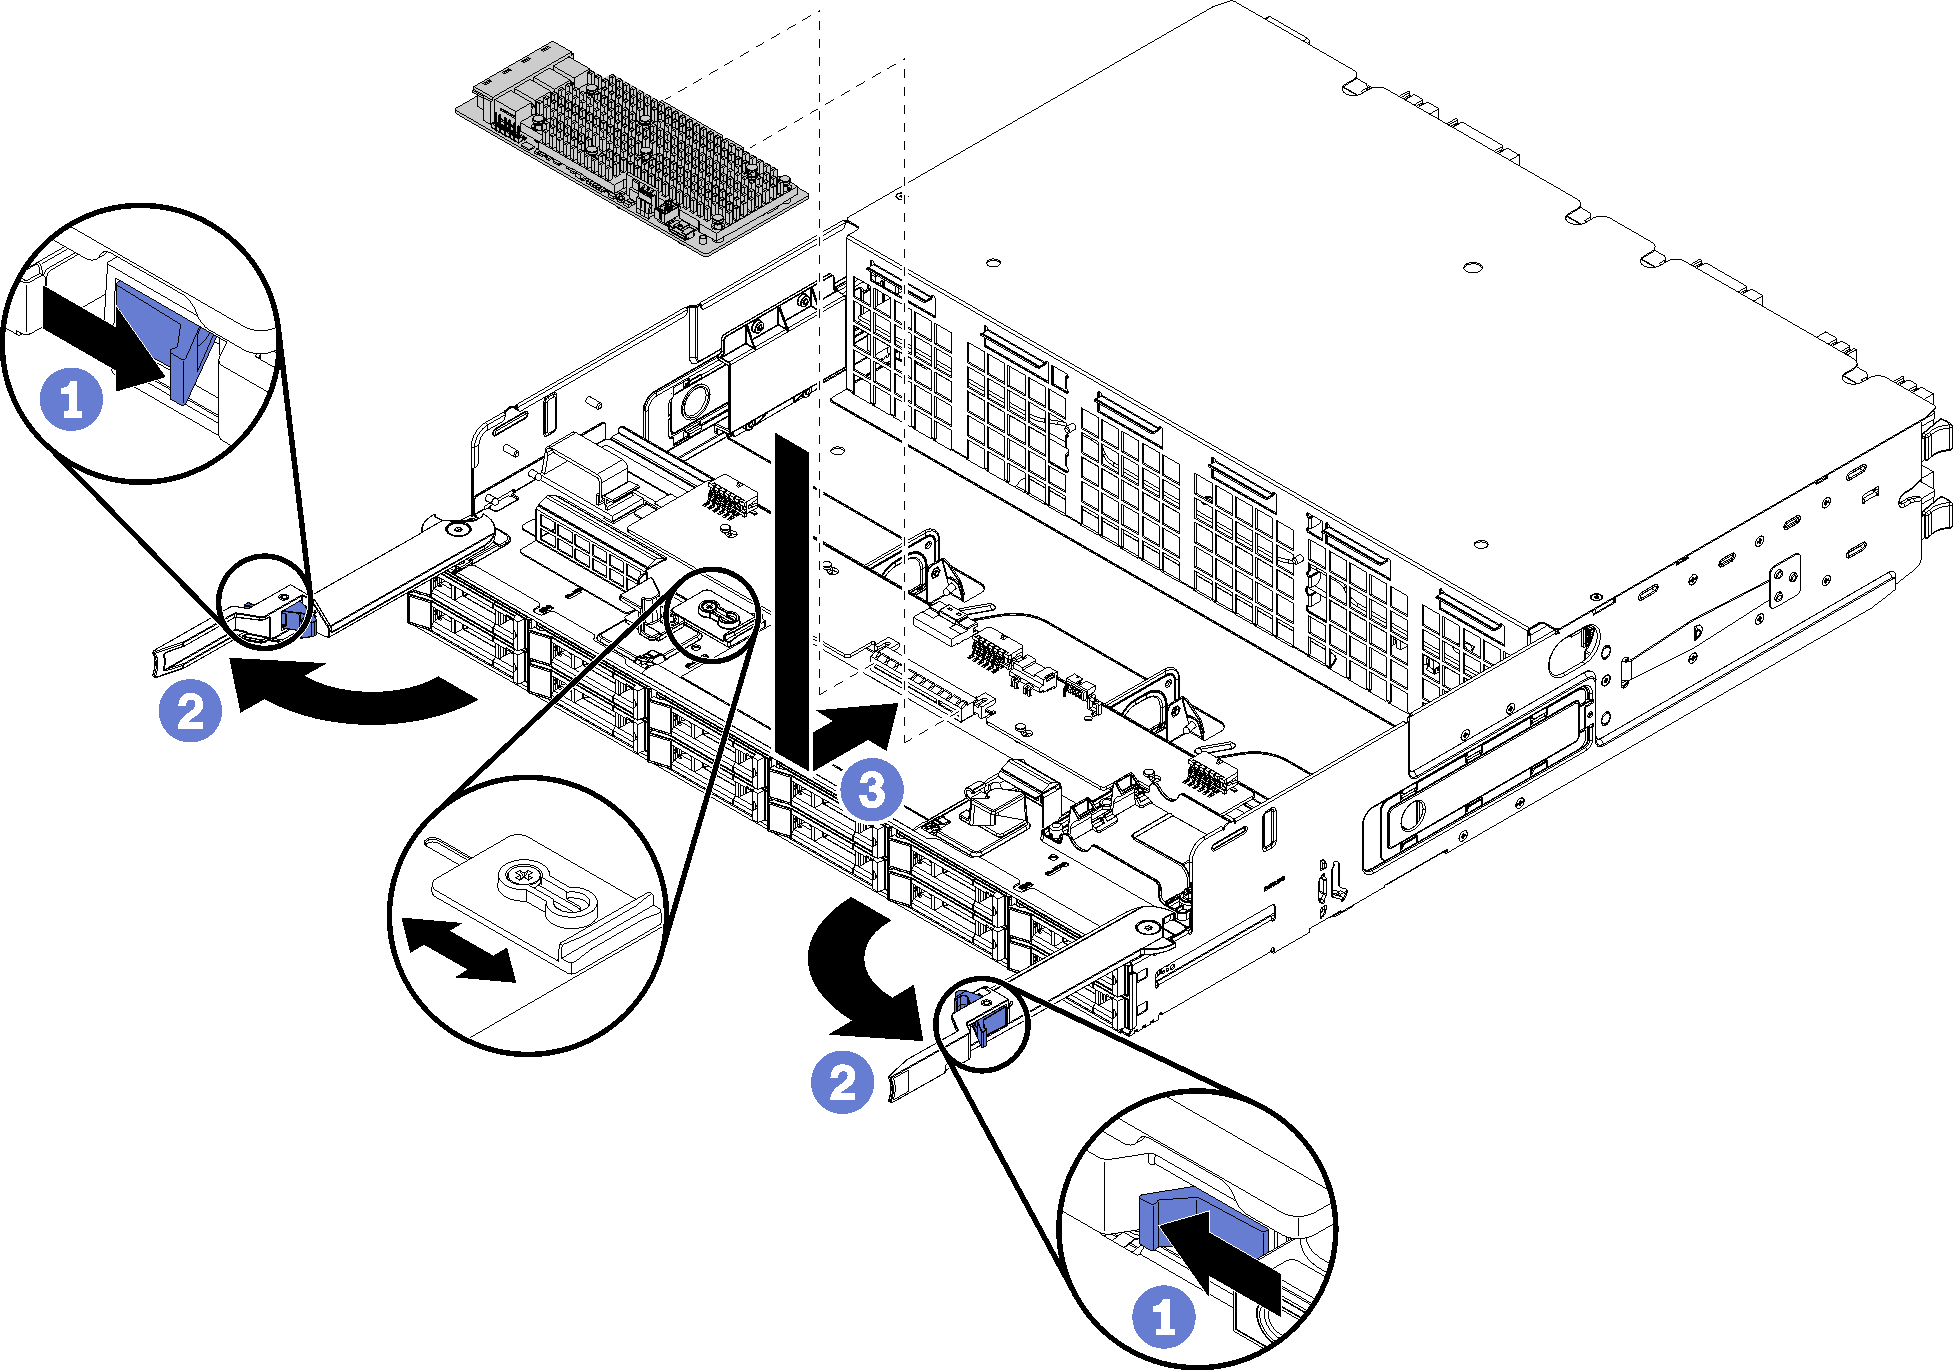
The upper RAID card is in the upper compute tray or optional storage tray that is accessed from the front of the server. Connect the three cables to the RAID card; then, connect the RAID card to the storage interposer in the upper tray.


Complete the following steps to install an upper tray RAID card:

- Connect the three cables to the RAID card.
- Rotate the RAID card down and align it with the connector on the storage interposer card; then, insert the RAID card in the storage interposer card connector.
After you have installed the upper RAID card:
Install the upper fan cage. See Install a fan cage (upper tray).
Turn the tray right-side up.
If you removed one or more system boards or a compute system board filler from a compute tray, install the system boards or system board filler. See Install a system board.
Install the upper compute tray or storage tray. See Install a compute tray or Install the storage tray (fully removed).
Install the front cover. See Install the front cover.
Demo video