Install a system board
Install a system board by inserting it in the compute tray, pushing it in until it locks in place, and connecting the cables.


Processor (see Processor and heat sink replacement)
Memory modules and memory module fillers (see Memory module replacement)
Memory air baffles (see Memory air baffle replacement)
Cables (see Internal cable routing.)
If you are installing the lower system board in a compute tray, first remove the upper system board or filler from the compute tray to access connectors on the lower system board. See Remove a system board or Remove a system board filler.
Complete the following steps to install the compute system board:
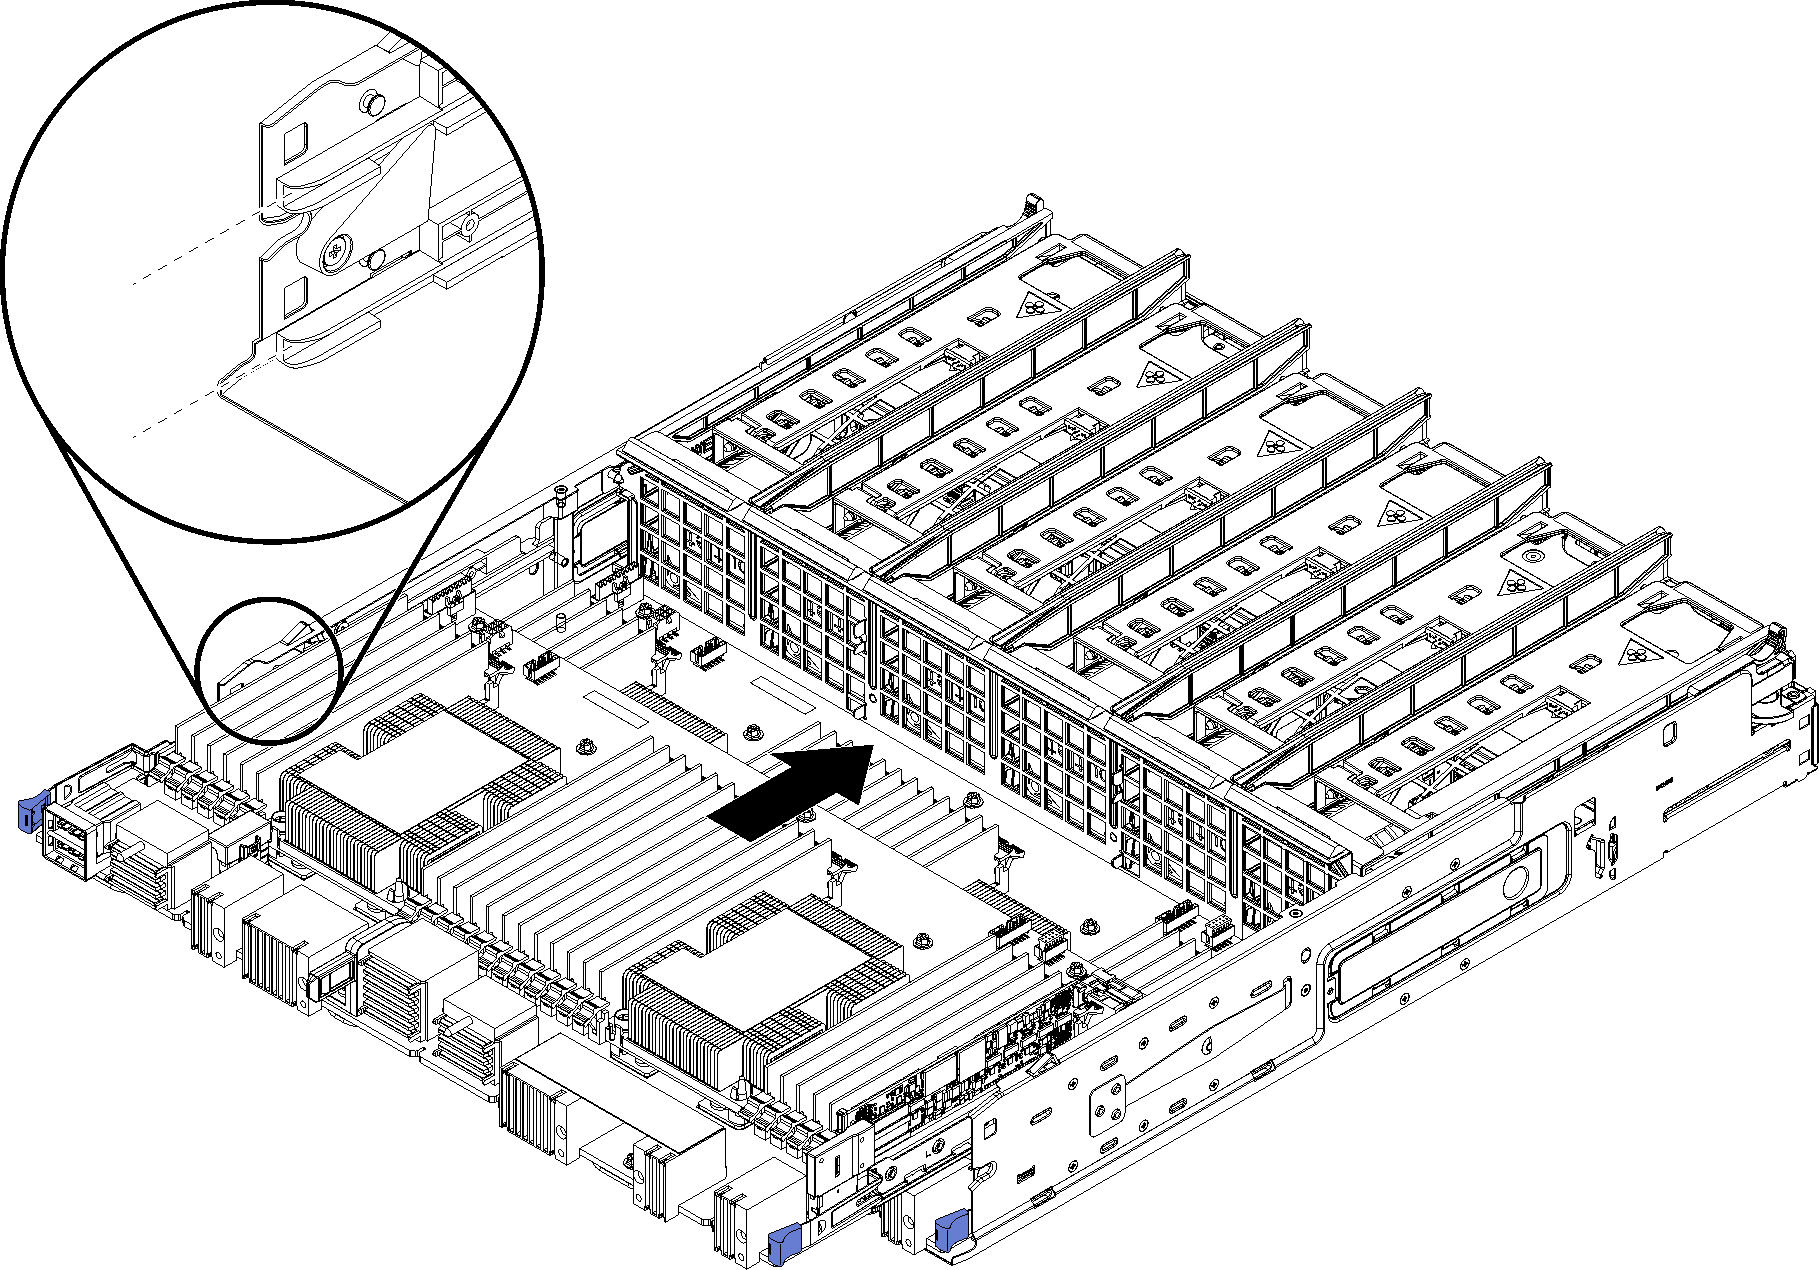
- Align the system board with the rails in the compute tray; then, insert the system board, making sure that the rails on the board fit into the slots in the compute tray.
- Slide the system board into the compute tray until the release clips snap into the locked position.
- Connect all cables on the system board that go to connectors in the compute tray. See Internal cable routing.
After you install the system board:
If you installed the lower system board in a compute tray, slide the upper system board or filler back into the compute tray until the release clips snap into the locked position.
If you are not installing another system board, install the compute tray and front cover. See Install a compute tray and Install the front cover.
Demo video