
Install a fan cage (upper tray)

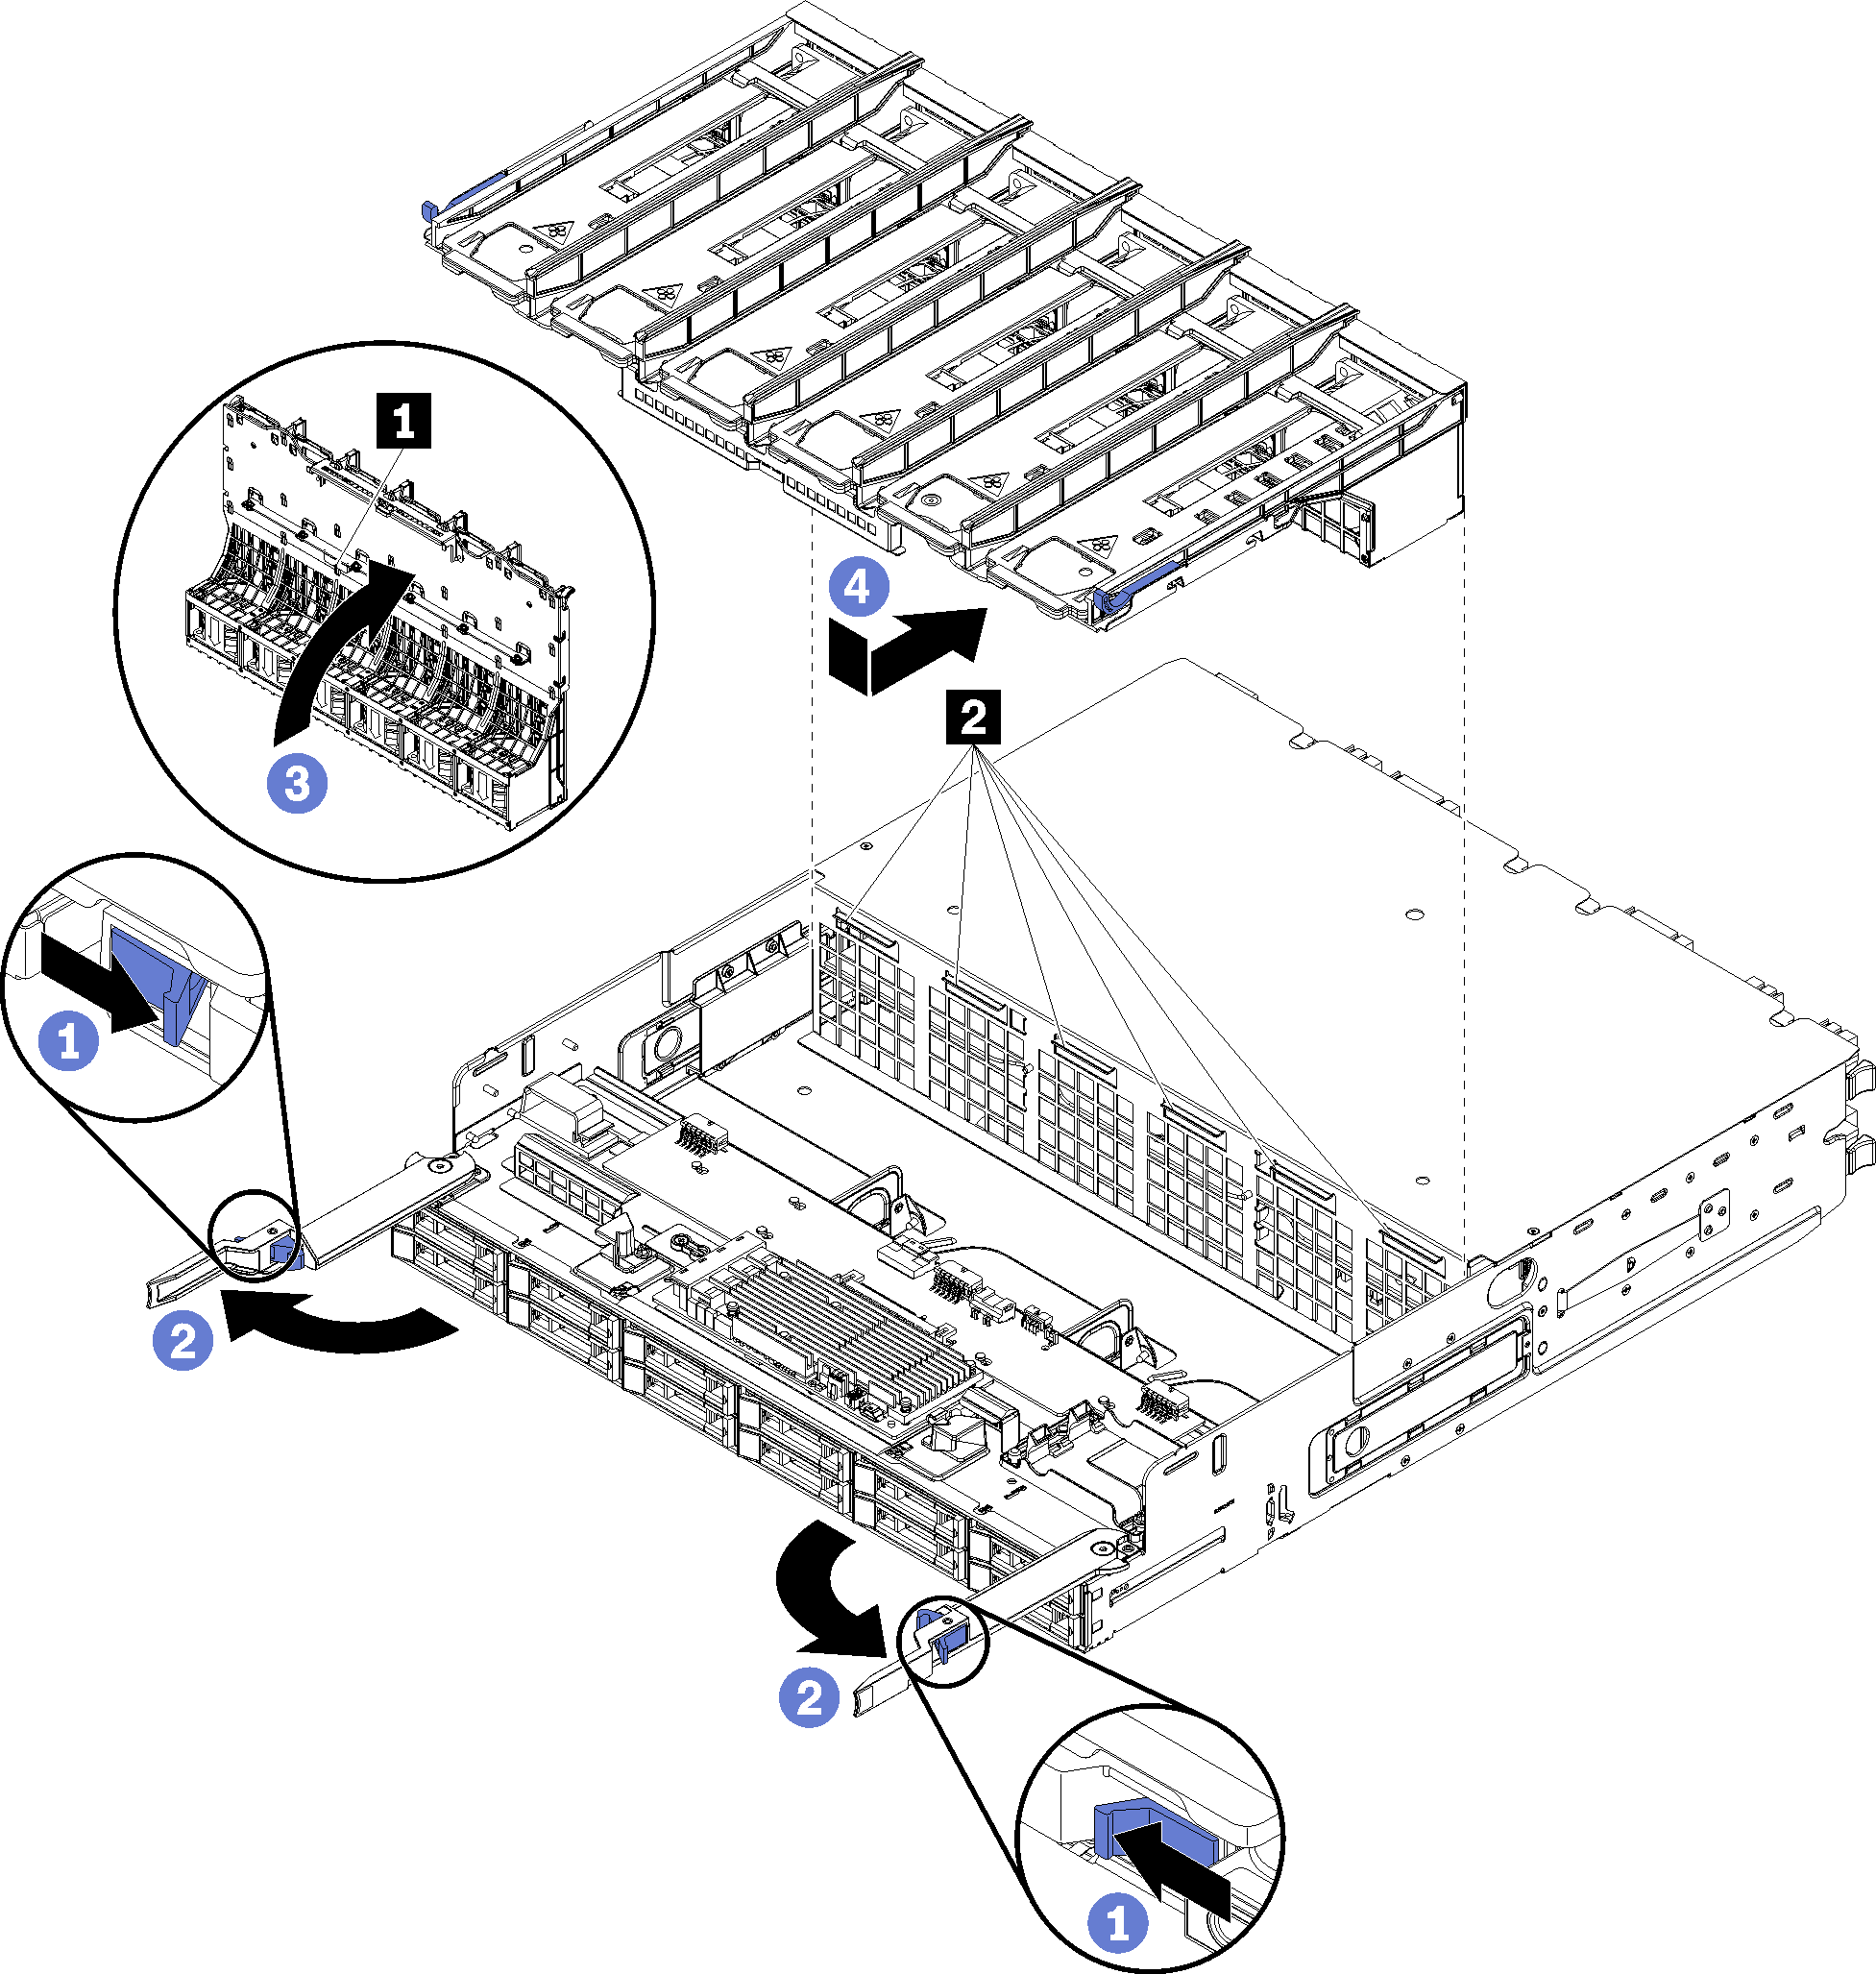
The upper fan cage is in the upper compute tray or optional storage tray that is accessed from the front of the server. Fan cages are keyed and each can be used only in one type of tray (upper or lower). Numbers on the fan cages are right-side up when the compute or storage tray is installed in the chassis. Install the upper fan cage by connecting the fan cage electrical connector, inserting the fan cage in the upper tray, and pushing it backward until it locks in place.

S002
disconnect all power
CAUTION
The power-control button on the device and the power switch on the power supply do not turn off the electrical current supplied to the device. The device also might have more than one power cord. To remove all electrical current from the device, ensure that all power cords are disconnected from the power source.
CAUTION
Make sure that all server power cords are disconnected from their power sources before performing this procedure.

Complete the following steps to install an upper fan cage:

Figure 1. Upper fan cage installation
Upper fan cage installation

  1. Make sure that the area where the fan cage installs is clear and that cables are routed to allow fan cage insertion.
  2. Make sure that the compute or storage tray release levers are open and perpendicular to the tray.
    Attention
    To prevent damage to components, lower the fan cage straight down when inserting it in the tray.
  3. Position the fan cage in the compute or storage tray, making sure that no cables are in the way; then, insert the fan cage part way into the tray.
  4. Connect the cable to the connector 1 in the underside of the fan cage.
  5. Insert the fan cage fully down into the tray, making sure that you do not pinch any cables.
    Important
    Make sure the that fan cage goes beneath all tabs on the tray when pushing it backward. The fan cage must be pushed fully back until it is against the tray bulkhead along its entire length.
  6. Slide the fan cage back into the tray with the fan cage under the tabs on the tray (2 in above illustration). Push the fan cage backward until it locks in place. If the fan cage does not move into place freely, make sure that no cables are obstructing its movement.

After you have installed the upper fan cage:

  1. Close the compute or storage tray release levers.

  2. Turn the tray right-side up.

  3. If you removed one or more system boards or a compute system board filler from a compute tray, install the system boards or system board filler. See Install a system boardor Install a system board filler.

  4. Install the upper compute tray or storage tray. See Install a compute tray or Install the storage tray (fully removed).

  5. Install the front cover. See Install the front cover.

Demo video

Watch the procedure on YouTube