Remove a fan cage (lower tray)
The lower fan cage is in the lower compute tray that is accessed from the front of the server. After removing the lower compute tray, press the fan cage releases and pull the fan cage toward the front of the compute tray to remove it; then, disconnect the fan cage electrical connector.
S002

CAUTION
The power-control button on the device and the power switch on the power supply do not turn off the electrical current supplied to the device. The device also might have more than one power cord. To remove all electrical current from the device, ensure that all power cords are disconnected from the power source.


CAUTION
Make sure that all server power cords are disconnected from their power sources before performing this procedure.
Before you remove a lower fan cage:
Remove the front cover. See Remove the front cover.
Remove the lower compute tray. See Remove a compute tray.
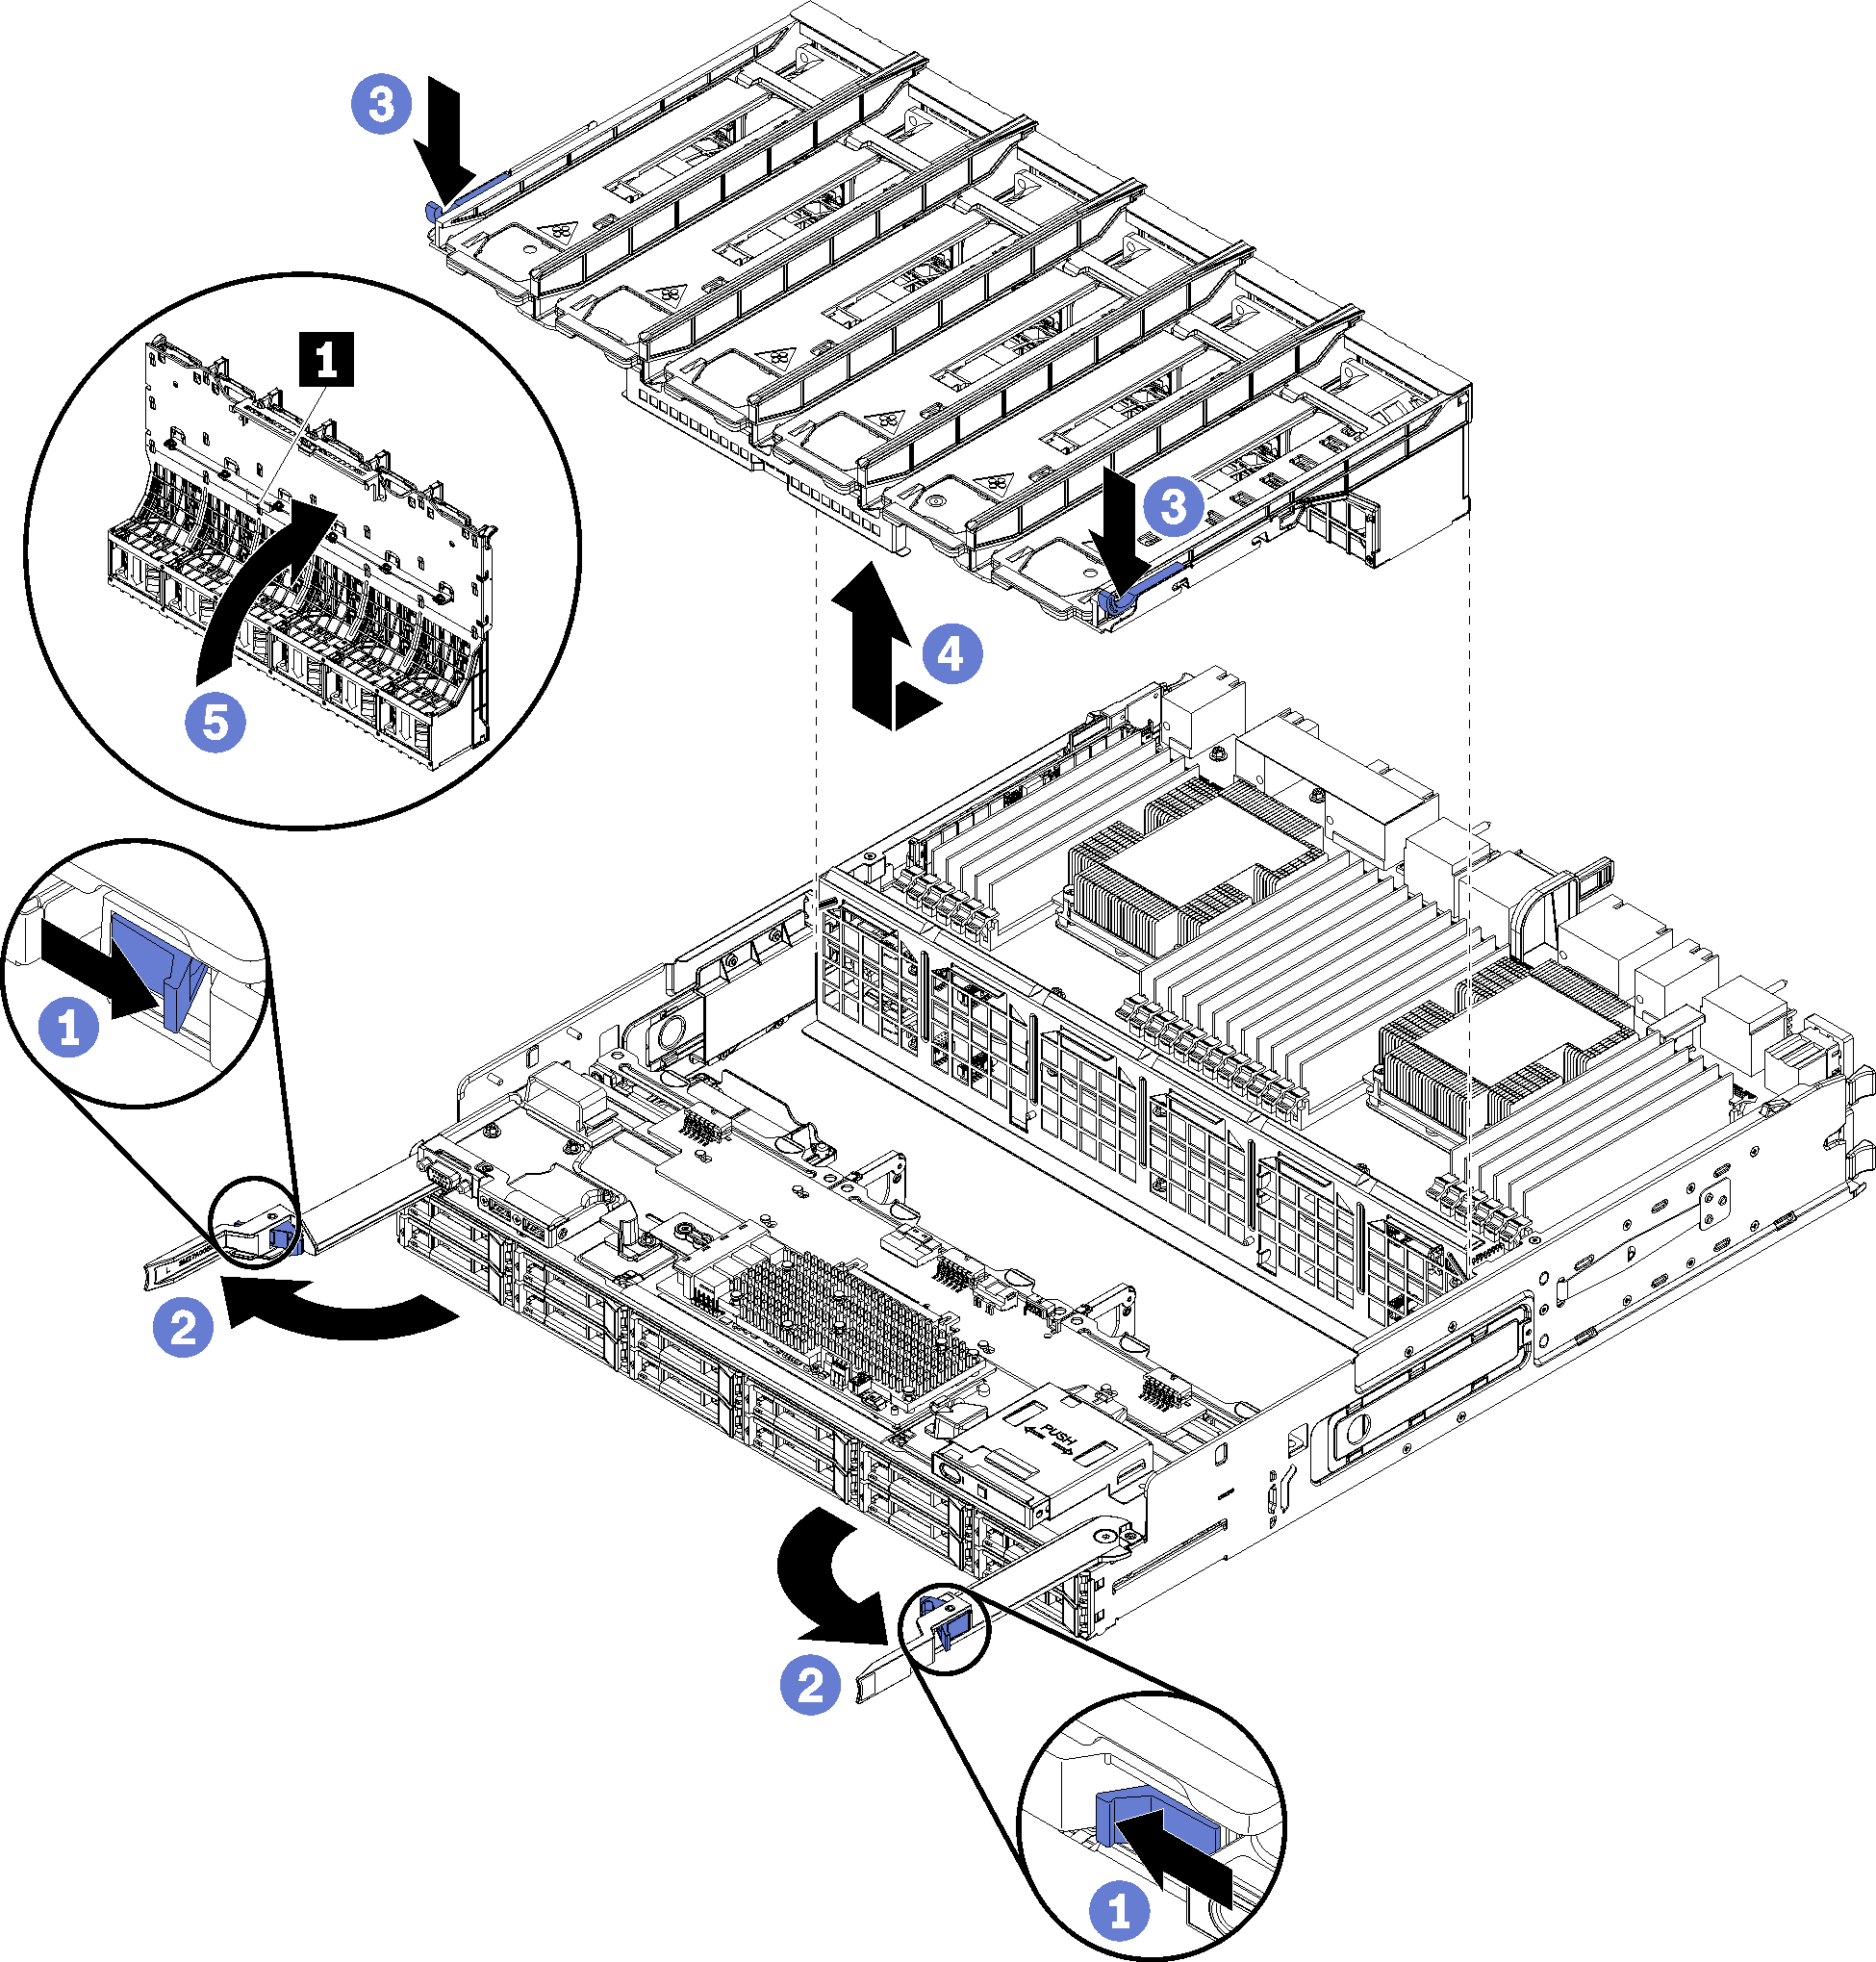
Complete the following steps to remove a lower fan cage.
Figure 1. Lower fan cage removal
If you are instructed to return the fan cage, follow all packaging instructions, and use any packaging materials for shipping that are supplied to you.
Demo video
Give documentation feedback