Install a 2.5-inch SSD into a 3.5-inch drive bay
Use this information to install a 2.5-inch SSD into a 3.5-inch drive bay.


To install a 2.5-inch SSD into a 3.5-inch drive bay, complete the following steps:
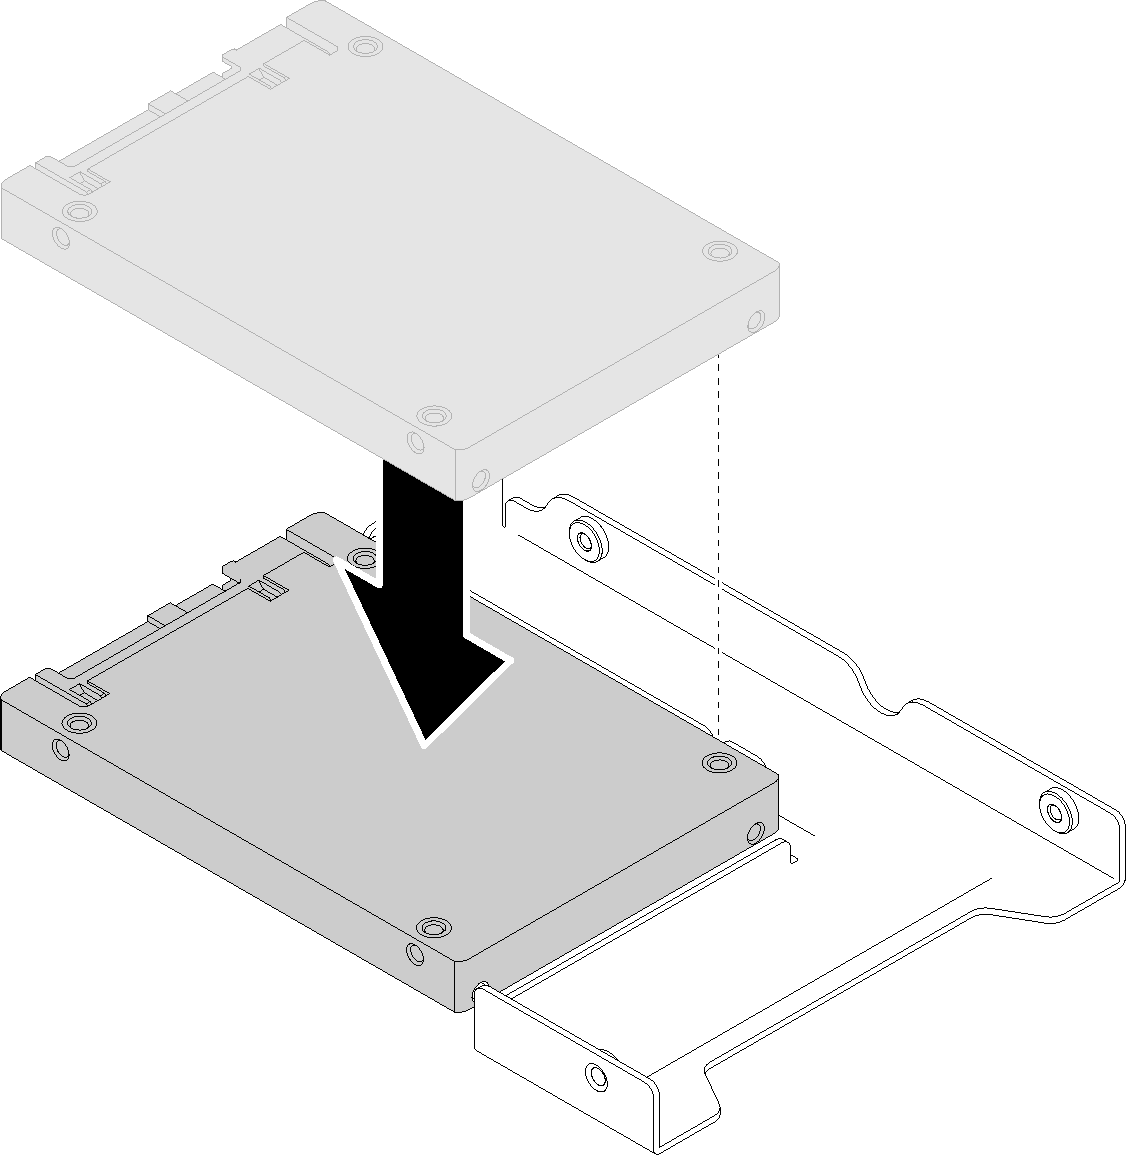
- Position the 2.5-inch SSD into the 2.5-inch to 3.5-inch drive adapter.Figure 1. Positioning the 2.5-inch SSD into the drive adapter
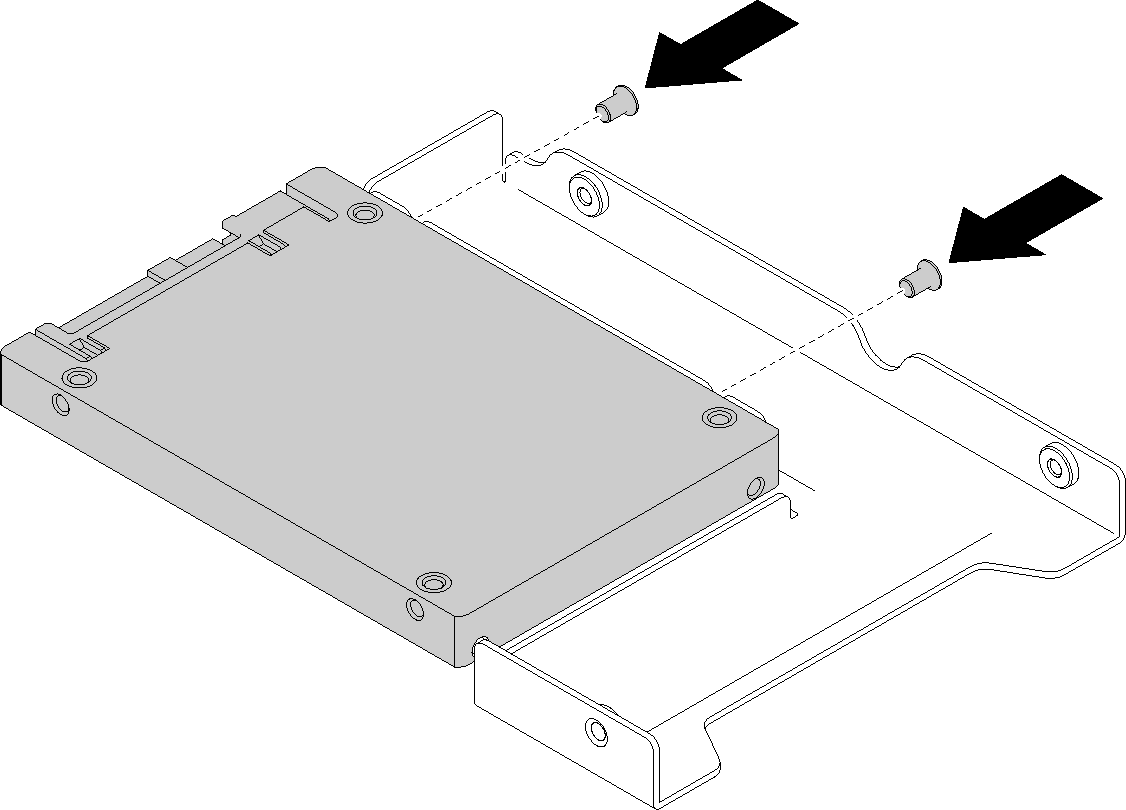
- Align the two screw holes in the SSD with the corresponding holes in the drive adapter; then, install the two screws to secure the drive to the drive adapter. Figure 2. Screw installation to secure the SSD to the drive adapter
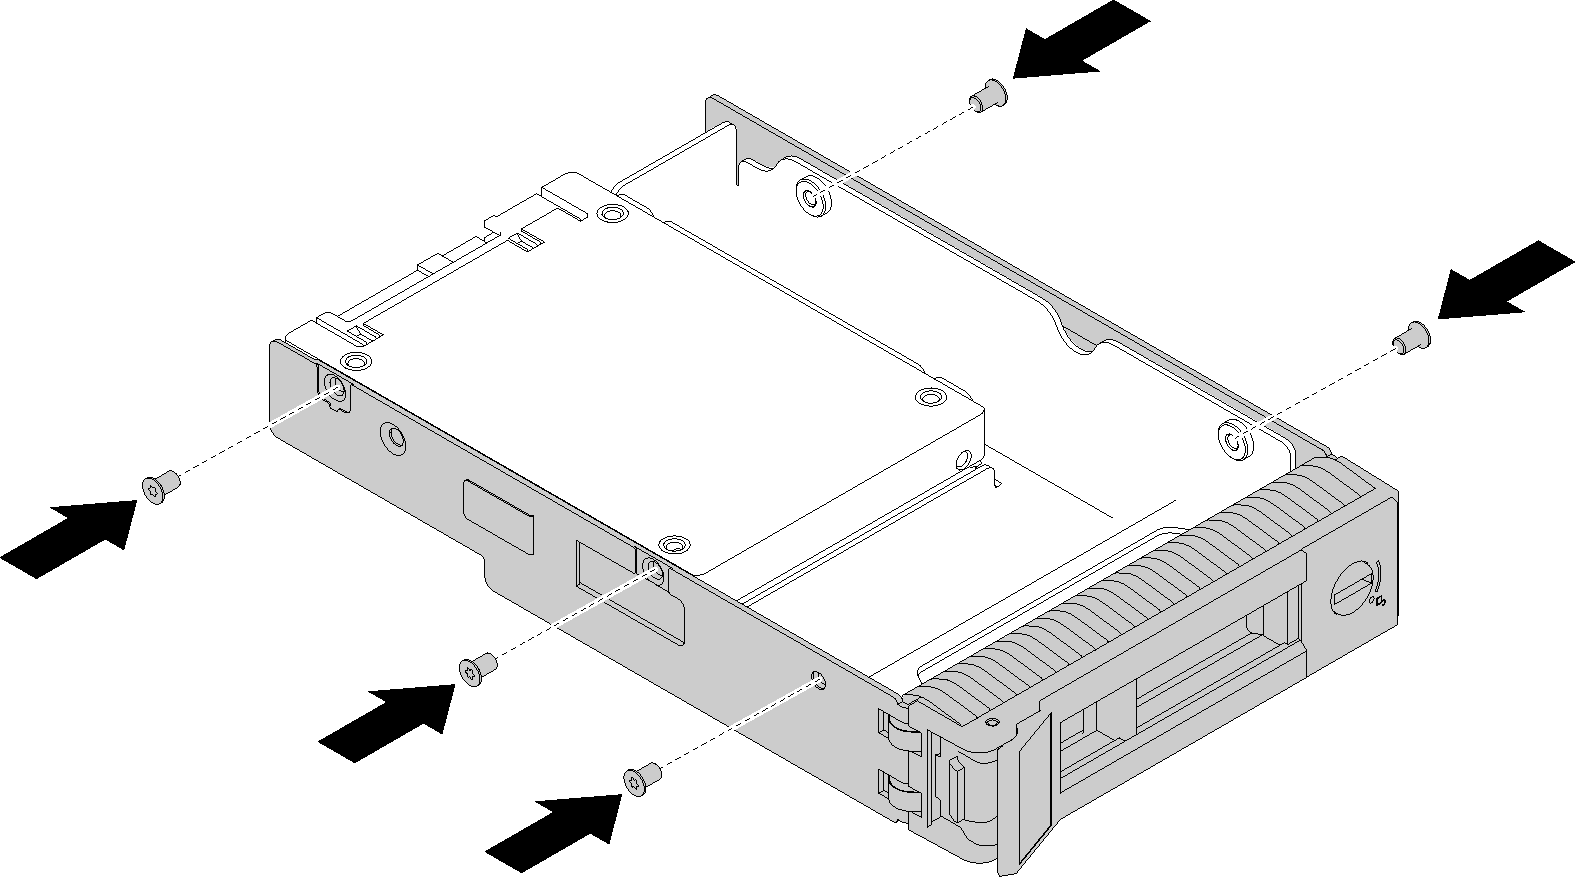
- Position the drive adapter with the SSD into the 3.5-inch drive tray. Align the screw holes in the drive adapter and the SSD with the corresponding holes in the tray; then, install the five screws to secure the drive adapter and the SSD into the tray.Figure 3. Screw installation to secure the drive adapter and the SSD to the drive tray
Demo video
Give documentation feedback