Install an optical drive

Use this information to install an optical drive.

Note
When a standalone optical drive is be installed, you will need to additionally purchase the ThinkSystem ST250 ODD/Tape Cable Kit option in order to install the drive.
S006
Laser hazard
CAUTION
When laser products (such as CD-ROMs, DVD drives, fiber optic devices, or transmitters) are installed, note the following:
  • Do not remove the covers. Removing the covers of the laser product could result in exposure to hazardous laser radiation. There are no serviceable parts inside the device.
  • Use of controls or adjustments or performance of procedures other than those specified herein might result in hazardous radiation exposure.
S007
Laser hazard
CAUTION
This product contains a Class 1M laser. Do not view directly with optical instruments.
S008
Laser hazard
DANGER
danger
Some laser products contain an embedded Class 3A or Class 3B laser diode. Note the following:

Laser radiation when open. Do not stare into the beam, do not view directly with optical instruments, and avoid direct exposure to the beam.

Before installing an optical drive:
  1. Follow these steps to install the optical drive and tape drive when the M.2 drive is present.
    1. When the M.2 drive is installed, ensure that SATA port 7 remains unconnected.

    2. Install the optical drive into the upper media bay, Bay 1.

    3. Install the backup drive (RDX or LTO tape) into the lower media bay, Bay 0.

    4. Connect the optical drive to SATA port 6.

    5. If an RDX drive is installed, connect the drive to the internal USB port adjacent to the M.2 drive using the cable that shipped with the RDX drive (see USB tape drive cable routing).

    6. If an LTO tape drive is installed, install a SAS HBA into an available PCIe slot, and connect the drive to the adapter with the cable that is shipped with the LTO tape drive (see SAS tape drive cable routing).

  2. Touch the static-protective package that contains the new optical drive to any unpainted surface on the outside of the server; then, , take the new optical drive out of the package and place it on a static-protective surface.

To install an optical drive, complete the following steps:

  1. Remove the front door (see Remove the front door).
  2. Remove the front bezel (see Remove the front bezel).
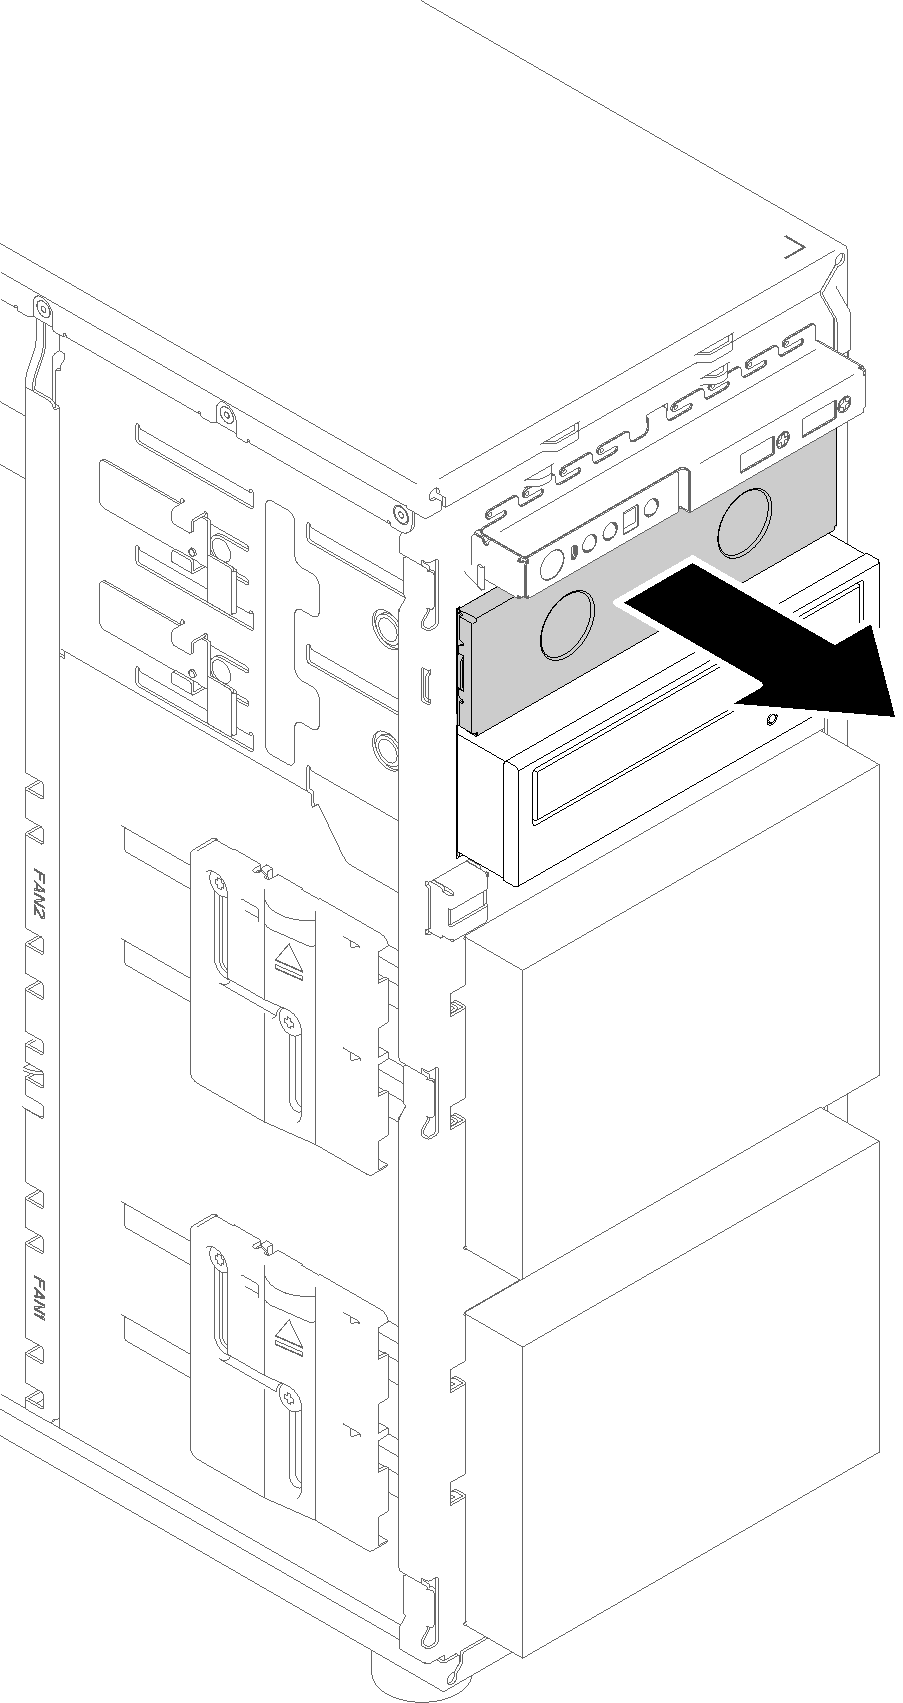
  3. If necessary, press the tabs on the side of the plastic bay filler of the optical drive bay and push the plastic bay filler as shown to remove it.
    Figure 1. Plastic bay filler removal in the optical drive bay
    plastic bay filler removal in the secondary optical drive bay
  4. If necessary, insert two of your fingers into the holes in the EMI shield and carefully pull the EMI shield out of the chassis.
    Figure 2. EMI shield removal in optical drive bay
    EMI shield removal in optical drive bay
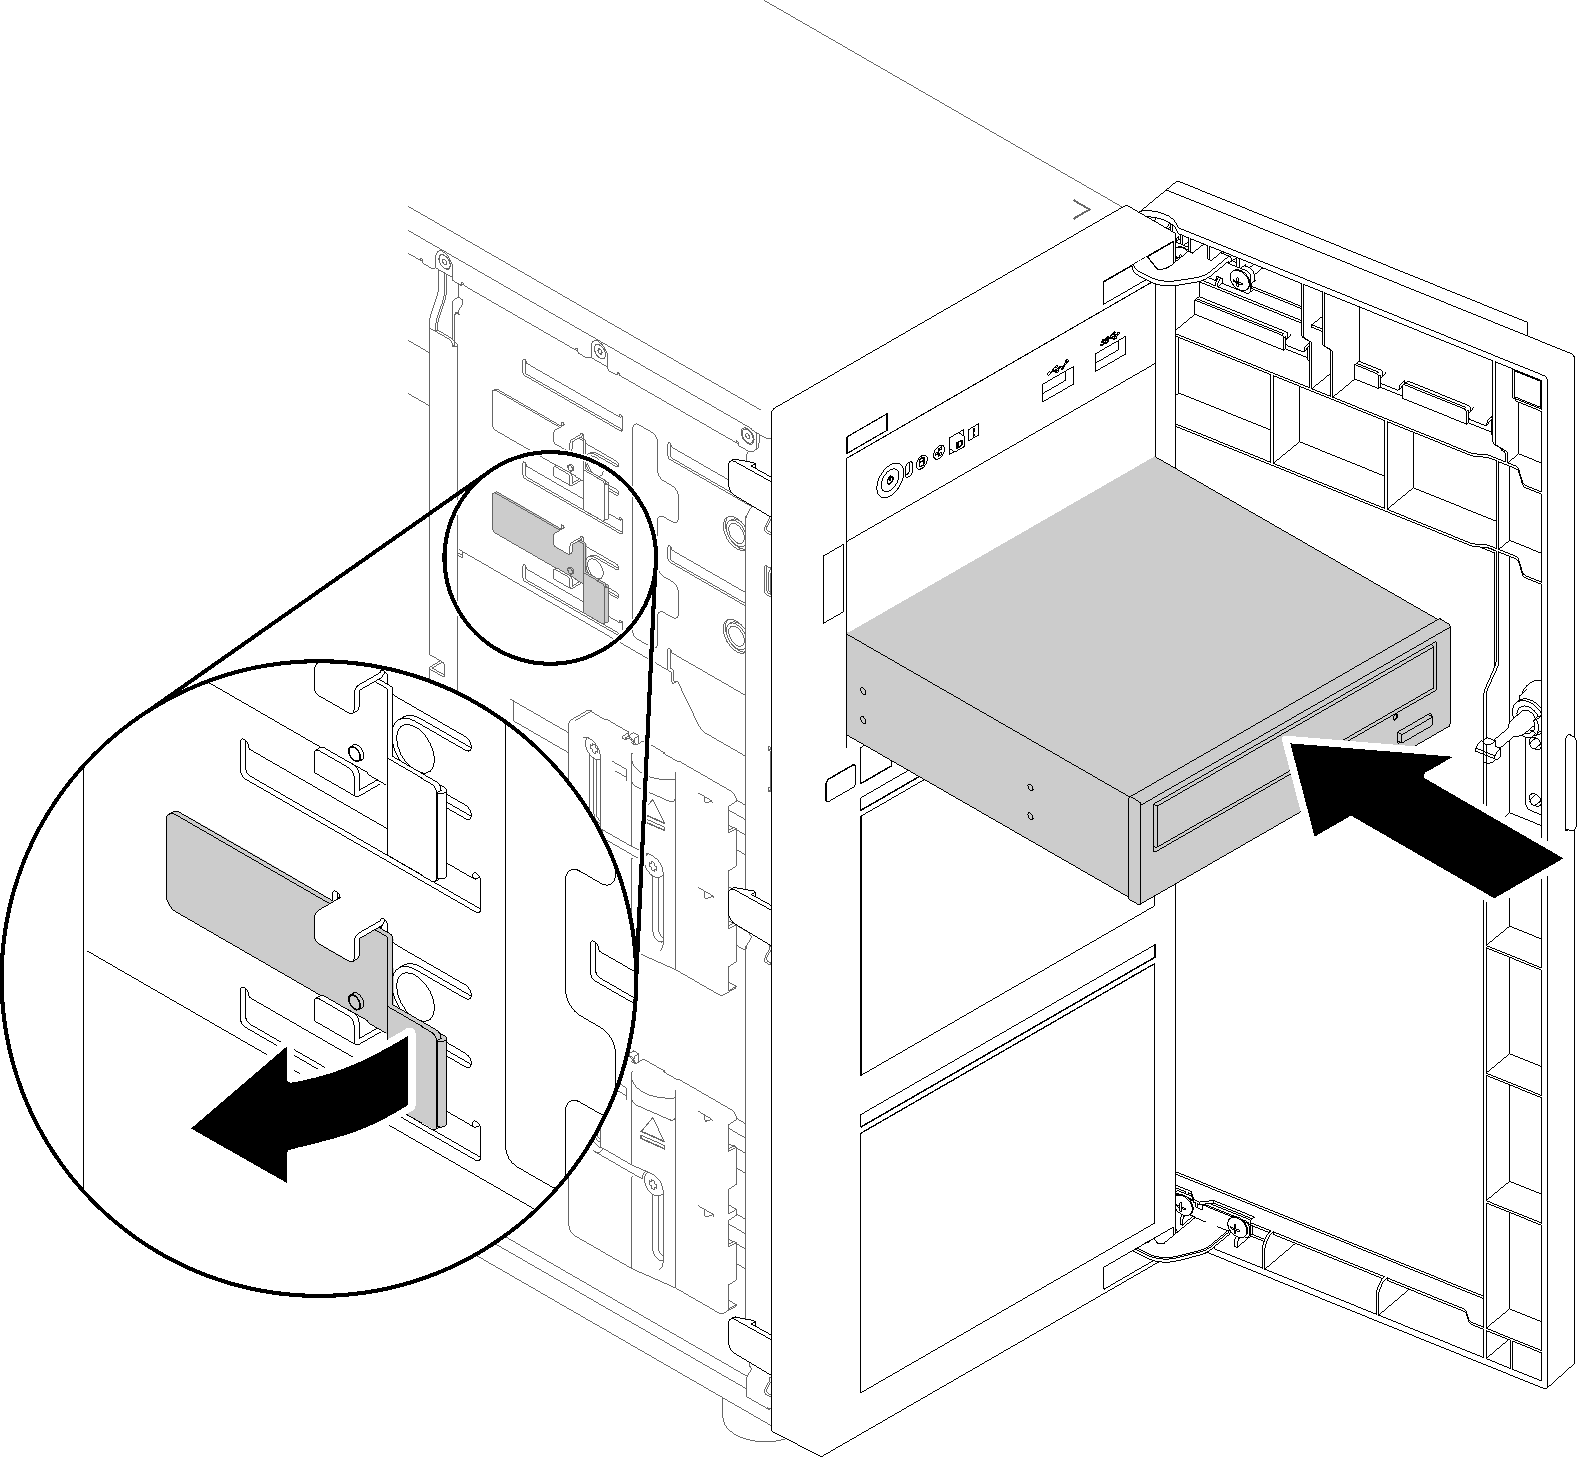
  5. Insert the optical drive into the optical drive bay and slide it in until it is obstructed.
  6. Gently pull the metal tab on the slide of the chassis and slide the optical drive slightly. Release the tab and keep sliding the optical drive until it snaps into position.
    Figure 3. Optical drive installation
    Optical drive installation
  7. Connect the power cable and the signal cable to the rear of the optical drive. See Cable routing: optical drive.
  8. Save the removed EMI-protective shield from the chassis and the plastic bay filler from the front bezel in case you later remove the drive and need the shields to cover the drive bay.