Install a tape drive
Use this information to install a tape drive.


- Follow these steps to install the optical drive and tape drive when the M.2 drive is present.
When the M.2 drive is installed, ensure that SATA port 7 remains unconnected.
Install the optical drive into the upper media bay, Bay 1.
Install the backup drive (RDX or LTO tape) into the lower media bay, Bay 0.
Connect the optical drive to SATA port 6.
If an RDX drive is installed, connect the drive to the internal USB port adjacent to the M.2 drive using the cable that shipped with the RDX drive (see USB tape drive cable routing).
If an LTO tape drive is installed, install a SAS HBA into an available PCIe slot, and connect the drive to the adapter with the cable that is shipped with the LTO tape drive (see SAS tape drive cable routing).
Touch the static-protective package that contains the new tape drive to any unpainted surface on the outside of the server; then, take the tape drive out of the package and place it on a static-protective surface.
To install a tape drive, complete the following steps:
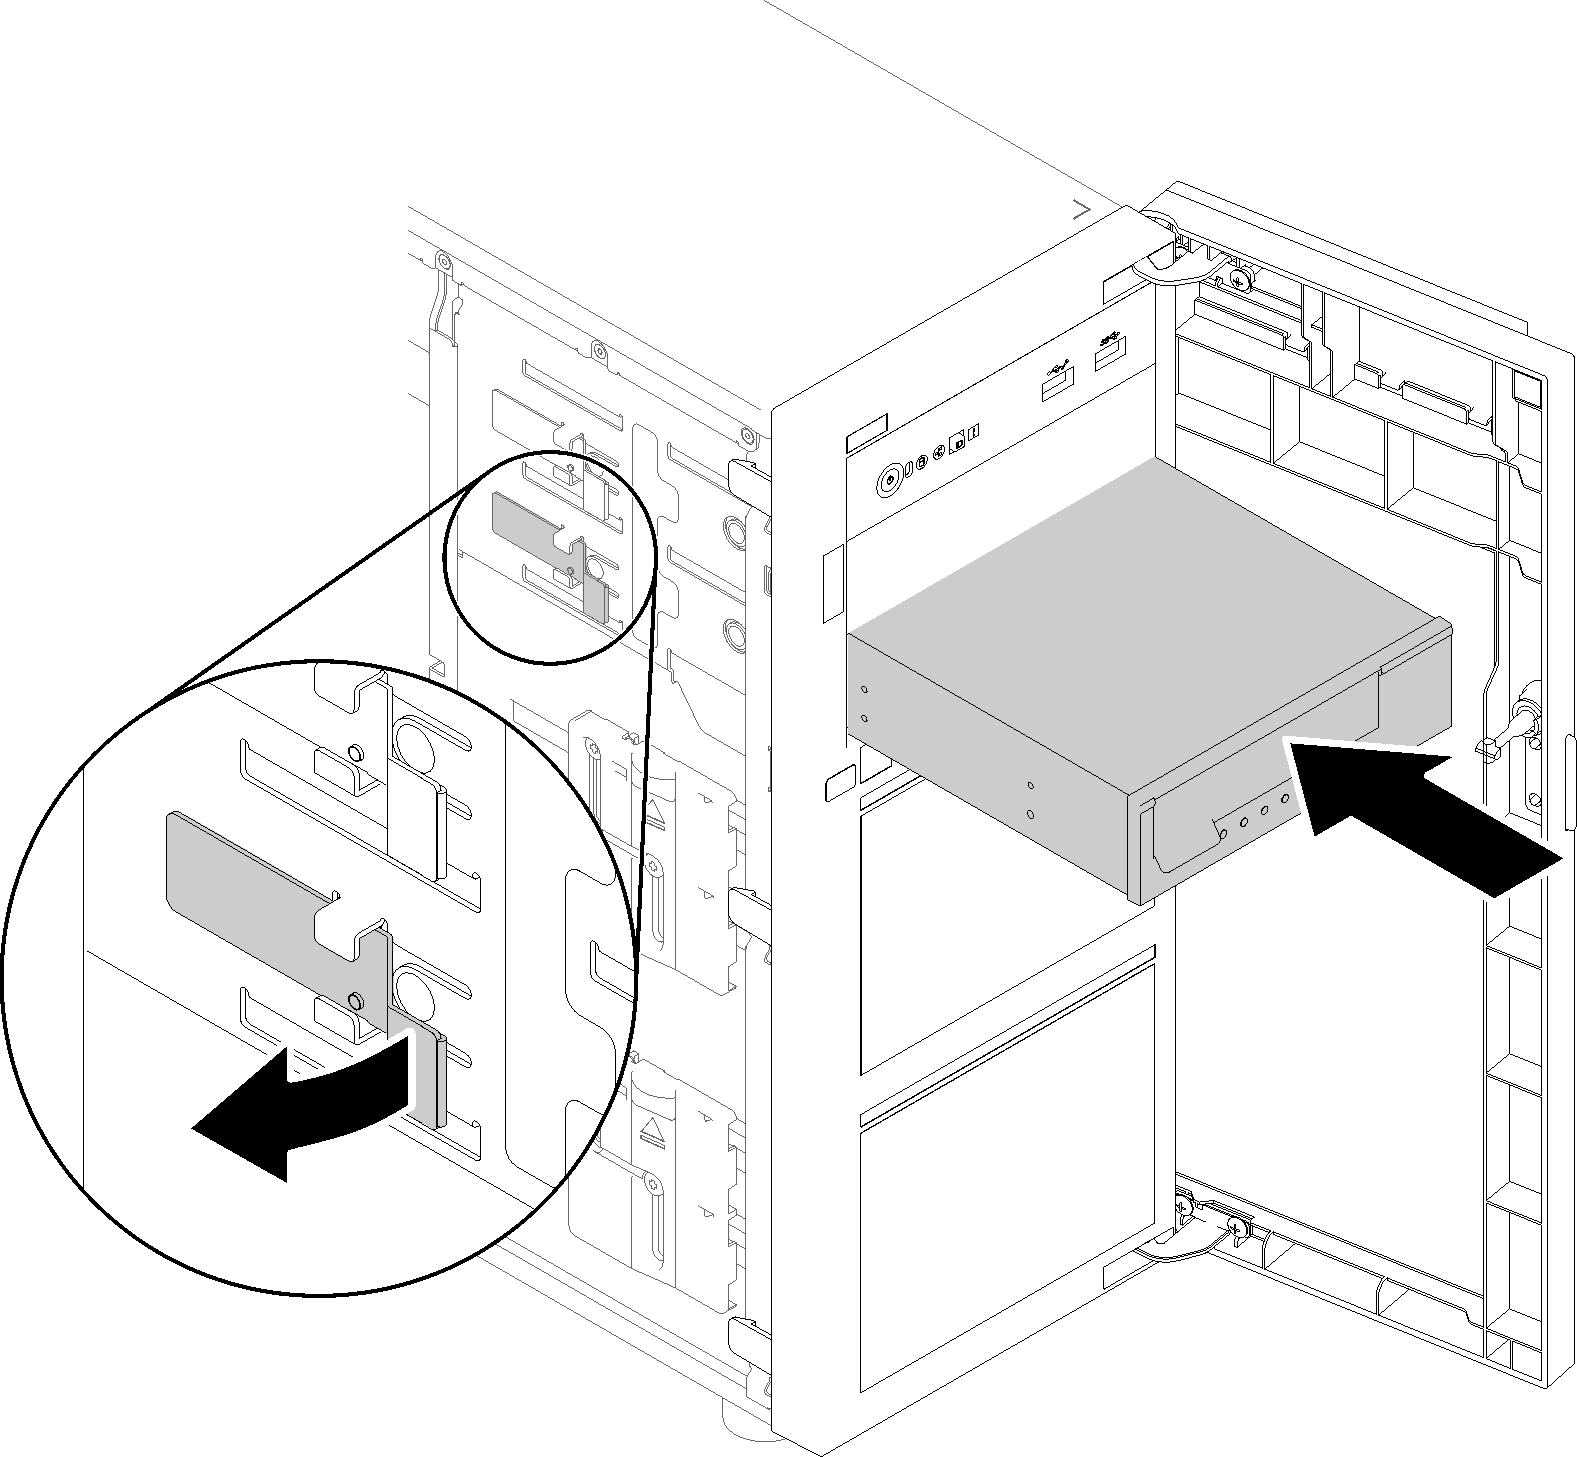
- Insert the tape drive into the lower drive bay and slide it in until it is obstructed. Gently pull the metal tab on the side of the chassis, and then continue to slide the tape drive in until it snaps into position.Figure 1. Tape drive installation
Demo video