Installing a simple-swap fan
Use this information to install a simple-swap fan in the server.
The server comes with two 120 mm x 38 mm simple-swap fans in the fan cage assembly. The following instructions can be used to install any simple-swap fan in the server.
Note
- When you install the second microprocessor, you must also install fan 2 and the air baffle that come with the second microprocessor upgrade kit. The fan filler can only be removed when fan 2 is installed. Otherwise, the fan filler must be installed for proper cooling.Figure 1. The available fan sockets in the server
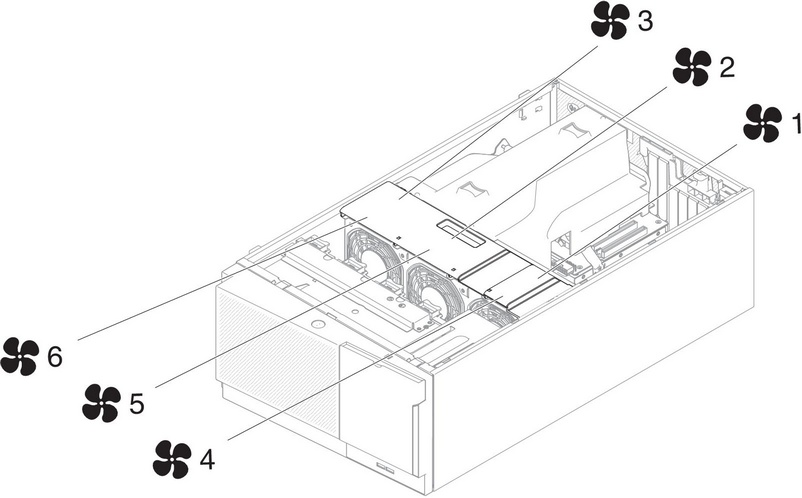
- You can order the three additional fans for redundant cooling.
Read the safety information in Safety and Installation guidelines.
Attention
Static electricity that is released to internal server components when the server is powered-on might cause the server to halt, which might result in the loss of data. To avoid this potential problem, always use an electrostatic-discharge wrist strap or other grounding system when you work inside the server with the power on.
If you are replacing a server component in the server, you need to turn off the server and peripheral devices, and disconnect the power cords and all external cables.
To install a simple-swap fan, complete the following steps.
- Perform the following steps only if you want to install the simple swap fan in the Fan 2 compartment:
- Press and release the clip on the fan filler to remove the fan filler from the server.Figure 2. Fan filler removal
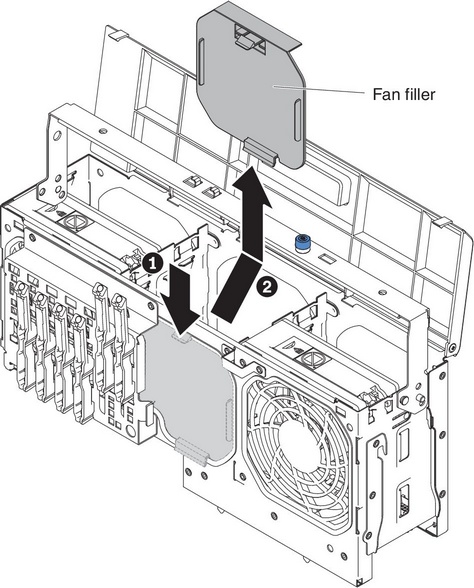
- Press and release the clip on the fan filler to remove the fan filler from the server.
- Insert the fan into the socket and close the handle to the locked position.Figure 3. Insert fan into the socket

If you have replaced a server component or installed an optional device in the server, you need to reconnect the power cords and all external cables, and turn on the server and peripheral devices.
Give documentation feedback