Use the information to remove the USB cable assembly.
Read the safety information in Safety and Installation guidelines.
If you are replacing a server component in the server, you need to turn off the server and peripheral devices, and disconnect the power cords and all external cables.
To remove the USB cable assembly from the server, complete the following steps.
- Carefully lay the server down on its side.
- Unlock and remove the left-side cover (see Removing the left-side cover).
- Remove the air baffle (see Removing the air baffle).
- Remove the fan cage assembly (see Removing the fan cage assembly).
- Disconnect the USB assembly cable from the system board (see System-board internal connectors and Internal cable routing and connectors).
- Stand the server back up in its vertical position.
- Open the bezel by pressing the button on the left edge of the bezel, and rotate the left side of the bezel away from the server.
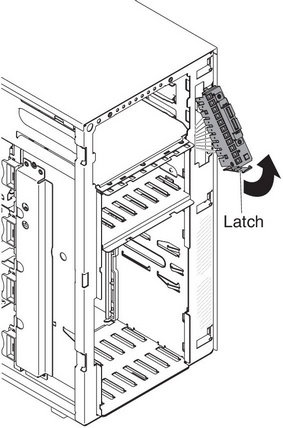
- Press down on the release latch on the bottom of the USB cable and light path diagnostics assembly bracket; then, rotate the top of the mounting bracket away from the server.
Figure 1. Release latch
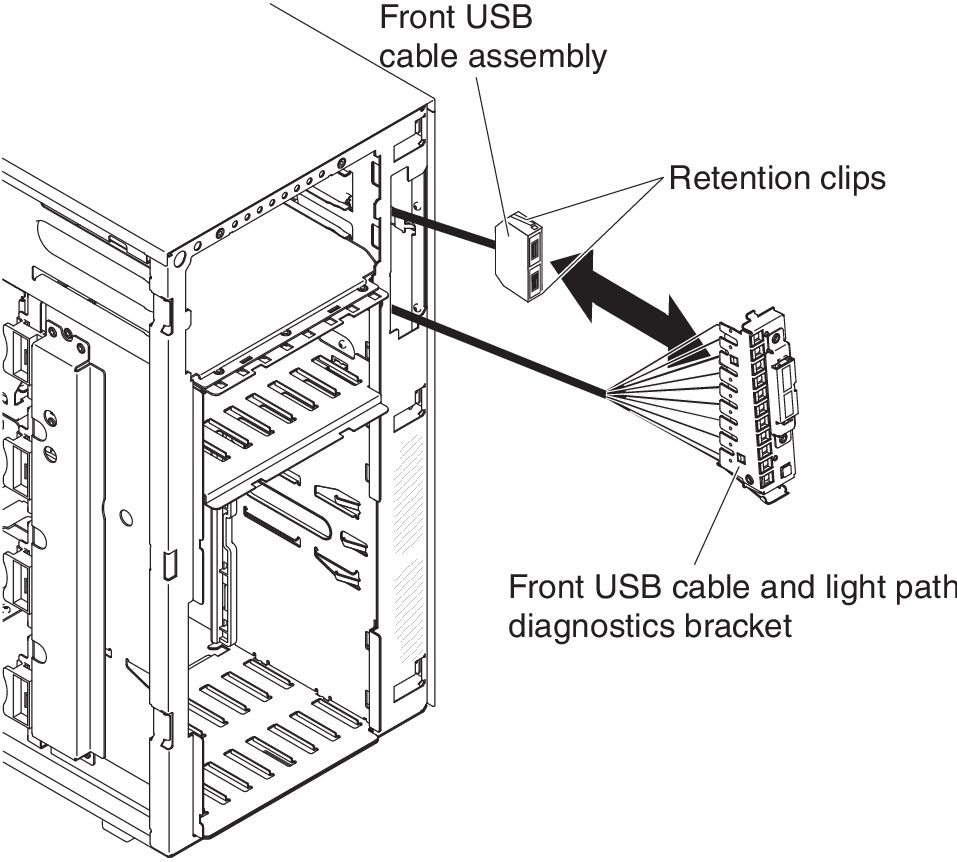
- Squeeze the retaining clips on each side of the USB cable connectors and pull the USB cable away from the mounting bracket.
Figure 2. Squeeze retaining clips
If you are instructed to return the server component or optional device, follow all packaging instructions, and use any packaging materials for shipping that are supplied to you.

