Installing the left-side cover/power cut-off switch assembly
Use this information to install the left-side cover/power cut-off switch assembly.
Read the safety information in Safety and Installation guidelines.
If you are replacing a server component in the server, you need to turn off the server and peripheral devices, and disconnect the power cords and all external cables.
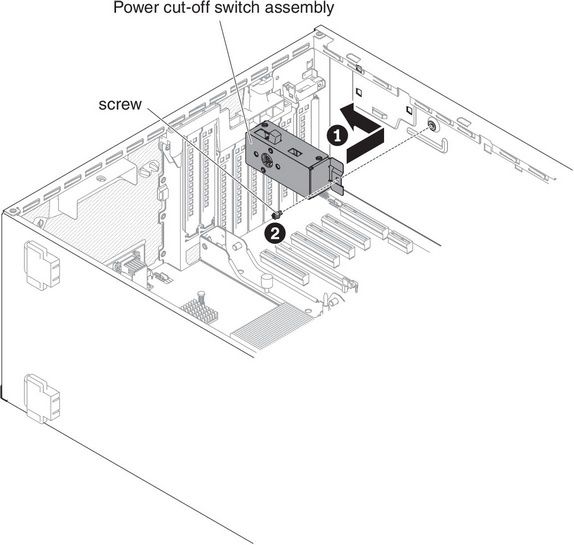
To install the left-side cover/power cut-off switch assembly, complete the following steps.
- Align the power cut-off switch assembly with the hole on the chassis wall and push the assembly toward the rear of the server.Figure 1. Align the power cut-off switch assembly
If you have replaced a server component or installed an optional device in the server, you need to reconnect the power cords and all external cables, and turn on the server and peripheral devices.
Give documentation feedback