Use this information to install the 3.5-inch hard disk drive backplate assembly.
Read the safety information in Safety and Installation guidelines.
If you are replacing a server component in the server, you need to turn off the server and peripheral devices, and disconnect the power cords and all external cables.
To install a 3.5-inch hard disk drive backplate assembly, complete the following steps.
- Unlock and remove the left-side cover (see Removing the left-side cover).
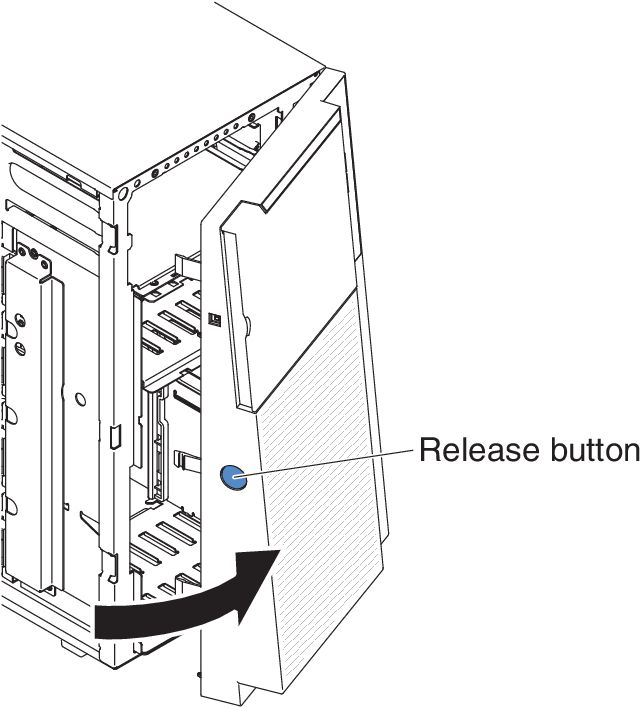
- Open the bezel by pressing the button on the left edge of the bezel, and rotate the left side of the bezel away from the server.
Figure 1. Open bezel
- Remove the air baffle (see Removing the air baffle).
- Remove the fan cage assembly (see Removing the fan cage assembly).
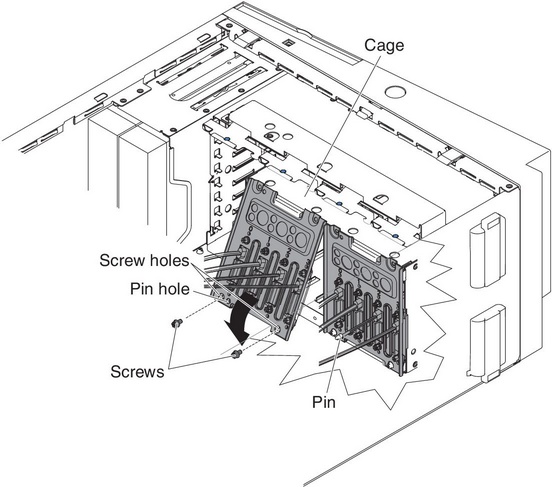
- Insert the bottom tabs of the 3.5-inch hard disk drive backplate assembly onto the lower lip of the drive cage.
Figure 2. Insert bottom tabs of the 3.5-inch HDD backplate assembly
- Rotate the backplate assembly toward the drive cage until the guide pins on the drive cage insert securely to the holes on the backplate assembly.
- Fasten the screws on the backplate assembly.
- Reconnect the power, configuration, and signal cables to the 3.5-inch hard disk drive backplate assembly (see Internal cable routing and connectors).
- Install the 3.5-inch simple-swap hard disk drives that were removed from the hard disk drive cage (see Installing a 3.5-inch simple-swap hard disk drive).
- Install the fan cage assembly (see Installing the fan cage assembly).
- Install the air baffle (see Installing the air baffle).
- Close the bezel.
- Install and lock the left-side cover (see Installing the left-side cover).
If you have replaced a server component or installed an optional device in the server, you need to reconnect the power cords and all external cables, and turn on the server and peripheral devices.

