Installing a SAS/SATA 8 Pac HDD option
Use this information to install a SAS/SATA 8 Pac HDD option.
You can install an Lenovo System x3500 M4 Hot-swap SAS/SATA 8 Pac HDD option to add eight additional 2.5-inch hot-swap hard disk drives in the server. See the Lenovo ServerProven website for a list of supported optional devices. To order a SAS/SATA 8 Pac HDD option, contact your Lenovo sales representative or Lenovo reseller.
Note
The 8 pac HDD option including structural parts and Tier 1 parts.
Read the safety information in Safety and Installation guidelines.
If you are replacing a server component in the server, you need to turn off the server and peripheral devices, and disconnect the power cords and all external cables.
To install a SAS/SATA 8 Pac HDD option, complete the following steps.
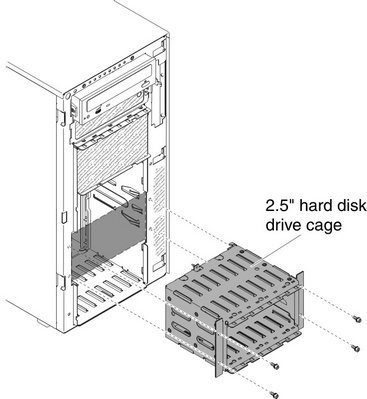
- Install the 2.5-inch hard disk drive cage if necessary.
- Align the 2.5-inch hard disk drive cage with the chassis to the area highlighted in grey as follows and install it in the server.NoteIf you are upgrading the hard disk drive bays from 16 to 24 and the 2.5-inch hard disk drive cage is already installed, keep the new 2.5-inch hard disk drive cage comes with the option in a safe place for potential future use.Figure 1. Align the 2.5-inch HD cage with chassis
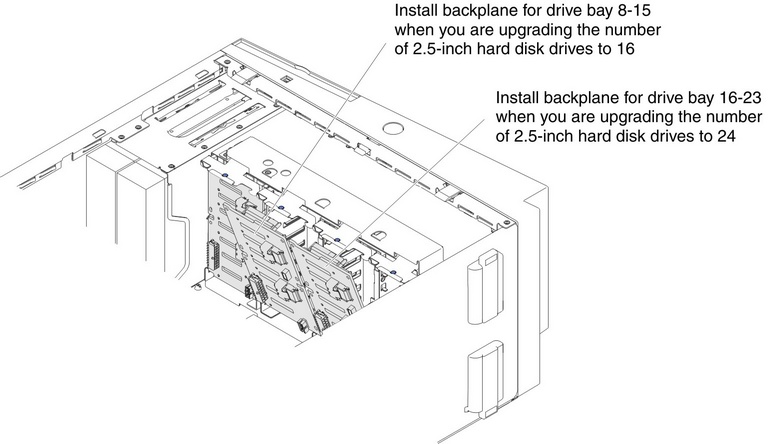
 NoteThe cage for the hard disk drive is installed only when you need to install more than eight hard disk drives. The cage is installed in the bays where the hard disk drive 16-23 will be installed.Figure 2. Install cage in drive bay 16-23
- Align the 2.5-inch hard disk drive cage with the chassis to the area highlighted in grey as follows and install it in the server.
- Install the 2.5-inch hot-swap hard disk drive backplane (see Installing the 2.5-inch hard disk drive backplane).Figure 3. Install backplane for bay 8-15 and 16-23
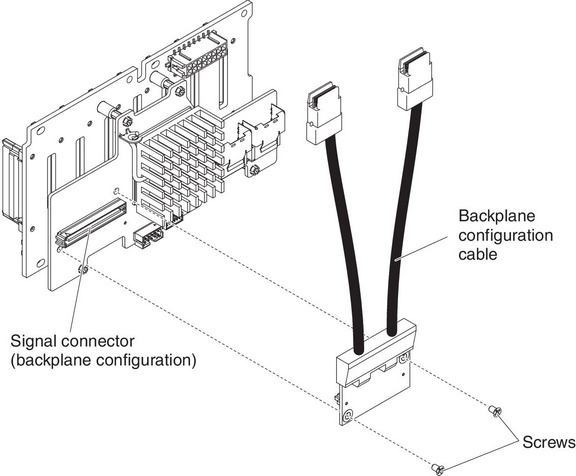
- Connect the backplane configuration cable, power cable, signal cable, and the configuration cable (see Internal cable routing and connectors).NoteYou may need to install the two screws on the backplane configuration cable.Figure 4. Put screws on the backplane
If you have replaced a server component or installed an optional device in the server, you need to reconnect the power cords and all external cables, and turn on the server and peripheral devices.
Give documentation feedback