Use this information to install a PCI riser-card assembly.
To install a PCI riser-card assembly, complete the following steps:
Figure 1. Installing a PCI riser-card assembly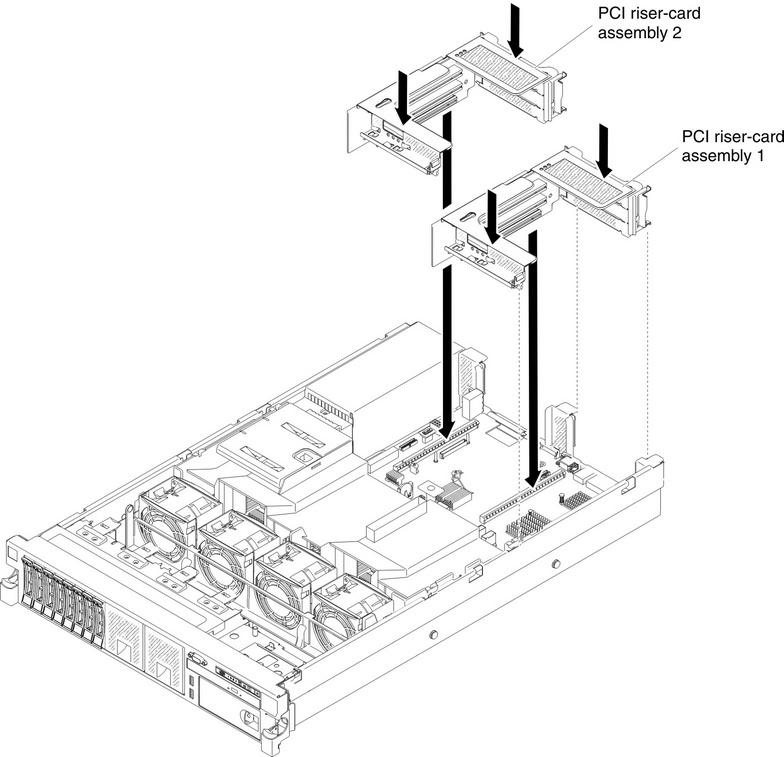
- Read the safety information that begins on page Safety and Installation guidelines.
- Make sure that the server and all peripheral devices are turned off and that the power cords and all external cables are disconnected.
- Reinstall any adapters and reconnect any internal cables that you removed in other procedures.
- Align the PCI riser-card assembly with the selected PCI riser-card connector on the system board:
- PCI riser-card connector 1: Carefully fit the two alignment slots on the side of the assembly onto the two alignment brackets in the side of the chassis.
- PCI riser-card connector 2: Carefully align the bottom edge (the contact edge) of the riser-card assembly with the PCI riser-card connector on the system board.
- Press down on the assembly. Make sure that the riser-card assembly is fully seated in the riser-card connector on the system board.