Install the flash power module
Use this information to install the flash power module.
Before you install the flash power module, complete the following steps:
Read Installation Guidelines to ensure that you work safely.
- Carefully lay the compute node on a flat, static-protective surface, orienting the compute node with the bezel pointing toward you.
Note
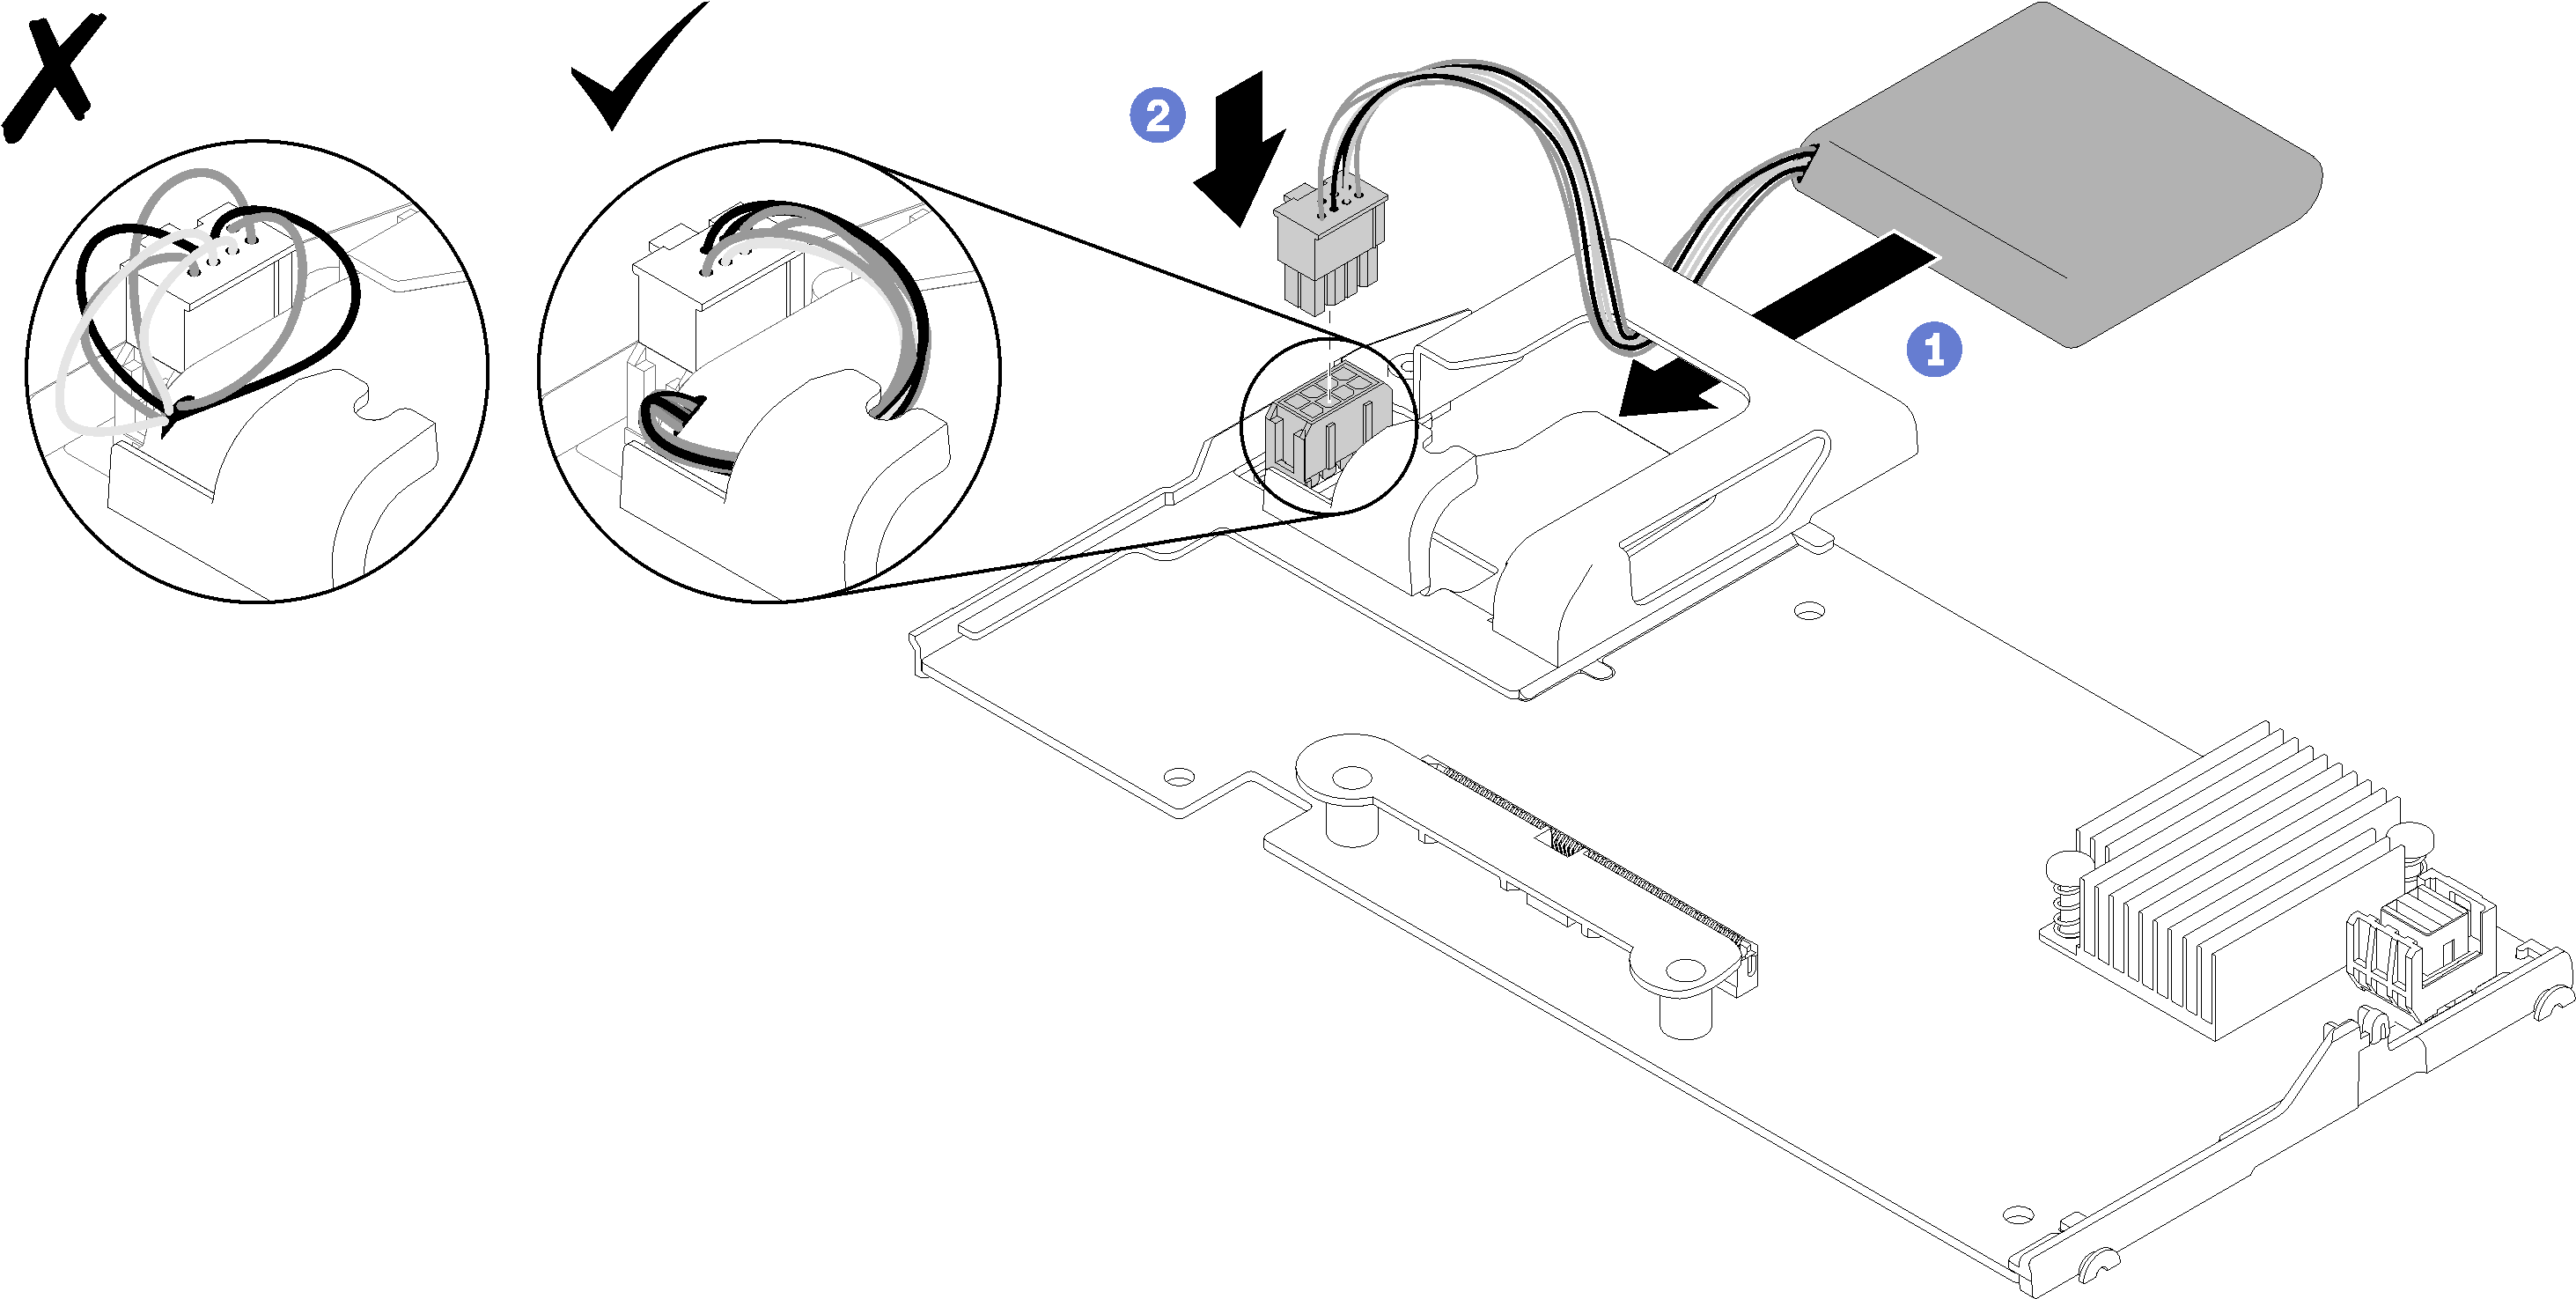
This section only applies to RAID adapters that come with a flash power module.
To install the flash power module, complete the following steps:
Figure 1. Flash power module installation
After you install the flash power module, complete the following steps:
Install the RAID adapter in the compute node. (see Install a RAID adapter).
Install the compute node cover (see Install the compute node cover ).
Install the compute node into the chassis (see Install the compute node in the chassis ).
Demo video
Give documentation feedback