Install a 2.5-inch hot-swap drive
Use this information to install a 2.5-inch hot-swap drive option.
Before you install a 2.5-inch hot-swap drive, complete the following steps:
Read Installation Guidelines to ensure that you work safely.
- Carefully lay the compute node on a flat, static-protective surface, orienting the compute node with the bezel pointing toward you.
The compute node has two 2.5-inch drive bays for installing hot-swap drives. One drive might already be installed in the compute node. If the compute node is equipped with one drive, you can install an additional drive. RAID level-0 (striping) can be configured on a compute node with a single drive installed. A minimum of two disk drives of the same interface type must be installed to implement and manage RAID level-1 (mirroring) arrays. See the Lenovo ThinkSystem SN550 Type 7X16 Setup Guide for more information.
To install a 2.5-inch hot-swap drive, complete the following steps:
Figure 1. 2.5-inch hot-swap drive installation
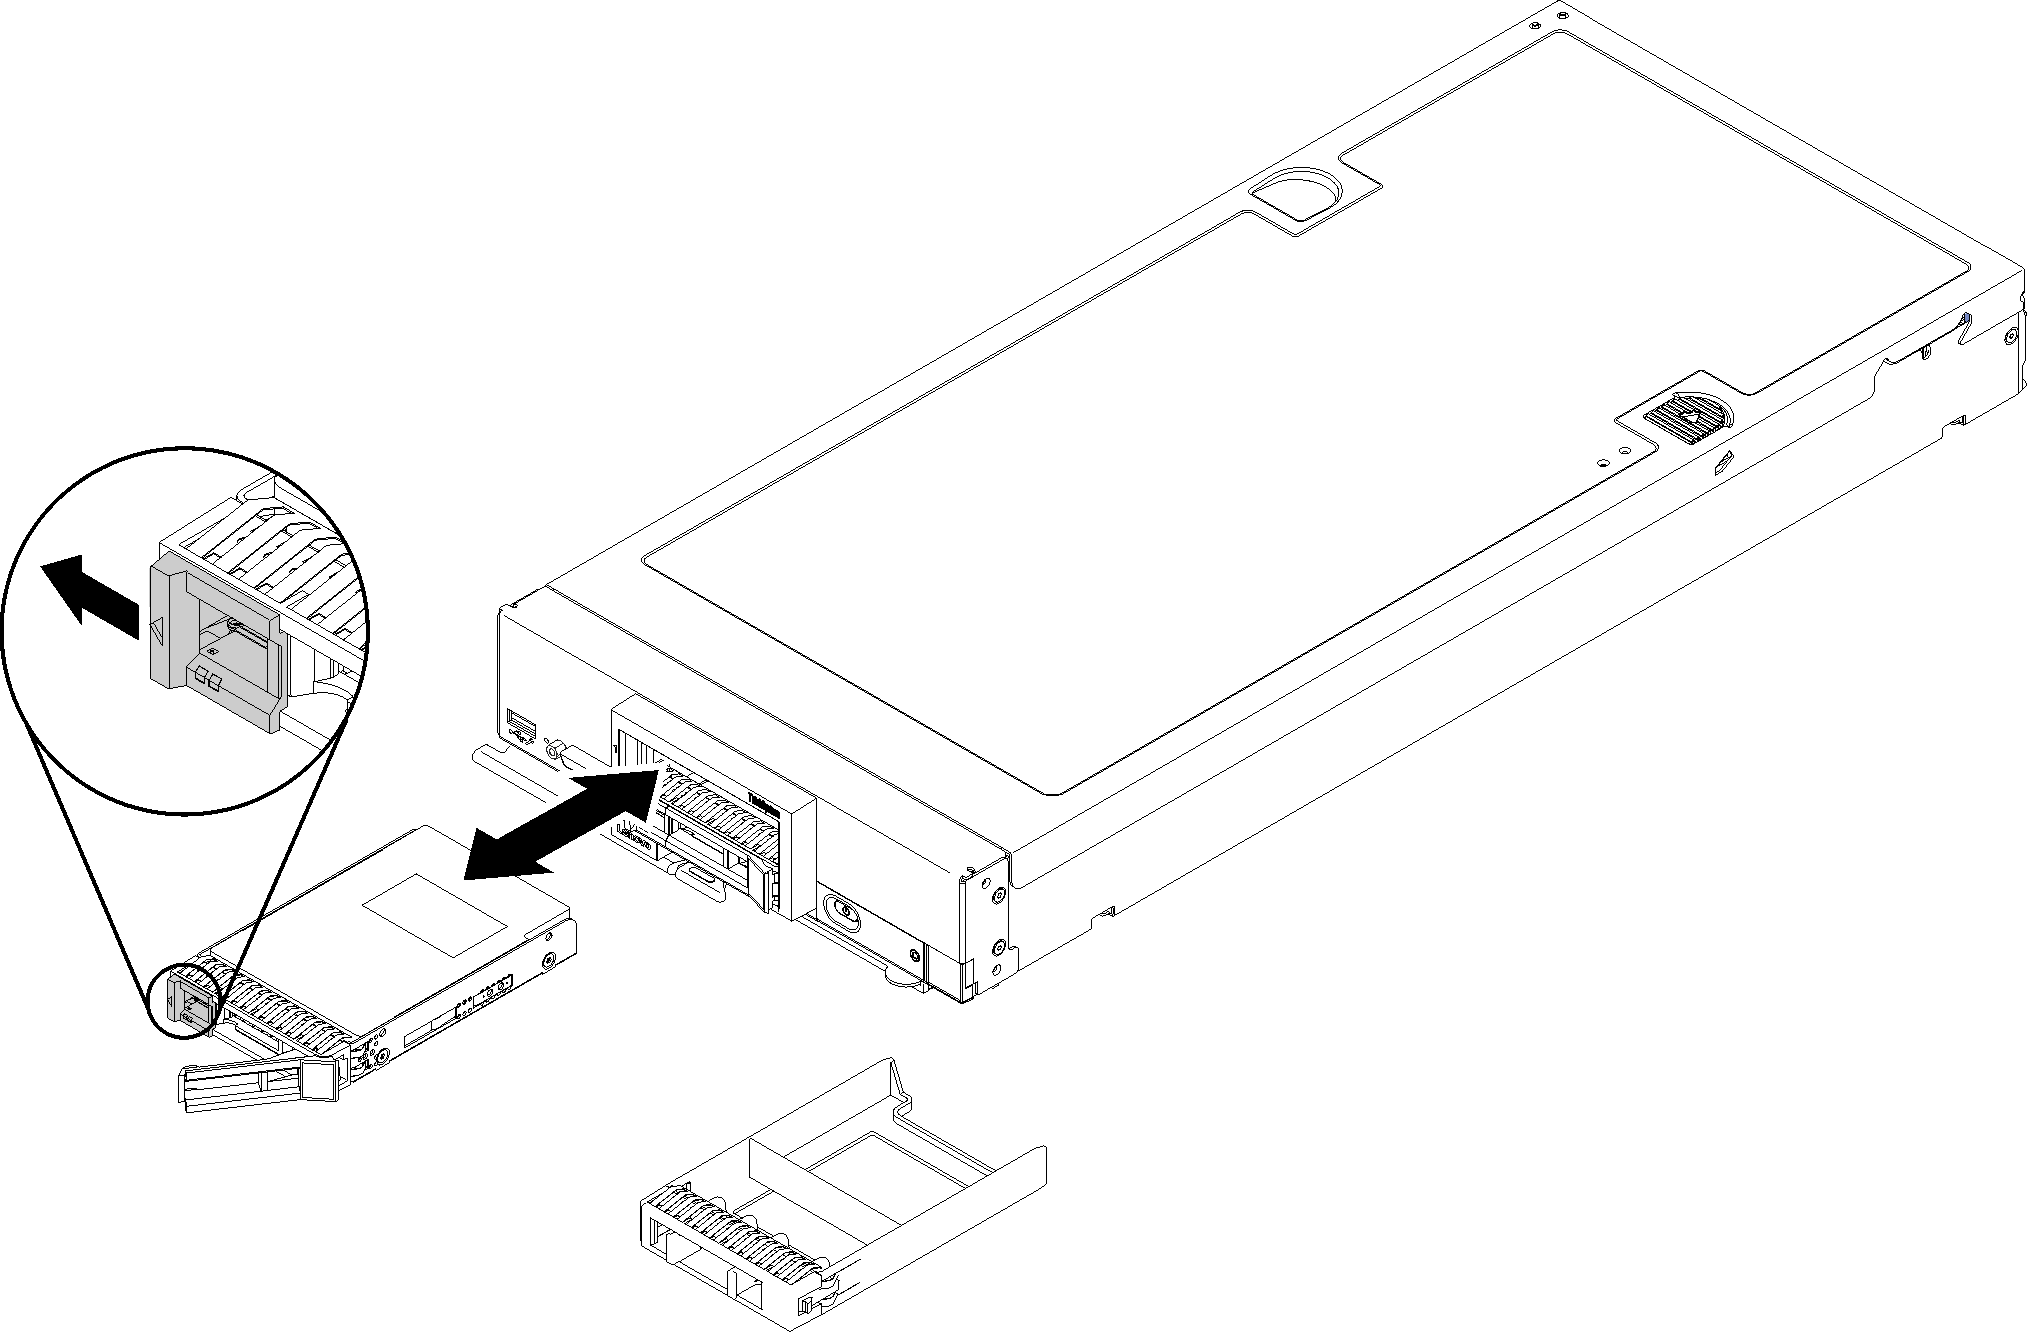
- Identify the drive bay in which you plan to install the hot-swap drive.
- If a drive bay filler is installed, remove it from the compute node by pulling the release lever and sliding the filler away from the compute node.
- Touch the static-protective package that contains the hot-swap drive to any unpainted metal surface on the Lenovo Flex System chassis or any unpainted metal surface on any other grounded rack component; then, remove the drive from the package.
- Open the release lever on the hot-swap drive and slide the drive into the bay until the lever catches on the bezel, then rotate the handle to fully seat the drive.
- Lock the drive into place by closing the release lever.
- Check the drive status LEDs to make sure that the drive is operating correctly.
Demo video
Give documentation feedback