Use this information to install the rear hot-swap drive assembly.
Before installing the rear hot-swap drive assembly, touch the static-protective package that contains the new rear hot-swap drive assembly to any unpainted surface on the outside of the server. Then, take the new rear hot-swap drive assembly out of the package and place it on a static-protective surface.
To install the rear hot-swap drive assembly, complete the following steps:
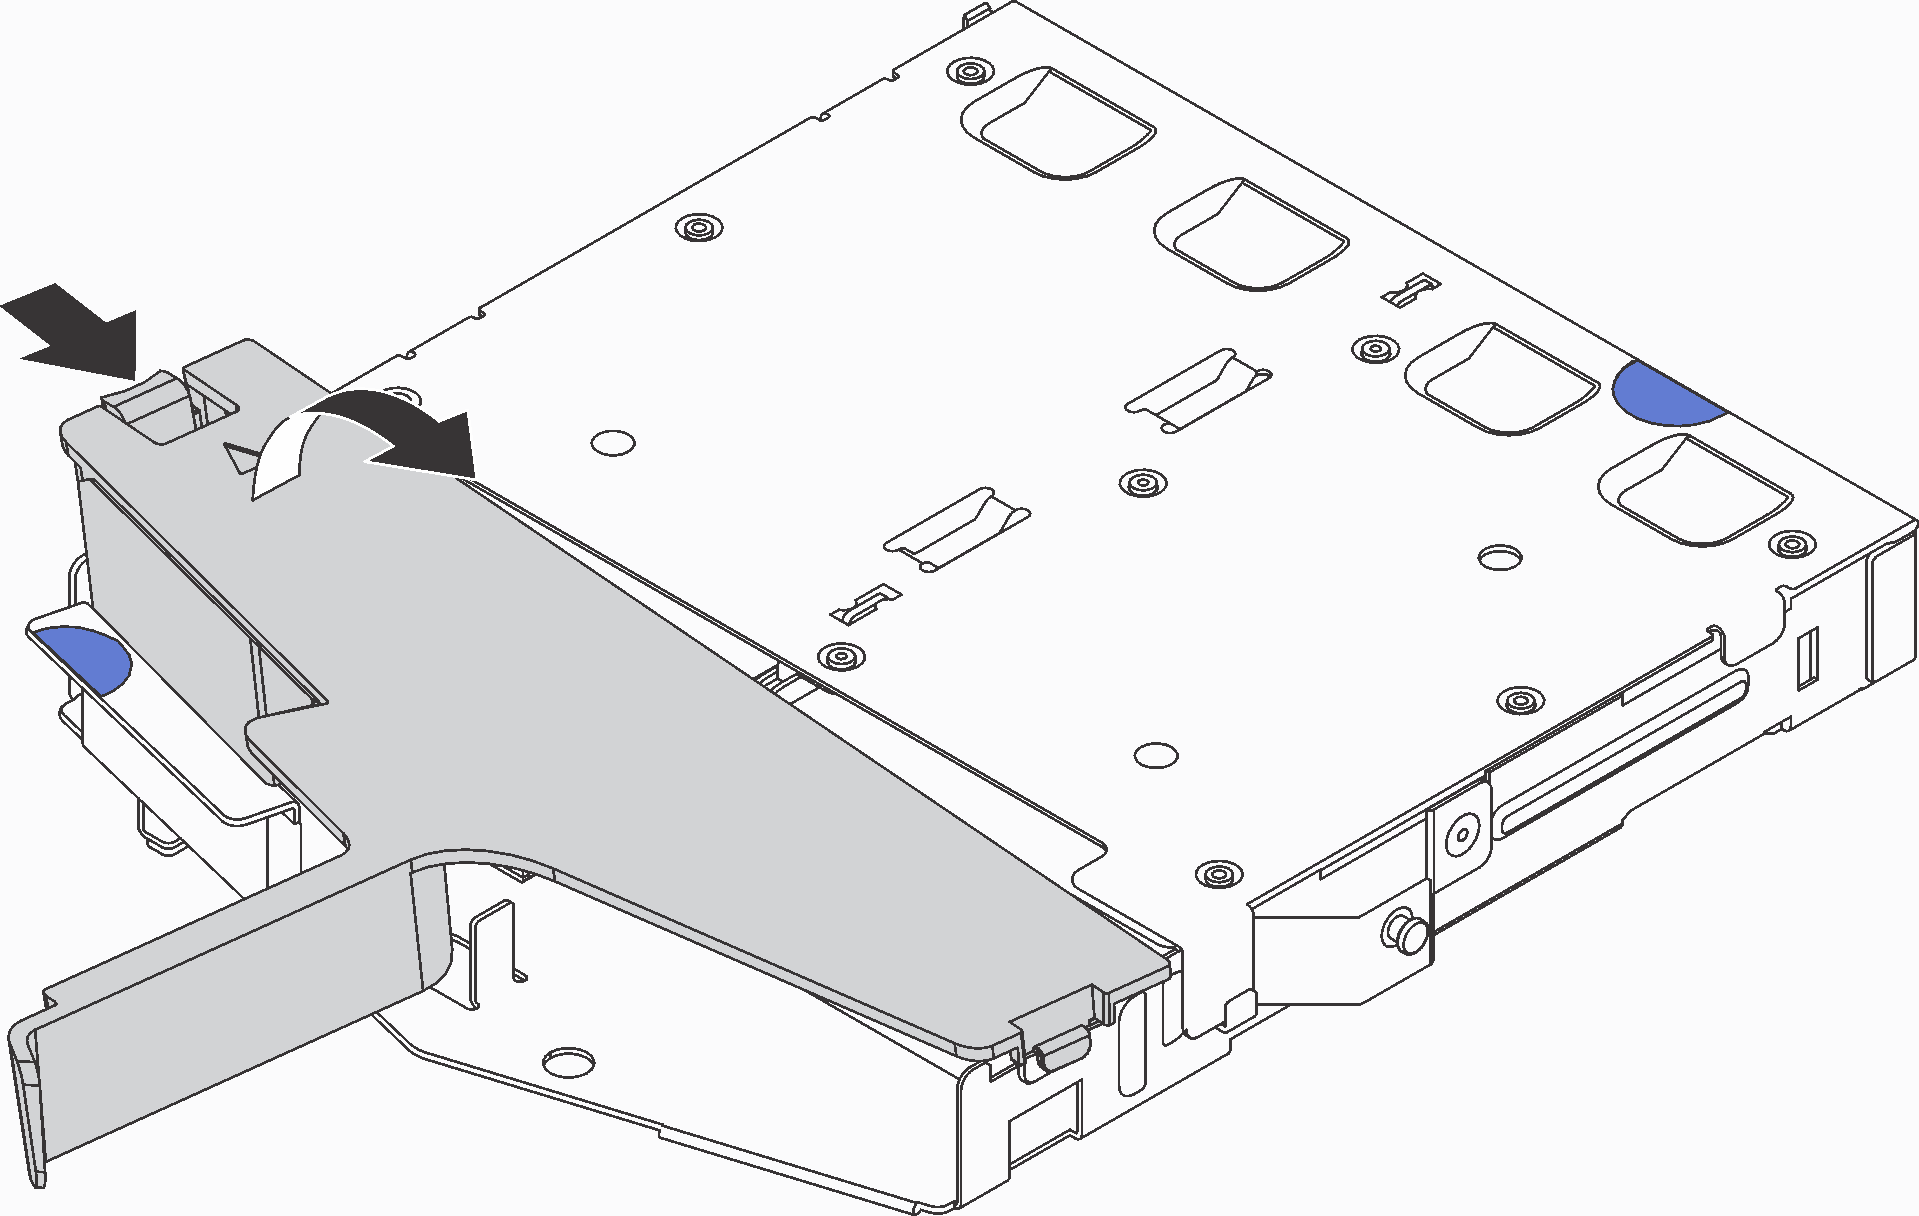
- Gently press and hold the tab on the rear hot-swap drive assembly as shown and remove the air baffle from the rear hot-swap drive assembly.
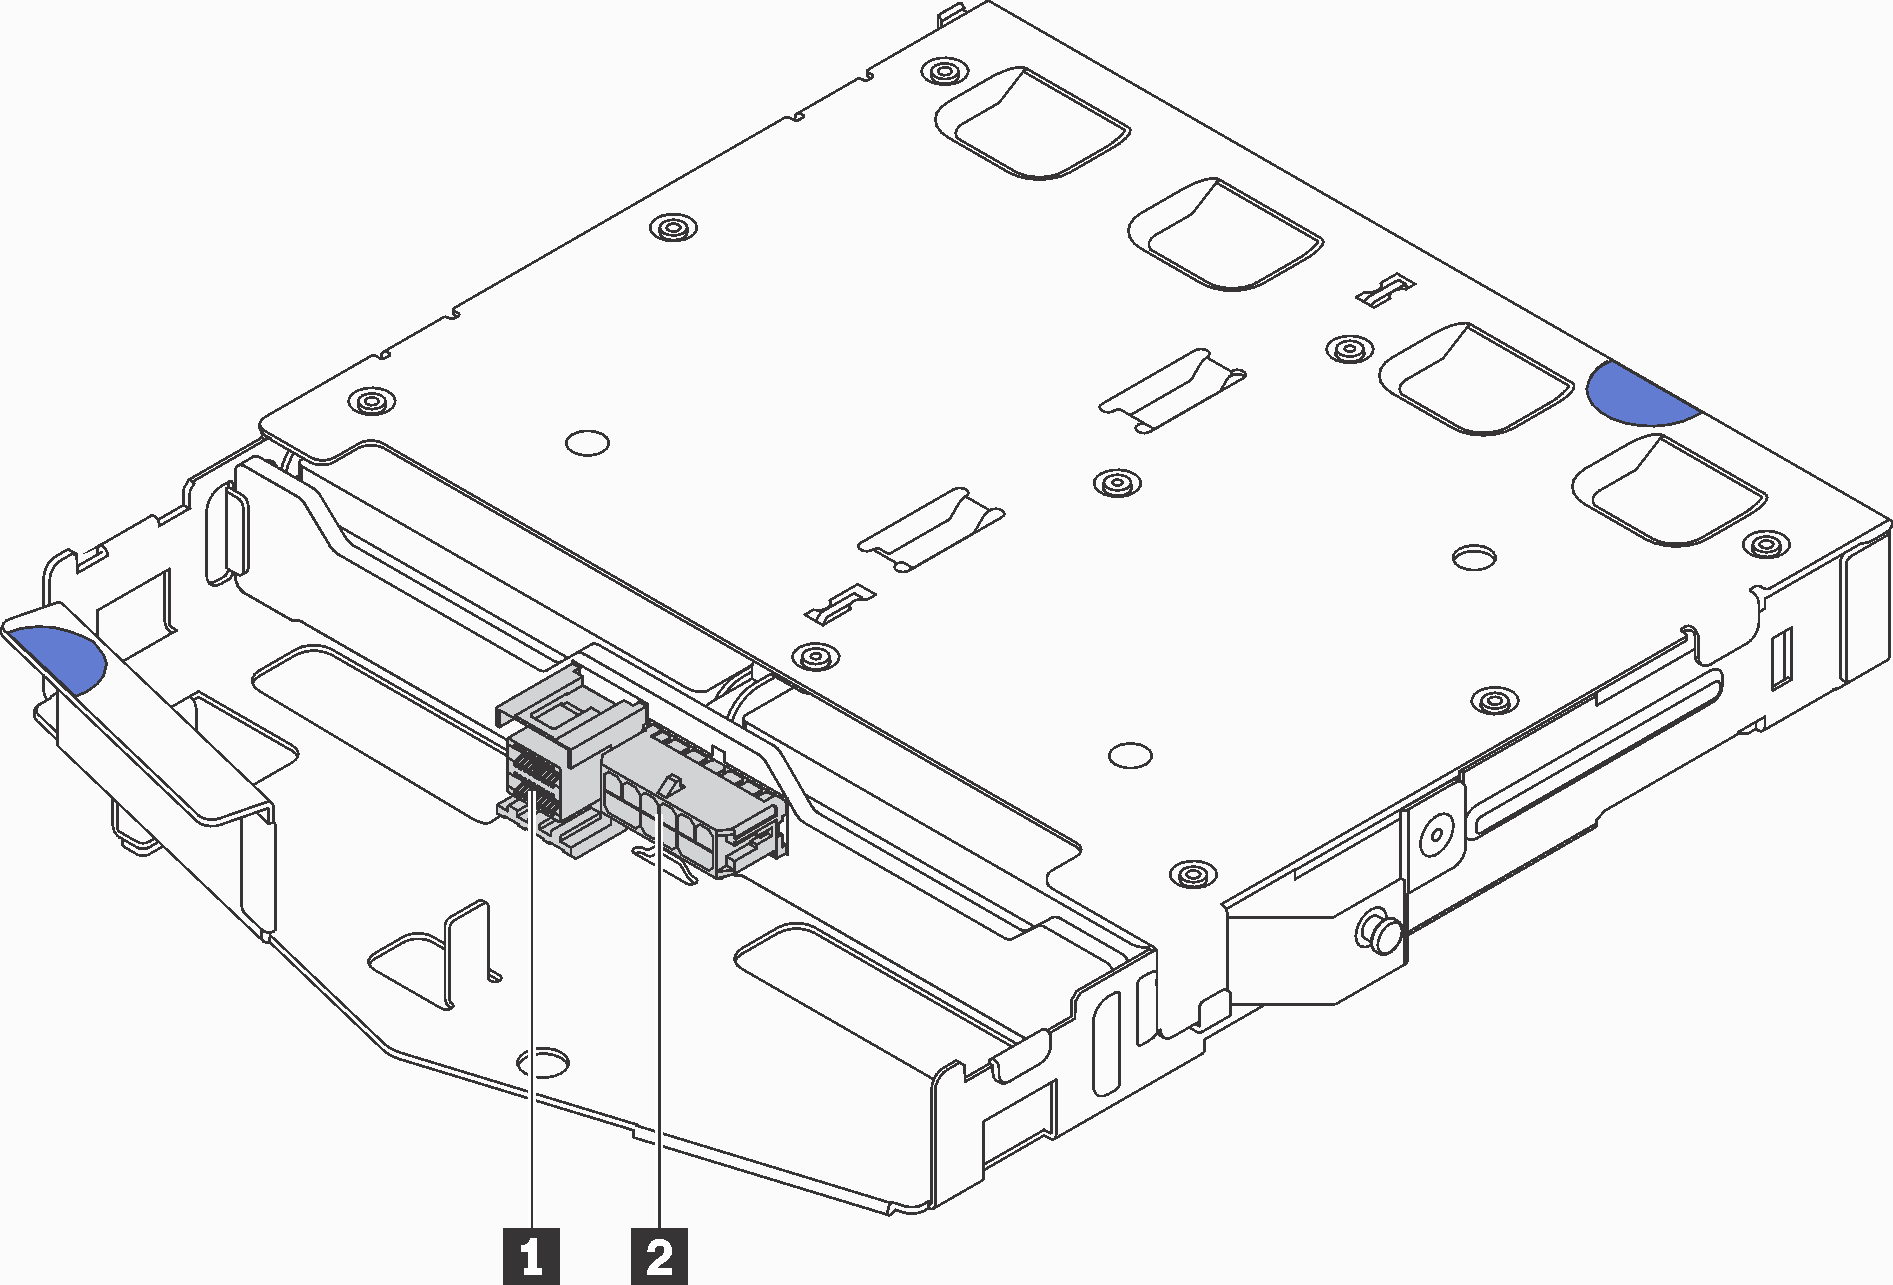
Figure 1. Air baffle removal - Connect the SAS signal cable to connector 1 on the rear backplane and connect the power cable to connector 2 on the rear backplane.
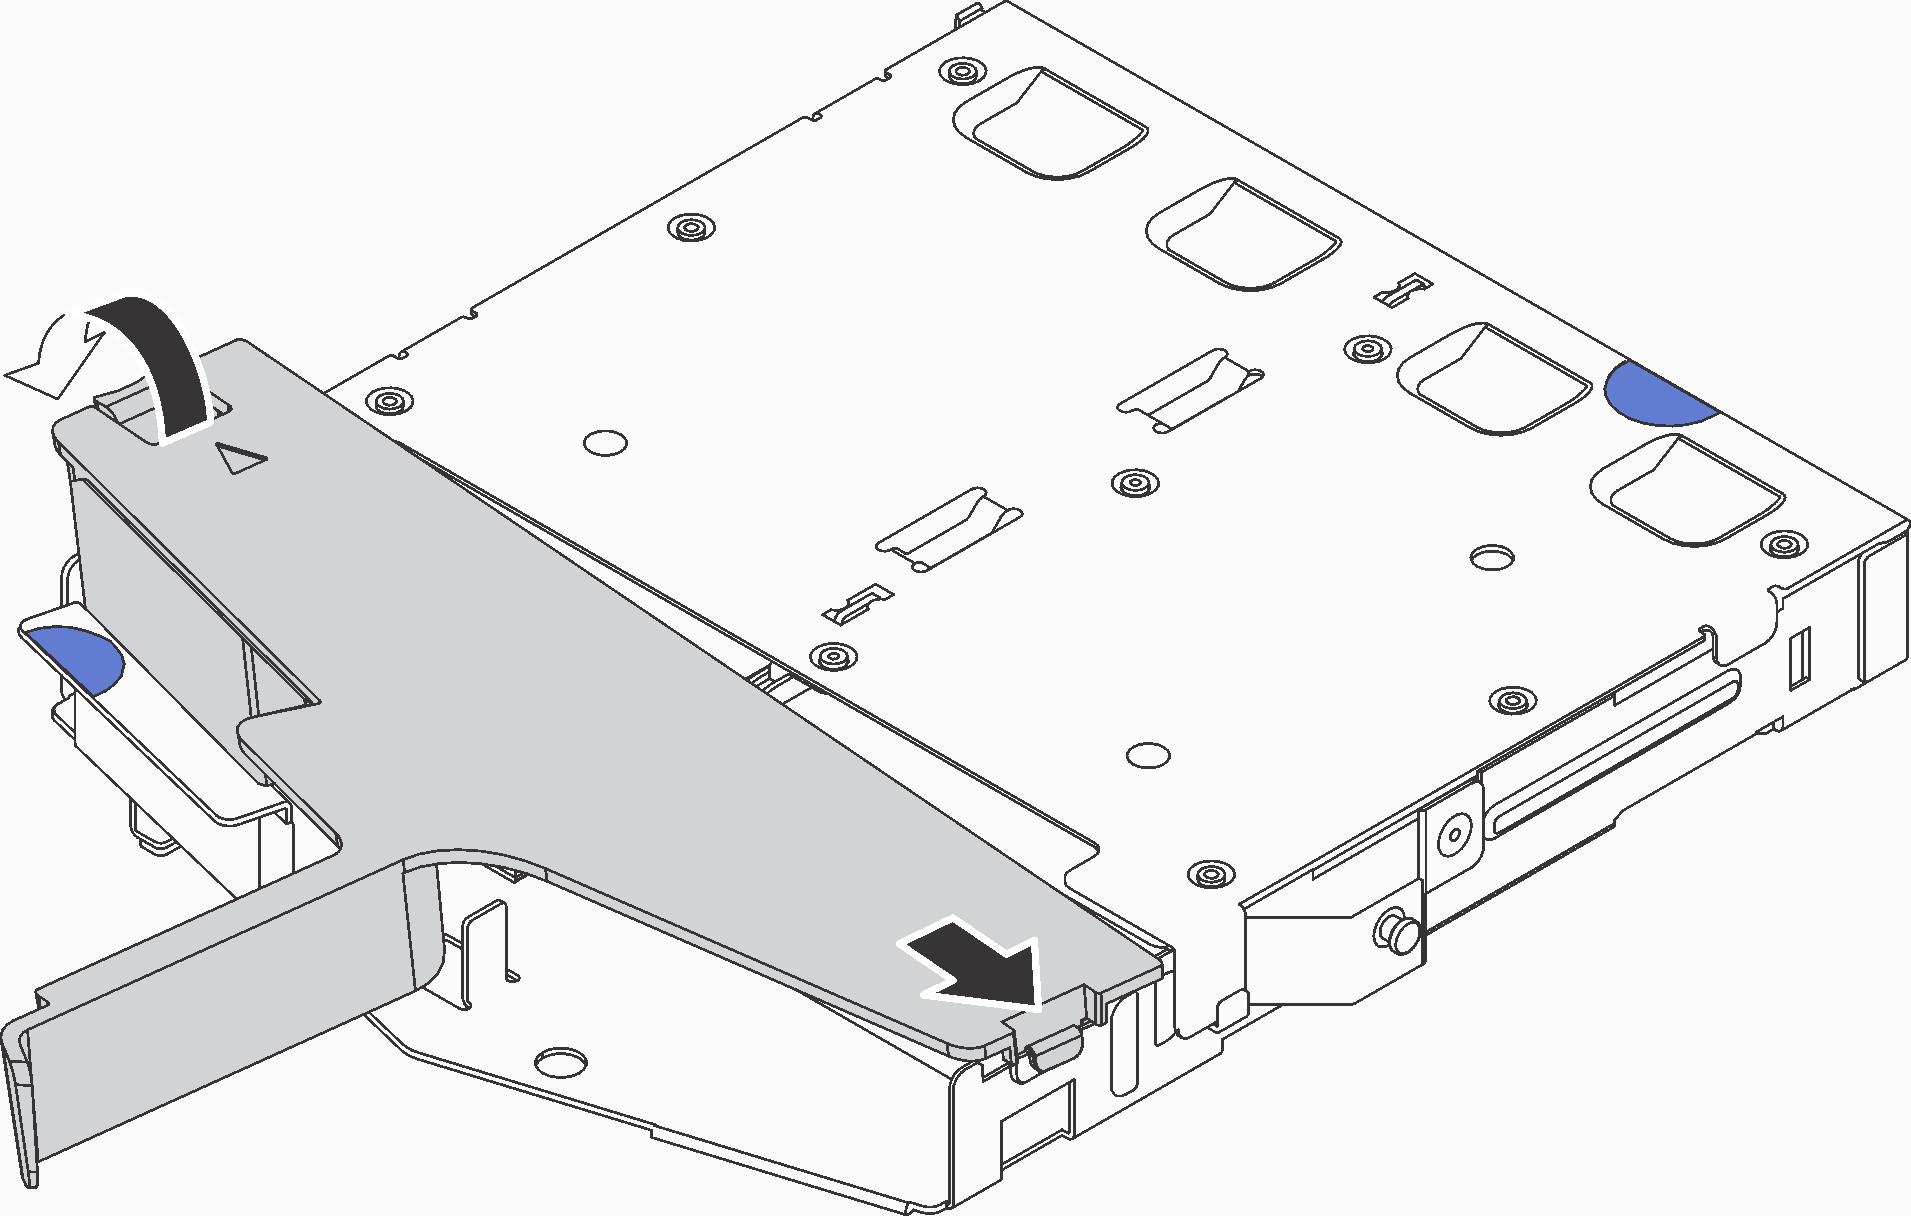
Figure 2. Rear backplane connectors - Install the air baffle into the rear hot-swap drive assembly as shown.
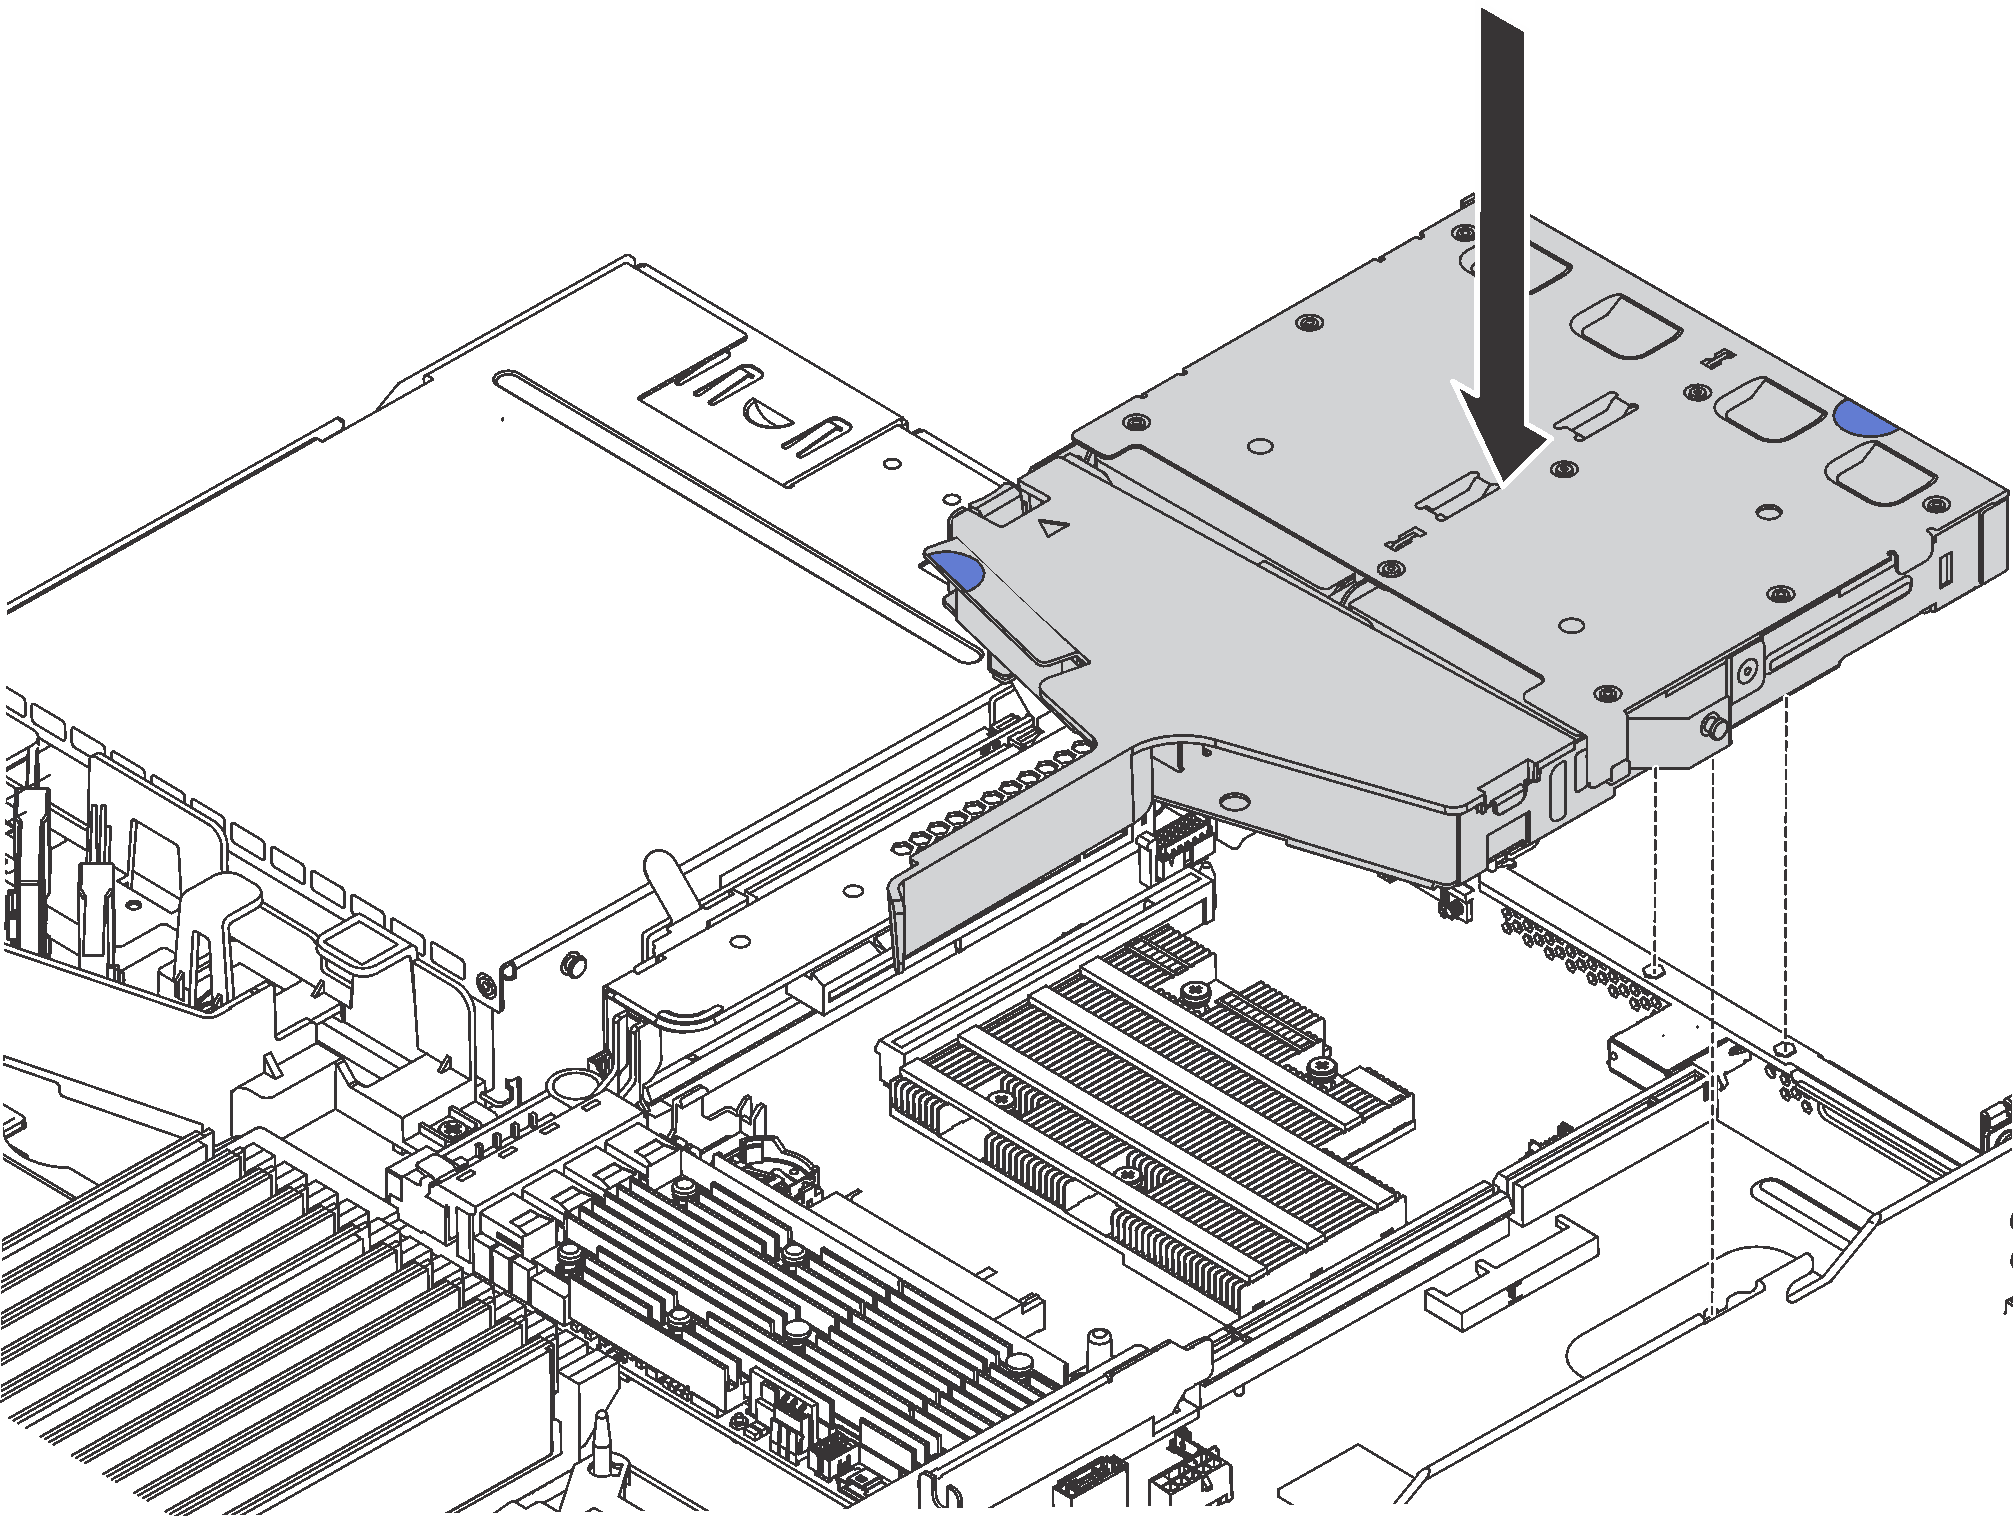
Figure 3. Air baffle installation - Align the three pins on the rear hot-swap drive assembly with the holes and slot in the chassis. Then, lower the rear hot-swap drive assembly into the chassis until it is fully seated.
Figure 4. Rear hot-swap drive assembly installation - Connect the SAS signal cable to the RAID adapter and connect the power cable to the system board. See Internal cable routing.
After installing the rear hot-swap drive assembly, install the rear hot-swap drives. See Install a hot-swap drive.


