Install a heat sink
Follow the instructions in this section to install a heat sink. This procedure must be executed by a trained technician.
About this task
Read Installation Guidelines and Safety inspection checklist to ensure that you work safely.
Power off the server and peripheral devices and disconnect the power cords and all external cables. See Power off the server.
Prevent exposure to static electricity, which might lead to system halt and loss of data, by keeping static-sensitive components in their static-protective packages until installation, and handling these devices with an electrostatic-discharge wrist strap or other grounding system.
| Torque screwdriver type list | Screw Type |
|---|---|
| Torx T20 screwdriver | Torx T20 screw |
Procedure
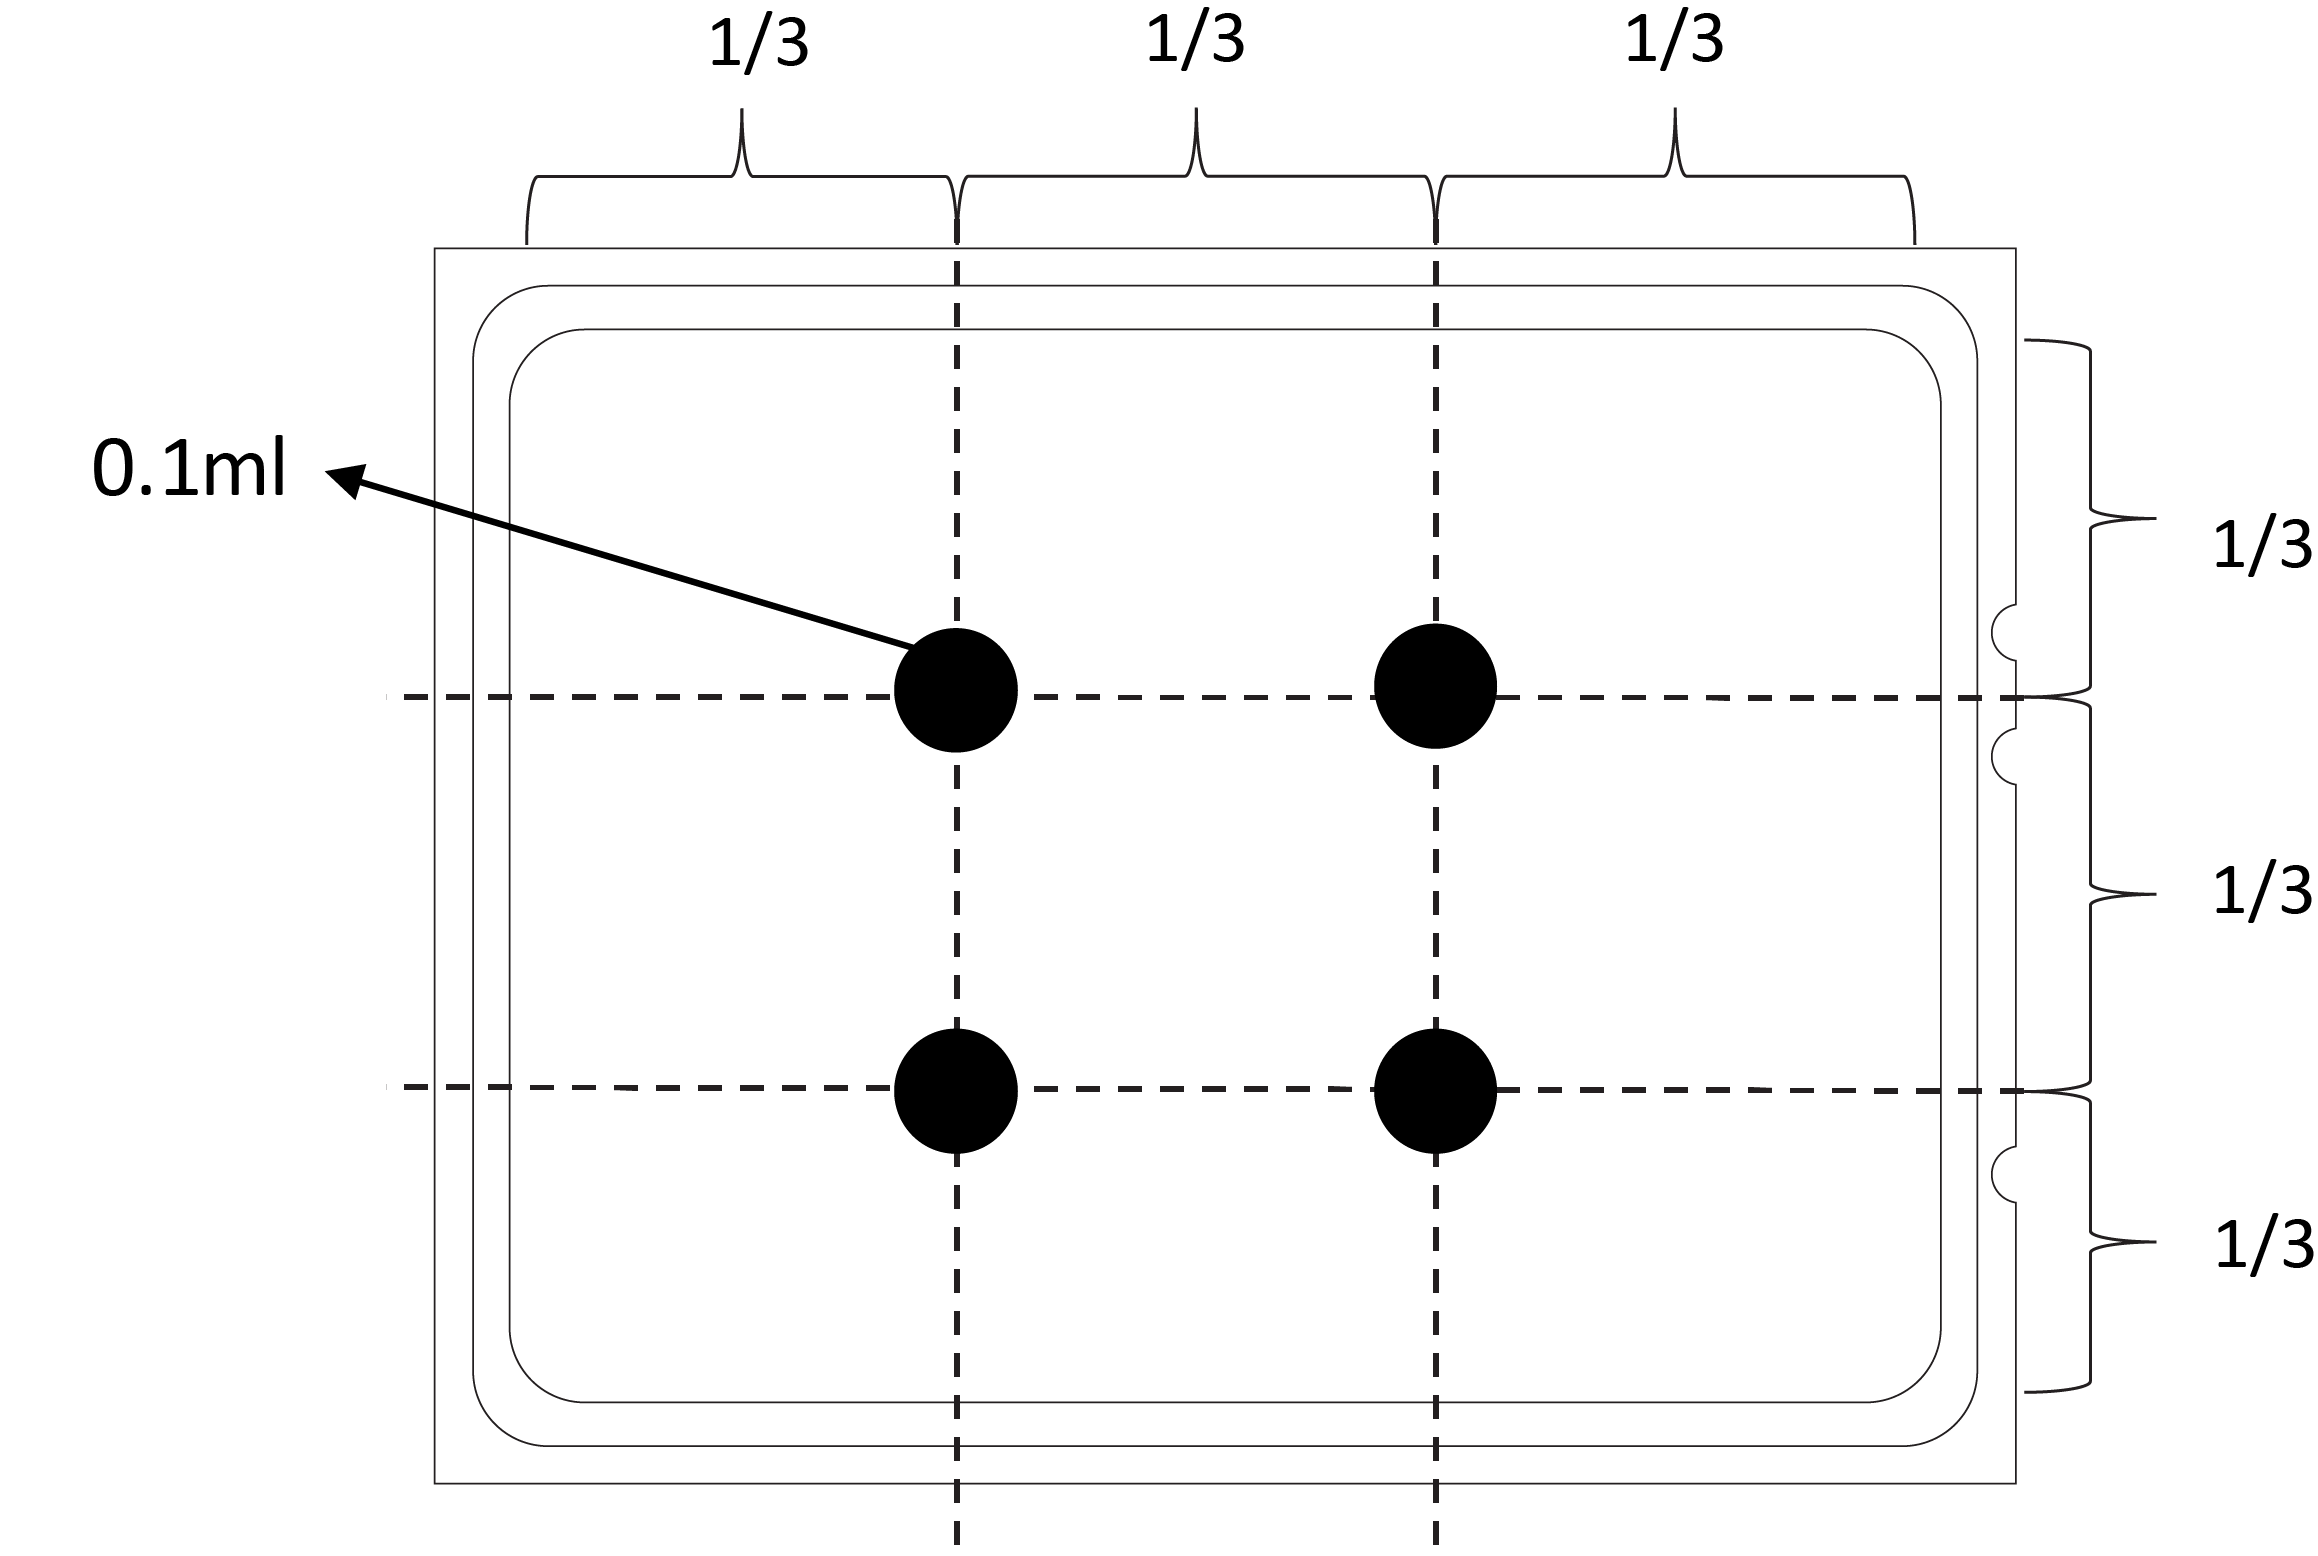
- Apply new thermal grease on the top of the processor with a syringe by forming four uniformly spaced dots, while each dot consists of about 0.1 ml of thermal grease.Figure 1. Applying thermal grease
- Install the heat sink.Figure 2. Installing a air cooling heat sink
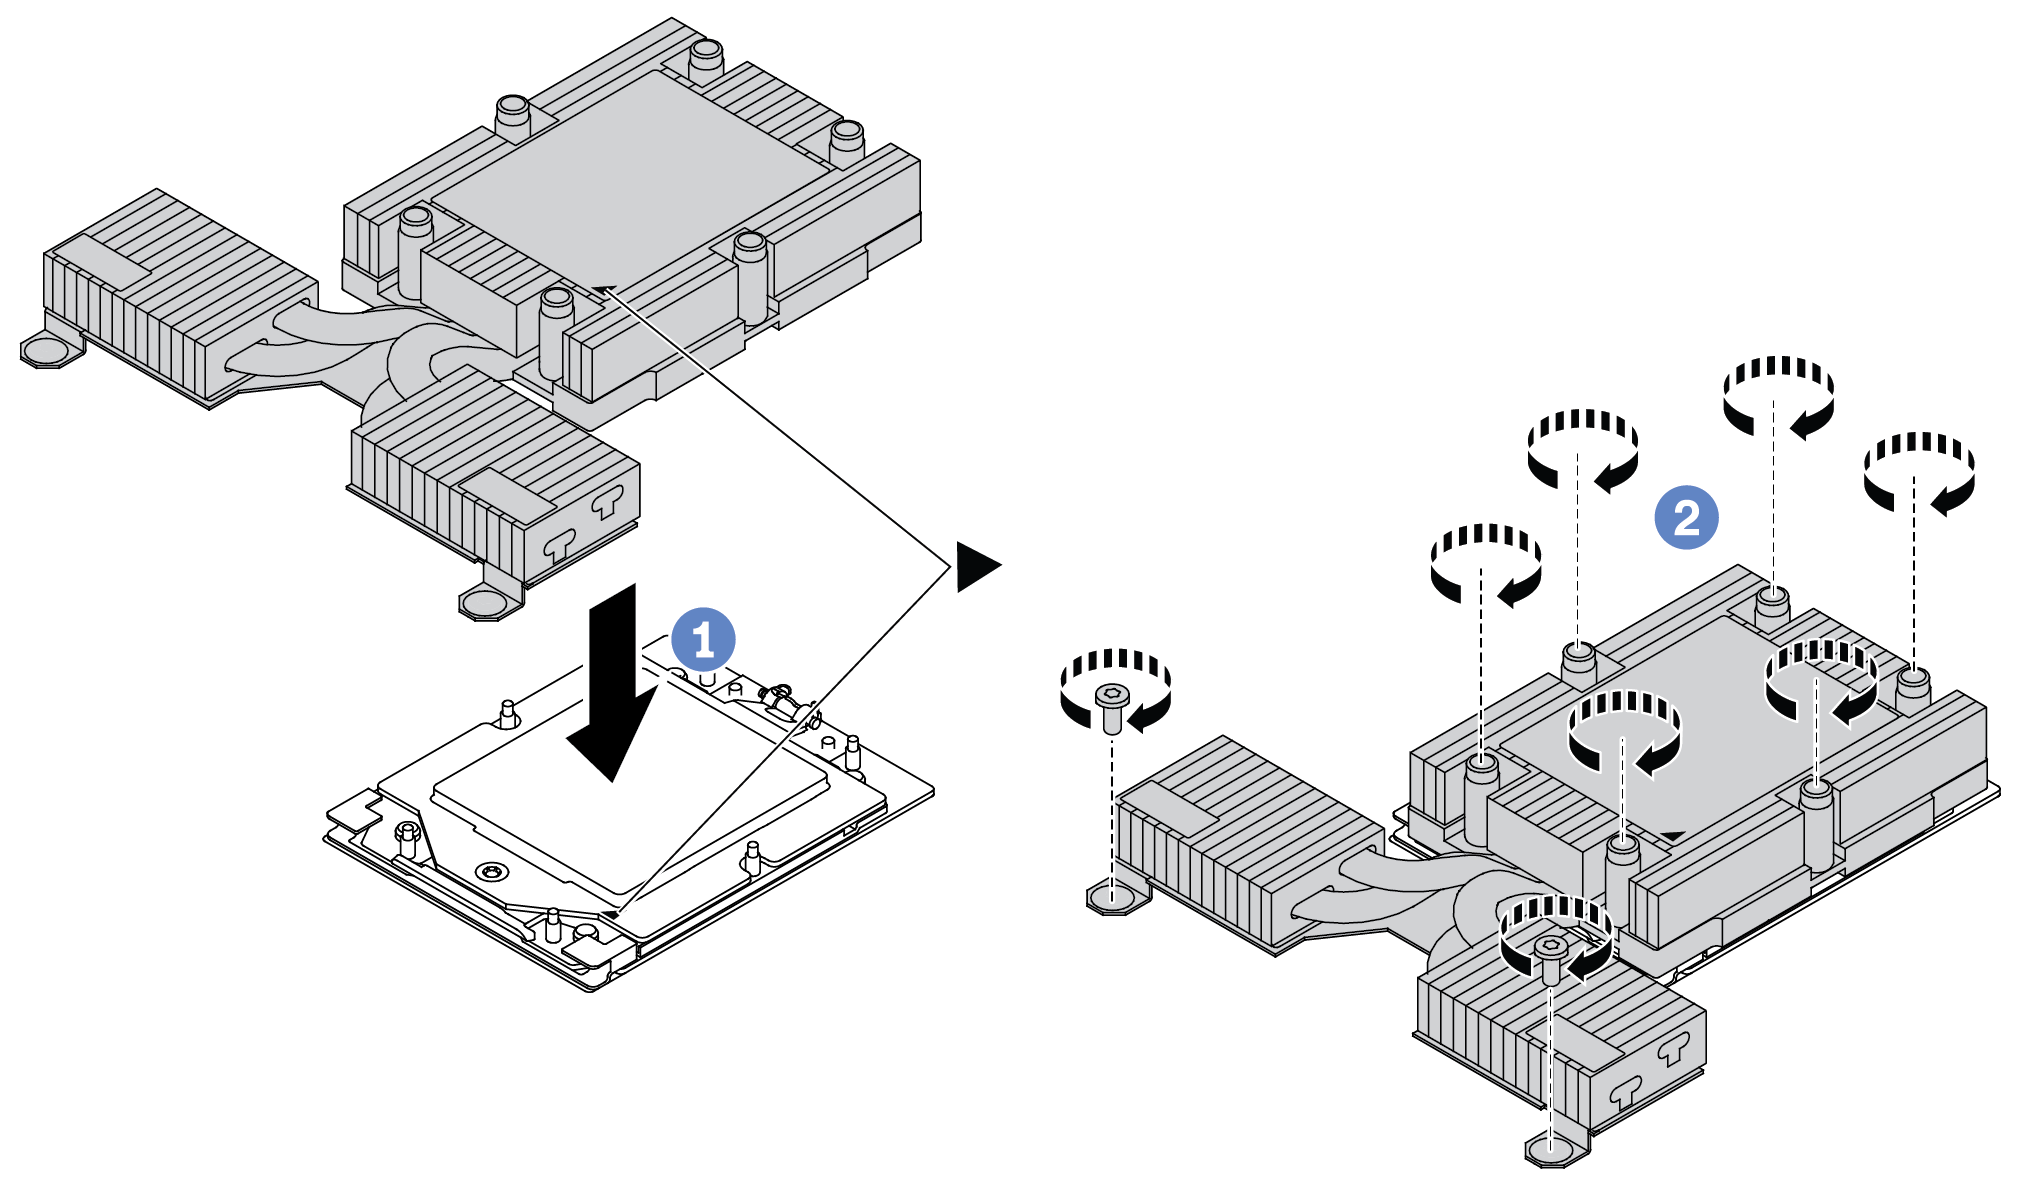
 Align the triangular mark and screws on the heat sink with the triangular mark and threaded posts on the processor carrier; then install the heat sink onto the processor carrier.
 Fully tighten all the screws in the installation sequence shown on the heat-sink label.
After you finish
Install any parts that you have removed.
Complete the parts replacement. See Complete the parts replacement.
Demo video