Remove a hot-swap power supply unit

Follow instructions in this section to remove a power supply unit.

About this task

If the power supply unit to be removed is the only one installed, the power supply unit is non-hot-swap. Before removing it, you must turn off the server first. To support redundancy mode or hot-swap, install an additional hot-swap power supply unit.

Attention
  • Read Installation Guidelines and Safety inspection checklist to ensure that you work safely.

  • Prevent exposure to static electricity, which might lead to system halt and loss of data, by keeping static-sensitive components in their static-protective packages until installation, and handling these devices with an electrostatic-discharge wrist strap or other grounding system.

Procedure

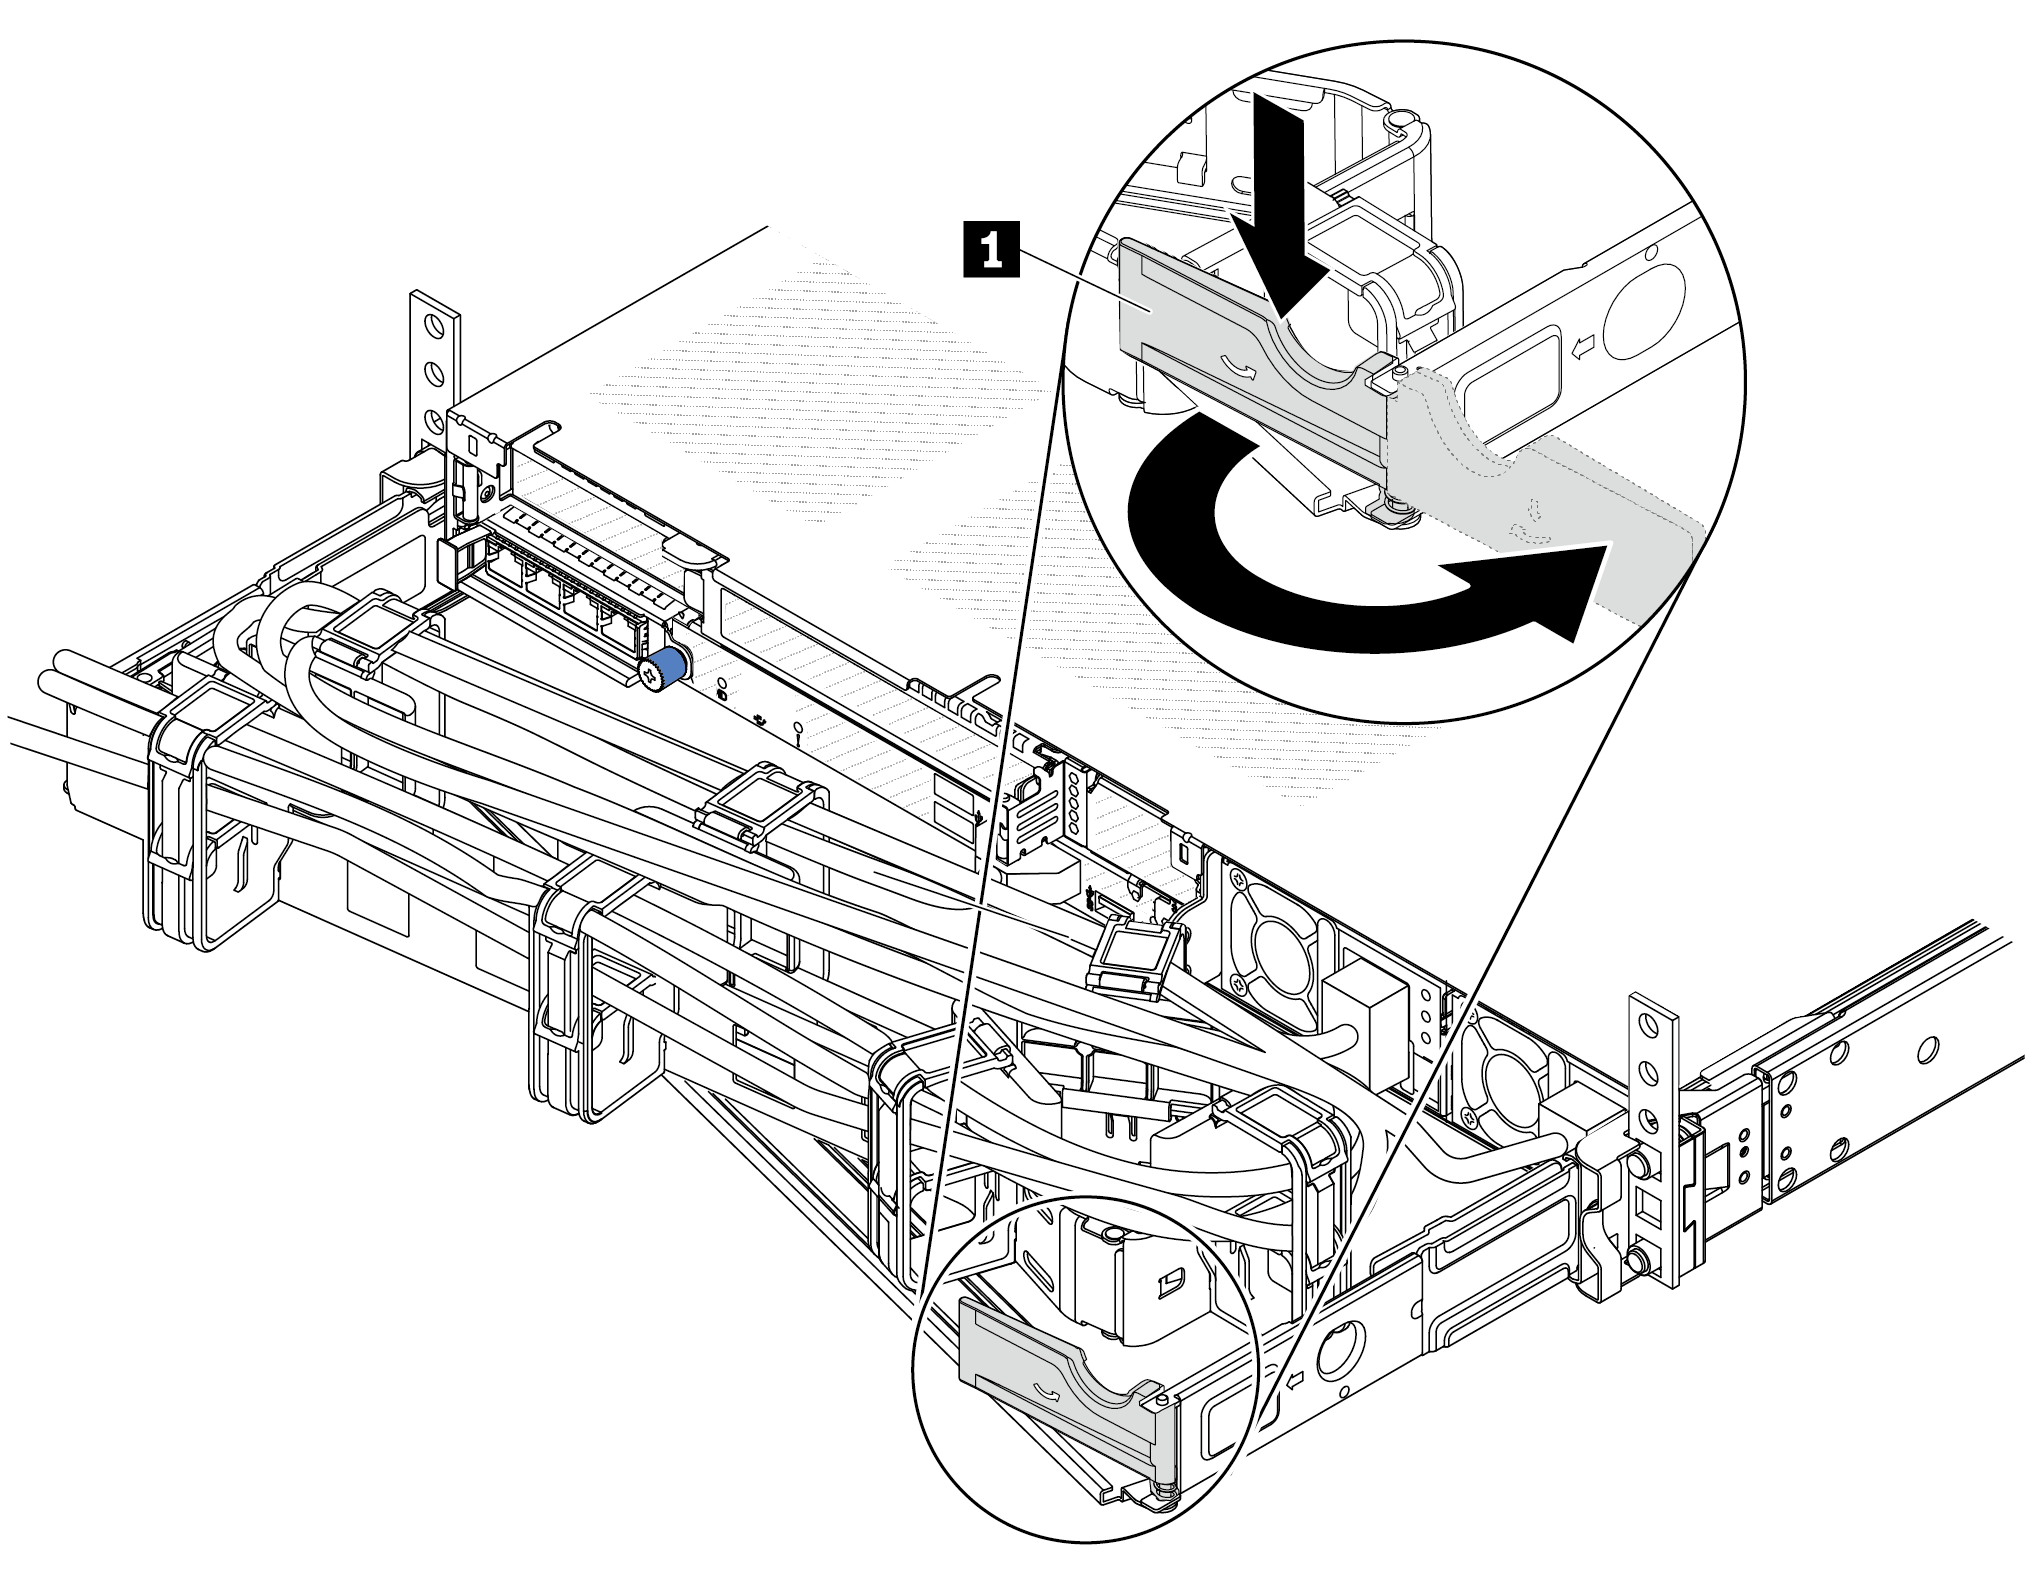
  1. If a cable management arm (CMA) is installed, adjust the CMA to gain access to the power supply bay.
    1. Press down the stop bracket 1 and rotate it to the open position.
    2. Rotate the CMA out of the way to gain access to the power supply unit.
    Note
    Your CMA kit might look different from the illustration.
    Figure 1. Adjusting the CMA
    Adjusting the CMA to get access to the power supply unit

  2. Disconnect the power cord from the hot-swap power supply unit and the electrical outlet.
    • For AC power supply units, disconnect both ends of the power cord and keep it in an ESD-safe place.

    • For 240 V DC power supply units, turn off the server, and then disconnect both ends of the power cord and keep it in an ESD-safe place.

    • For –48V DC power input:

      1. Disconnect the power cords from the electrical outlet.

      2. Use a slotted screwdriver to loosen the captive screws on the power supply terminal block.

      3. Disconnect the power cords from the power supply unit, make the wire terminal insulated, and keep them in an ESD-safe place.

    Note
    If you are replacing two power supplies, replace them one by one to ensure that the power supply to the server is not interrupted. Do not disconnect the power cord from the secondly replaced power supply until the power output LED for the firstly replaced power supply unit is lit. For the location of the power output LED, refer to Power supply LEDs.
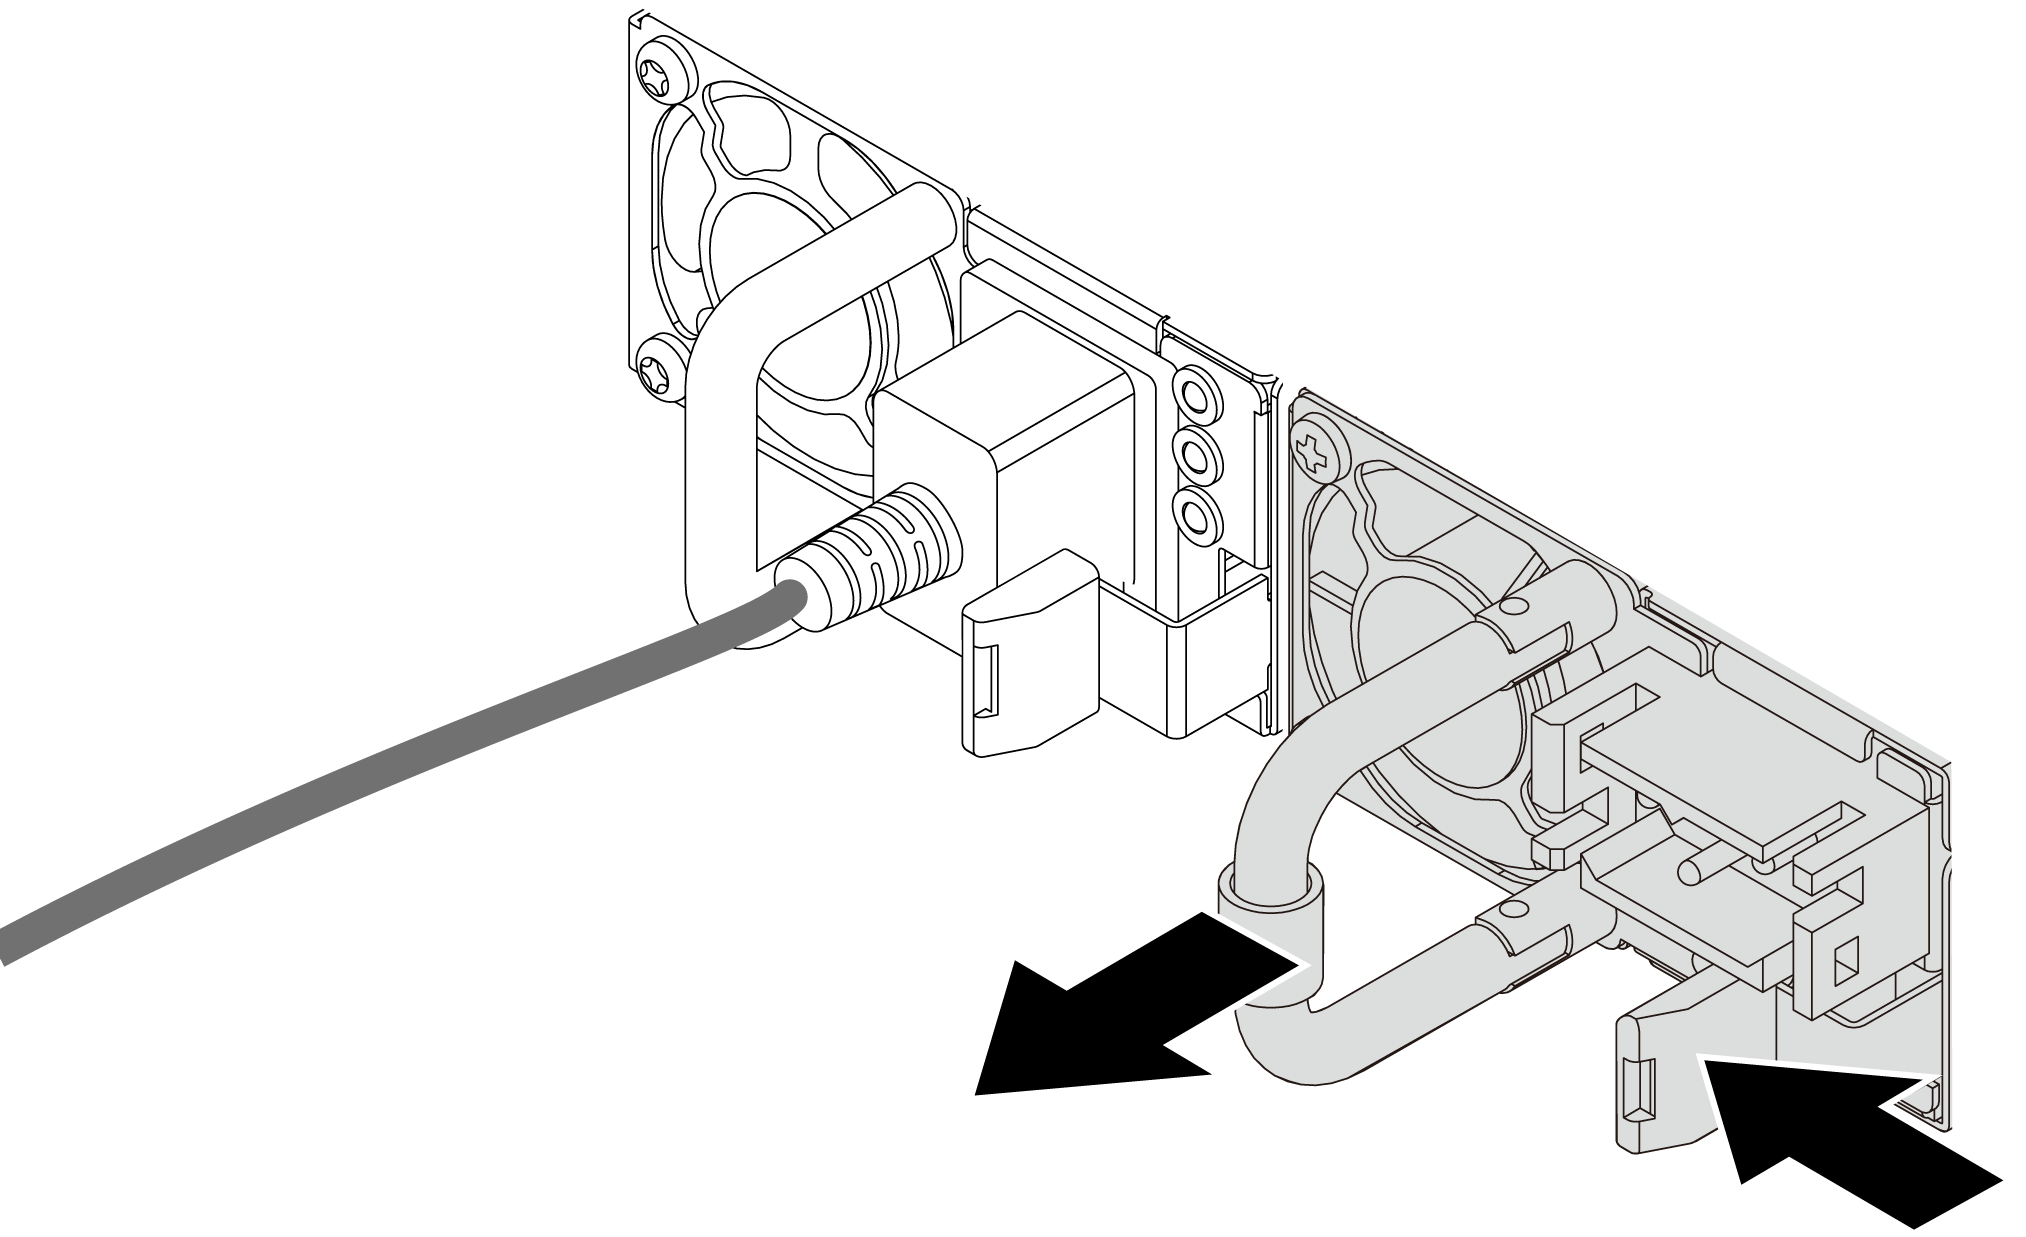
  3. Press the release tab toward the handle and carefully pull the handle at the same time to slide the hot-swap power supply unit out of the chassis.
    Note
    If your CMA kit obstructs in the way, slightly pull the power supply unit upwards when sliding the power supply unit out of the chassis.
    Figure 2. Removing the power supply unit
    Removing the power supply unit

After you finish

  1. Install a new power supply unit or install the power-supply filler to cover the power supply bay. See Install a hot-swap power supply.

    Important
    To ensure proper cooling during normal server operation, both of the power supply bays must be occupied. This means that each bay must have a power supply unit installed; or one has a power supply unit installed and the other has a power supply filler installed.
  2. If you are instructed to return the component or optional device, follow all packaging instructions, and use any packaging materials for shipping that are supplied to you.

Demo video
Watch the procedure on YouTube