Install the middle or rear 2.5-inch-drive backplane
Use this information to install the middle or rear 2.5-inch-drive backplane.


To install the middle or rear 2.5-inch-drive backplane, complete the following steps:
Note
The illustration shows installing the backplane on the middle drive cage. The procedure is the same for installing the backplane on the rear drive cage.
For an NVMe backplane, only 7 mm NVMe drives (installed in 15 mm-height drive trays) are supported, 15 mm NVMe drives not supported.
Figure 1. Installing the middle or rear 2.5-inch-drive backplane
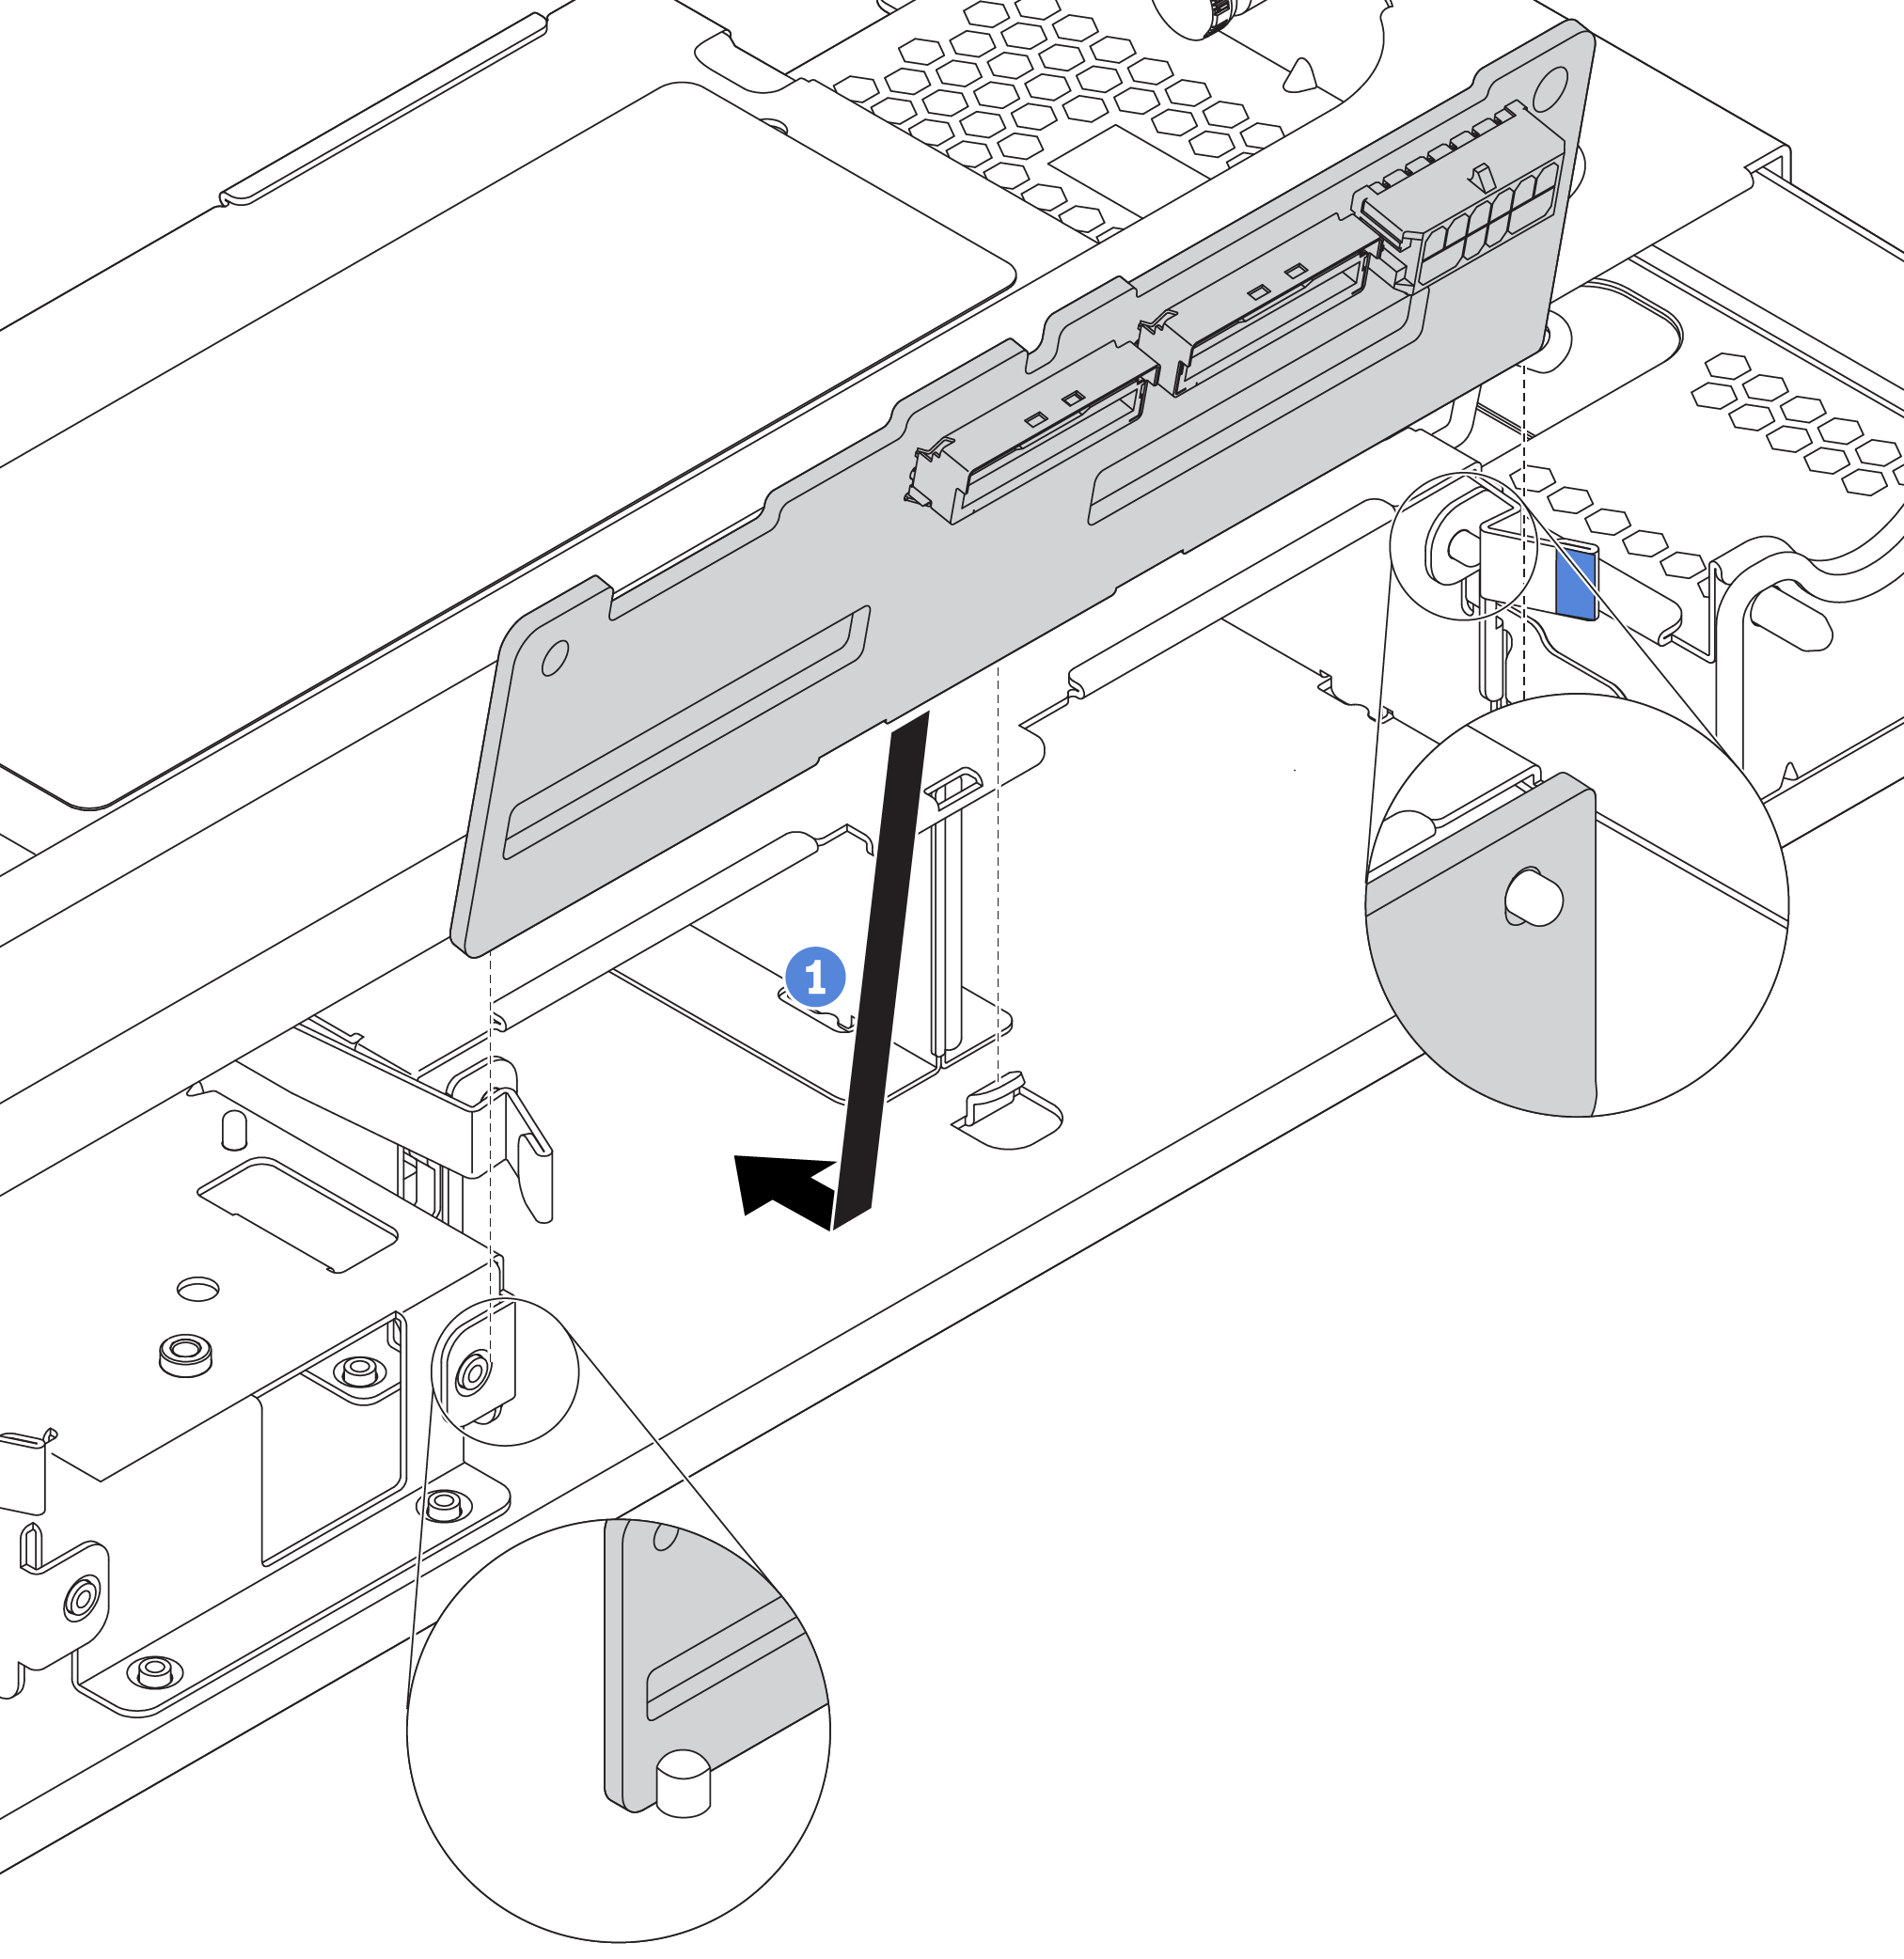
- Align the bottom of the backplane with the studs at the bottom of the drive cage.
- Rotate the backplane to vertical position so that the holes in the backplane pass through the pins on the drive cage, and press the backplane into position. The release latches will secure the backplane in place.
After you finish
Reinstall all the drives and fillers (if any) into the drive bays. See Install a hot-swap drive.
Complete the parts replacement. See Complete the parts replacement.
Demo video
Give documentation feedback