Install a GPU adapter
Use this information to install a GPU adapter.


Note
GPU adapters are supported on some server models with requirements. See Technical rules for GPU adapters.
The GPU adapter kit comes with a 1U performance heat sink, performance system fans (speed of 29000 RPM), and GPU air baffles. Before installing the GPU:
Install the 1U performance heat sink. See Replace a heat sink.
Install the performance system fans. See Install a system fan.
Install the required air baffle. See Install the air baffle.
To install a GPU adapter, complete the following steps:
- Depending on the GPU type, install the add-on GPU air baffle for the GPU adapter.
For a double-wide GPU adapter (for example, NVIDIA V100 GPU): If the GPU adapter does not have a bracket installed, install the screws to secure the GPU bracket 1 to the GPU adapter. Then, install the add-on GPU air baffle 2 to the GPU adapter.
Figure 1. Installing the add-on GPU air baffle for a double-wide GPU adapter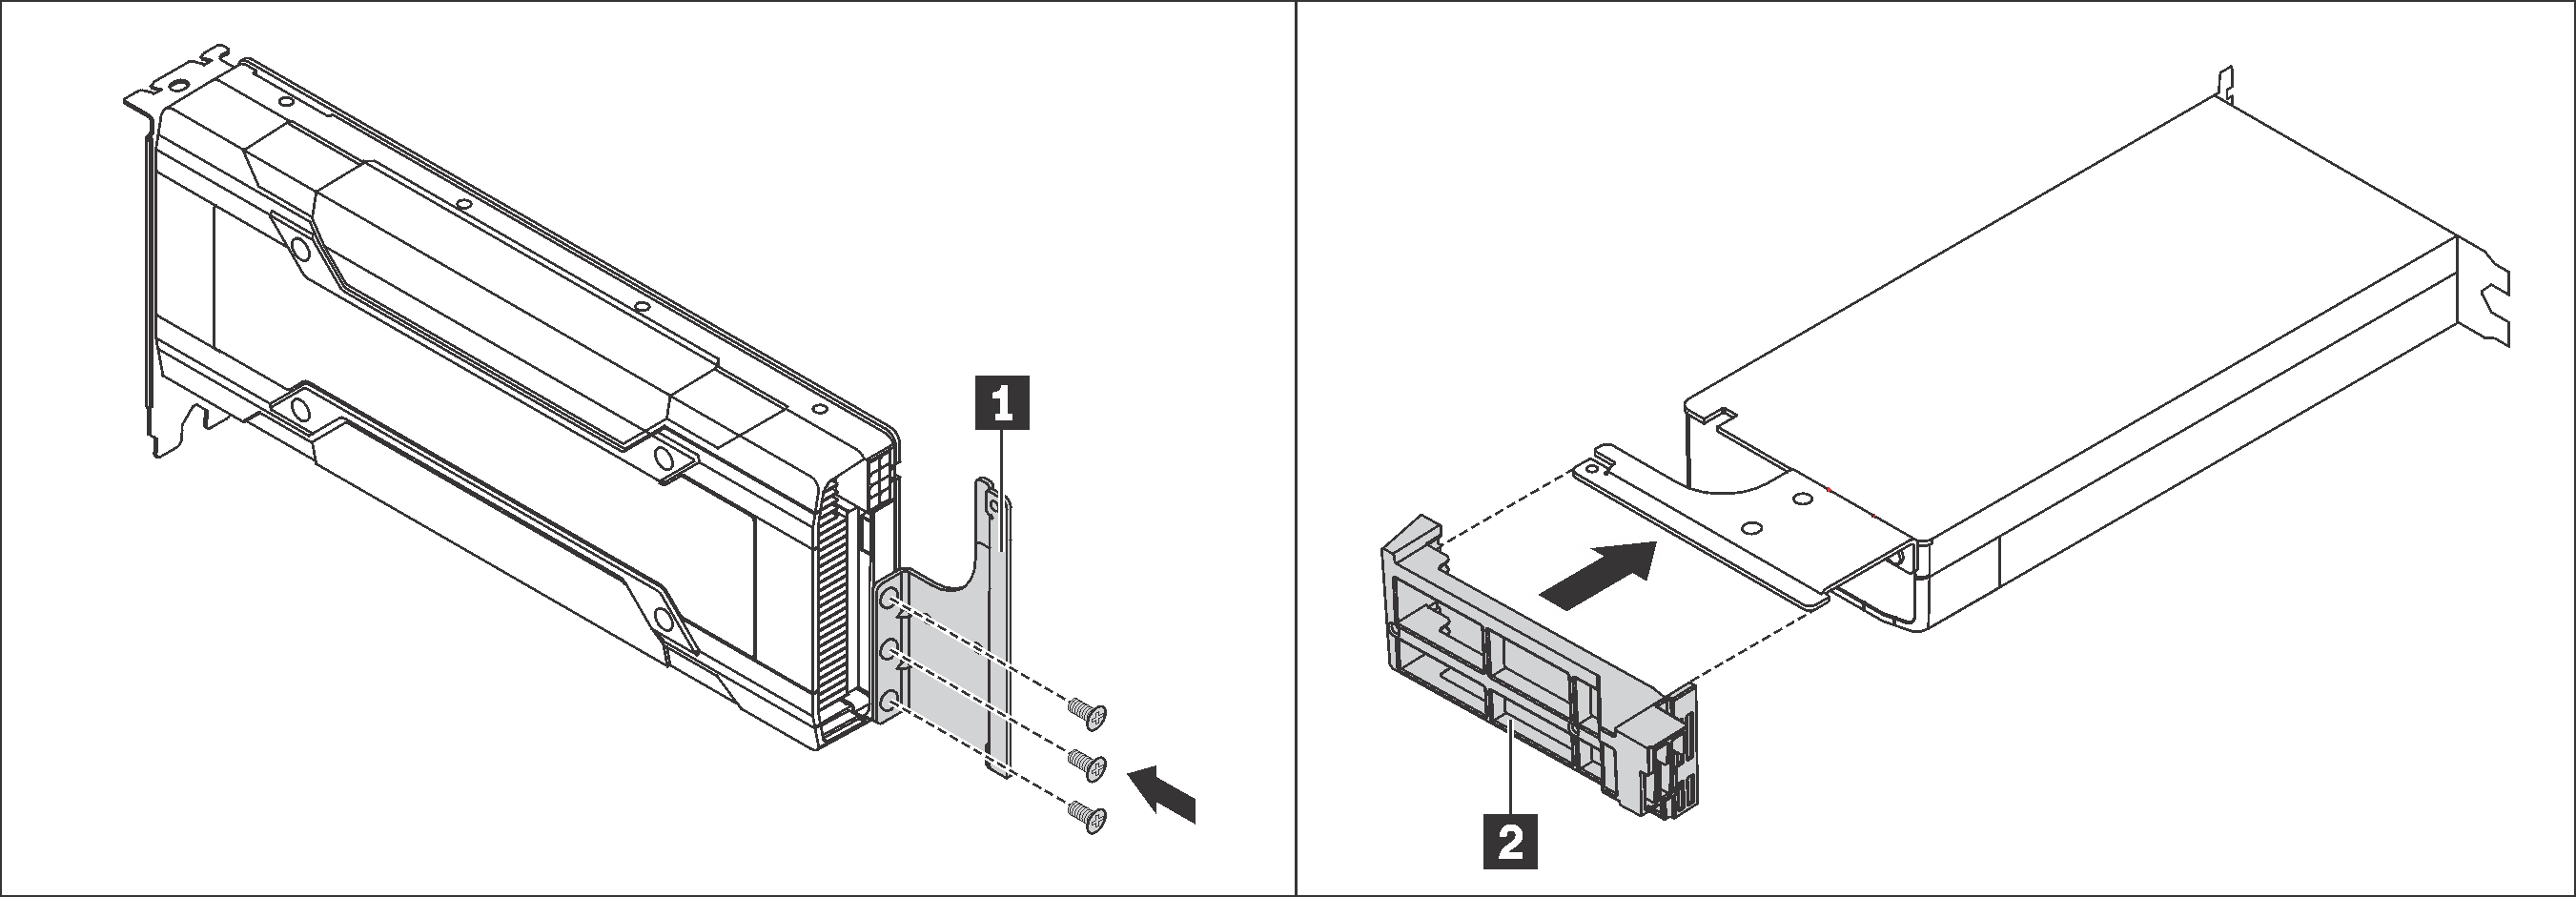
For a single-wide GPU adapter (for example, NVIDIA T4 GPU), install the add-on GPU air baffle onto the air baffle.
Figure 2. Installing the add-on GPU air baffle for a single-wide GPU adapter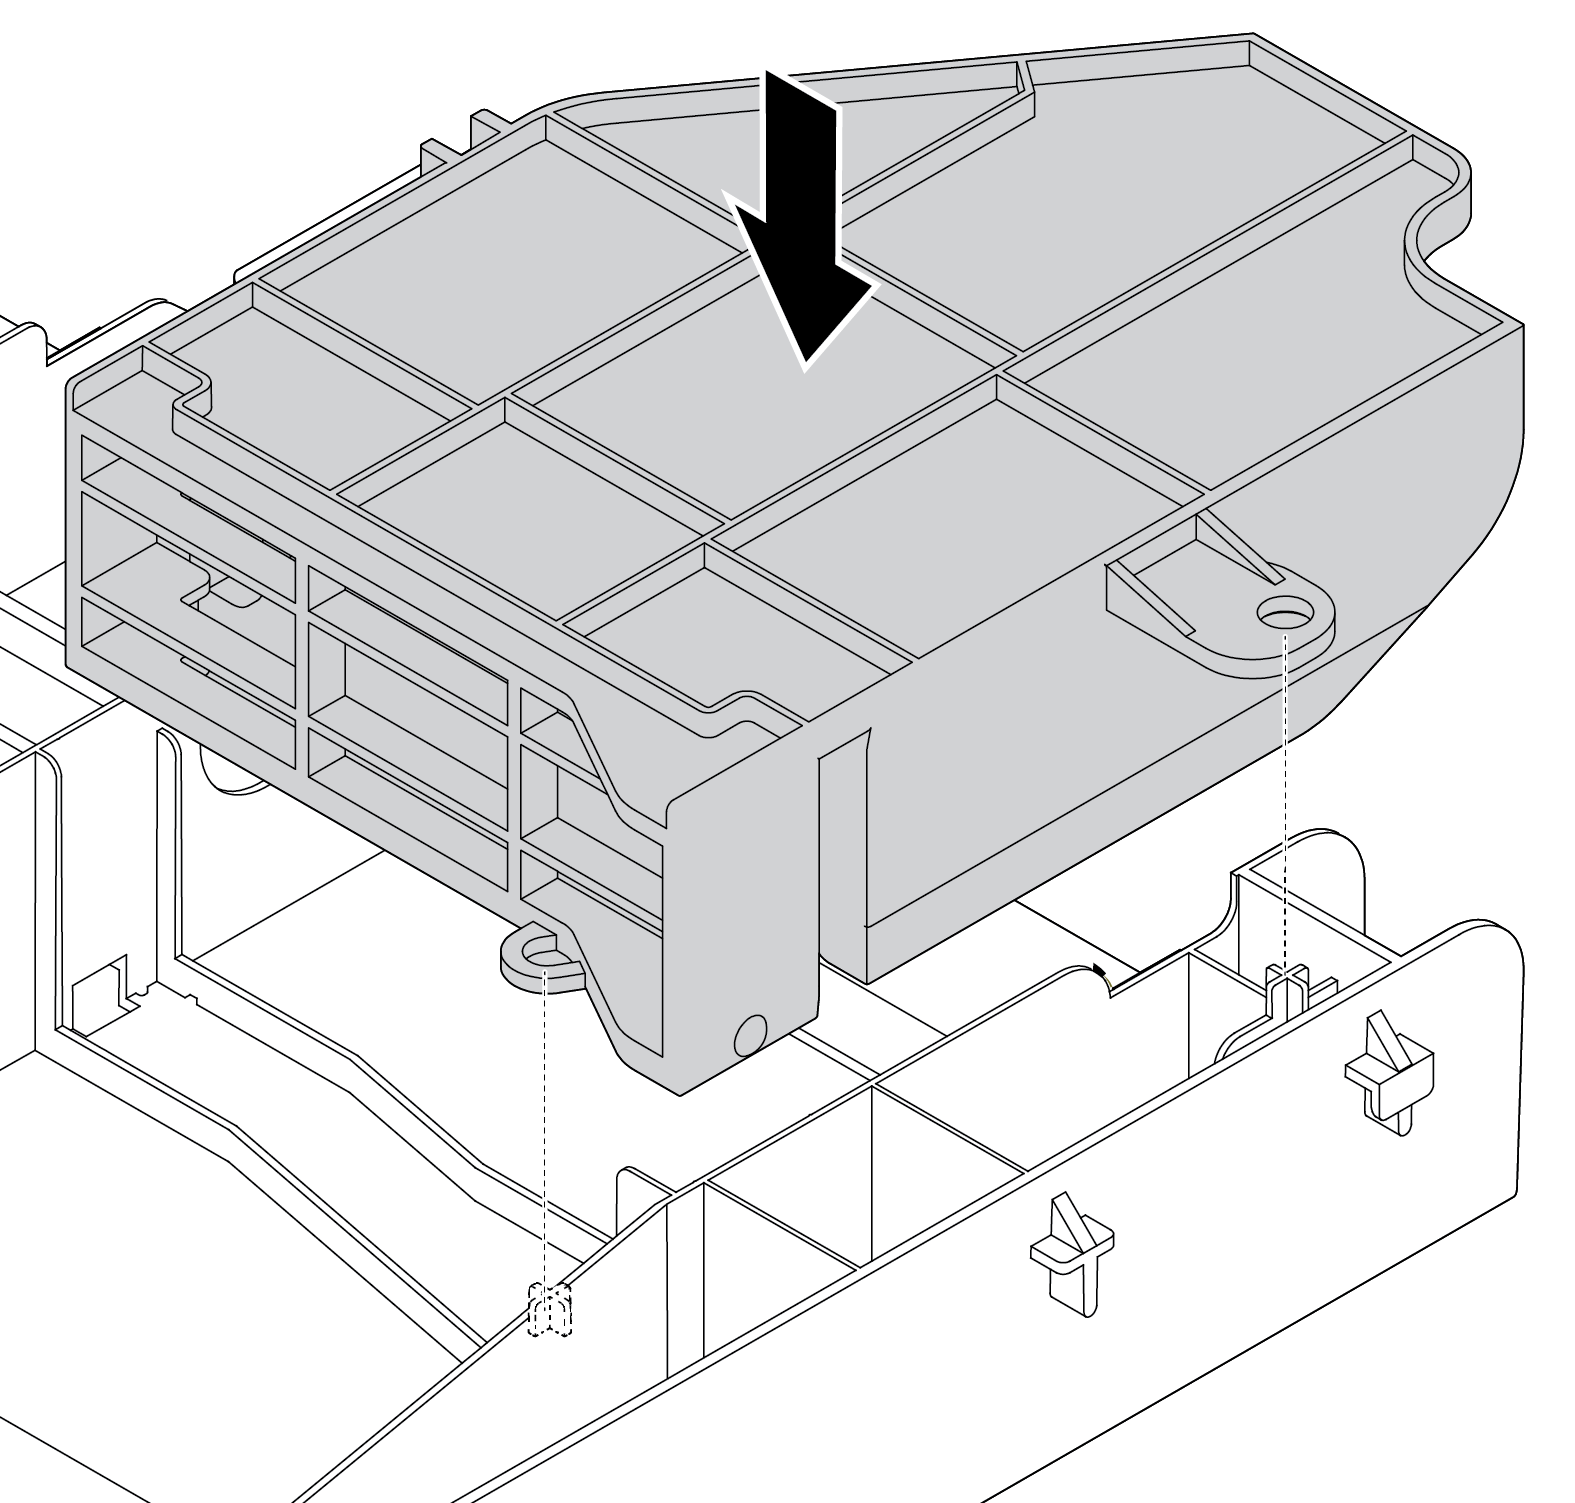
Give documentation feedback