H100/H200 putty pad and PCM identification and location
Follow the information in this section for H100/H200 putty pad and PCM identification and location
About this task
Attention
- Read Installation Guidelines and Safety inspection checklist to ensure that you work safely.
- Touch the static-protective package that contains the component to any unpainted metal surface on the server; then, remove it from the package and place it on a static-protective surface.
Important
Putty pad/phase change material (PCM) replacement guidelines
- Before replacing the putty pad/PCM, gently clean the hardware surface with an alcohol cleaning pad.
- Hold the putty pad/PCM carefully to avoid deformation. Make sure no screw hole or opening is blocked by the putty pad/PCM.
- Do not use expired putty pad/PCM. Check the expiry date on putty pad/PCM package. If the putty pads/PCM are expired, acquire new ones to properly replace them.
| Pad index | NVSwtich cold plate module | Front GPU cold plate module | Rear GPU cold plate module | Front GPU | Rear GPU | GPU complex | GPU baseboard |
|---|---|---|---|---|---|---|---|
| 1 NVSWITCH PCM kit | V | V | V | ||||
| 2 NVSWITCH Putty Pad kit | V | V | V | ||||
| 3 SR780a V3 water loop putty pad kit | V | V | V | V | V (x2) | V (x2) | |
| 4 H100/H200 PCM kit | V | V | V | V | V (x2) | V (x2) | |
| 5 H200 GPU SERVICE FIXTURE | V | V | V | V | V | V | |
| 6 SR780a V3 water loop service kit | V | V | V | V | V | V | |
| 7 Torque wrench tool kit | V | V | V | V | V | V | V |
| 8 Alcohol cleaning pad | V | V | V | V | V | V | V |
| 9 GPU base board handle | V | V |
Figure 1. H100/H200 putty pad and PCM identification and location
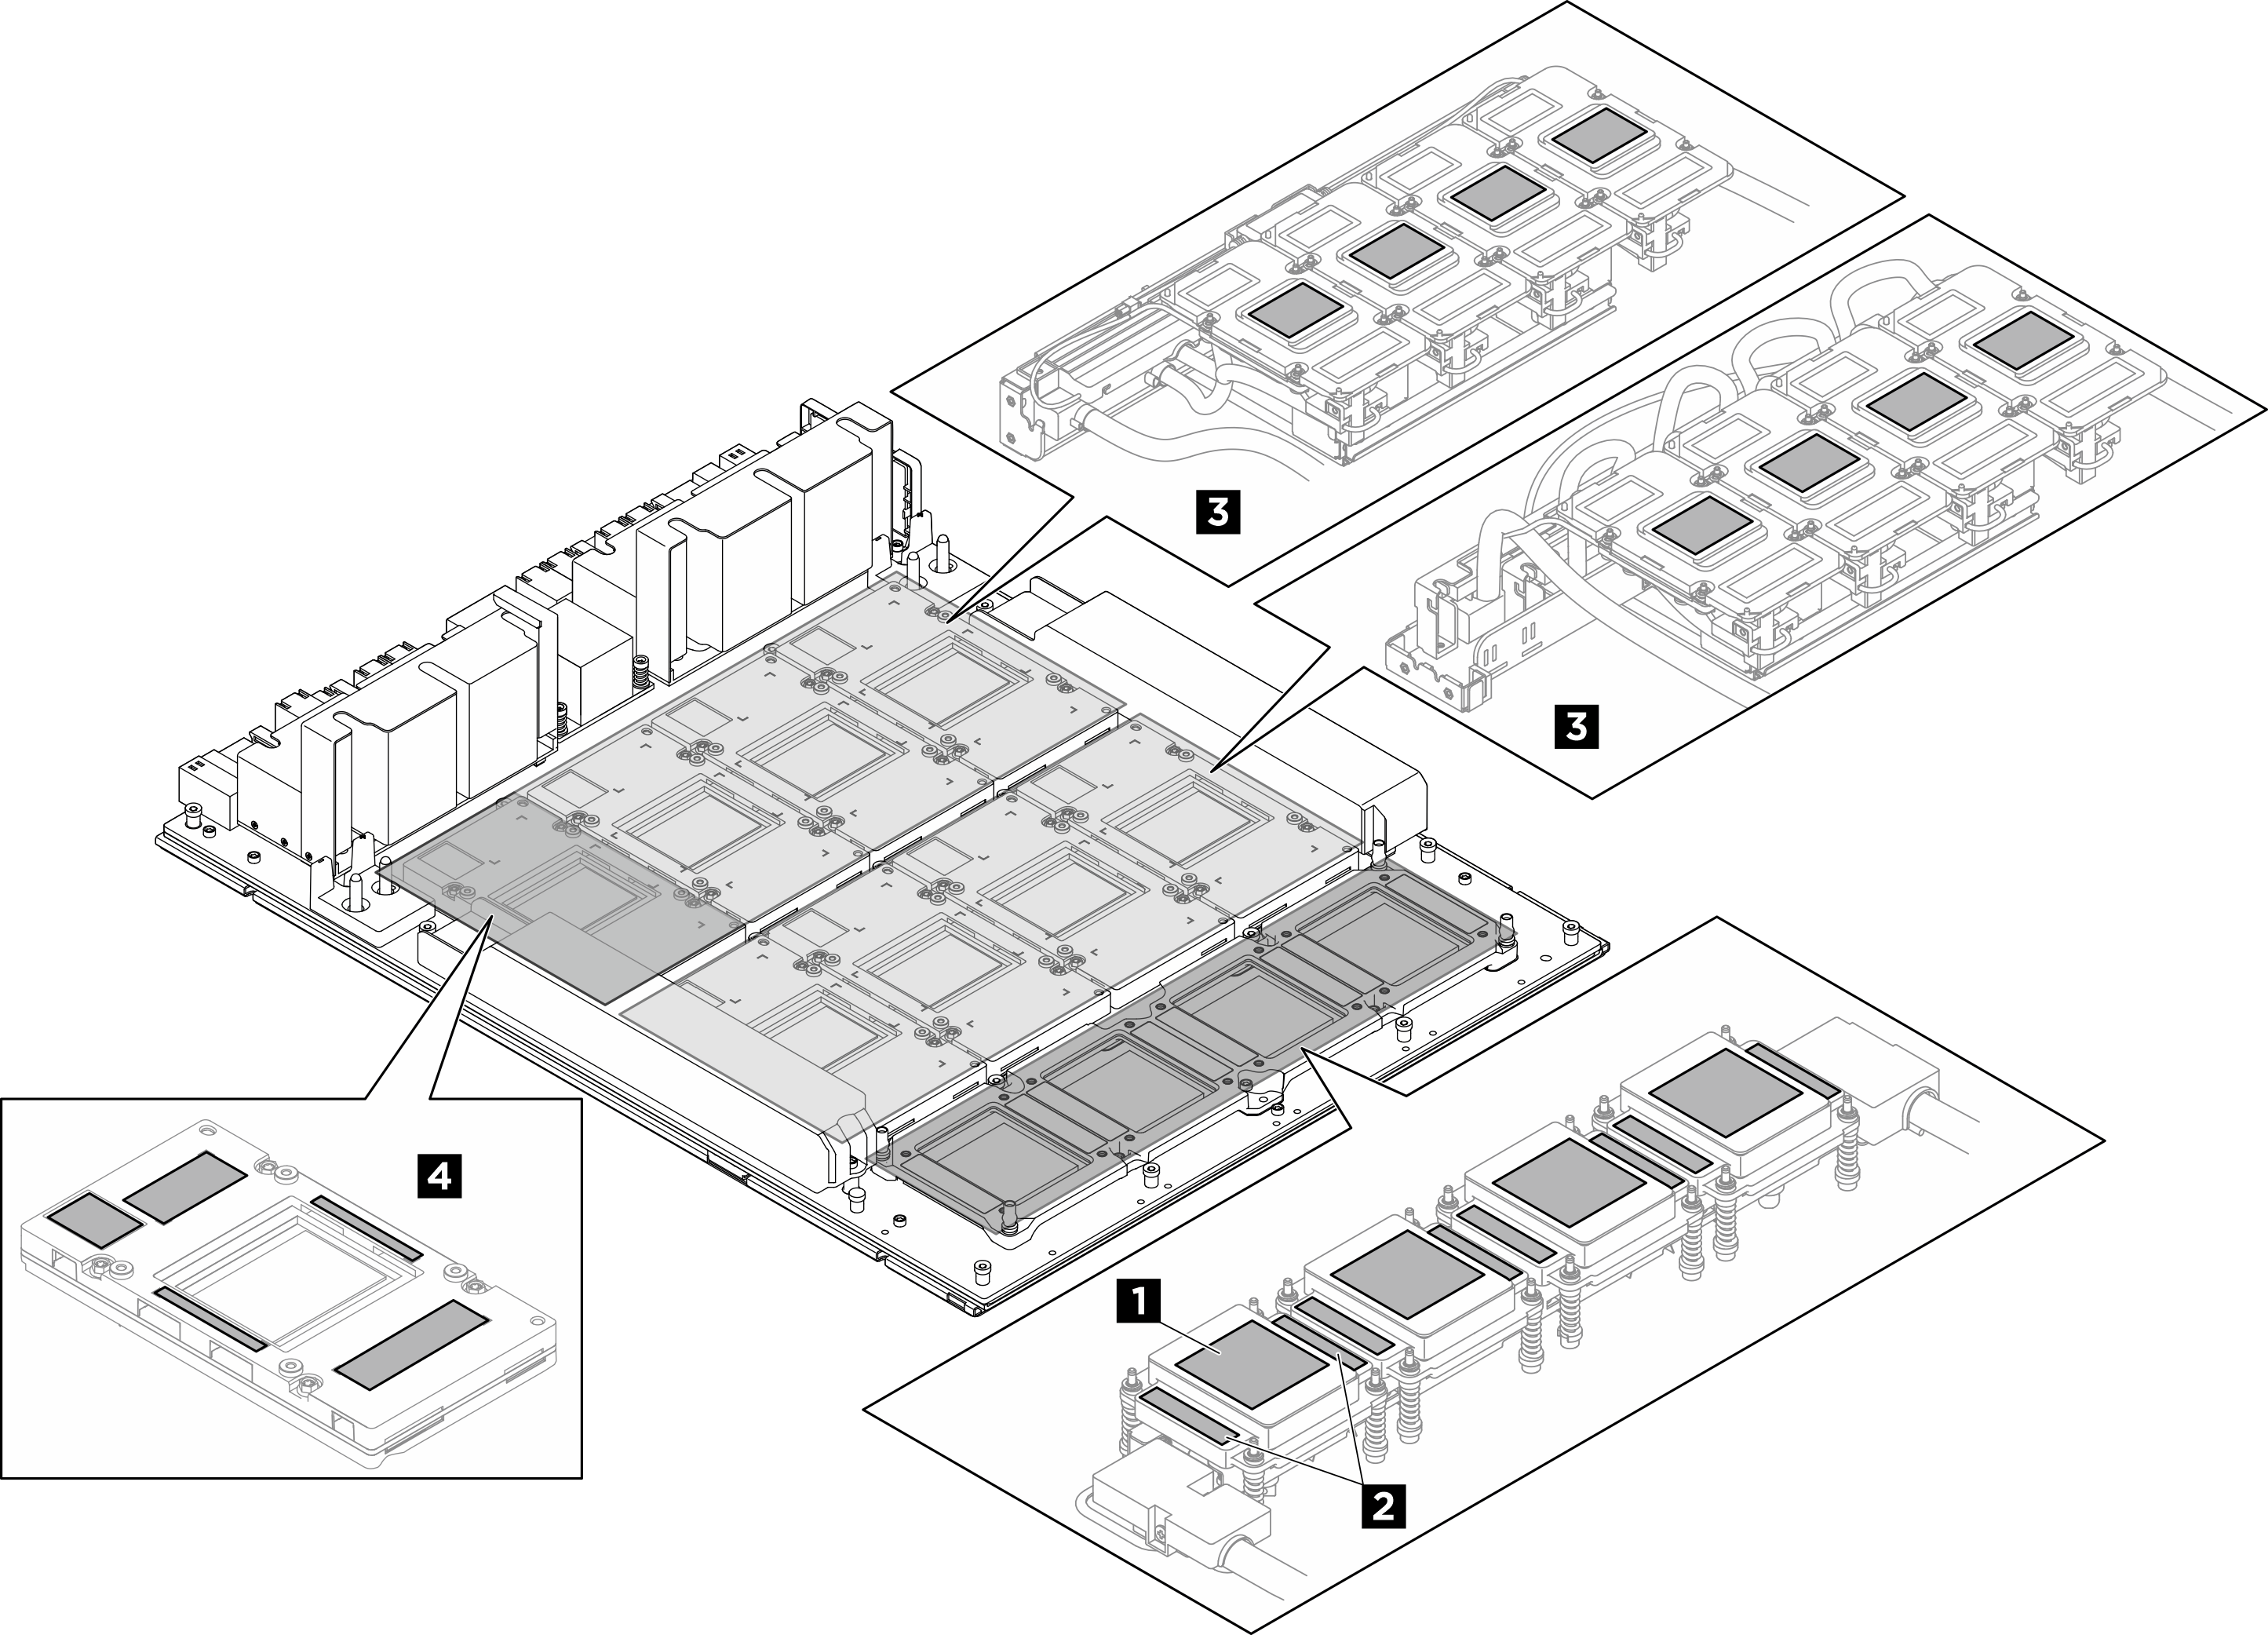
| Pad index | Pad type | Attached component |
|---|---|---|
| 1 NVSWITCH PCM kit | H100/H200 NVSwitch PCM | H100/H200 NVSwitch cold plate |
| 2 NVSWITCH Putty Pad kit | H100/H200 NVSwitch putty pads | H100/H200 NVSwitch cold plate |
| 3 H100/H200 PCM kit | H100/H200 GPU PCM | H100/H200 GPU cold plate |
| 4 SR780a V3 water loop putty pad kit | H100/H200 GPU putty pad | H100/H200 GPU |
Give documentation feedback