Installing an adapter
Use this information to install an adapter.
- To confirm that the server supports the adapter that you are installing, see the Lenovo ServerProven website.
- Locate the documentation that comes with the adapter and follow those instructions in addition to the instructions in this section.
- Do not set the maximum digital video adapter resolution above 1600 x 1200 at 75 Hz for an LCD monitor. This is the highest resolution that is supported for any add-on video adapter that you install in the server.
- Avoid touching the components and gold-edge connectors on the adapter.
- The server uses a rotational interrupt technique to configure PCI adapters so that you can install PCI adapters that do not support sharing of PCI interrupts.
Read the safety information in Safety and Installation guidelines.
If you are replacing a server component in the server, you need to turn off the server and peripheral devices, and disconnect the power cords and all external cables.
| Description | Supported maximum total memory size |
|---|---|
| NVIDIA Tesla K8, K40c, and M60 (Active) | 1 TB |
| NVIDIA Quadro K620, K5200, K6000, M5000, and M6000 | 1 TB |
If your adapter was previously configured, backup or record its configuration information, if possible, before replacing the adapter. See the documentation for your adapter for information and instructions.
If you are replacing a ServeRAID adapter, import your RAID configuration to the replacement adapter as a foreign configuration after you finish the replacement. See the ServeRAID-M Software User Guide for instructions.
The Intel X710 2x10GbE SFP+ Adapter supports 10-Gbps transfer rate only.
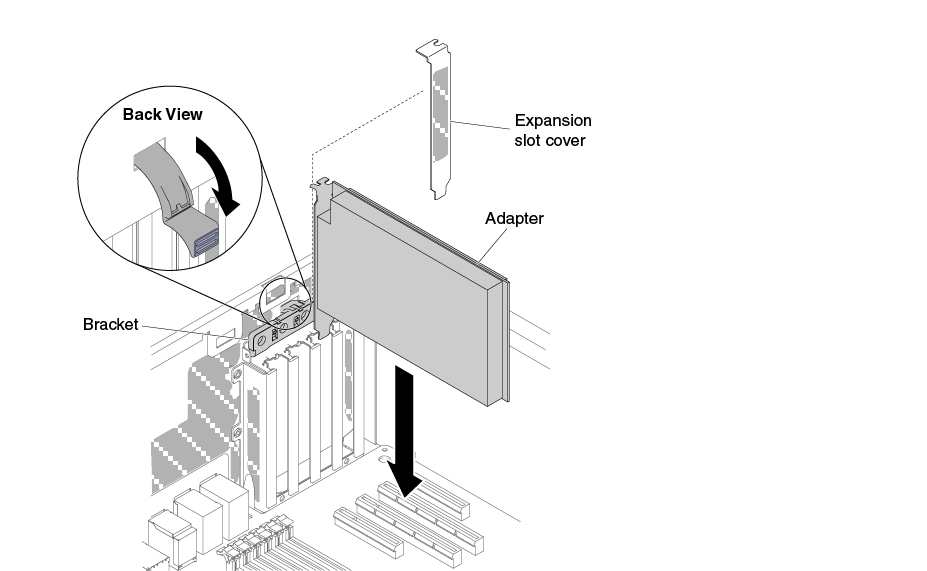
To install an adapter, complete the following steps.
- Press down the adapter-retention brackets to the open position.Figure 1. Rotate the adapter-retention brackets to the open position
If you have replaced a server component or installed an optional device in the server, you need to reconnect the power cords and all external cables, and turn on the server and peripheral devices.