Replacing the SD adapter
Use this information to replace a SD adapter.
The following notes describe the types of adapters that the server supports and other information that you must consider when you install an adapter:
- To confirm that the server supports the adapter that you are installing, see the Lenovo ServerProven website.
- Locate the documentation that comes with the adapter and follow those instructions in addition to the instructions in this section.
- Do not set the maximum digital video adapter resolution above 1600 x 1200 at 75 Hz for an LCD monitor. This is the highest resolution that is supported for any add-on video adapter that you install in the server.
- Avoid touching the components and gold-edge connectors on the adapter.
- The server uses a rotational interrupt technique to configure PCI adapters so that you can install PCI adapters that do not support sharing of PCI interrupts.
Attention
Static electricity that is released to internal server components when the server is powered-on might cause the server to stop, which might result in the loss of data. To avoid this potential problem, always use an electrostatic-discharge wrist strap or other grounding system when working inside the server with the power on.
Read the safety information in Safety and Installation guidelines.
If you are replacing a server component in the server, you need to turn off the server and peripheral devices, and disconnect the power cords and all external cables.
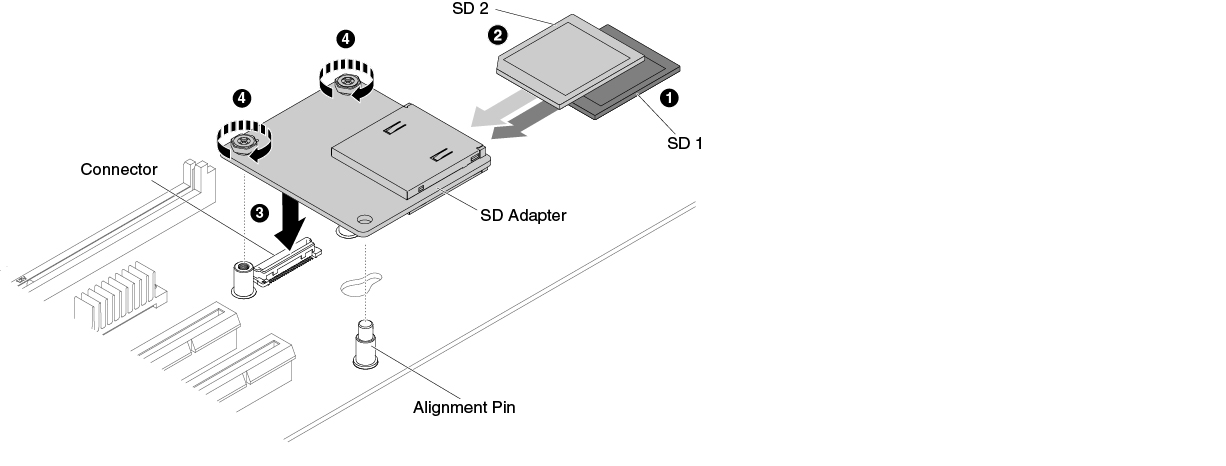
To install the SD adapter, complete the following steps:
- Fasten the two screws.Figure 1. SD adapter installation
Give documentation feedback