Use the information to install the USB cable assembly.
Read the safety information in Safety and Installation guidelines.
If you are replacing a server component in the server, you need to turn off the server and peripheral devices, and disconnect the power cords and all external cables.
To install the USB cable assembly, complete the following steps.
- Carefully lay the server down on its side.
- Unlock and remove the left-side cover (see Removing the left-side cover).
- Remove the air baffle (see Removing the air baffle).
- Remove the fan cage assembly (see Removing the fan cage assembly).
- Stand the server back up in its vertical position.
- Remove the USB cable assembly.
- Touch the static-protective package that contains the USB cable assembly to any unpainted metal surface on the server; then, remove the assembly from the package.
- Angel one side (without the release latch) of the USB assembly to the server chassis.
Figure 1. The USB assembly installation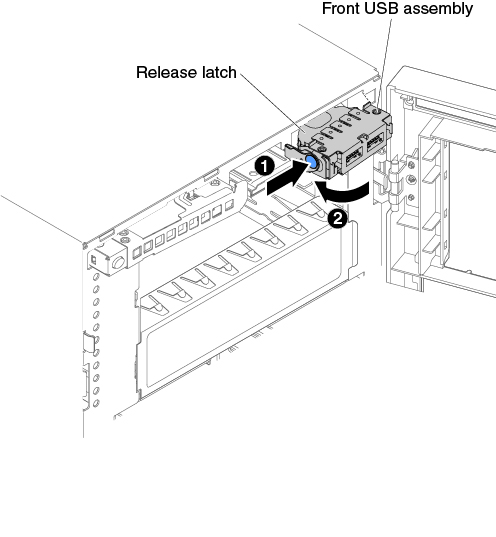
- Rotate and insert the USB cable assembly into the mounting bracket.
- Connect the USB cable to the system board (see System-board internal connectors and Internal cable routing and connectors).
- Close the bezel (see Installing the bezel).
- Reinstall the air baffle (see Replacing the air baffle).
- Install and lock the left-side cover (see Installing the left-side cover).
If you have replaced a server component or installed an optional device in the server, you need to reconnect the power cords and all external cables, and turn on the server and peripheral devices.