Replacing the DVD drive cable
Use this information to replace the DVD drive cable.
To install the DVD drive cable, complete the following steps:
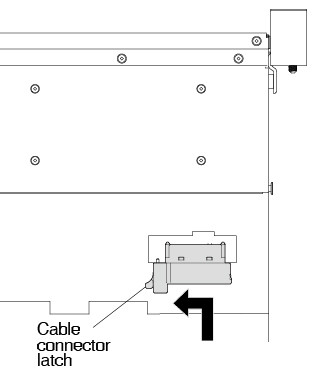
- Align the cable connector with the connector on the rear of the DVD drive cage. Press the cable connector into the DVD drive cage connector and slide it to the left until it is firmly seated.Figure 1. DVD drive cable latch
The following illustration shows cable routing for the DVD cable:
AttentionFollow the DVD drive cable routing as the illustration shows. Make sure that the cable is not pinched and does not cover any connectors or obstruct any components on the system board.Figure 2. DVD drive cable routing for 2.5-inch hard disk drive server models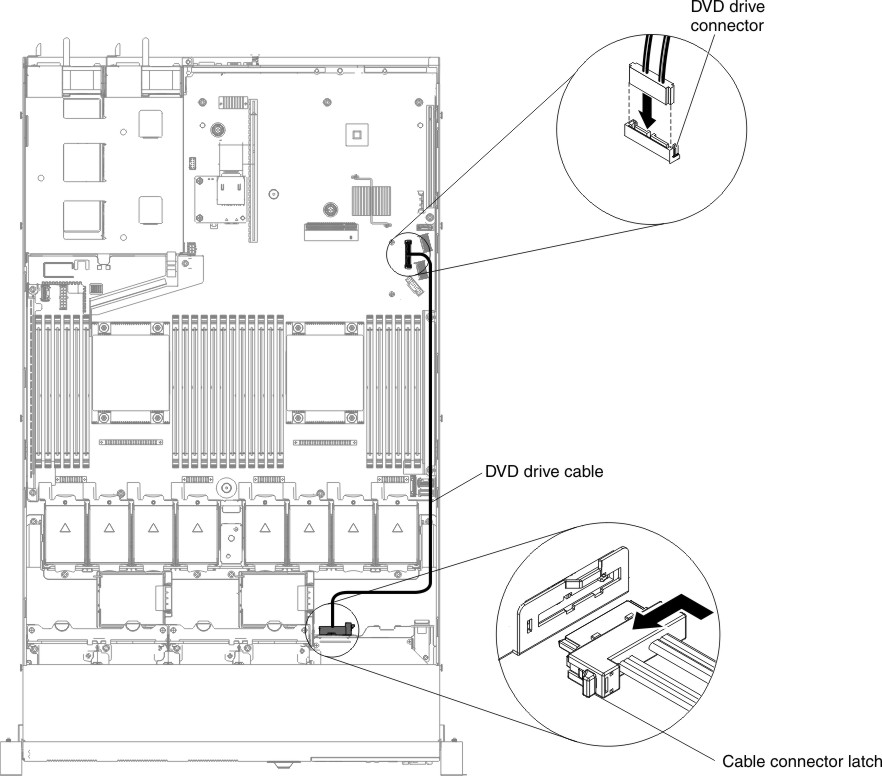 Figure 3. DVD drive cable routing for 3.5-inch hard disk drive server models
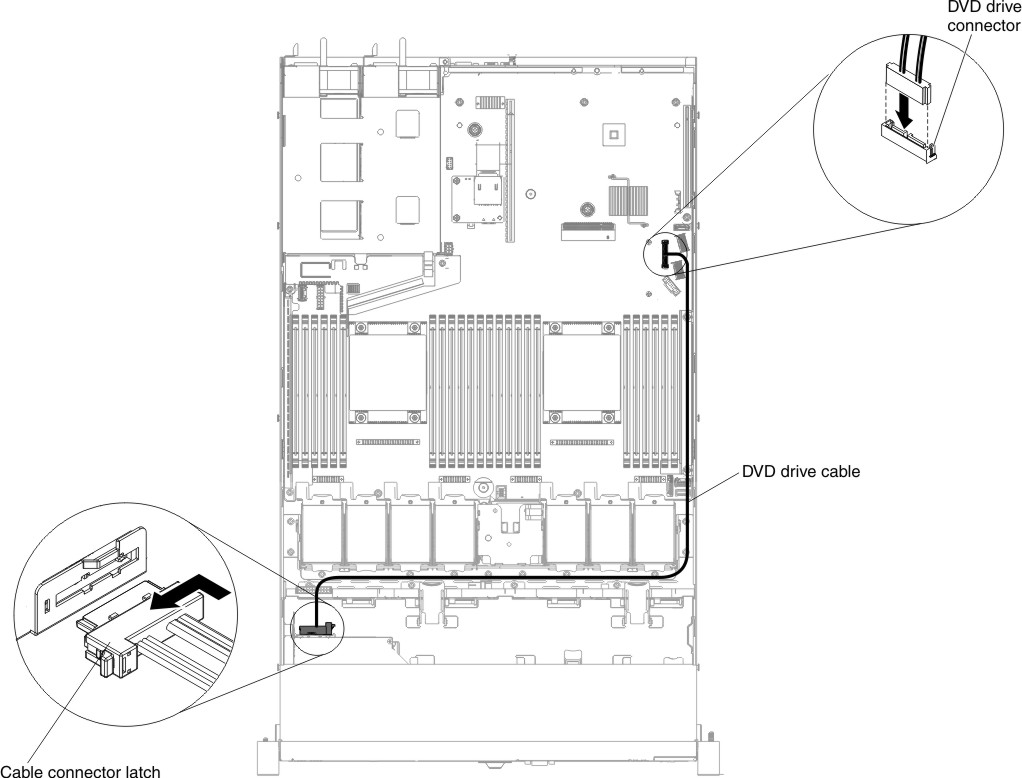
Give documentation feedback