Replacing the media cage
Use this information to replace the media cage.
To install the media cage, complete the following steps:
- Carefully push the media cage back into the server; then reconnect the cables that were removed from the system board. This may include the DVD drive, front USB connector assembly, front video connector assembly, operator information panel assembly, or LCD operating panel assembly cables. Remember to insert the cables into the relevant cable clips and cable tie.Note
- Refer to the illustration that applies to your particular server configuration.
- Remember the cable routing before disconnecting the cables from the system board.
Eight 2.5-inch hot-swap or simple-swap hard disk drive server configuration:
Figure 1. Media cage installation for eight 2.5-inch hot-swap or simple-swap hard disk drive server configuration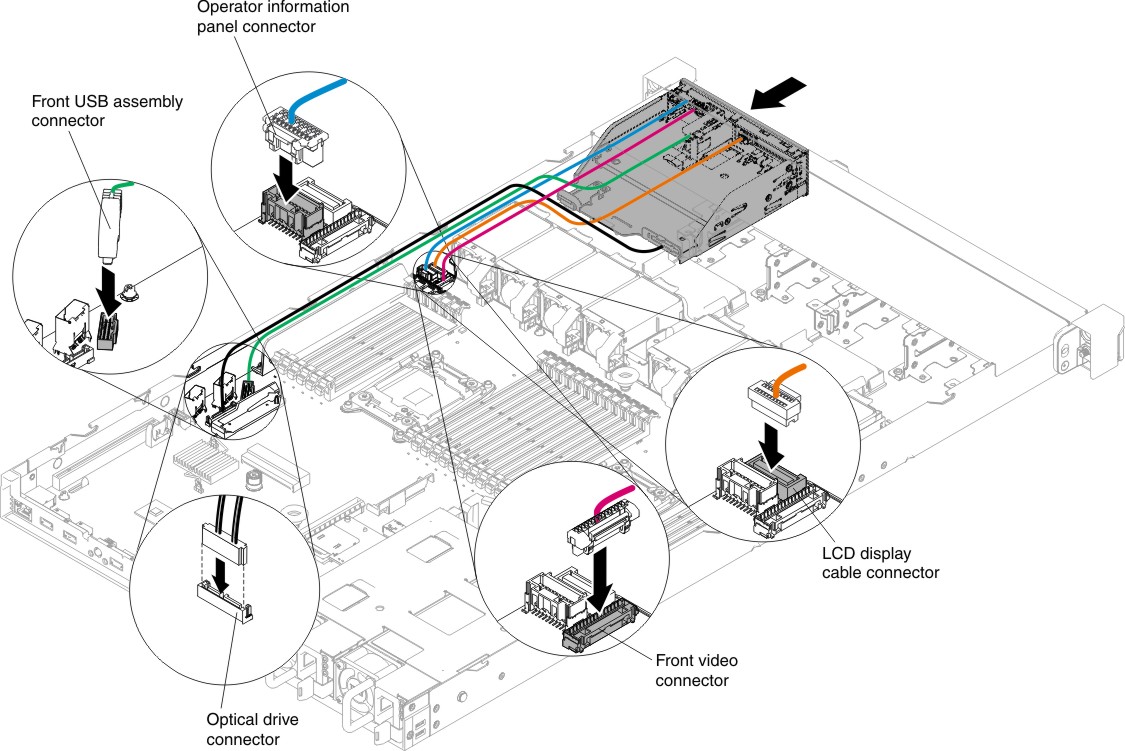
Ten 2.5-inch hot-swap hard disk drive server configuration:
Figure 2. Media cage installation for ten 2.5-inch hot-swap hard disk drive server configuration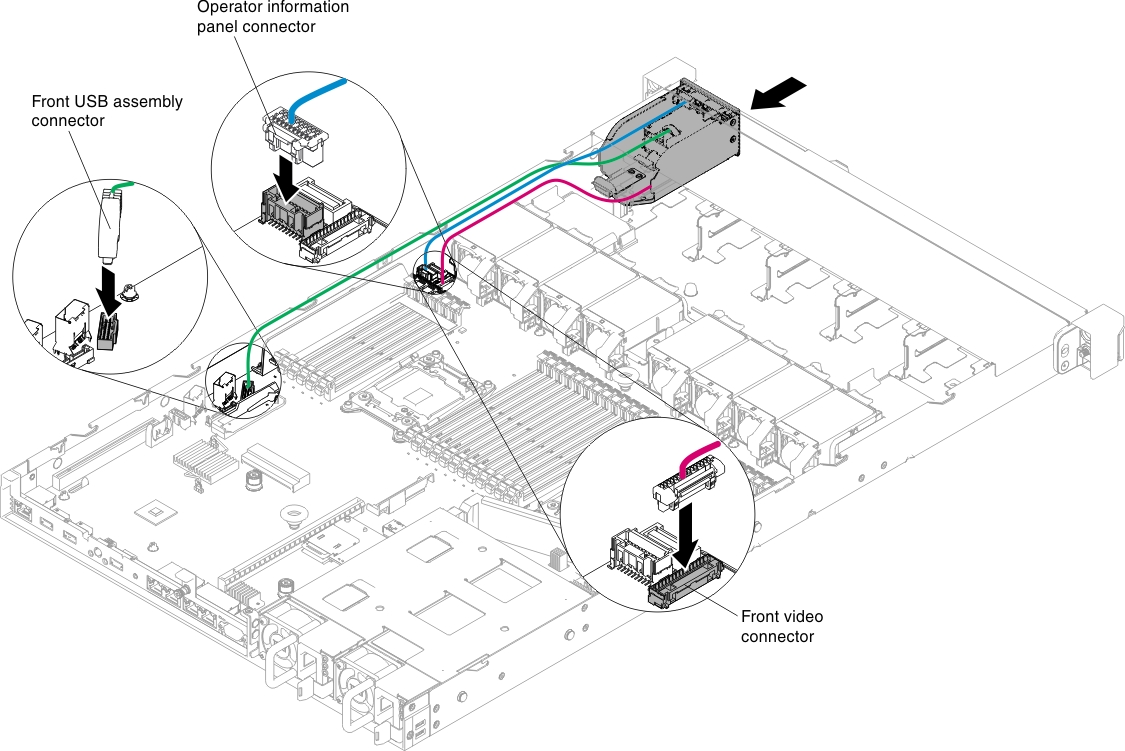
Four 3.5-inch hot-swap or simple-swap hard disk drive server configuration:
Figure 3. Media cage installation for four 3.5-inch hot-swap or simple-swap hard disk drive server configuration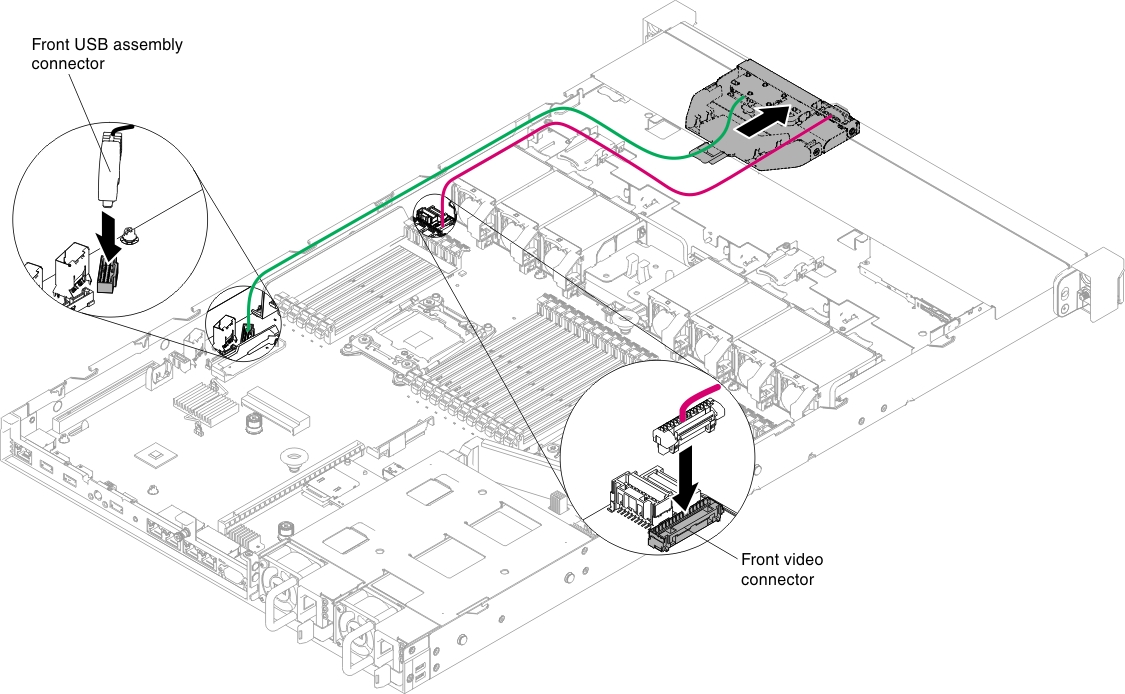
Give documentation feedback