Replacing the operator information panel assembly
Use this information to replace the operator information panel assembly.
To install the operator information panel, complete the following steps.
- Read the safety information that begins on Safety and Installation guidelines.
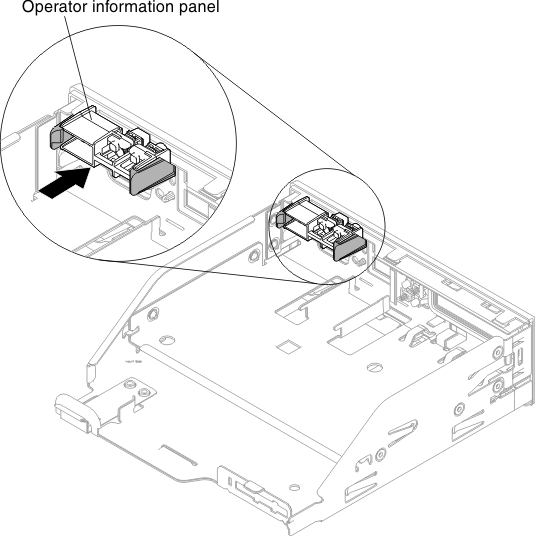
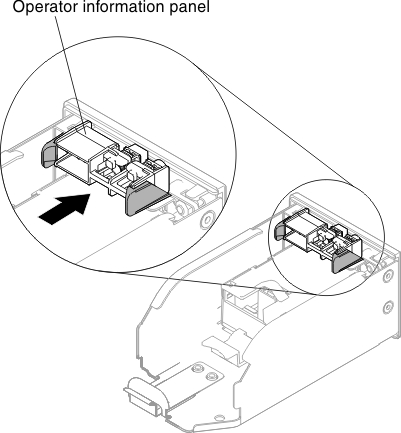
- For the eight 2.5-inch hot-swap or simple-swap and ten 2.5-inch hot-swap hard disk drive server configuration, install the operator information panel assembly into the media cage. For the four 3.5-inch" hot-swap or simple-swap hard disk drive server configuration, go to step 4.NoteRefer to the illustration that applies to your particular server configuration.
Eight 2.5-inch hot-swap or simple-swap hard disk drive server configuration:
Figure 1. Operator information panel assembly installation into media cage for eight 2.5-inch hot-swap or simple-swap hard disk drive server configuration
Ten 2.5-inch hot-swap hard disk drive server configuration:
Figure 2. Operator information panel assembly installation into media cage for ten 2.5-inch hot-swap hard disk drive server configuration
- Carefully push the media cage back into the chassis (see Replacing the media cage). Remember to reconnect the cables that were removed from the system board.
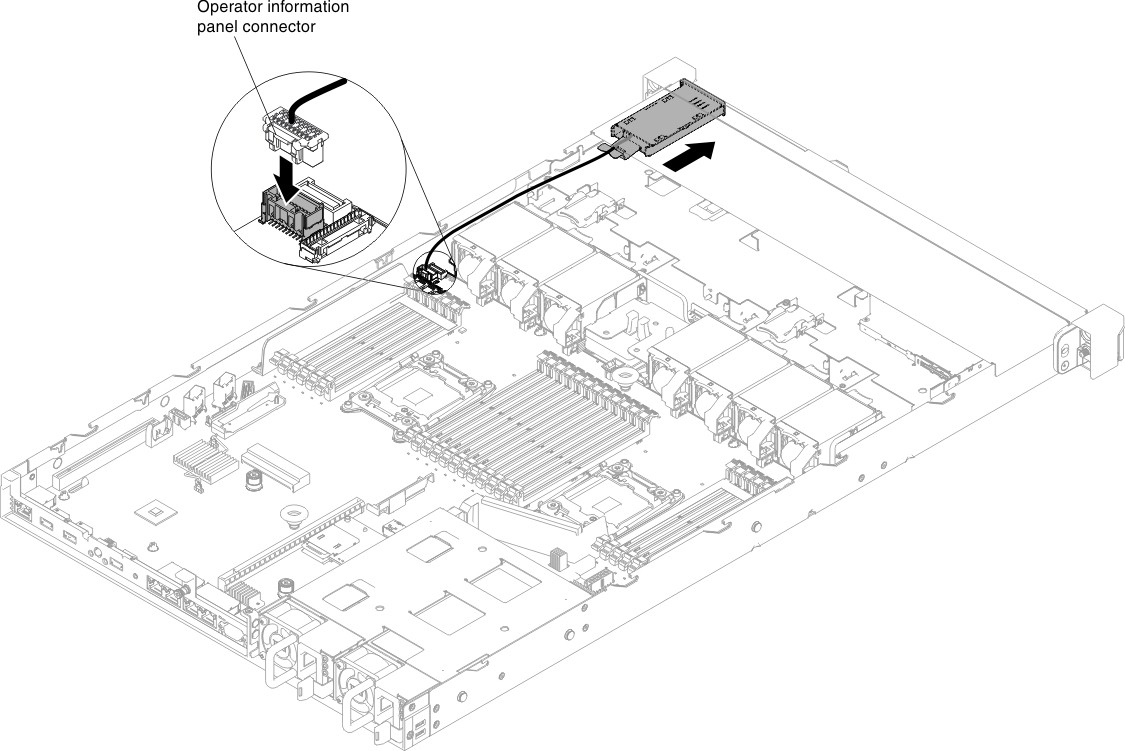
- For the four 3.5-inch hot-swap or simple-swap hard disk drive server configuration, slide the operator information panel into the chassis from the inside of the server; then, reconnect the operator information panel assembly cable to the system board.Figure 3. Operator information panel assembly installation for four 3.5-inch hot-swap or simple-swap hard disk drive server configuration

- Reconnect the operator information panel assembly cable to the operator information panel assembly. This step applies to all types of server configurations.
- Reinstall the cover (see Replacing the cover).
- Slide the server into the rack.
- Reconnect the power cords and any cables that you removed.
- Turn on the peripheral devices and the server.
Give documentation feedback