Removing the media cage
Use this information to remove the media cage.
To remove the media cage, complete the following steps:
- Disconnect the cables that may be attached to the system board. This may include the DVD drive, front USB connector assembly, front video connector assembly, operator information panel assembly, or LCD operating panel assembly cables. After disconnecting the cables, slightly lift the release latch; then, carefully push the media cage out of the chassis and set it aside.Note
- Refer to the illustration that applies to your particular server configuration.
- Remember the cable routing before disconnecting the cables from the system board.
Eight 2.5-inch hot-swap or simple-swap hard disk drive server configuration:
Figure 1. Media cage removal for eight 2.5-inch hot-swap or simple-swap hard disk drive server configuration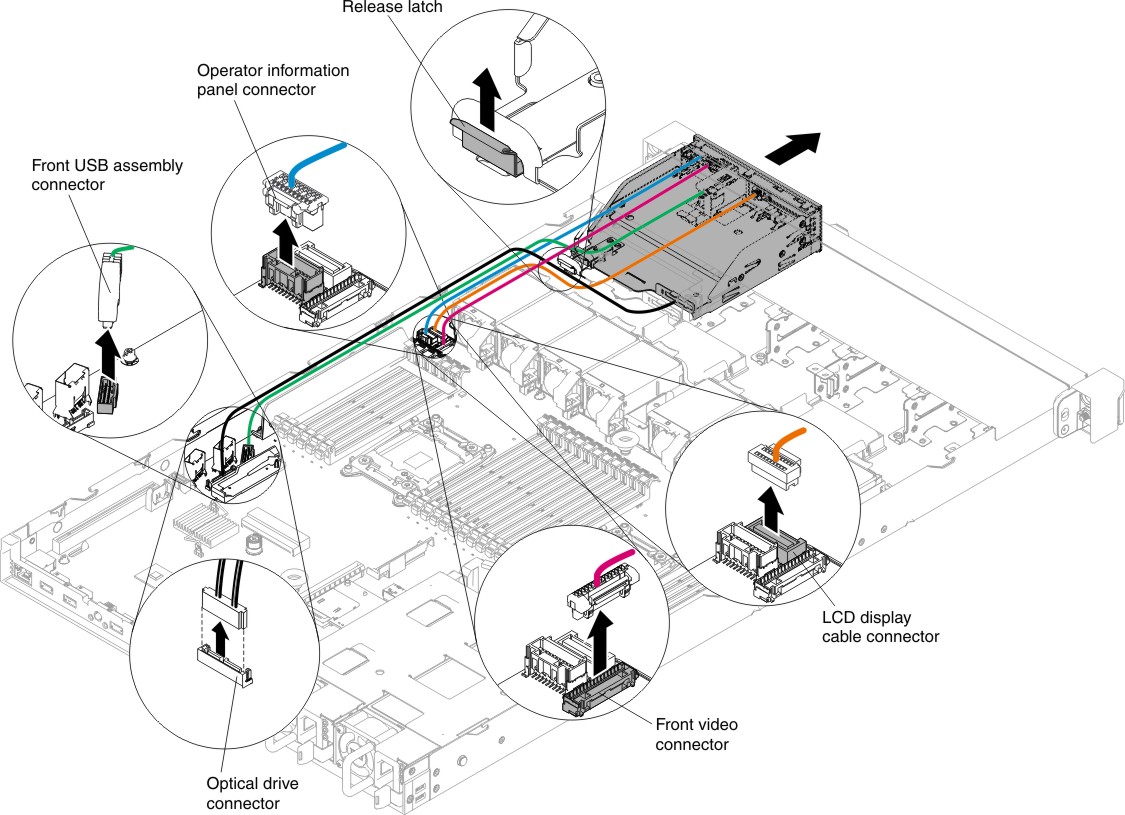
Ten 2.5-inch hot-swap hard disk drive server configuration:
Figure 2. Media cage removal for ten 2.5-inch hot-swap hard disk drive server configuration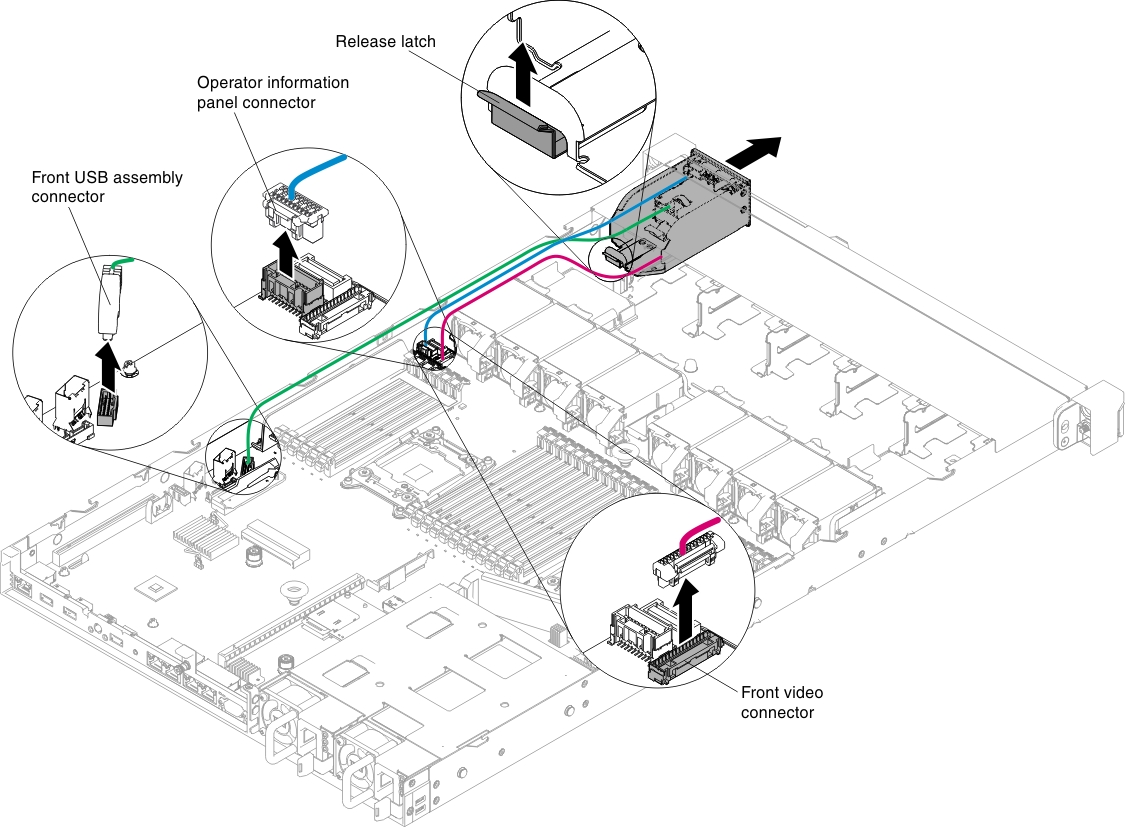
Four 3.5-inch hot-swap or simple-swap hard disk drive server configuration:
Figure 3. Media cage removal for four 3.5-inch hot-swap or simple-swap hard disk drive server configuration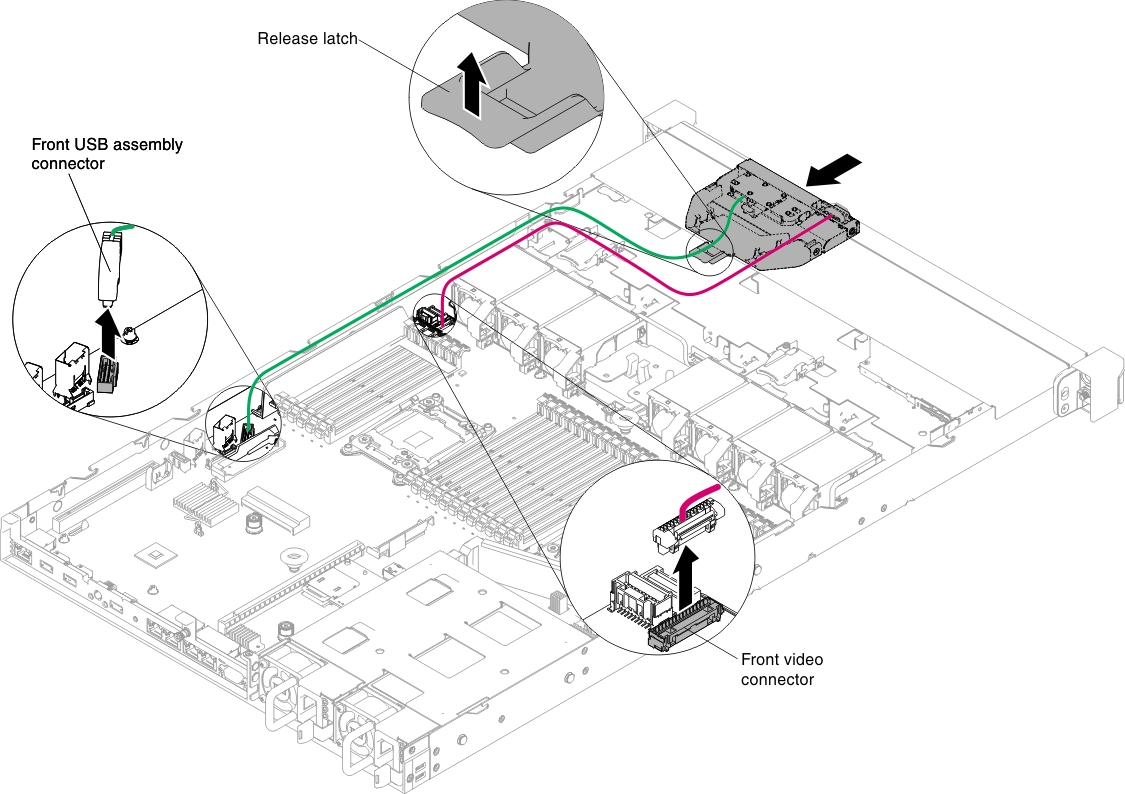
Give documentation feedback