Remove the system management sideband cable kit

Use this information to remove the system management sideband cable kit.

About this task

Attention
  • Read Installation Guidelines and Safety inspection checklist to ensure that you work safely.

  • Turn off the corresponding DWC tray that you are going to perform the task on.

  • Disconnect the power cords and all external cables from the enclosure.

  • Disconnect the power cords from the enclosure.

Watch the procedure
  • A video of this procedure is available at YouTube.

Procedure

  1. Make preparations for this task.
    1. Remove the tray from the enclosure. See Remove a tray from the enclosure.
    2. Remove the tray cover. See Remove the tray cover.
    3. Remove the cross braces. See Remove the cross braces.
    4. Remove the front E3.S drive cage. see Remove an E3.S front drive cage assembly.
    5. When replacing the sideband cable with a new one, and there is a ferrite core attached to it, remove the ferrite core. Keep the ferrite core for future use. See Remove the ferrite core.
  2. Disconnect the system management sideband cables from the system boards, see Internal cable routing.
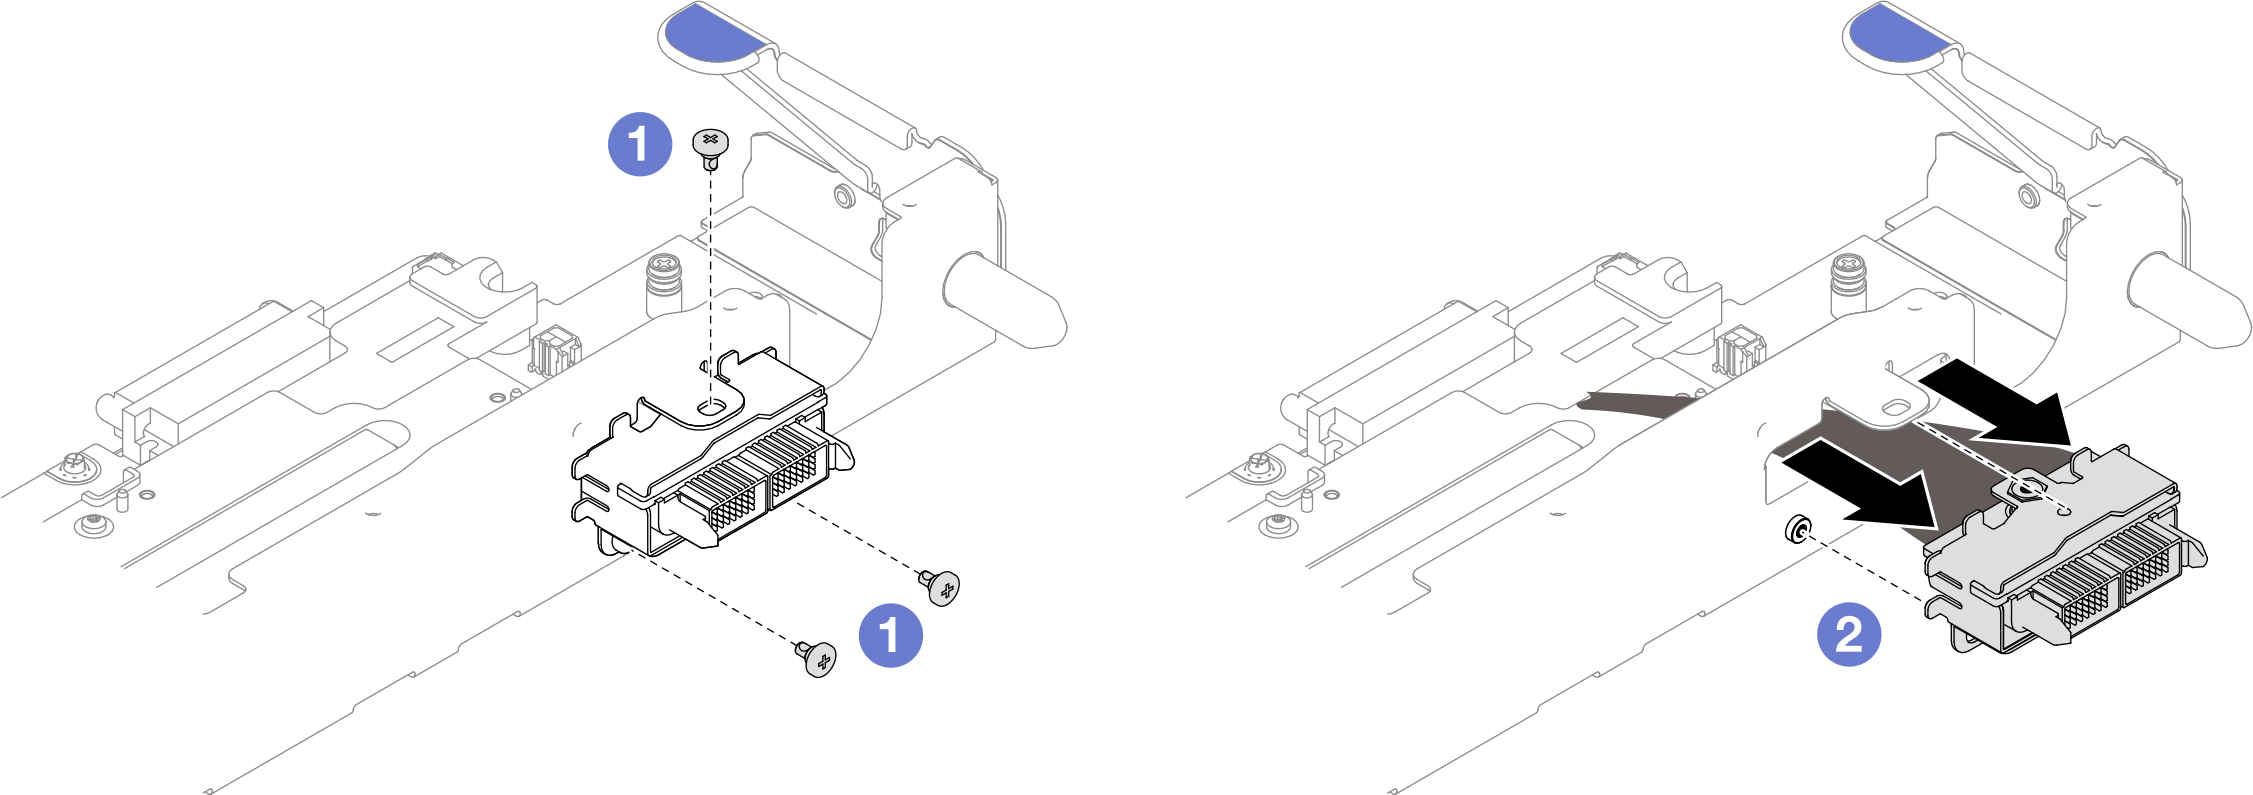
  3. Remove the system management sideband cable kit.
    1. Remove three M3 PH1 screws from the tray rear bezel.
    2. Remove the system management sideband cable kit.
    Figure 1. Removing the system management sideband cable kit

After you finish

If you are instructed to return the component or optional device, follow all packaging instructions, and use any packaging materials for shipping that are supplied to you.