Install a power adapter (Rack mount)
Follow instructions in this section to install a power adapter to the enclosure.
About this task
Read Installation Guidelines and Safety inspection checklist to ensure that you work safely.
Power off the server and peripheral devices and disconnect the power cords and all external cables. See Power off the server.
Touch the static-protective package that contains the component to any unpainted metal surface on the server; then, remove it from the package and place it on a static-protective surface.
Power adapters to the node must be of the same brand, power rating, wattage or efficiency level.
- Depending on the model, the enclosure might look slightly different from the illustrations in this section.
- ThinkEdge SE100 1U2N and 1U3N Enclosure only support 300W power adapters. For supported power adapters, see Lenovo ServerProven website.
| ThinkEdge 300W 230V/115V External Power Supply | ||
|---|---|---|
Information published | Value and precision | Unit |
Manufacturer’s name | Lenovo | - |
Model identifier | Adapter | - |
Input voltage | 100-240 | V |
Input AC frequency | 50-60 | Hz |
Output voltage | 28.0 | V |
Output current |
| A |
Output power |
| W |
Average active efficiency |
| % |
Efficiency at low load (10 %) |
| % |
No-load power consumption |
| W |
Procedure
- Make preparation for this task.
- Remove the middle cover.
Remove the middle top cover of 1U2N enclosure
 Loosen the six captive screws on the middle top cover.
 Lift up the middle top cover from the enclosure, and place it on a flat clean surface.
Figure 1. Removing the middle top cover of 1U2N enclosure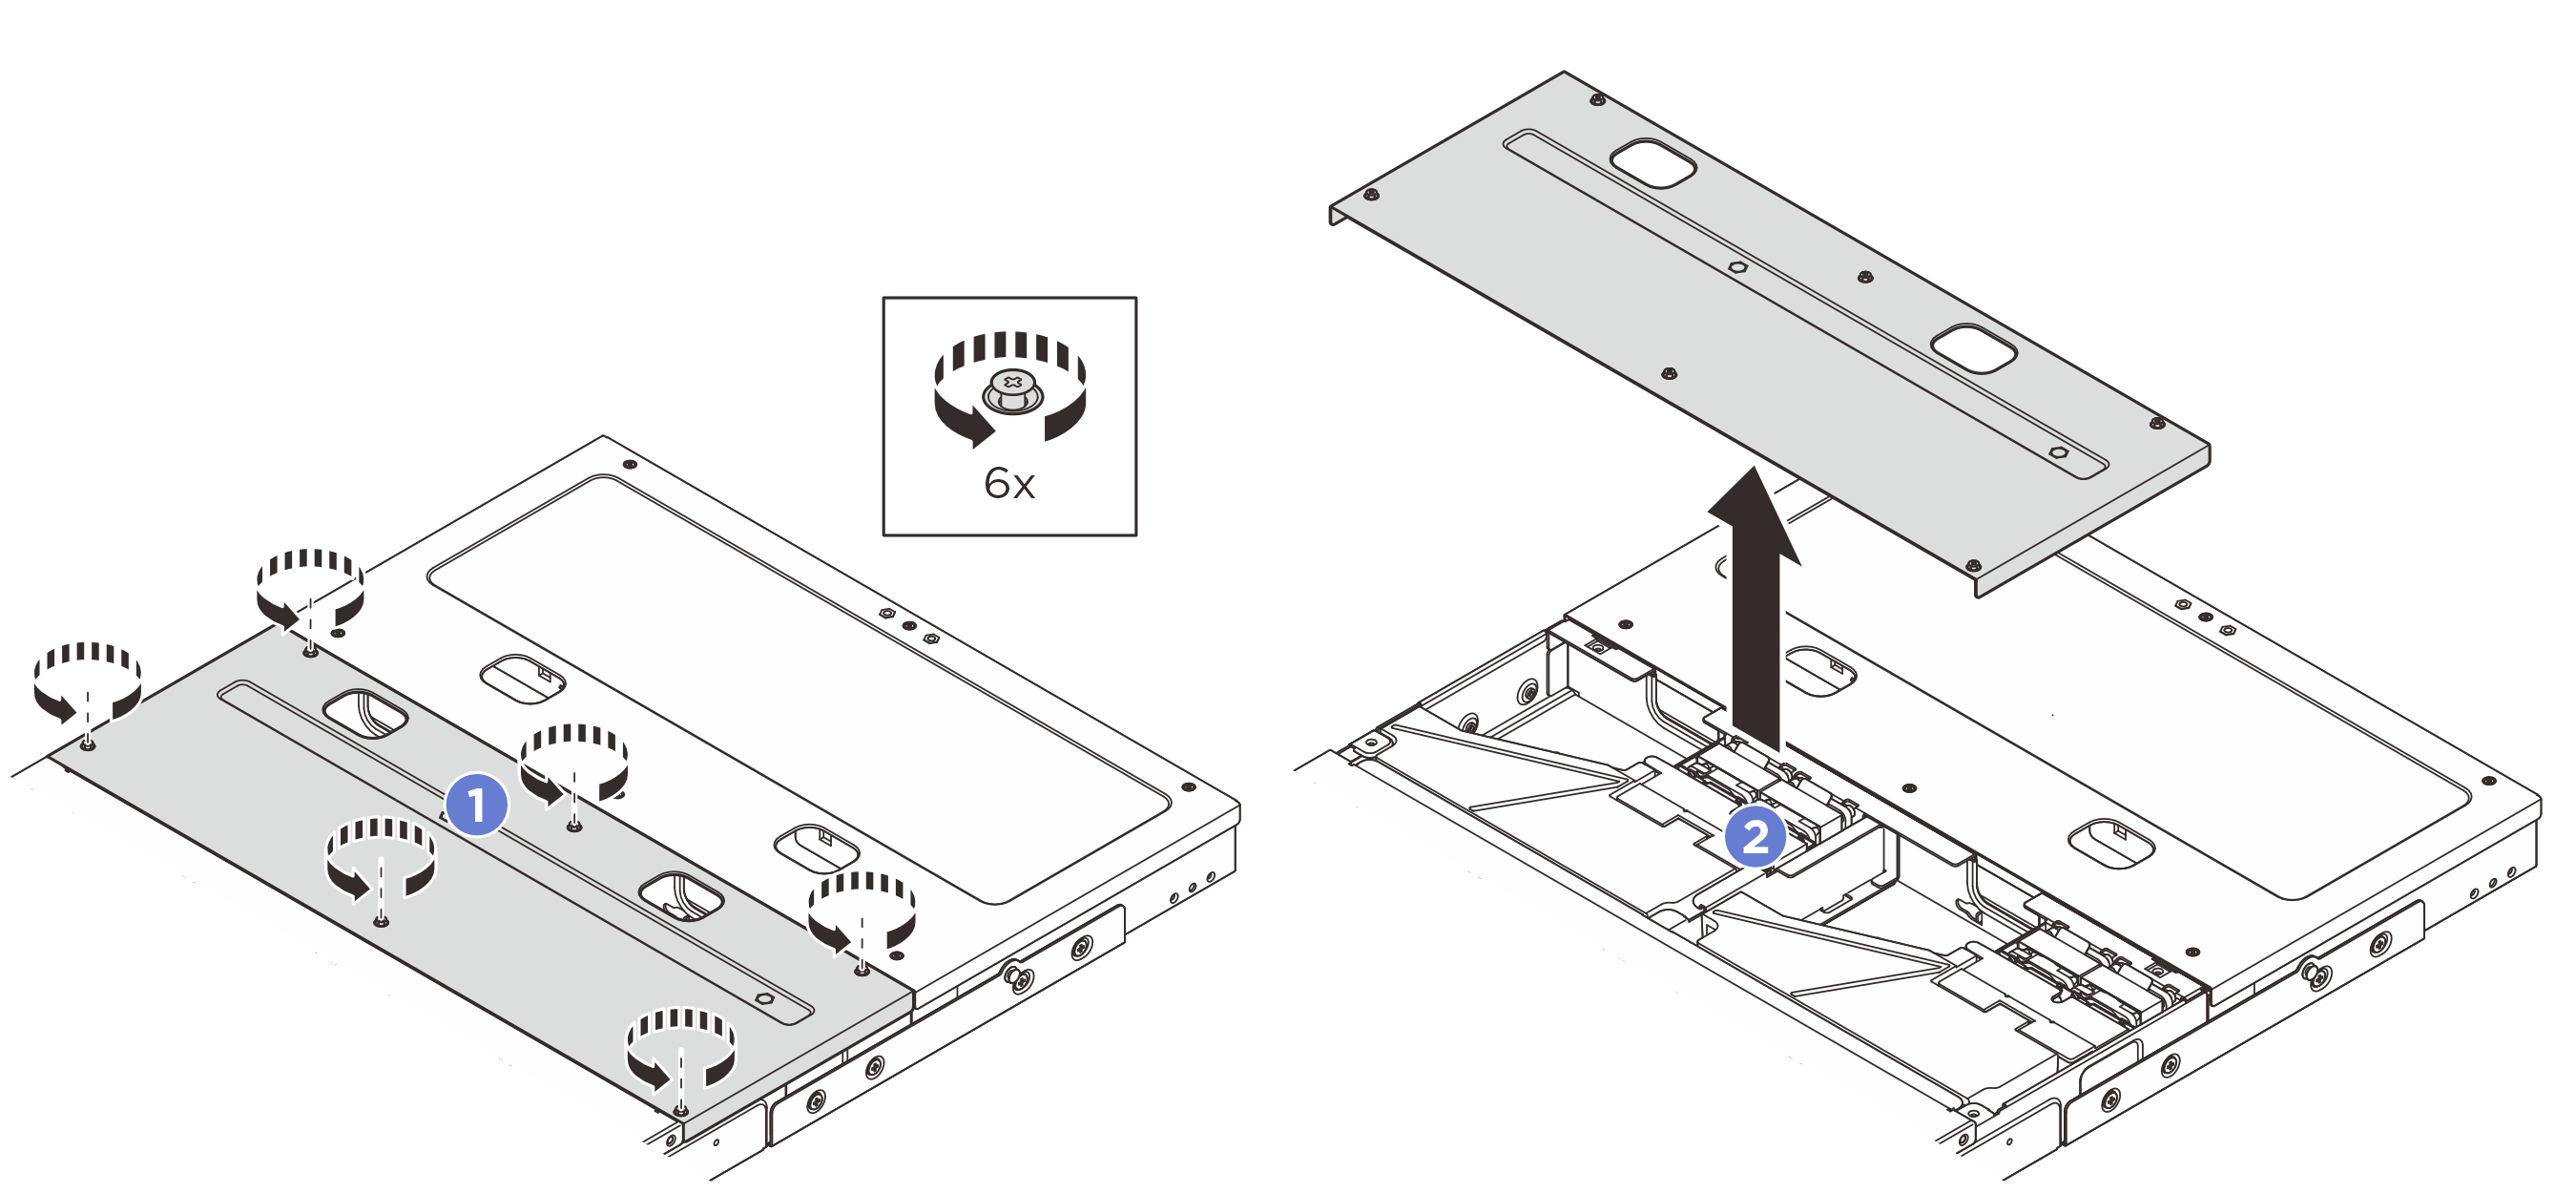
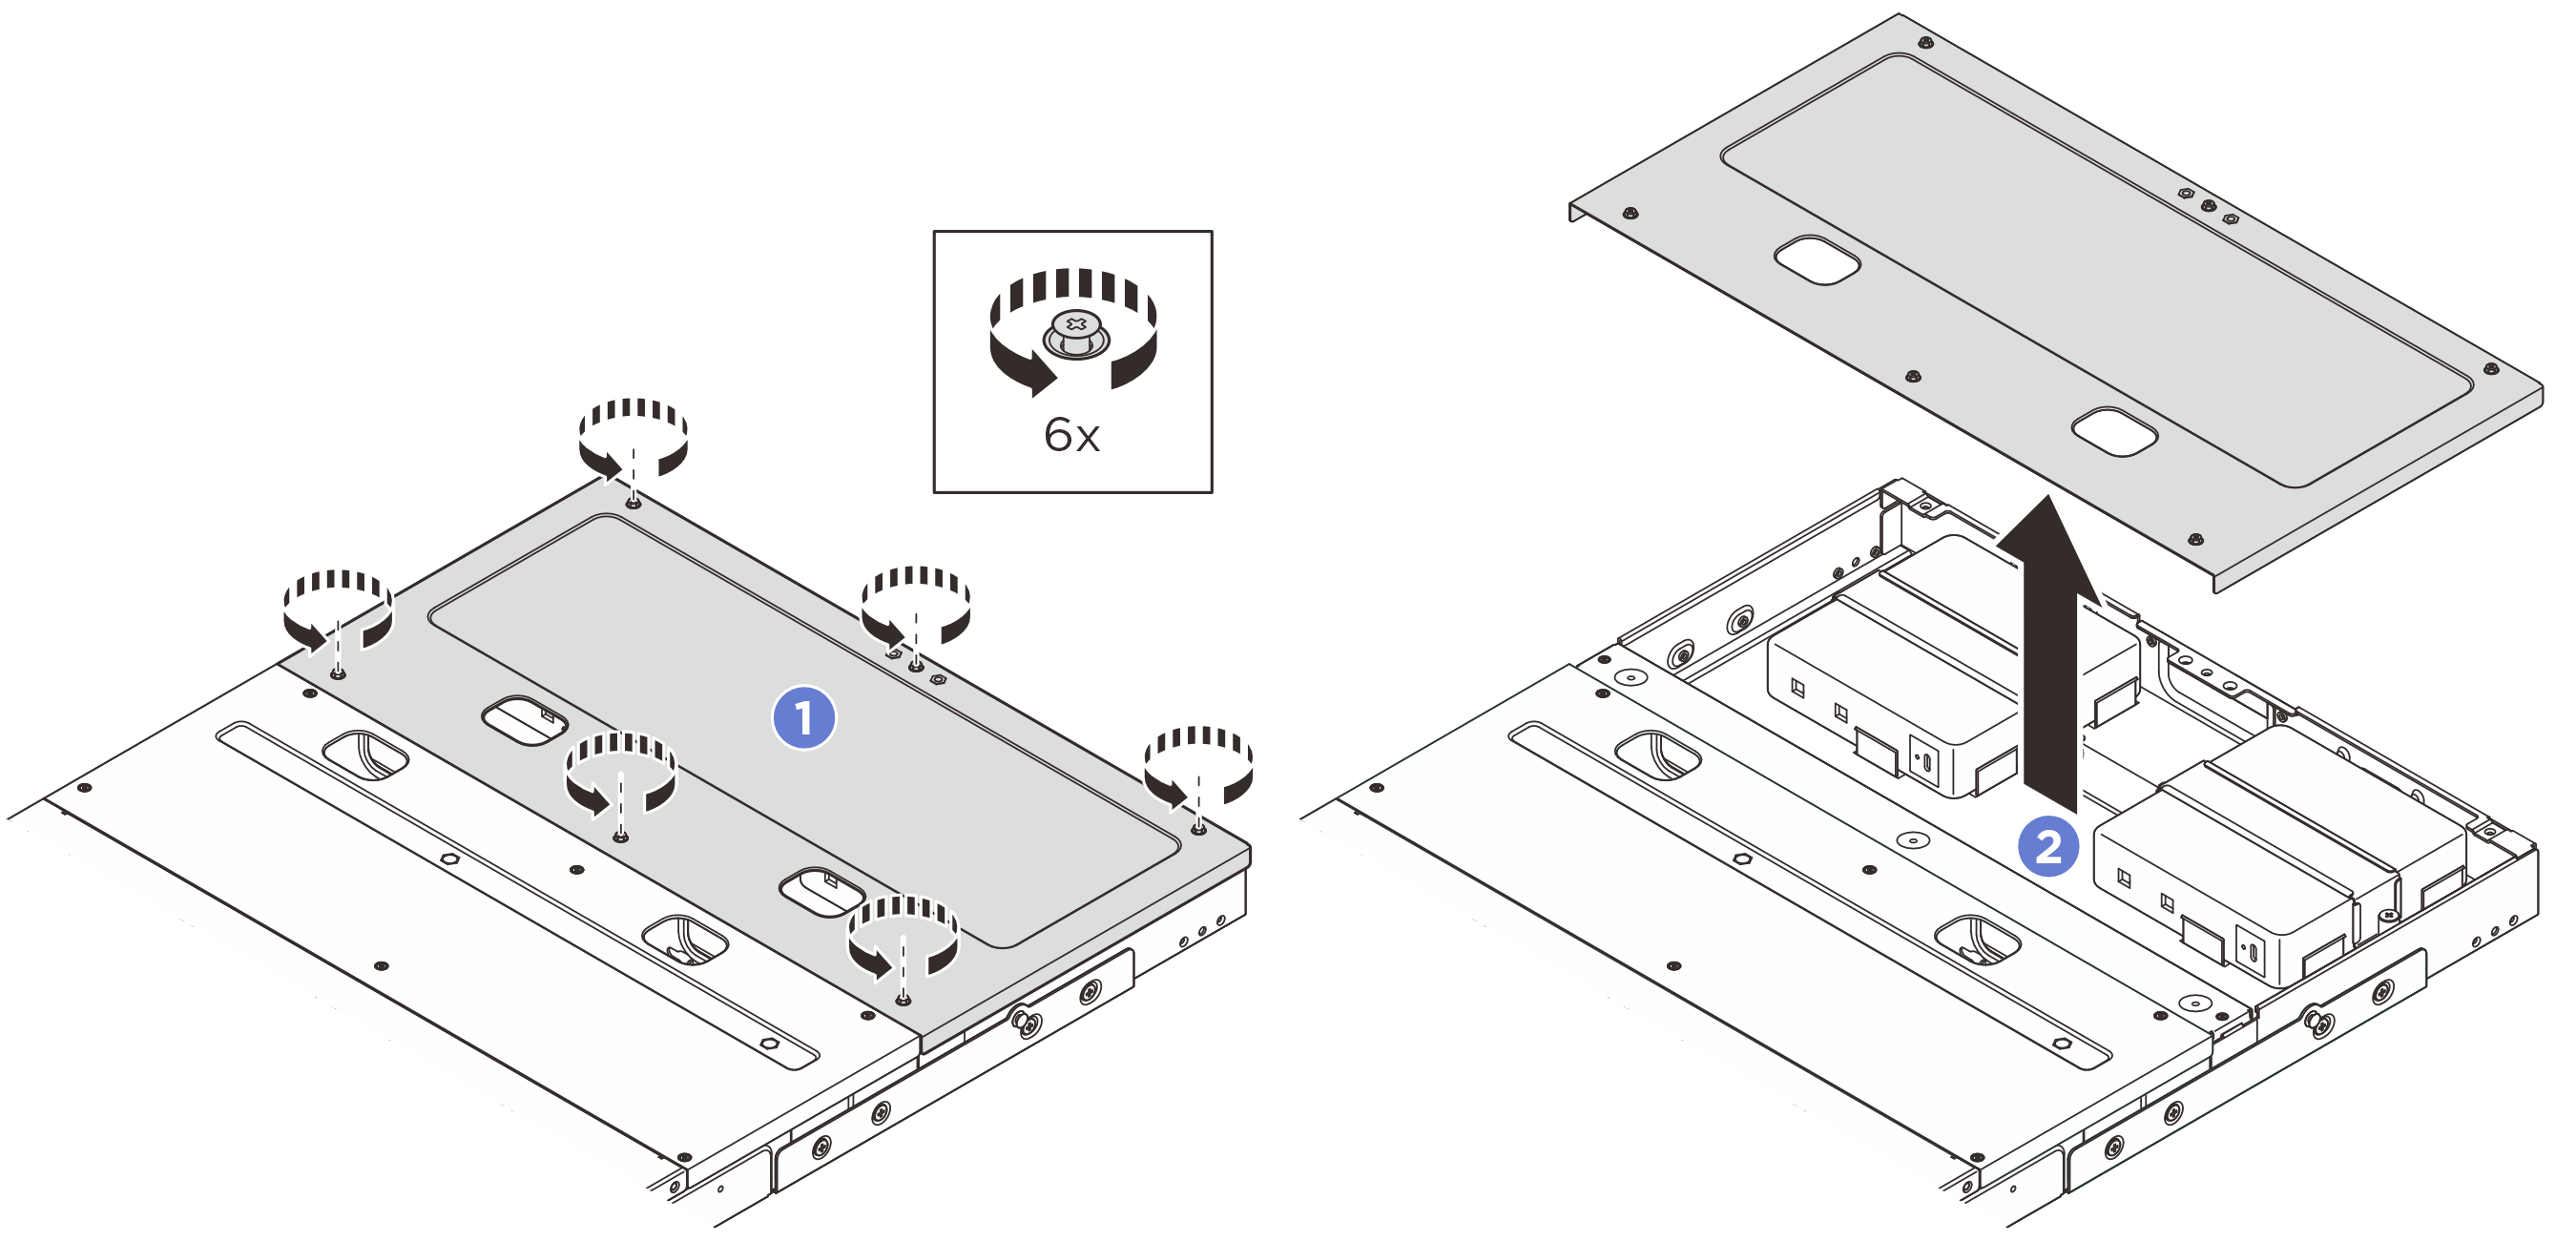
Remove the middle top cover of 1U3N enclosure
- Loosen the eight captive screws on the middle top cover.
- Lift up the middle top cover from the enclosure, and place it on a flat clean surface.
Figure 2. Removing the middle top cover of 1U3N enclosure
- Remove the rear cover.
- Loosen the six captive screws on the rear top cover.
- Lift up the rear top cover from the enclosure, and place it on a flat clean surface.
- Remove the air baffle. Pinch the air baffle by the blue touch points, and carefully lift the air baffle out of the enclosure.Figure 3. Removing the air baffle from 1U2N enclosure
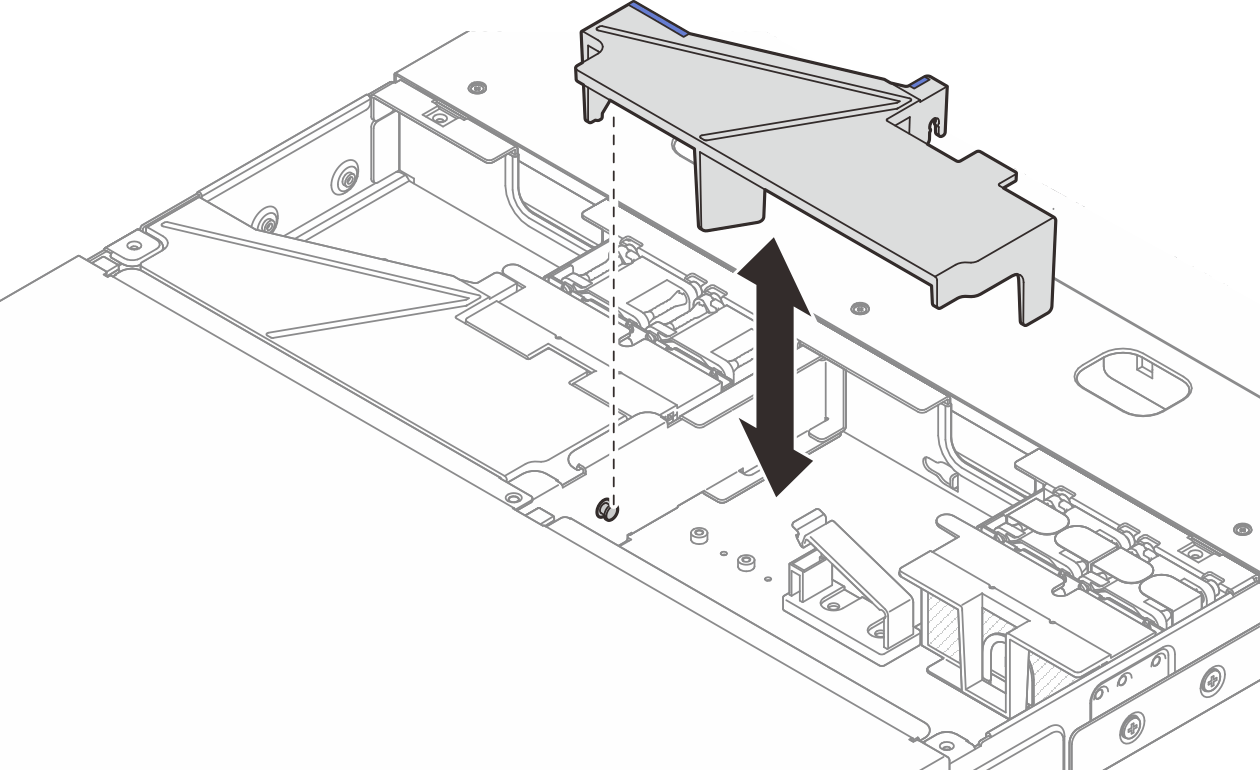 Figure 4. Removing the air baffle from 1U3N enclosure
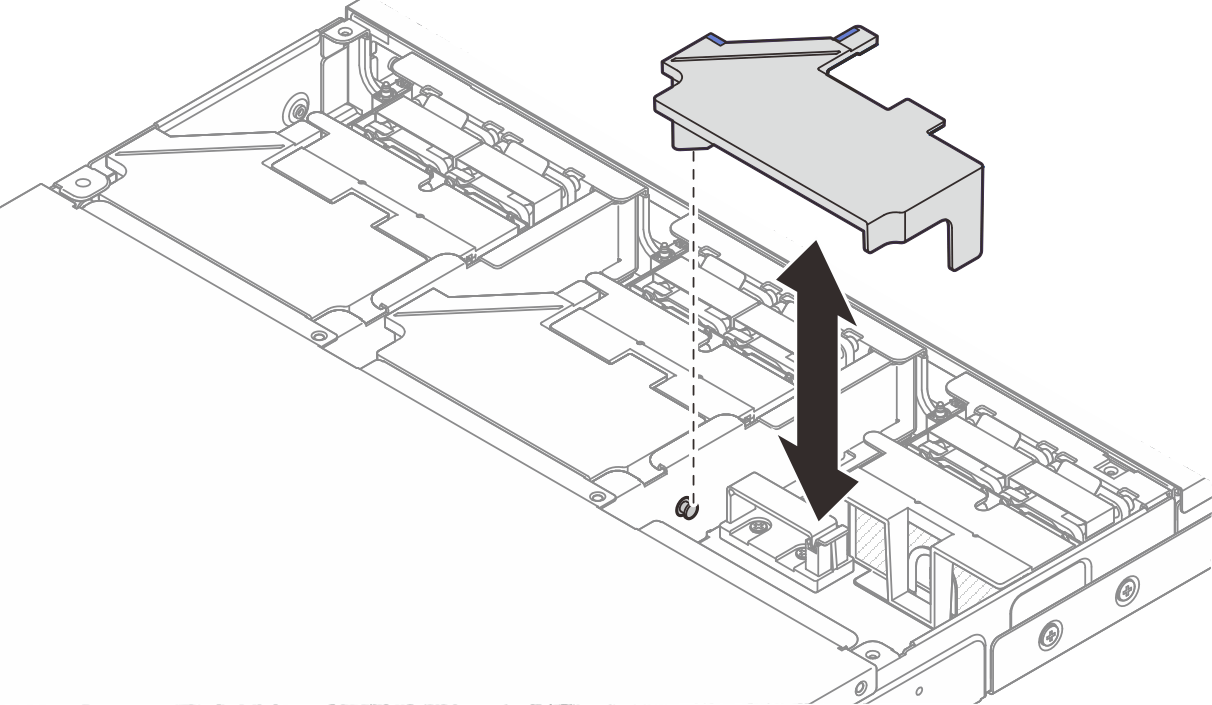
- Remove the crossbar.
- Loosen the two captive screws that secure the crossbar.
- Hold the crossbar and remove it from the enclosure.
Figure 5. Removing the crossbar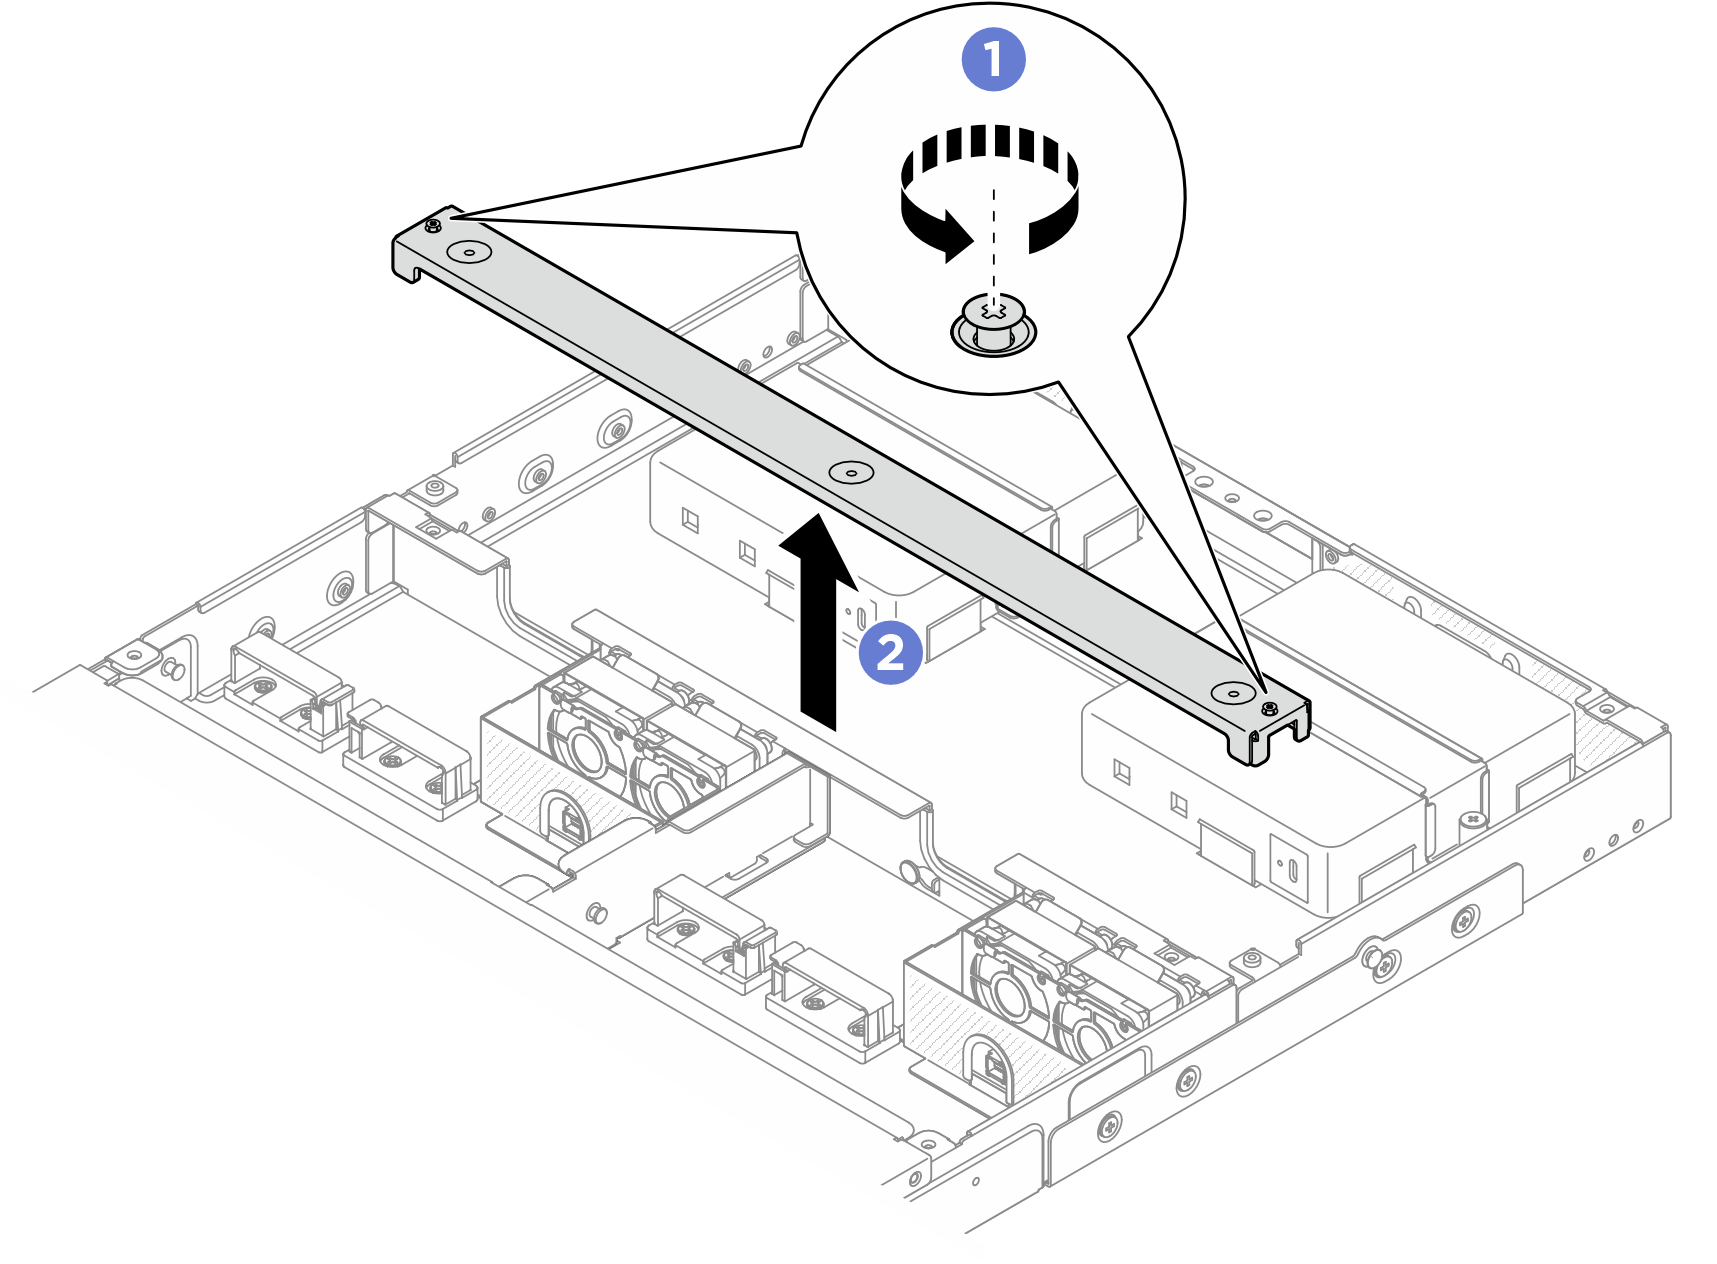
- Remove the middle cover.
- Install the power adapter.
- Install the power adapter into the enclosure.
- Lower the power adapter bracket onto the top of the power adapter.
 Tighten the two captive screws on both sides of the power adapter bracket to secure the power adapter.Figure 6. Installing the power adapter
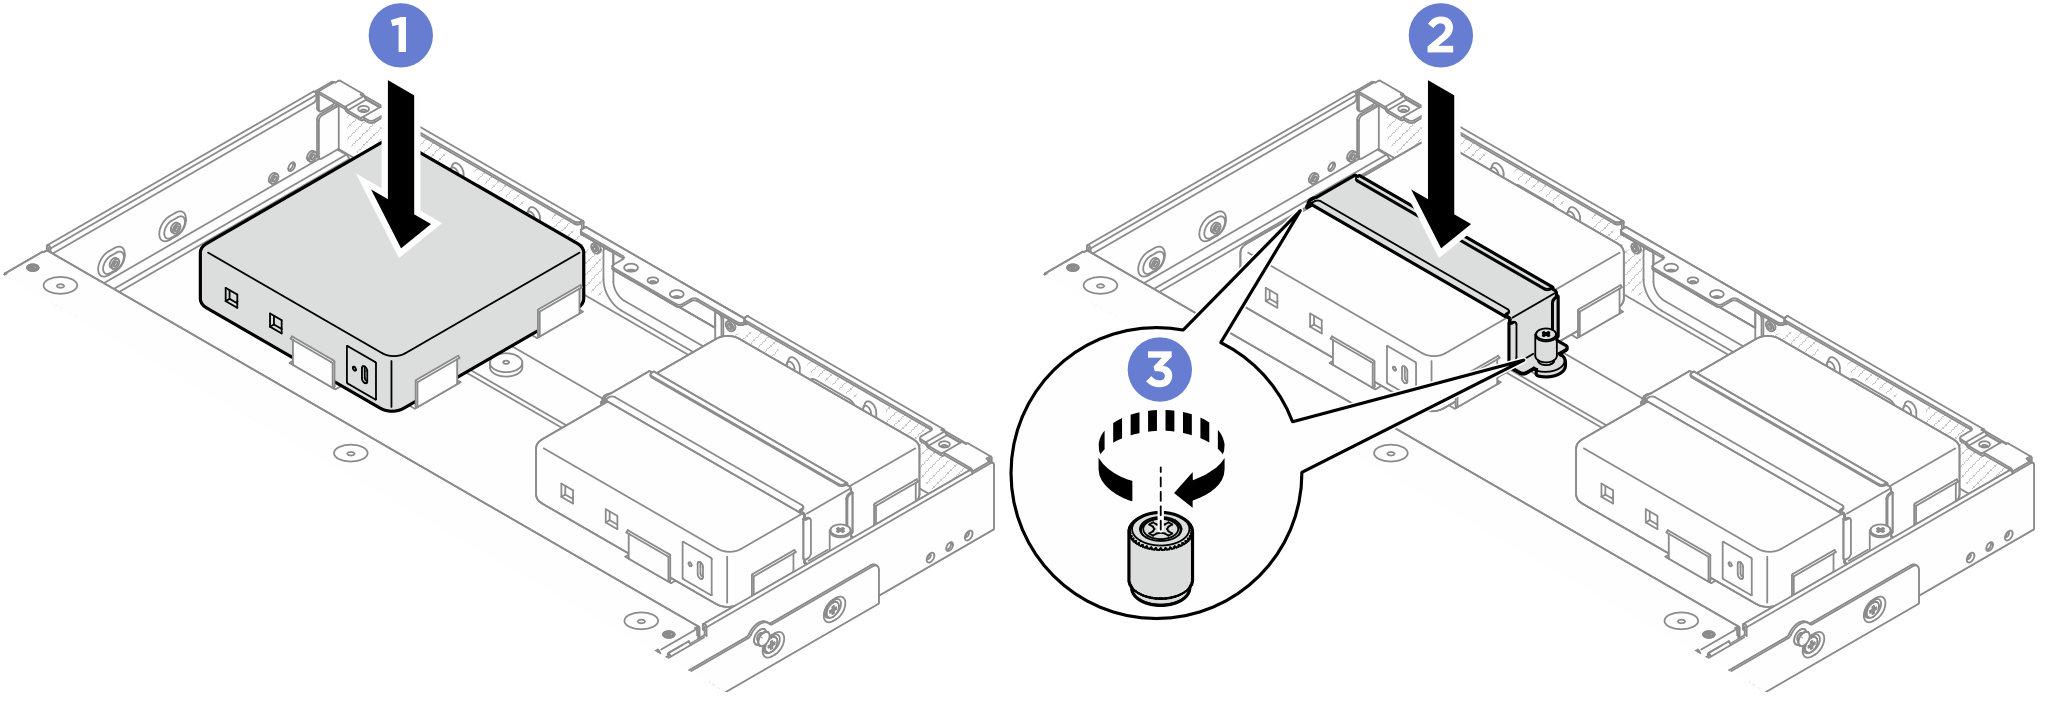
- Connect the power cable to the node.
- Align the screw holes and install the power cable to the node.
- Tighten the screw and make sure the power cable is securely locked.NoteTo connect the power adapter to the node, 1U2N enclosure needs two USB-C output power cables for one power adapter, and 1U3N enclosure needs three USB-C output power cables for one power adapter. Plug in the additional power cable to the power adapter installed in an 1U3N enclosure. For more details about cable routing, see
ThinkEdge SE100 Enclosure Internal Cable Routing Guide. Figure 7. Installing the power cable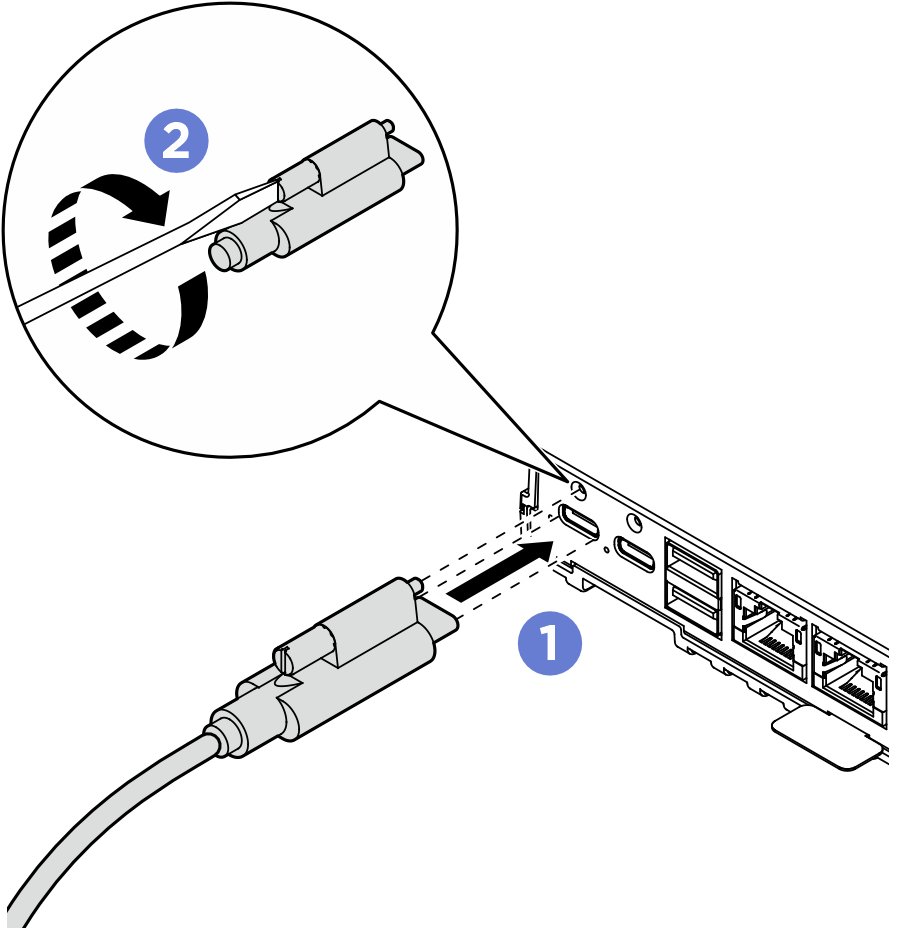
After you finish
- Install the air baffle. Align the air baffle with the guide pin on the enclosure; then, lower the air baffle down until it is firmly seated.Figure 8. Installing the air baffle to 1U2N enclosureFigure 9. Installing the air baffle to 1U3N enclosure
- Install the middle top cover.
Install the middle top cover of 1U2N enclosure
- Place the middle top cover on the top of the enclosure with both sides aligned.
- Tighten the six captive screws to secure the middle top cover.
Figure 10. Installing the middle top cover of 1U2N enclosure
Install the middle top cover of 1U3N enclosure
- Place the middle top cover on the top of the enclosure with both sides aligned.
- Tighten the eight captive screws to secure the middle top cover.
Figure 11. Installing the middle top cover of 1U3N enclosure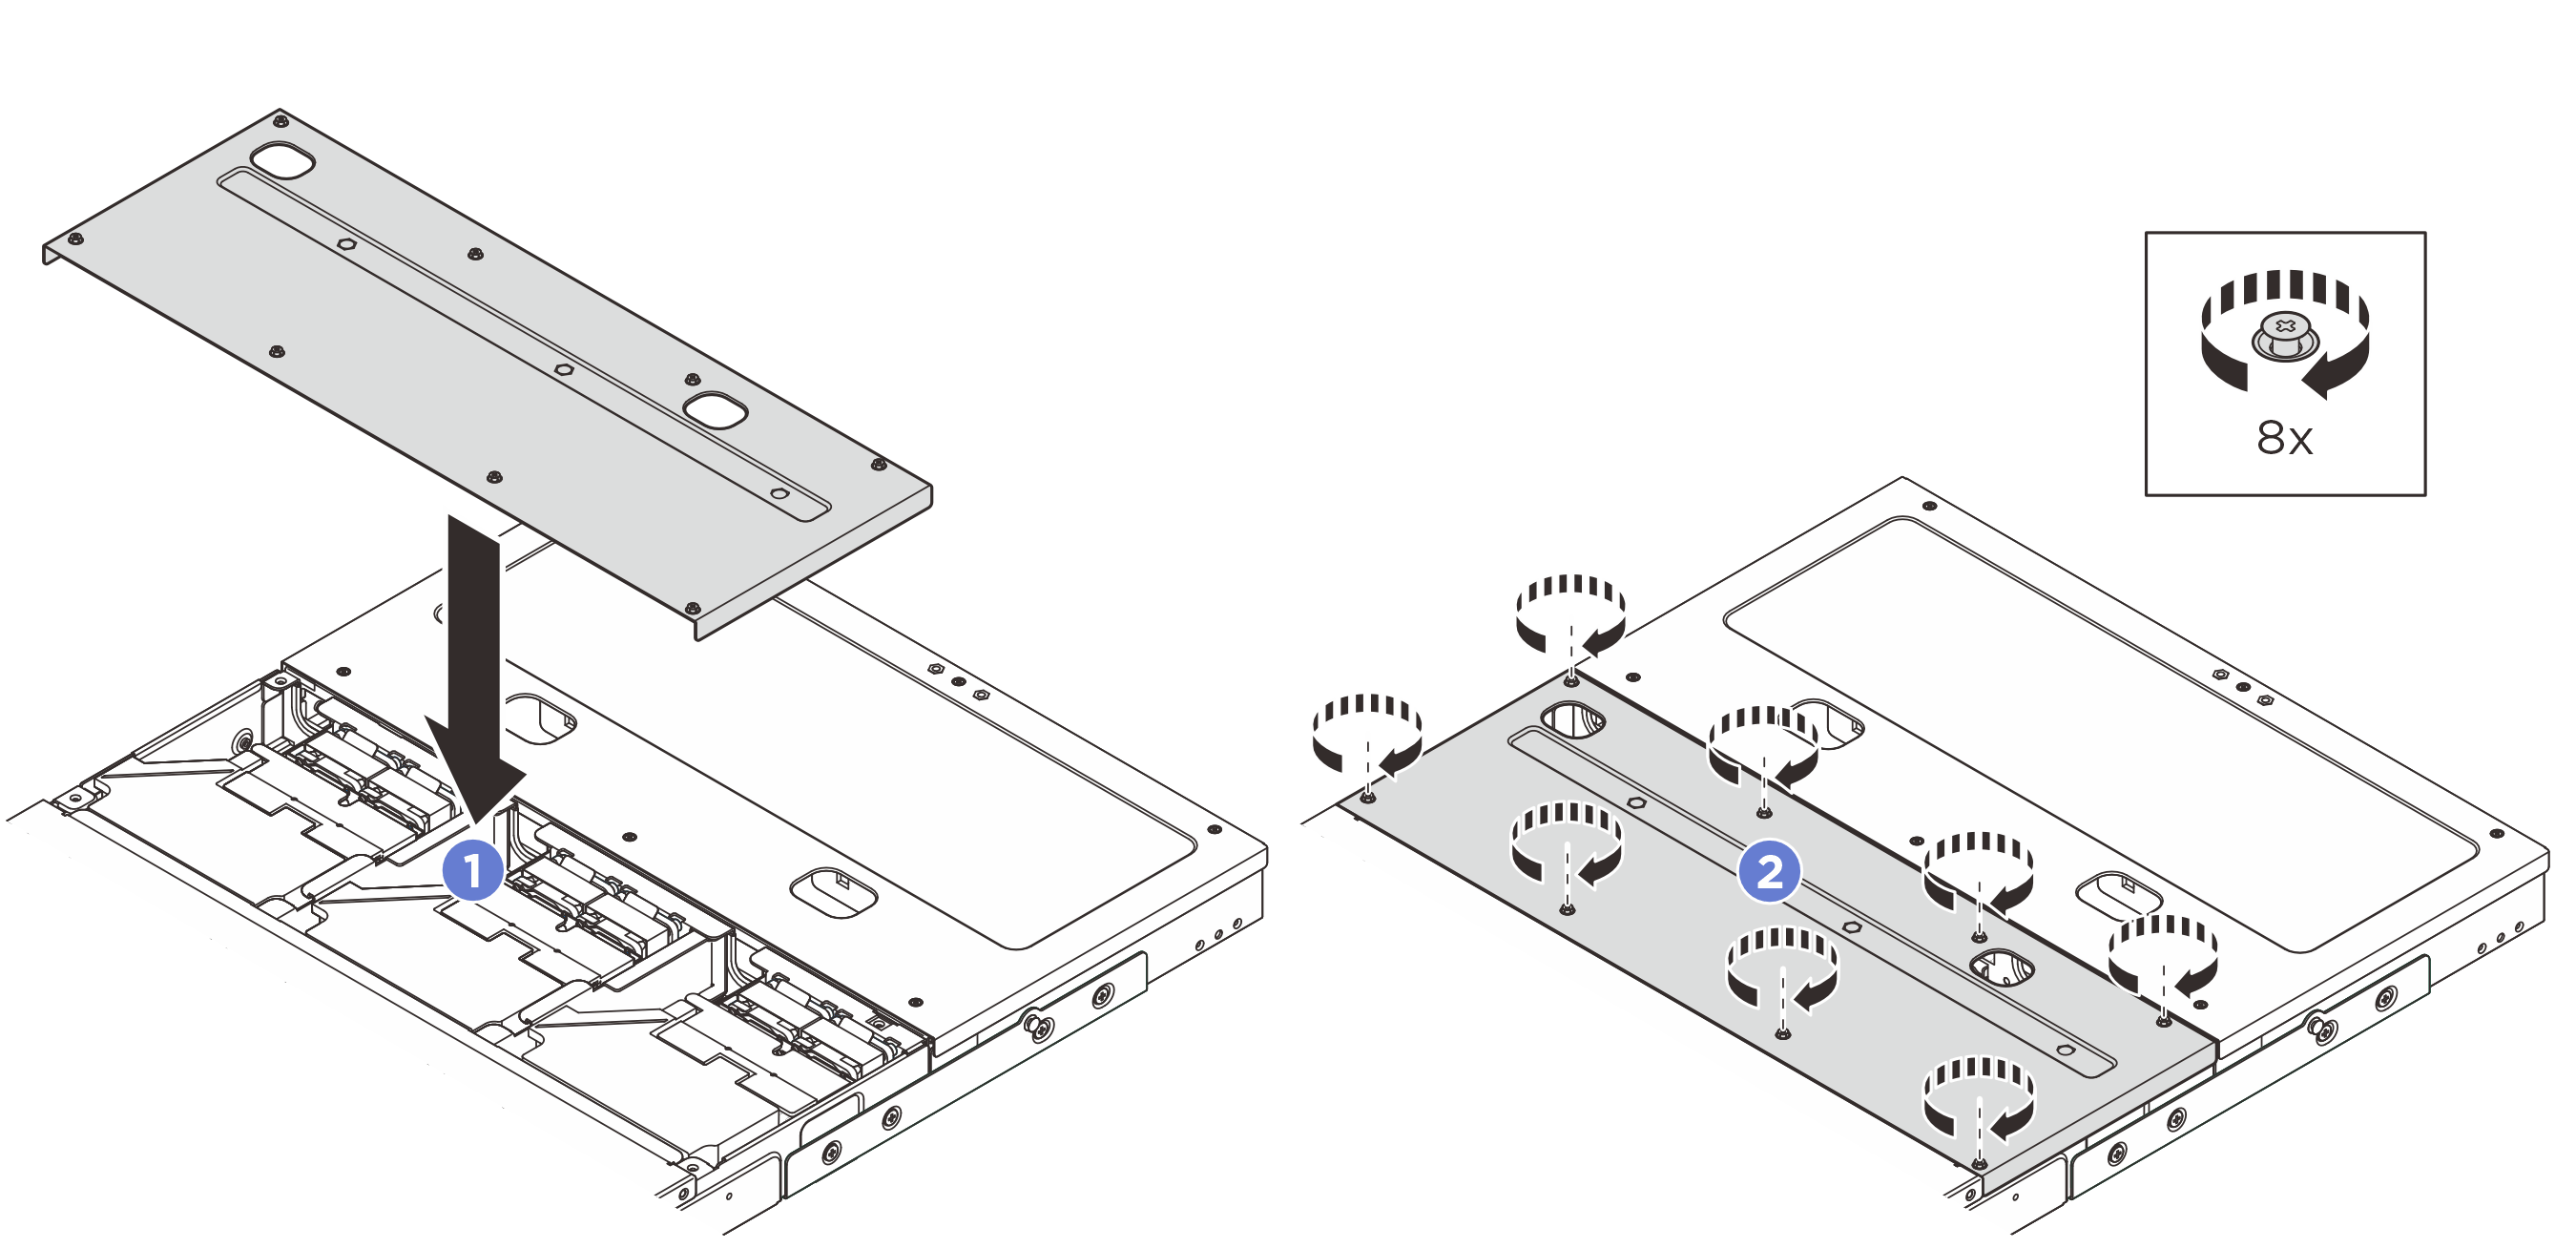
- Install the crossbar.
- Align the crossbar with the screw holes on the enclosure; then lower the crossbar onto the enclosure. Make sure all the cables are routed properly under the crossbar.
- Tighten the two captive screws to secure the crossbar.
Figure 12. Installing the crossbar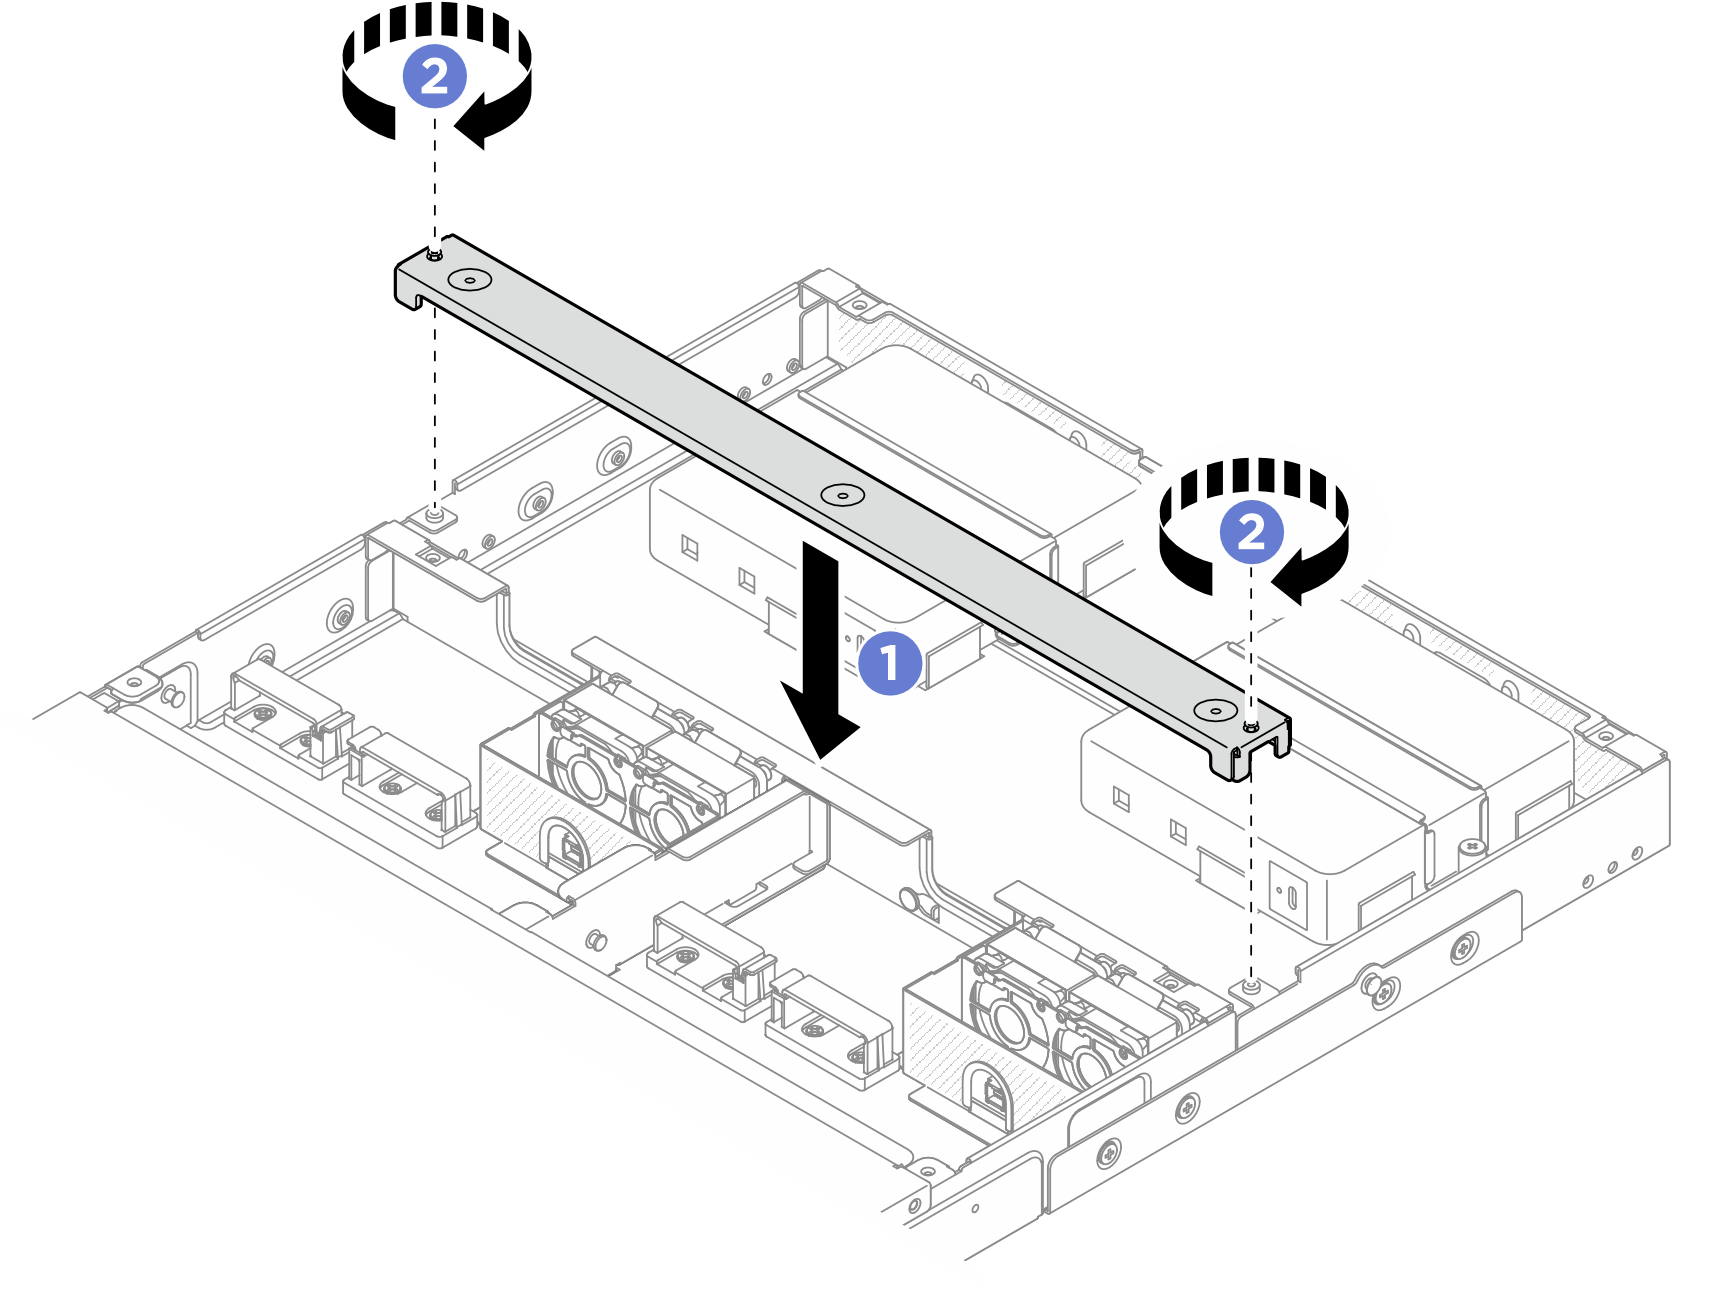
- Install the rear top cover.
- Place the rear top cover on the top of the enclosure with both sides aligned.
- Tighten the six captive screws to secure the rear top cover.
Figure 13. Installing the rear top cover
- Reinstall the enclosure to the rack. See Install a node to the rack.
Demo video