Remove the PCIe riser card

Follow the instructions in this section to remove the PCIe riser card.

S002
disconnect all power
CAUTION
The power-control button on the device and the power switch on the power supply do not turn off the electrical current supplied to the device. The device also might have more than one power cord. To remove all electrical current from the device, ensure that all power cords are disconnected from the power source.

About this task

Attention

Procedure

  1. Make preparation for this task.
    1. Remove the top cover. See Remove the top cover.
    2. Remove PCIe riser 1 or PCIe riser 2. See Remove the PCIe riser assembly.
    3. Remove all the PCIe adapters from the riser assembly. See Remove a PCIe adapter.
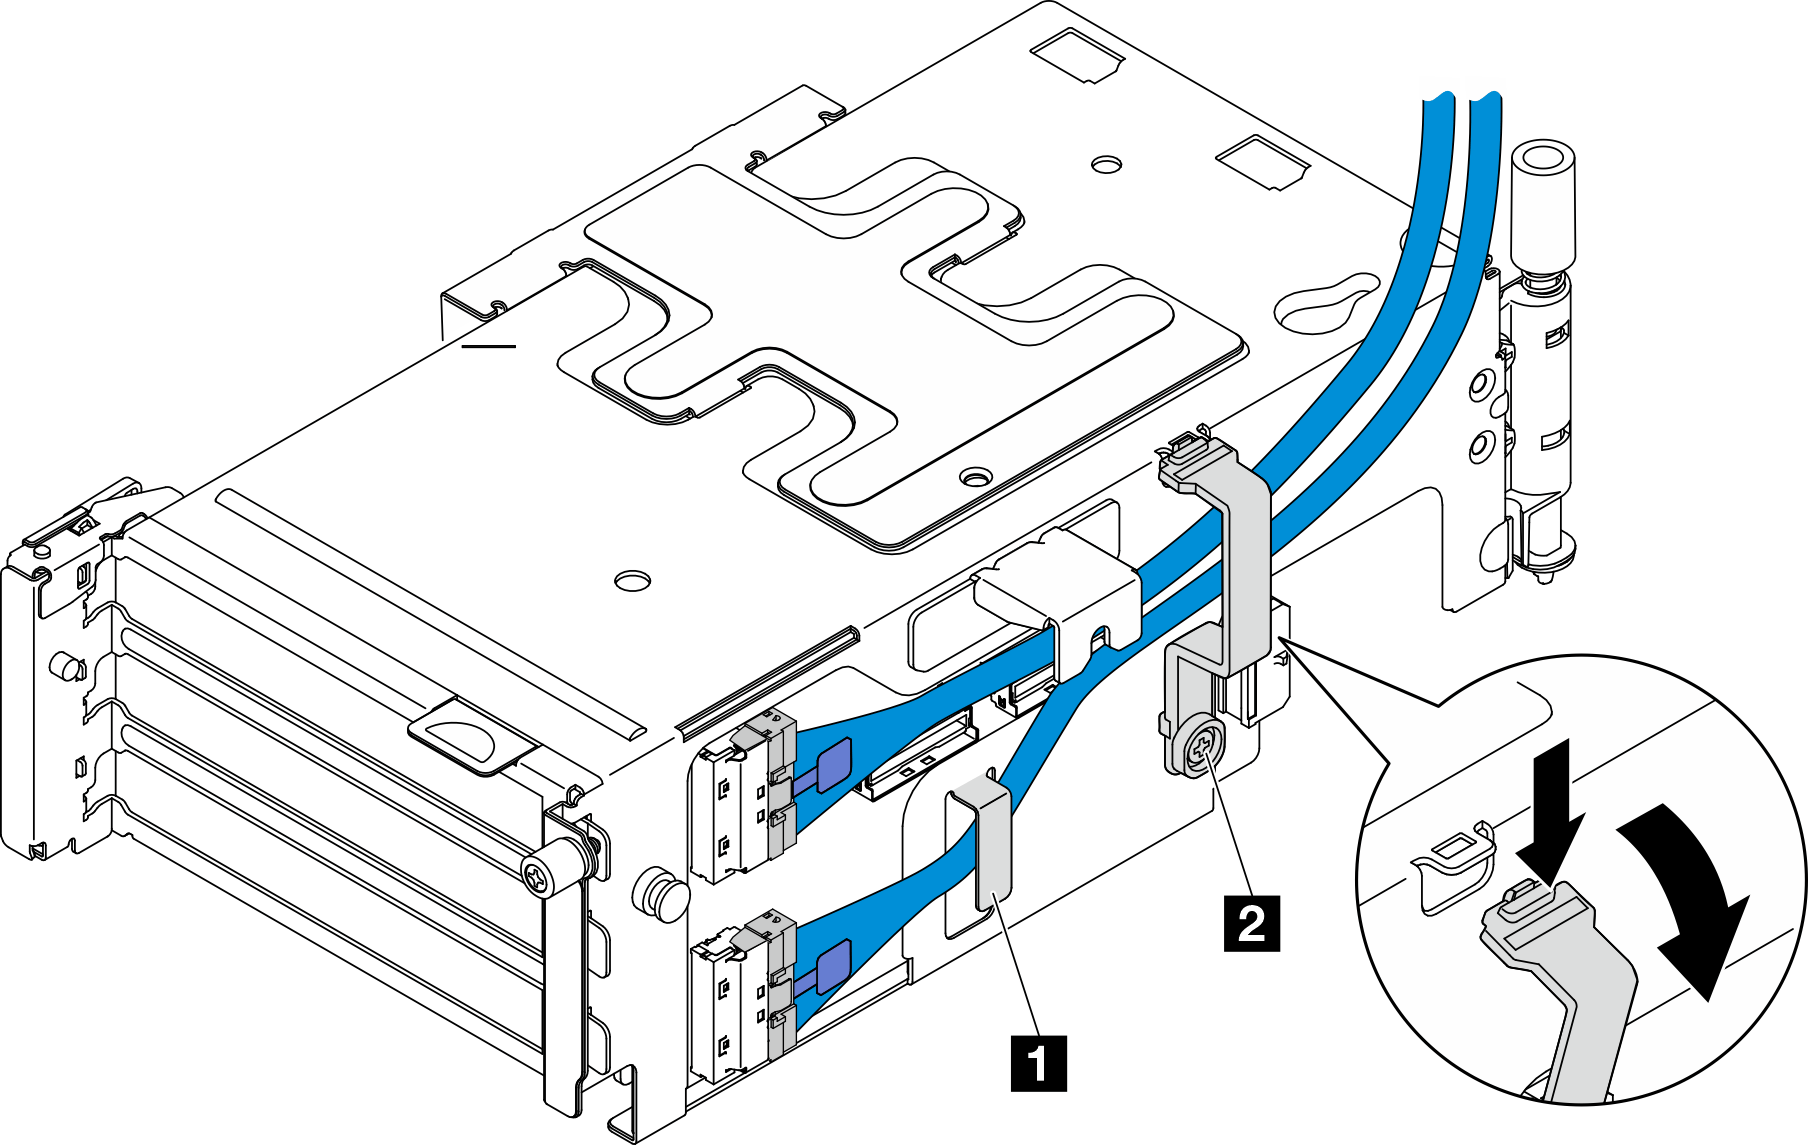
  2. Disconnect all the cables from the riser card.
    Note

    To remove the blue signal cable from PCIe riser 2, after disconnecting the cable, press 2 the cable clip to disengage it from the slot; then, remove the cable. Insert the cable clip back to the slot if necessary.

    Figure 1. PCIe riser 2 cable routing

    The blue signal cable is not supported in the following configurations:

    • Front SATA drive backplane and internal NVMe drive backplane connect to the system board
    • Front NVMe drive backplane and internal NVMe drive backplane connect to the system board
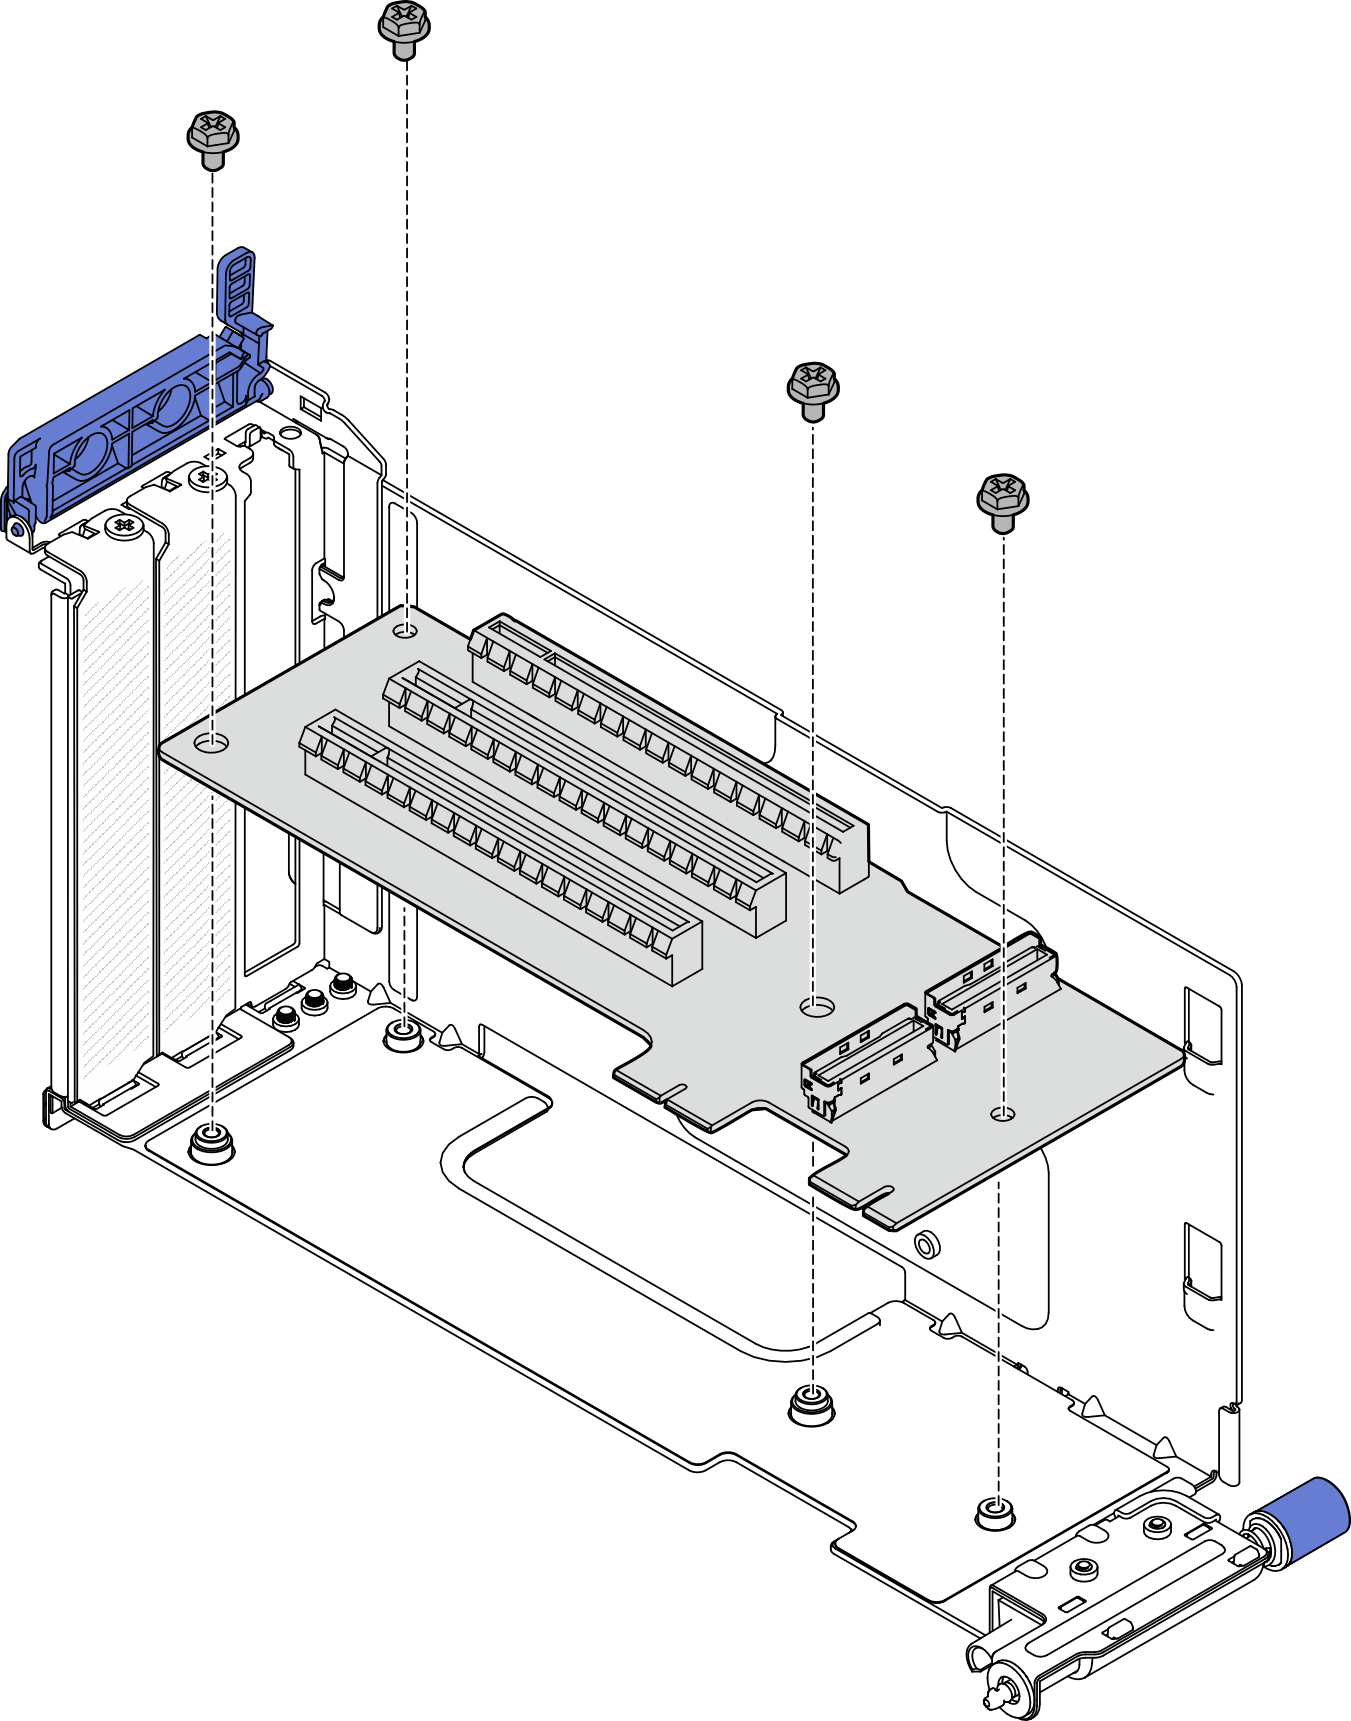
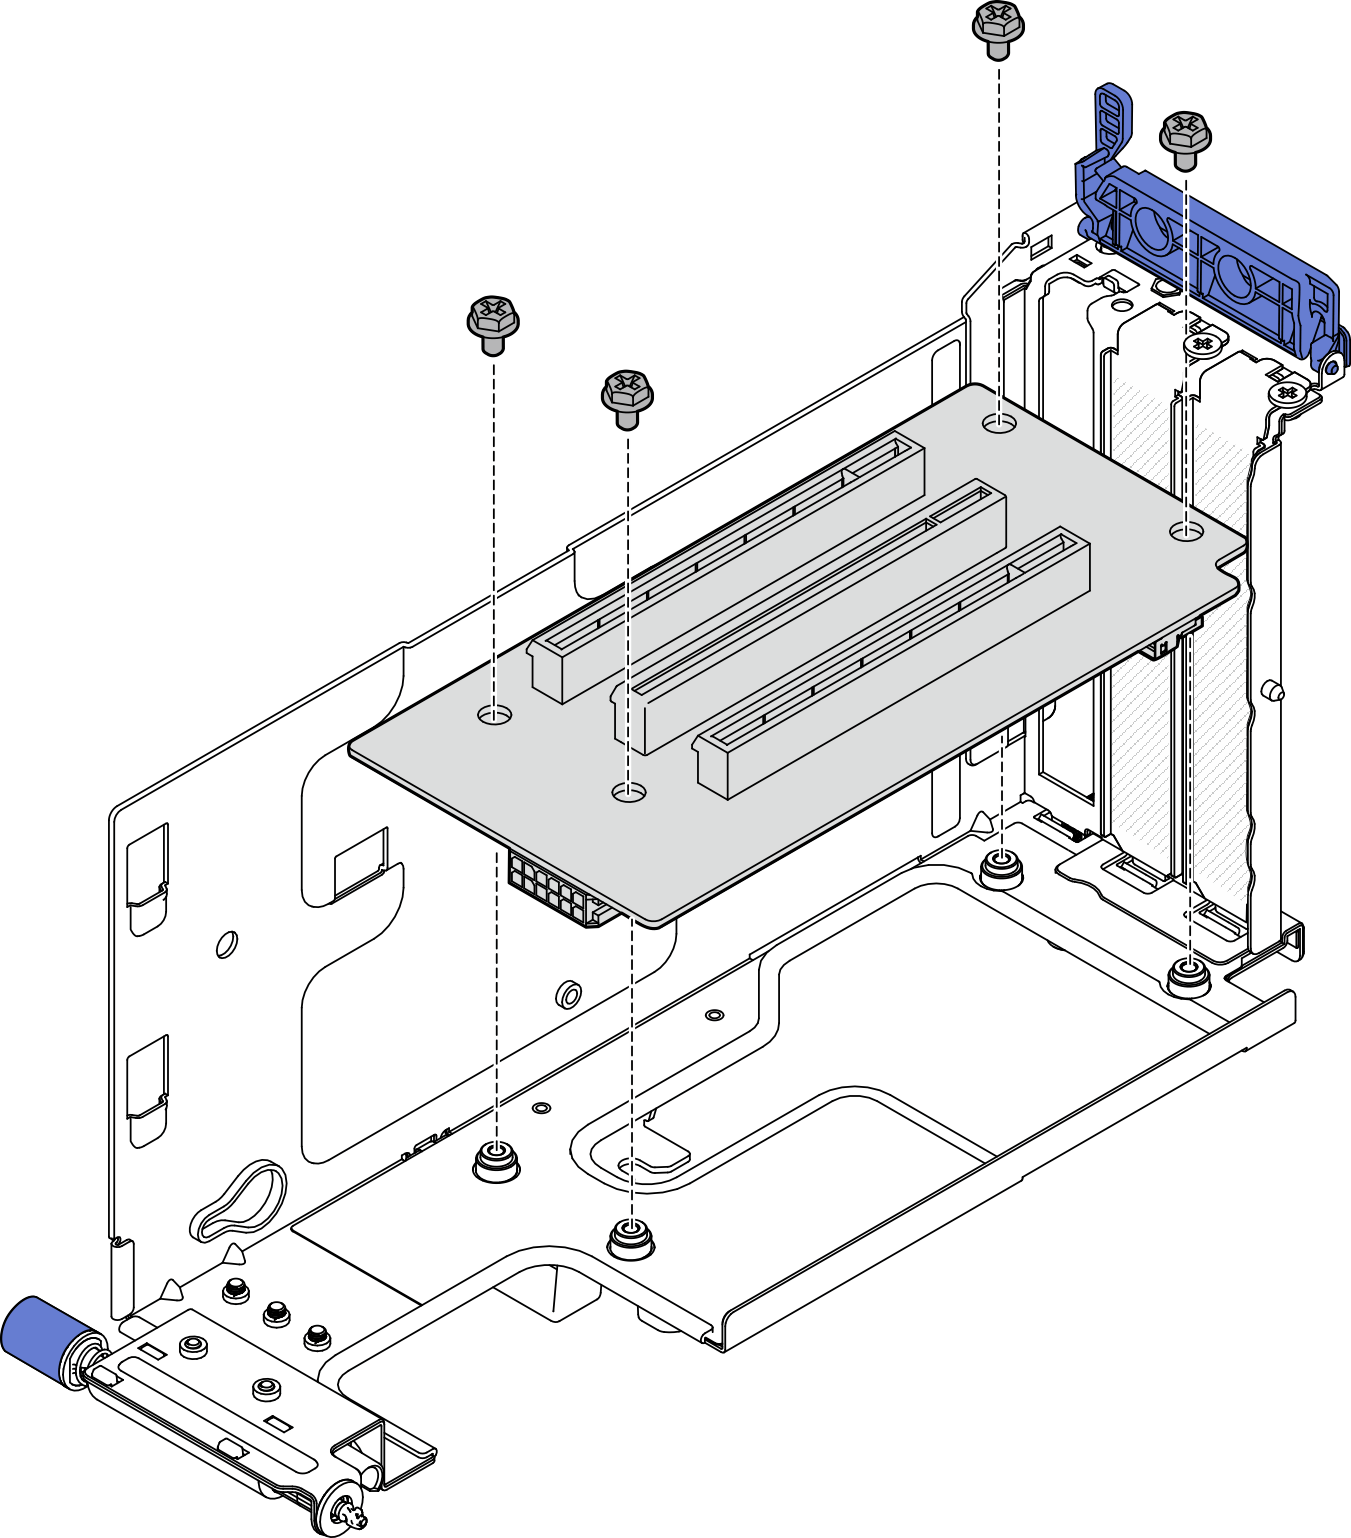
  3. Loosen the four screws that secure the riser card; then, remove the riser card.
    Figure 2. Removing the riser card from PCIe riser 1


    Figure 3. Removing the riser card from PCIe riser 2


After this task is completed

  • Install a replacement unit. See Install the PCIe riser card.

  • If you are instructed to return the component or optional device, follow all packaging instructions, and use any packaging materials for shipping that are supplied to you.

Demo Video
Watch the procedure on YouTube