
Remove and replace the system-board assembly

Note
  • This procedure should be performed only by trained service technicians.
  • If possible, back up all compute node settings, including the settings for any options installed in the compute node.
Before you replace the system-board assembly, complete the following steps:
  1. Read Installation Guidelines to ensure that you work safely.

  2. Power off the corresponding compute node that you are going to perform the task on.

  3. Remove the compute node from the chassis (see Remove the compute node from the chassis).

  4. Carefully lay the replacement system-board assembly (system board FRU) and the defective system-board assembly (defective node) side-by-side on a flat, static-protective surface.
Important
When you replace the system-board assembly, you must update the compute node with the latest firmware or restore the pre-existing firmware. Make sure that you have the latest firmware or a copy of the preexisting firmware before you proceed (see Firmware updates for more information).

See System-board layout for more information about the locations of the connectors, switches, and LEDs on the system board.

To remove and replace the system-board assembly, complete the following steps:

Important
To avoid damage when replacing a defective system-board assembly, transfer internal components between the defective system-board assembly and the replacement system-board assembly one at a time. Unless otherwise noted, install each internal component in the replacement system-board assembly immediately after removing it from the defective system-board assembly.

  1. Remove any storage drives, optional drive components, and hard disk drive bay fillers from the defective system-board assembly and set them aside on a static-protective surface (see Remove a 2.5-inch hot-swap drive ).
    Note

    When removing the storage drives, make note of the drive bay from which the drive was removed so that you can install the drive back in to the same drive bay.

  2. Remove the storage drive bezel from the defective system-board assembly and immediately install it on the replacement system-board assembly (see Remove the bezel and Install the bezel ).
  3. Remove the covers from both compute nodes (see Remove the compute node cover). Keep the cover that comes with the replacement system-board assembly for reference and re-install it on the defective system-board assembly prior to returning the defective system-board assembly.
  4. If a RAID adapter is installed in the defective system-board assembly, remove it and set it aside on a static-protective surface (see Remove a RAID adapter).
  5. Remove the hard disk drive backplane from the defective system-board assembly and immediately install it in the replacement system-board assembly (see Remove the 2.5-inch drive backplane and Install a 2.5-inch drive backplane).
  6. Install any removed disk drives, optional drive components, and disk drive bay fillers into the replacement system-board assembly (see Install a 2.5-inch hot-swap drive).
  7. Remove the air baffle from the defective system-board assembly and set it aside (see Remove the air baffle).
  8. Transfer processor and heat sink assembly 1 (rear processor) from the defective system-board assembly to the replacement system-board assembly (see Remove a processor and heat sink and Install a processor and heat sink).
    Attention
    • Remove and install only one processor at a time.
    • When removing and installing a processor, protect the other processor socket with a socket cover.
    • When transferring a processor to a replacement system-board assembly, install the socket cover in the defective system-board assembly immediately after installing the processor in the replacement system-board assembly.
  9. Repeat Step 8 for the processor and heat sink assembly 2 (front processor), if one is installed.
  10. Remove the DIMMs one at a time from the defective system-board assembly (see Remove a memory module and immediately install them in the replacement system-board assembly (see Install a memory module).
    Attention
    • Remove and install only one DIMM at a time.
  11. Remove all of the installed components in the following list from the defective system-board assembly; then, immediately install them on the replacement system-board assembly:
  12. If a RAID adapter was removed from the defective system-board assembly, install it in the replacement system-board assembly (see Install a RAID adapter ).
  13. Install the air baffle in the replacement system-board assembly (see Install the air baffle). The air baffle is required to maintain system cooling.
    Note
    Retaining clips on the DIMM connectors must be in the closed position to install the air baffle.
  14. Install the compute node cover that you removed from the defective system-board assembly onto the replacement system-board assembly (see Install the compute node cover).
  15. Make sure that both processor sockets on defective system-board assembly have socket covers installed; then, install the compute node cover that came with the replacement system-board assembly onto the defective system-board assembly (see Install the compute node cover).
    Note
    Retention clips that secure the I/O expansion adapters must be in the closed position to install the cover.
  16. If a blank ID label plate is on the replacement system-board assembly, remove it and discard (see Remove the ID label plate).
  17. Remove the ID label plate that has machine type and serial number information from the front panel of the defective system-board assembly and immediately install it on the replacement system-board assembly (see Remove the ID label plate and Install the ID label plate).
    Note
    If your compute node has an RFID tag, it is already attached to the ID label plate.
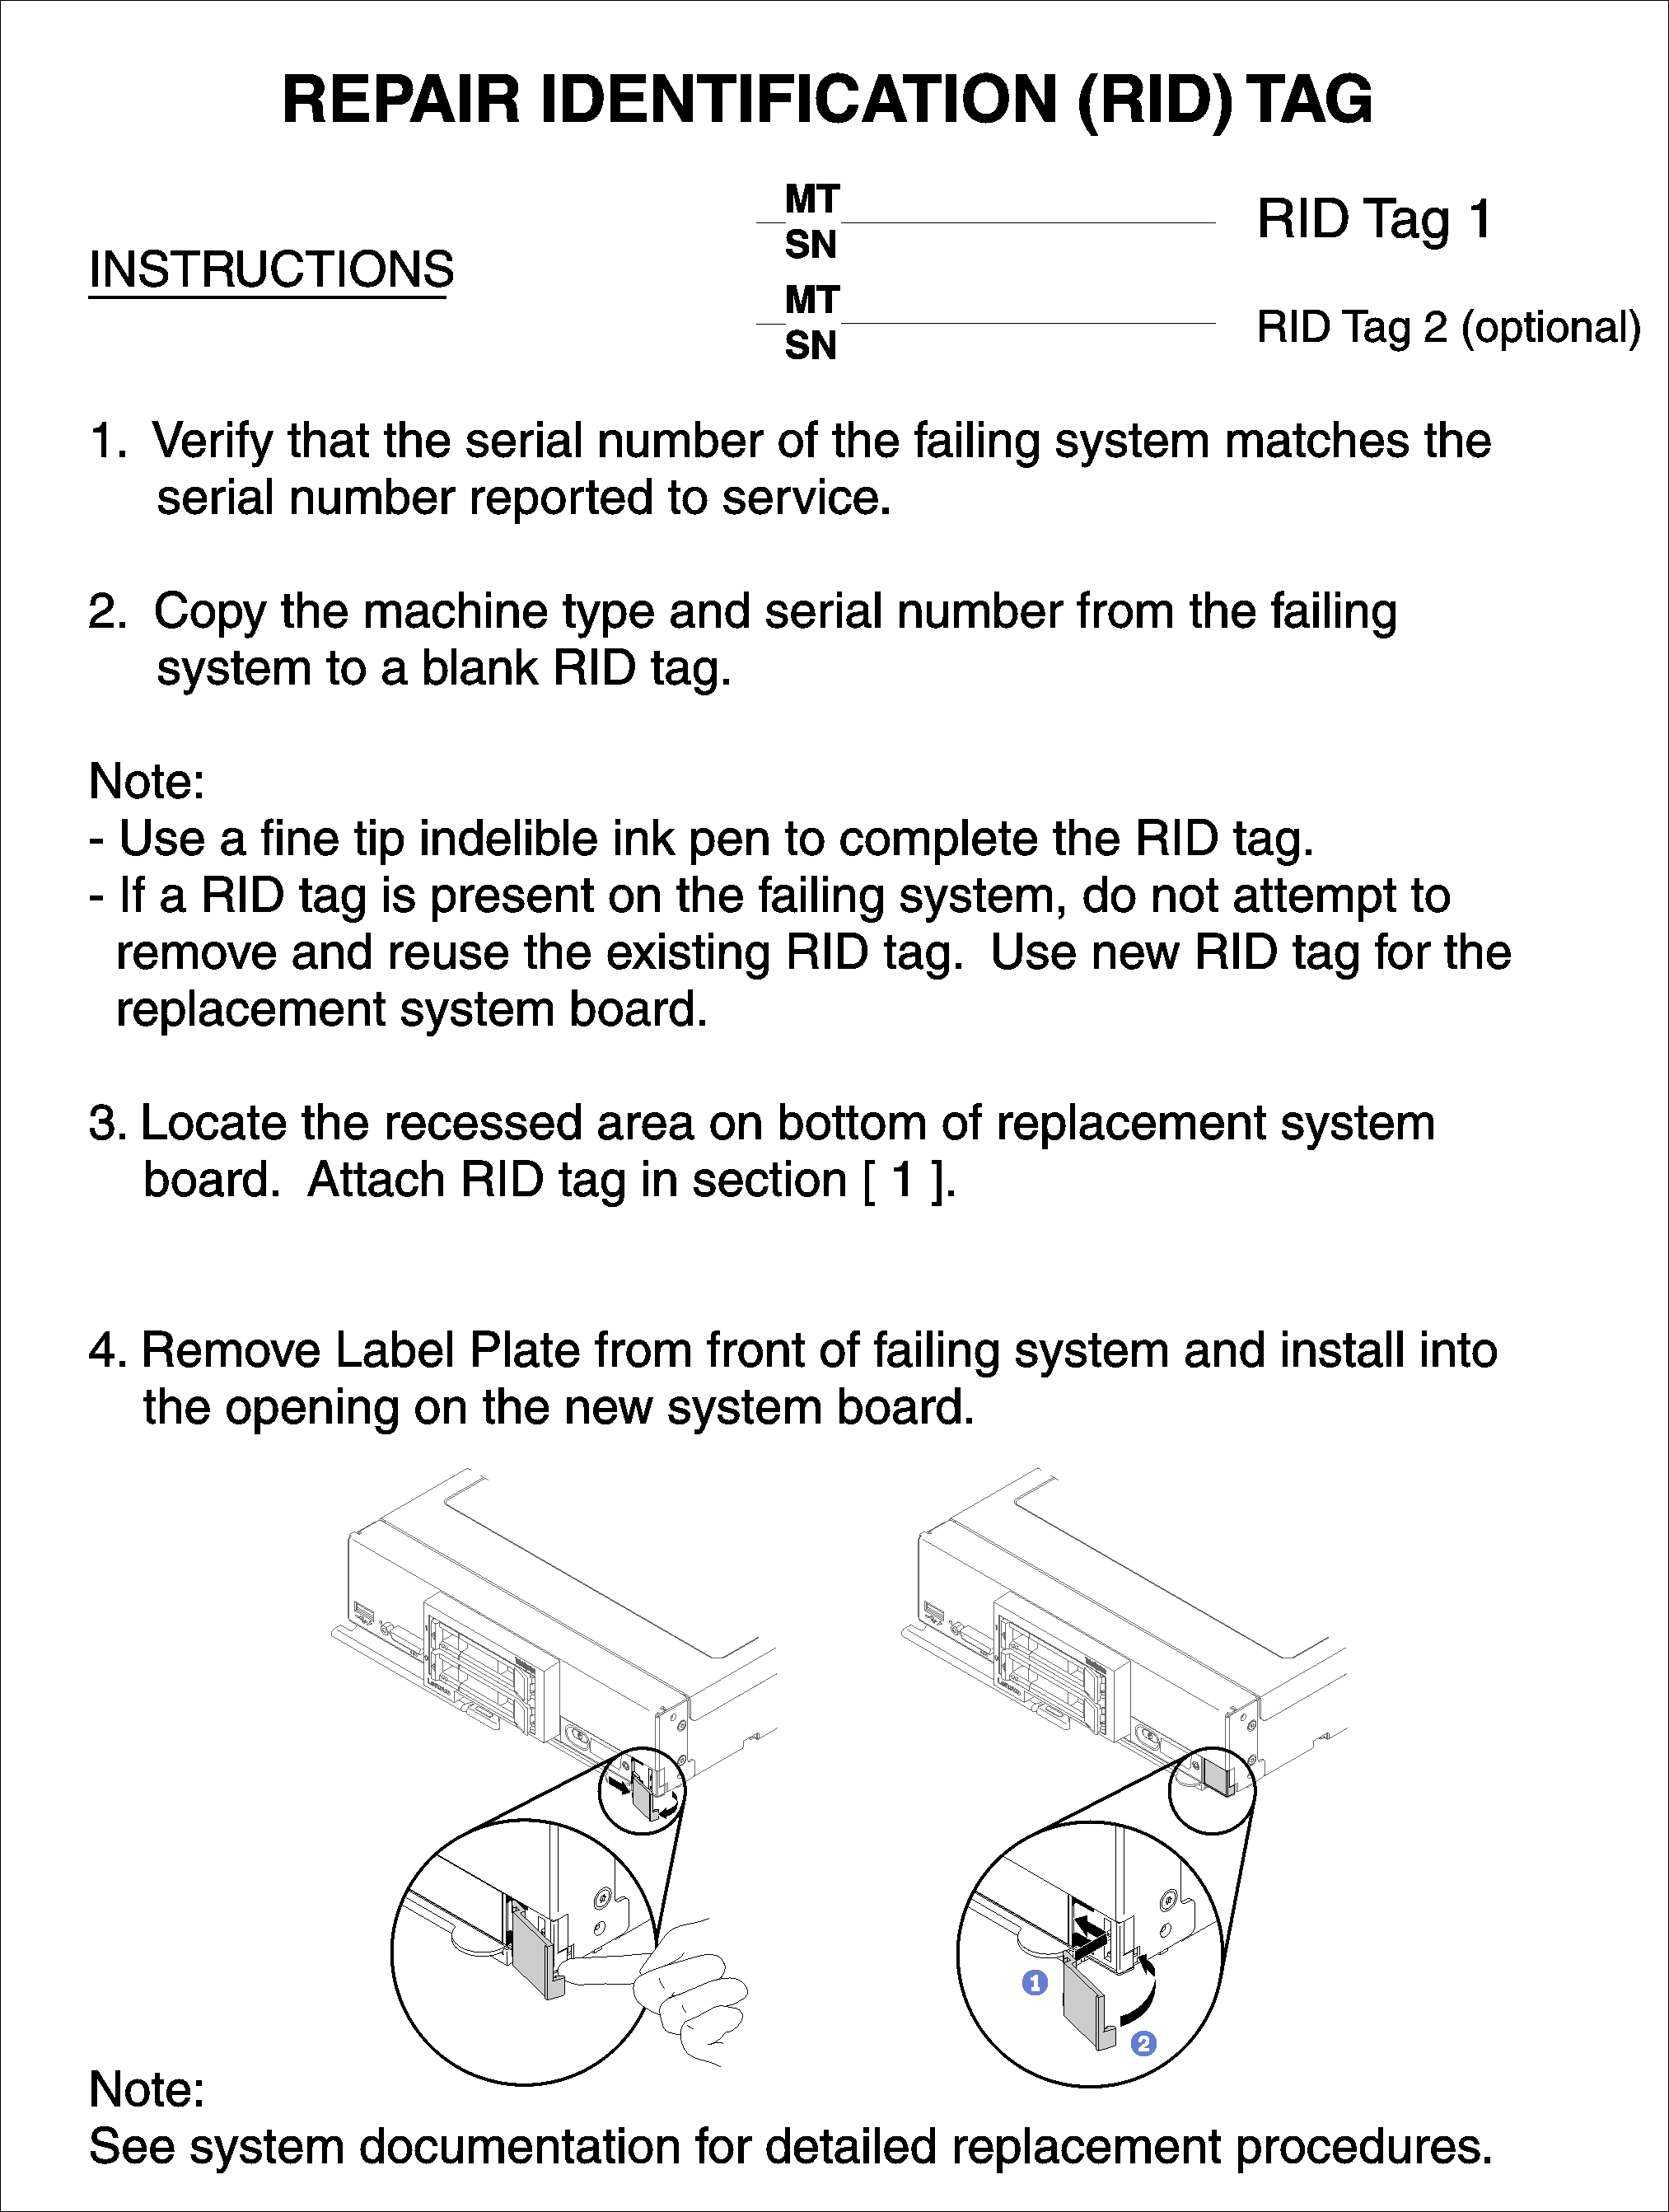
  18. The replacement system-board assembly comes with a Repair Identification (RID) tag. Using a fine tip indelible ink pen, transfer the machine type and serial number from the defective system-board assembly to the label on the Repair Identification tag; then, place the tag in the recessed area 1 on the bottom of replacement system-board assembly.
    Figure 1. Repair Identification (RID) tag
    Repair Identification (RID) tag

After you transfer components to the replacement system-board assembly, complete the following steps:

  1. Install the compute node in the chassis (see Install the compute node in the chassis).
  2. If an Attention label is on the replacement system-board assembly front panel above the power button, read it; then, remove the label and discard it before turning on the compute node.
  3. Use the CMM Web Interface to restore the IP address of the compute node XClarity controller. See Starting the web interface for more information.
    Note
    If you configured static IP addresses, you will not be able to access the node remotely or from a management device until the IP address of the XClarity controller is restored.
  4. Update the machine type and serial number with new vital product data (VPD). Use the Lenovo XClarity Provisioning Manager to update the machine type and serial number. See Update the machine type and serial number.

  5. Enable Trusted Platform Module (TPM) (see Enable TPM/TCM).

  6. Optionally, enable Secure Boot (see Enable UEFI Secure Boot).

  7. Update the compute node configuration.

Note
Make sure the latest version of ThinkSystem M.2 with Mirroring Enablement Kit Firmware is applied to avoid virtual disk/array missing after system board replacement.
If you are instructed to return the system-board assembly, follow all packaging instructions, and use any packaging materials for shipping that are supplied to you.
Important
Before you return the system-board assembly, make sure that you install the CPU socket covers from the new system-board assembly. To replace a CPU socket cover:
  1. Take a socket cover from the CPU socket assembly on the new system-board assembly and orient it correctly above the CPU socket assembly on the removed system-board assembly.

  2. Gently press down the socket cover legs to the CPU socket assembly, pressing on the edges to avoid damage to the socket pins. You might hear a click on the socket cover is securely attached.

  3. Make sure that the socket cover is securely attached to the CPU socket assembly.

Demo video

Watch the procedure on YouTube