Install a PCIe adapter
Use this information to install a PCIe adapter.


Touch the static-protective package that contains the new PCIe adapter to any unpainted surface on the outside of the server. Then, take the new PCIe adapter out of the package and place it on a static-protective surface.
Locate the correct PCIe slot for the PCIe adapter. For information about the PCIe slots and supported PCIe adapters, see Rear view.
Before installing the PCIe adapter, refer to the specific technical rules for the PCIe adapter:
If the server is installed with 280-watt processor, seeRules about 280-watt processor installation for PCIe adapter installation limitations.
To install a PCIe adapter, complete the following steps:
- Pivot the latch on the riser bracket to the closed position.Figure 1. Riser 1 assembly (LP/FHFL) installation
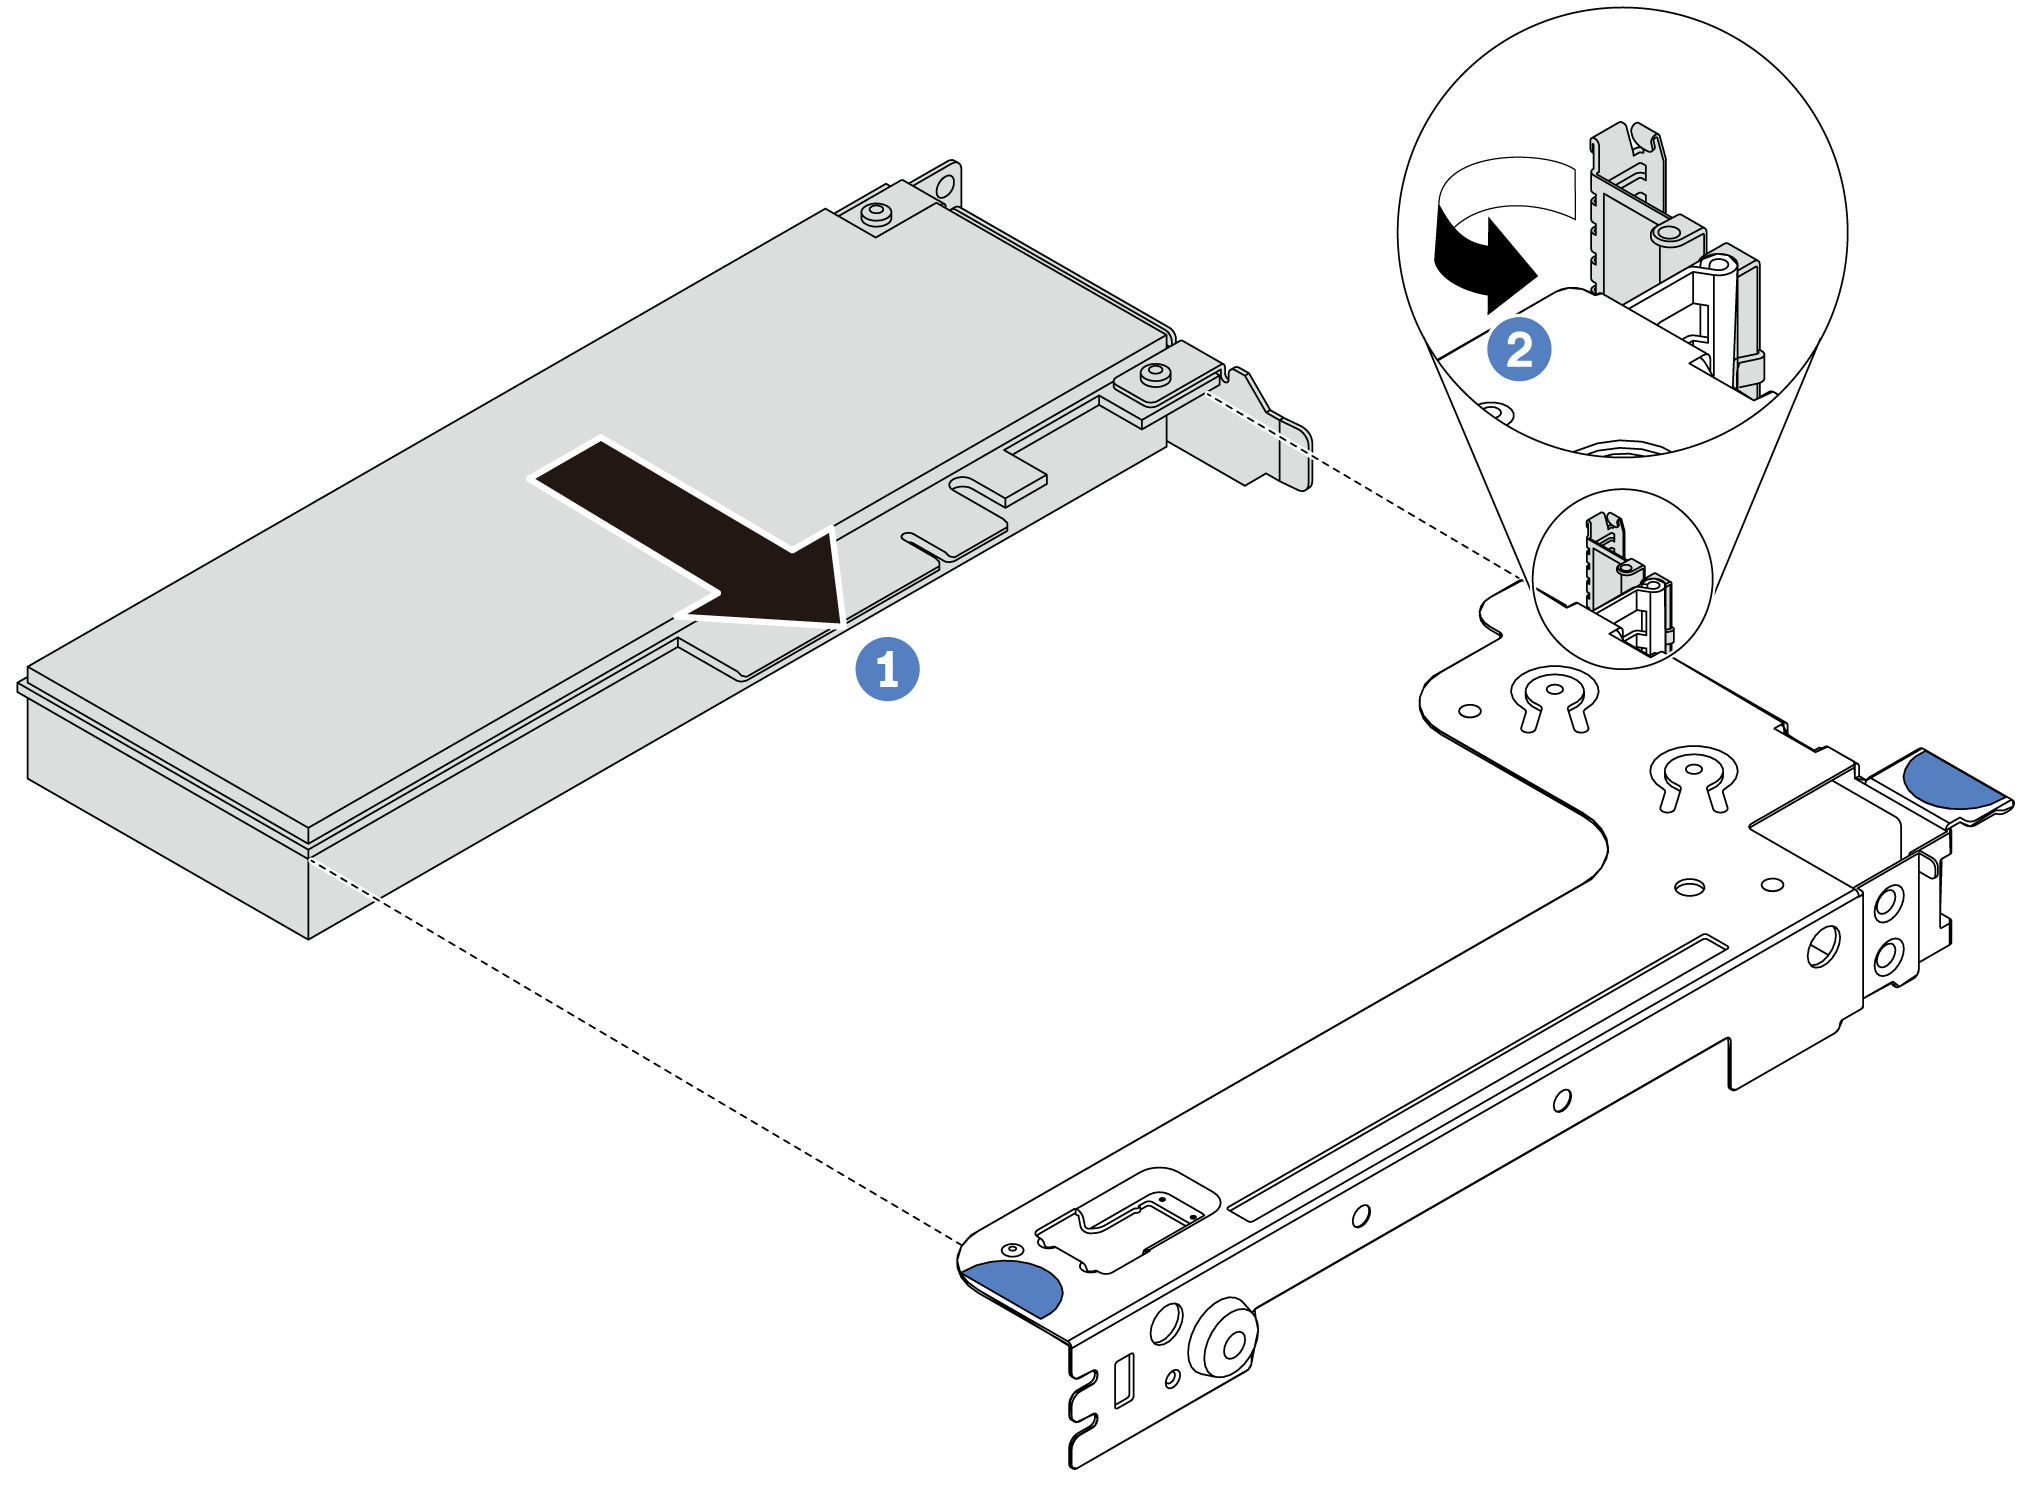
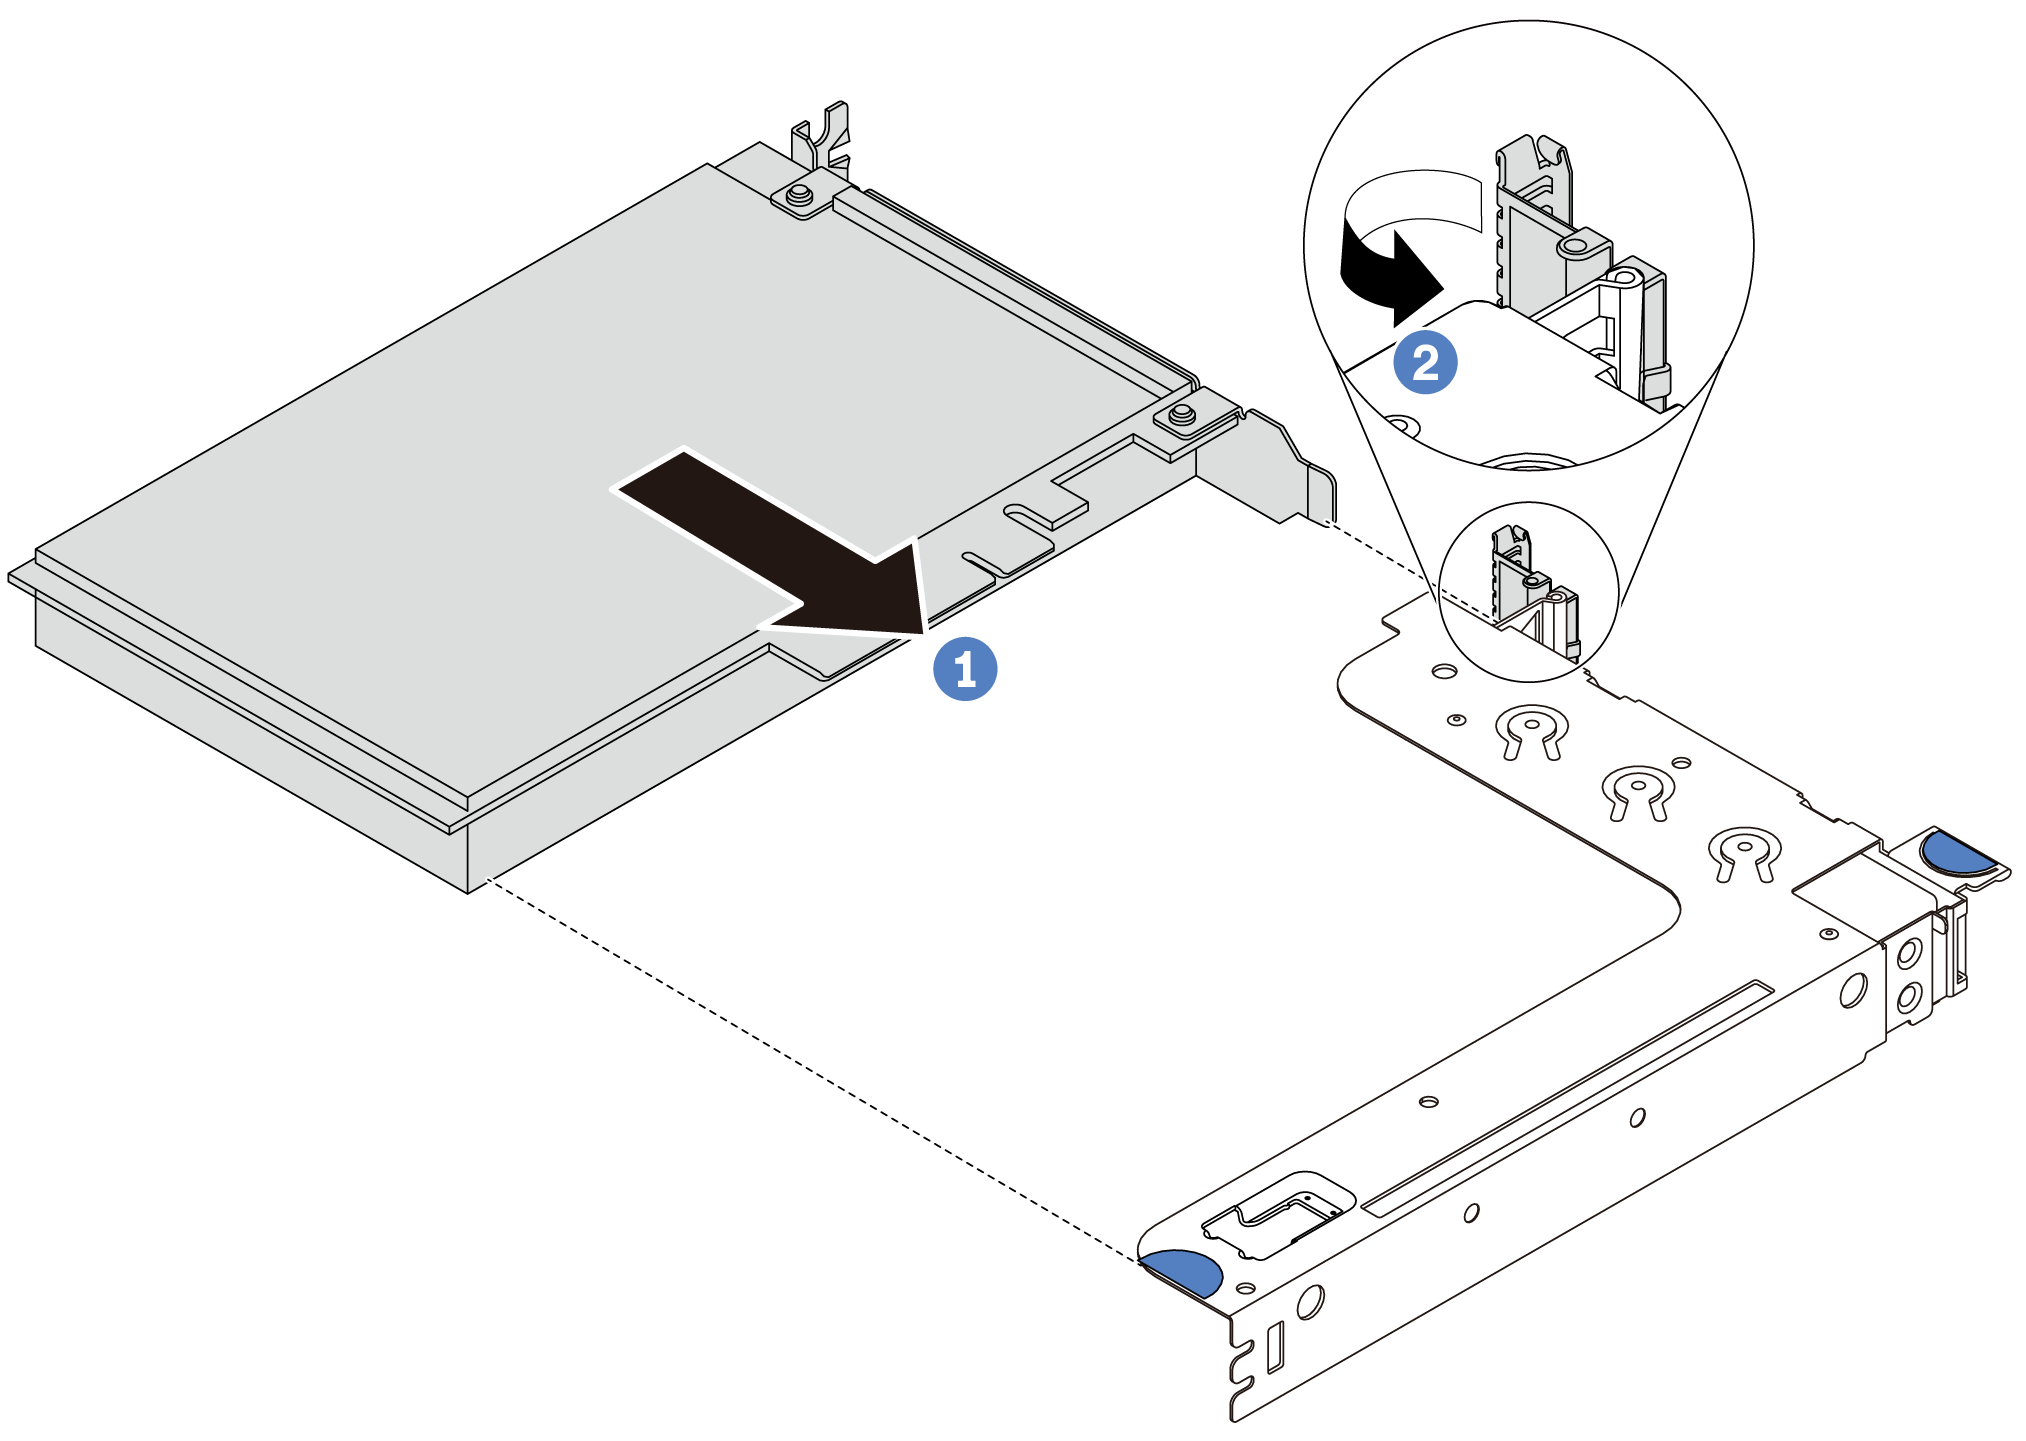 Figure 2. Riser 2 assembly (LP+LP) installation
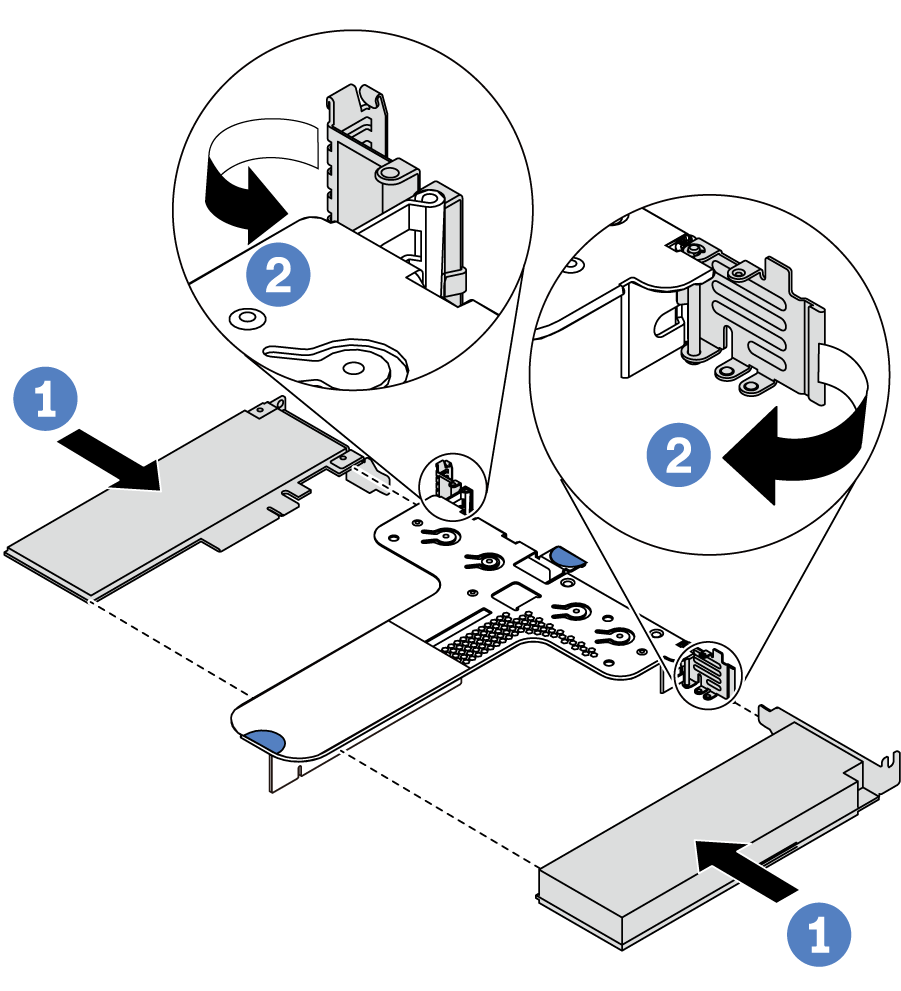 Figure 3. Internal riser assembly (LP) installation
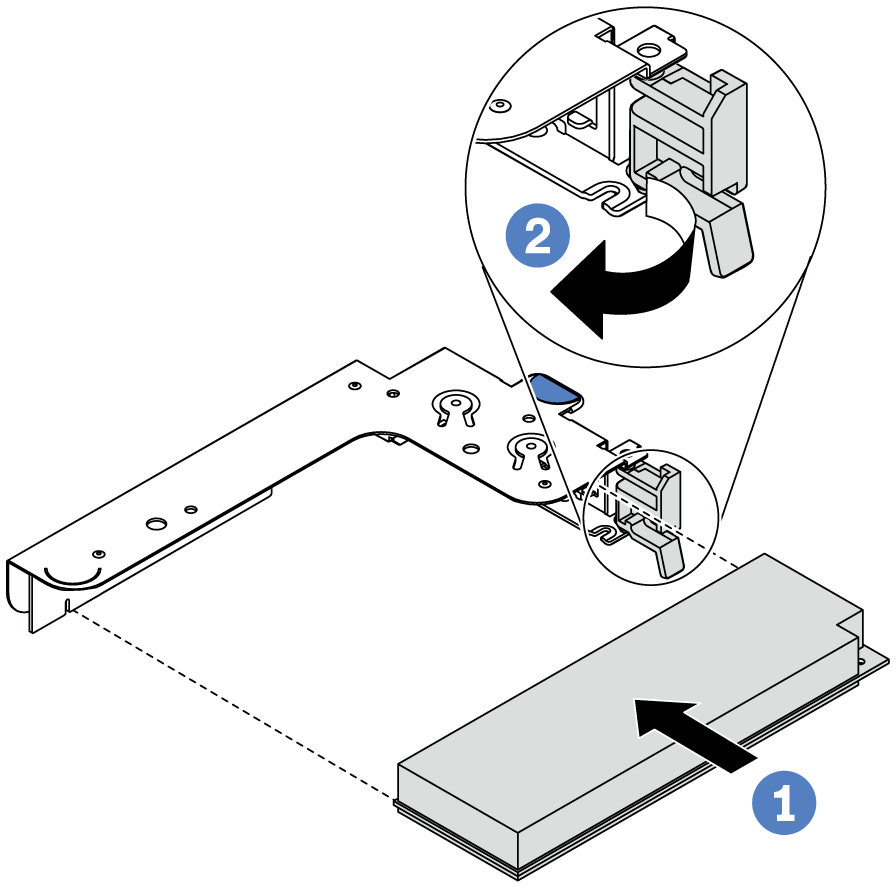
Reinstall the riser assembly. See Install a riser card.
Complete the parts replacement. See Complete the parts replacement.
Demo video